Create sitemap online without restrictions. Detailed Sitemap Guide
The robots.txt and sitemap.xml files make it possible to organize site indexing. These two files complement each other well, although at the same time they solve opposite problems. If robots.txt serves to prohibit indexing of entire sections or individual pages, then sitemap.xml, on the contrary, tells search robots which URLs need to be indexed. Let's analyze each of the files separately.
Robots.txt file
robots.txt is a file in which rules are written that restrict search robots’ access to directories and site files in order to avoid their contents being included in the search engine index. The file must be located in the root directory of the site and be available at: site.ru/robots.txt.
In robots.txt, you need to block all duplicate and service pages of the site from indexing. Often public CMS create duplicates, articles can be accessed in several URLs at the same time, for example; in categories site.ru/category/post-1/, tags site.ru/tag/post-1/ and archive site.ru/arhive/post-1/. In order to avoid duplicates, it is necessary to prohibit indexing of tags and the archive; only categories will remain in the index. By service pages, I mean the pages of the administrative part of the site and automatically generated pages, for example: results when searching on the site.
It is simply necessary to get rid of duplicates, as they deprive the site’s pages of uniqueness. After all, if the index contains several pages with the same content, but accessible at different URLs, then the content of none of them will be considered unique. As a result, search engines will forcefully lower the positions of such pages in the search results.
Robots.txt directives
Directives are rules, or you can also say commands for search robots. The most important one is User-agent, with its help you can set rules for all robots or for a specific bot. This directive is written first, and after it all other rules are indicated.
# For all robots User-agent: * # For Yandex robot User-agent: Yandex
Another mandatory directive is Disallow, with its help sections and pages of the site are closed, and its opposite is the Allow directive, which, on the contrary, forcibly allows the specified sections and pages of the site to be indexed.
# Prohibit indexing of the section Disallow: /folder/ # Allow indexing of the subsection with pictures Allow: /folder/images/
In order to indicate the main mirror of the site, for example: with or without www, the Host directive is used. It is worth noting that the main mirror is registered without specifying the http:// protocol, but the https:// protocol must be specified. Host is understood only by Yandex and Mail.ru bots and you only need to enter the directive once.
# If the main mirror works via the http protocol without www Host: site.ru # If the main mirror works via the https protocol with www Host: https://www.site.ru
Sitemap is a directive indicating the path to the sitemap.xml file, the path must be specified in full with the protocol, this directive can be written anywhere in the file.
# Specify the full path to the sitemap.xml file Sitemap: http://site.ru/sitemap.xml
To simplify writing rules, there are special symbolic operators:
- * - denotes any number of characters, as well as their absence;
- $ - means that the symbol before the dollar sign is the last one;
- # - denotes a comment; everything that is in the line after this operator will be ignored by search robots.
After familiarizing yourself with the basic directives and special operators, you can already sketch out the contents of a simple robots.txt file.
User-agent: * Disallow: /admin/ Disallow: /arhive/ Disallow: /tag/ Disallow: /modules/ Disallow: /search/ Disallow: *?s= Disallow: /login.php User-agent: Yandex Disallow: / admin/ Disallow: /arhive/ Disallow: /tag/ Disallow: /modules/ Disallow: /search/ Disallow: *?s= Disallow: /login.php # Allow the Yandex robot to index images in the modules section Allow: /modules/*. png Allow: /modules/*.jpg Host: site.ru Sitemap: http://site.ru/sitemap.xml
You can find a detailed description of all directives with examples of their use in the publication on the Yandex website in the help section.
Sitemap.xml file
sitemap.xml is a so-called site map for search engines. The sitemap.xml file contains information for search robots about the site pages that need to be indexed. The contents of the file must contain the URL addresses of the pages, but it is not necessary to indicate the priority of the pages, the frequency of page re-crawling, and the date and time the pages were last modified.
It should be noted that sitemap.xml is not required, and search engines may not take it into account, but at the same time, all search engines say that having the file is desirable and helps to correctly index the site, especially if pages are created dynamically or the site has a complex structure nesting.
There is only one conclusion: that the robots.txt and sitemap.xml files are necessary. Correctly setting up indexing is one of the factors in placing site pages in higher places in search results, and this is the goal of any more or less serious site.
A sitemap is an html page of a site or a special xml file, which displays links to all important pages of the site. To understand what a site map is, just imagine a book’s table of contents and it will immediately become clear why do you need a site map. A site map helps a visitor, be it a person or a search robot, quickly find any page on the site, making a minimum number of transitions. On simple, small sites, all pages can be accessed within 1-2 clicks from the main page, but what if the site is large and its structure is complex? Such a site will not only be inconvenient for visitors, but also not obvious to search engines.
What types of sitemaps are there?
Search engines index the site gradually, level by level, starting from the main page. If the site has many levels of nesting of pages, then it will take many months for all the pages of the site to be indexed. So it is necessary create a sitemap, on which there will be all links to all pages of the site at once, so that the robot does not waste time navigating through nesting levels, right? Yes and no. The answer depends on why the map is being made and what it will be like. Let's take a look what are the types of sitemaps?.
Sitemap HTML Sitemap
Sitemaps are divided into 2 main types or formats: sitemap html and a sitemap xml file. HTML sitemap is a site page, which lists the links. Usually these are links to the most important sections and pages of the site. HTML sitemap is more designed for people rather than robots and helps you quickly navigate the main sections of the site. For a sitemap in the form of an HTML page, there are serious restrictions on the number of links on one page. If there are too many links on a page, not all links may be indexed, or the site map page may even be excluded from searches for having an excessive number of links, even .
In order for the html sitemap to be correctly indexed and adequately perceived by visitors, you should not place more than 100 links on the page. This is more than enough to place on the page all the sections and subsections that do not fit into the main menu.
Usually, site map in HTML format has a tree structure, where expanded sections and subsections are indicated. Unnecessarily bulky HTML site maps are often designed with graphic elements, CSS styles and supplemented with Java script. However, an html sitemap is of little value to search engines.
An HTML sitemap is not a full-fledged sitemap. What to do if the site has hundreds, thousands, tens of thousands of pages? To do this, you need to place links to all pages in the sitemap in xml format.
XML Sitemap
An XML sitemap is a file in xml format, like sitemap.xml, which is usually located at the root of the site. A sitemap in xml format has many advantages over an html sitemap. Sitemap xml is a special sitemap format, which is determined by all popular search engines, such as Google and Yandex. You can specify up to 50,000 links in xml sitemap. Moreover, in the sitemap xml you can specify the relative priority and frequency of page updates.
It is worth saying that the contents of the site map are only recommendations for the search robot. For example, if you set an annual update frequency for a website page, search robots will still visit more often. And if you set the page refresh rate to be hourly, this does not mean that robots will index the page every hour.
An xml sitemap has a specific syntax, let's look at the structure of an xml sitemap in more detail.
Example sitemap file sitemap.xml
The correct sitemap.xml must be UTF8 encoded. The contents of the sitemap.xml file look like this:
Where the following required tags are used:
— parent tag, it contains all URLs; — тег, в котором указываются сведения о конкретном url-адресе; https://totrdlo.ru/en/ — в данном теге указывается непосредственно url.
— этот тег заключает в себе дату последнего изменения страницы; — тег используется, чтобы указать насколько часто изменяется страница: always, hourly, daily, weekly, monthly, yearly, never; — указывает приоритет определенной страницы, относительно других страниц сайта от 0,1 – низкий приоритет, до 1 – высокий приоритет.
Так же, в файле карты сайта в формате xml должно содержаться указание на пространство имен языка XML:
Xmlns="http://www.sitemaps.org/schemas/sitemap/0.9"
Если файл карты сайта включает более 50 тысяч ссылок или размер sitemap.xml превышает 10 мб, рекомендуется разделить карту сайта на несколько файлов. В таком случае, в карте сайта необходимо указать несколько ссылок на разные файлы карт.
Здесь используются уже знакомые нам теги
— родительский тег, в который заключаются адреса всех карт сайта; — тег, в котором заключается параметры для каждой карты сайта.
Пример файла карты сайта sitemap.txt
Еще одним способом оформления карты сайт в виде файла может быть карта сайта в формате txt:
1. http://mysite.ru/ 2. http://mysite.ru/page/ 3. http://mysite.ru/page1/
Все просто. В файле sitemap.txt построчно перечисляются все необходимые ссылки. Карта сайта в формате txt — это «вариант для ленивых». Здесь работает аналогичное sitemap xml ограничение в 50.000 ссылок. Однако, TXT карта сайта лишена возможностей указания даты последнего изменения и приоритета страницы.
Как создать карту сайта
Создание карты сайта важный процесс, в котором необходимо четко указать, какие страницы сайта нужно индексировать и как лучше их индексировать. В зависимости от того о каком типе карты сайта идет речь, используются различные способы создания карты сайта . Как создать html карту сайта обсуждать отдельно смысла нет. Рассмотрим как сделать карту карта в формате xml файла. Существует несколько основных способов создания карты сайта, но все их объединяет то, где находится карта сайта и как файл sitemap определяется поисковыми системами.
Как уже было написано выше — файл карты сайта размещается в корне сайта . Поисковые системы способны самостоятельно обнаружить файл карты сайта. Но существует несколько способов указания прямой ссылки на файл(ы) карты сайта(ов) для более скорого обнаружения поисковыми системами. Самый простой способ указать место расположения файла карты сайта — это непосредственное указание ссылки или нескольких ссылок на файлы карт сайта в инструментах для вебмастеров от Yandex и Google. Там же можно проверить карту сайта , провести анализ карты сайта на корректность , соответствие того, какие страницы из карты сайта найдены поисковой системой и сколько из них находится в индексации.
Второй способ указать поисковым системам на расположение файла карты сайта — это .
Sitemap: http://mysite.ru/sitemap.xml
В robots.txt можно указать несколько файлов sitemap, после чего, он автоматически будут добавлены в инструменты для вебмастеров. Как найти карту сайта мы рассмотрели, теперь перейдем к тому, как создать карту сайта.
Основные способы создания карты сайта
- Генерация карты сайта силами системы управления сайта, если CMS имеет подобную встроенную возможность.
- Скачать карту сайта со стороннего онлайн сервиса. Существует множество online генераторов карт сайта с различным возможностями и ограничениями. Напрмер xml-sitemaps.com обладает возможностью настройки параметров карты сайта, но имеет ограничение по количеству ссылок в файле sitemap.xml в 500 штук.
- Скачать программу-генератор карты сайта . Подобные программы генераторы обычно платные, но при их помощи можно можно регулярно генерить sitemap xml для одного или нескольких сайтов. Вот пара примеров подобных программ-генераторов: SiteMap XML Dynamic SiteMap Generator, WonderWebWare SiteMap Generatior.
- Автоматическое создание sitemap карты сайта в Joomla (Джумла), WordPress (Вордпресс), Bitrix (Битрикс).
- Создание карты сайта вручную .
Карта сайта — один из важнейших инструментов . Не важно, как будет создана карта сайта. Важно — какие ссылки будут перечислены в карте сайта и как часто она будет обновляться. Иногда, в карту сайта выгружается все подряд и даже те ссылки, которые запрещены в robots.txt или . А обновление карты сайта происходит раз в месяц или реже. Подобное отношение к карте сайта может не просто сделать ее бесполезной, но того хуже — запутать поискового робота, что негативно отразится на индексации и позициях сайта в поиске.
Создайте карту сайта для своего ресурса. Но будте внимательны и хорошо подумайте, что выгружать в sitemap, а что нет.
Недавно для одного сайта я , а через некоторое время получил уведомление о найденных там ошибках. Если честно, слегка удивился такому заявлению, так как использовал проверенный и один из лучших плагинов в данной сфере — WordPress SEO by Yoast . Однако сервис Яндекса настаивал на своем:
При клике по этим 442 ошибкам я попал на страницу с результатами анализа, но вместо ошибок там почему-то отображались лишь предупреждения, которых оказалось еще и значительно меньше. Все они касались тега image:image в sitemap.xml с картинками из текущей страницы.

Насколько я знаю, данная опция используется достаточно давно, странно, что в Sitemap тег image для Яндекс до сих пор кажется чем-то неизвестным. Ниже рассмотрим несколько основных моментов:
- (хаки для изображений).
Sitemap для изображений
Если честно, я не знал, что сейчас в Sitemap картинки выводятся наряду со ссылками на страницы. Используемые ранее , модуль Google XML Sitemaps для вордпресс и выводили просто список нужных записей и постов без изображений. Однако позже я перешел на модуль SEO Yoast и здесь, как оказалось, все немного по другому.
Информацию о теге image:image для Sitemap можно найти в справке Search Console. Для карты сайта допускается использование нескольких тегов:
Вот пример Image XML Sitemap (здесь 2 страницы по 2 картинки в каждой):
|
|
As you can see, Google displays information on Images in Sitemap separately from pages.
XML sitemap from Yoast SEO
Let's assume that you have already downloaded, installed and activated this module. To create a sitemap in Yoast SEO, you need to go to the same section of the plugin settings menu.

You will find 4 points here:
- General settings;
- Types of posts - inclusion of posts, pages, media files in the site map;
- Excluded entries - the ability to remove certain notes by ID;
- Taxonomies - inclusion/exclusion of different taxonomies from the map.
At the very top above these menu items you will find a slider that should be set to “Enabled”, which corresponds to the activated Yoast SEO XML sitemap. In the “General” tab there is a “XML Sitemap” button that will redirect you to the generated sitemap. By the way, it is located at sitemap_index.xml, so do not forget to make the appropriate changes to Robots.txt. For each separate category of URLs, its own separate Sitemap file is created:
- http://www.site_name.ru/post-sitemap.xml - WordPress posts;
- http://www.site_name.ru/page-sitemap.xml - site pages;
- http://www.site_name.ru/category-sitemap.xml - categories (headings);
- http://www.site_name.ru/post_tag-sitemap.xml - tags (labels).
If you previously used it for a WordPress site, then in the Yoast SEO settings you will see a corresponding notification about the impossibility of combining two modules. You will need to disable Google XML Sitemaps.
Images in XML sitemap from Yoast SEO
I already mentioned above that the Yoast SEO module automatically adds images to the Sitemap, and you cannot disable this option. Yes, there is a ban on indexing so-called attachments, but these are not the images themselves, but a special type of post (media post type).
You also need to understand that not all images uploaded using Sitemap will be indexed. Don't worry about this, the result depends on Google's decision. The search engine may consider your file insufficiently useful, unique, large, etc.
Yoast SEO has two filters that help you slightly “tweak” the display of images in the sitemap. First - wpseo_xml_sitemap_img allows you to disable adding images to the XML Sitemap.
function wpseo_cdn_filter($uri) ( return str_replace("http://example.com", "http://cdn.example.com", $uri); ) add_filter("wpseo_xml_sitemap_img_src", "wpseo_cdn_filter");
Changes will take effect after updating the site map. You can speed up this process by disabling and then enabling Sitemap output.
Plugins for creating Image Sitemap XML
Most of the services and programs that allow you to create Sitemaps for images turned out to be paid. Some of them have trial versions with full functionality, so if you need to make one sitemap, you can use them. I found only one completely free project - Free image Sitemap Generator from the Angel Digital agency.

On the page in the form, enter the address of your site and click on the “Generate Image Sitemap” link. In a couple of minutes, you will receive the source code for the sitemap, which you copy into a text editor and save as an XML file. It all looks, of course, not particularly presentable and I’m not sure that in a couple of years the project will still work, but the service generated a Sitemap with pictures. The only drawback is that the final file will have to be cleaned up a bit from duplicates and various images that are not content (for example, icons on the page).
If you have WordPress, then you are in luck. There are several suitable solutions for this system. I chose two that inspire maximum confidence.
Udinra All Image Sitemap

The Udinra All Image Sitemap plugin automatically creates a sitemap for images and sends pings to Google, Bing and Ask.com. This module has the most downloads (10 thousand), the highest ratings and is updated regularly. There is a Pro version with cool functionality (support for eCommerce plugins and galleries), but in theory, the free option should also be suitable for an ordinary site.
Advanced Image Sitemap
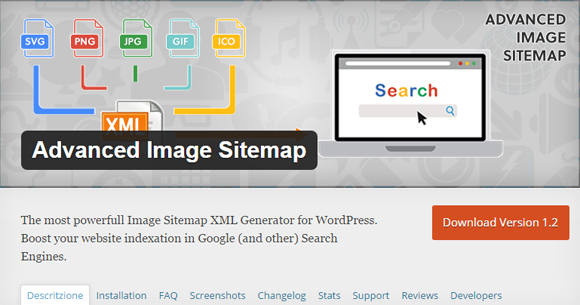
The author of the Advanced Image Sitemap module calls it the most powerful tool for creating Images Sitemap XML. Judging by the description, the plugin has more settings than the previous one, however, the small number of downloads is a little confusing.
Total. Of course, it’s funny that in 2016 a Yandex error occurs with an unknown image:image tag in the Sitemap. Theoretically, the situation can be corrected with a little trick. First, create a sitemap without images in Yoast SEO (using the hack above) + create Images Sitemap XML separately as the second module. Next, for Google you “scramble” both cards, while for Yandex in Robots.txt and/or the webmaster panel you show only the option without pictures.
I wonder if these warnings in Yandex.Webmaster interfere with reading data from the XML sitemap? What do you think about this? How do you implement Sitemap for images?
File Sitemap- this is a file with information about the pages of the site, otherwise called Site Map. With a Sitemap, you can tell search engines which pages on your site need to be indexed, how often information on pages is updated, and which pages are most important to index.
Here you can generate the necessary Google and Yandex XML code for the sitemap. And also create a visual site map online, which you can place on one of your pages.
You can read more about the XML Sitemap file format at sitemaps.org
Beginner Expert VIP Information XML Structure History FAQ
Technical details of the sitemap
Sitemap.xml file tags:
- changefreq- the most likely frequency of changes in the content of the specified URL;
- lastmod- actual date of the last URL update;
- loc- the URL itself;
- priority- priority of the specified page in relation to other pages of the site;
- url- this tag serves as the parent of the first four tags specified;
- urlset- this tag combines tags of the first five types.
A feature of using the XML format is the need to replace all service characters with their safe representation. Below is a table of characters that appear in the URL and must be replaced:
- & - ampersand;
- " - single quotes;
- " - double quotes;
- > - "greater than" sign;
- < - "less than" sign.
The Sitemap file has a 10 megabyte index file size limit. To ensure that this limitation does not affect owners of small websites, it is possible to compress files that are intended for Sitemap using the open archive format gz (gzip archiver).
You can specify the file location Sitemap using file robots.txt. To do this, simply add to the file robots.txt the following line:
Sitemap: http://DOMEN.ru/sitemap.xml
The URL must be the full URL for the Sitemap.
To convey new information to search engines Sitemap use a line like:
Search engine/ping?sitemap=http://DOMEN.ru/sitemap.xml
For Google: http://www.google.com/webmasters/sitemaps/ping?sitemap=http://DOMAIN.ru/sitemap.xml
To check the correctness of your site map, you should first check it for correctness. The easiest way to do this is to use one of the utilities located on websites or xml.org. You will need an XML schema for the Sitemap index file data. To indicate a link to the verification scheme in the XML file, check the " Add a link to the XSD schema for verification". After this, when you open the Sitemap.xml file in the browser, if there are errors in the structure, you will receive a corresponding message.
Sitemap development history
For as long as the Internet can remember, webmasters have always tried to please search spiders - to help them collect detailed information about the structure of the site being promoted.
The first, most ancient and completely natural way was to create a special page on which all the site’s links were placed. Such pages were and are called site maps. The principle of their operation is simple: when a search robot visits this page, it will automatically follow the links published there and add them to the index.
This scheme was convenient for the time being. Later, when sites ceased to be exclusively static pages with a small number of pages, a new problem arose related to the ineffectiveness of the method of publishing the classic version of the site map, because There were not enough places for links, the pages turned out to be large and inconvenient.
On some sites the number of pages has exceeded 1,000; naturally, it has become impossible to place absolutely all links on the site map. The indexing rate of such sites began to decline. The world needed a new effective solution to the problem that had arisen.
And the problem was solved. In June 2005, the company Google a new convenient format for describing new website pages was created to improve the quality of their indexing by search engines.
The standard was named Sitemaps 0.84. The principle of an XML text database was adopted as a basis, allowing a compact description of the site structure in a text file, including new and previously published site pages with the ability to specify additional META information. Effective solution Sitemaps, proposed Google, began to enjoy wild popularity.
The popularity also affected the opinions of other search engines towards the new approach to creating sitemaps. So in November 2006, such search giants as MSN And Yahoo, and in April and Ask.com. Happy format Sitemaps got a new version Sitemap 0.90, expanding functionality.
In May 2007, support for connecting the standard was officially announced Sitemaps in file robots.txt search engines Ask, Google And Yahoo, i.e. find the site map Sitemap it has become easier: just indicate its location in this file, and the source of information for Sitemap use RSS feeds or regular text files.
June 2, 2008, 3 years after the announcement of the protocol Google a message about support for this protocol appeared on the Yandex blog for webmasters Yandex ohm
How to ensure that your website always has a fresh map? For this purpose, a free site map maintenance service has been created.
You can also purchase a ready-made universal search script on your website, taking into account the morphology of the Russian language + site map generator.
.
Yandex Webmaster allows you to:
- add sitemap;
- update;
- delete;
- analyze.
How to add a Sitemap to Yandex Webmaster
To add a Sitemap file to the queue for indexing, you need, as always, to go to the Webmaster service - webmaster.yandex.ru. Further:
- In the Indexing section you will find the Sitemaps option.
- Add the full address of the Sitemap files, for example, https://site/sitemap.xml.
- Click Add.
- Wait while Yandex Webmaster checks the file.
After adding, the file is queued for processing. The robot will add it within two weeks. Each added file, including those attached to the Sitemap index, is processed by the robot separately.
After loading, opposite each sitemap you will see one of the statuses in Yandex Webmaster:
| Status | Description | Note |
|---|---|---|
| "OK" | The file is formed correctly and loaded into the robot database | The date of the last download will be displayed next to the file. Indexed pages will appear in search results within two weeks |
| « » | The specified URL redirects to another address | Remove the redirect and notify the robot about the update |
| "Error" | The file is not formed correctly | Click the Error link for more details. After making changes to the file, notify the robot about the update |
| "Not indexed" | When accessing Sitemap, the server returns an HTTP code other than 200 | Check if the file is available to the robot using the Check Server Response tool, specifying the full path to the file. If the file is not available, contact the administrator of the site or server on which it is located. If the file is available, inform the robot about the update |
| Access to the file is denied in robots.txt using the Disallow directive | Allow access to the Sitemap and notify the robot about the update |
Update Sitemap
When changes occur to the Sitemap, it does not need to be deleted from Yandex Webmaster and added again. The search engine itself checks it for changes and errors from time to time.

If your Sitemap is not indexed, then this can be speeded up. You need to go to the “Indexing” section, then to the “Sitemap files” item. Click on the update icon opposite the site map. Yandex will download the data within three days. You can use the function up to 10 times for one host.
Once you have used up all attempts, the next one will be available 30 days after the first. The exact date is displayed in the Webmaster interface.
Remove Sitemap from Webmaster
In the Yandex.Webmaster interface, you can delete those files that were added on the “Sitemap Files” page:
If a directive was added to the Sitemap in your robots.txt file, remove it. After making changes, information about the Sitemap will disappear from the robot and Yandex.Webmaster database within a few weeks.
Formats supported by Yandex Webmaster
Yandex accepts Sitemap in the following formats:
XML Sitemap format
It is preferable to transmit in XML format, because it can contain additional data.
Yandex supports the Sitemap protocol. Use this format if you want to report:
- date of last page update (lastmod element);
- page change frequency (changefreq element);
- page significance (priority element) - the robot loads pages one by one, taking into account the presence and value of the coefficient from 0.0 to 1.0. Specify the coefficient for those URLs that are most important to the site.
TXT format Sitemap
In this format, you can only transmit page addresses. That's all. Yes, sadness and sorrow, better use XML :)
Use this format to report page addresses only.
https://site/ssylki-v-yandex-webmaster/ https://site/zerkala-sajta-v-yandex-webmaster/
To transmit information about videos, specify links to XML feeds in the Sitemap (see details in the Ya.Video service Help).
Search does not support sharing image, RSS, and Atom feed information using a Sitemap.
When is a Sitemap needed?
Yandex is developing special algorithms by which the indexing robot learns about the site. For example, using internal and external links - moving from one page to another. Sometimes the robot may skip pages. Use Sitemap if your site:
- a large number of pages;
- individual pages without navigation links;
- deep nesting.
How to create a file

Add Sitemap.xml to Yandex Webmaster - video
 Error solution: An error occurred while loading data Error on the computer side
 PayPal wallet verification procedure
 Pirates of the Caribbean: Dead Men Tell No Tales post-credits scene Pirates 5 ending post-credits