What to do if the computer is being diagnosed. Step-by-step PC troubleshooting
To begin with, let's agree that the refusal to turn on the computer implies that nothing is displayed on the screen. In this case, sounds from the system unit may or may not be present.
It is necessary to start diagnostics by determining the type of failure, which will reduce the time of diagnostics and simplify further repairs. It is necessary to find out whether this failure is systematic or episodic.
- If it manifests itself chaotically without a certain pattern (it turns on, then it doesn’t), then episodic failure, and the cause of the failure must be sought in poor contacts, soldering, as well as the gradual failure of the power supply elements (aging).
- If the computer does not turn on stably from 1 time, turns off stably at the same moment or does not turn on at all - systematic failure.
Episodic failures are much more difficult to diagnose; in fact, an individual situation is considered in each case. In this article, we will consider only standard systematic faults.
Regardless of the type of failure, the first step in any diagnostics is the localization of the failure (narrowing the search area for the place of a possible failure). This is due to the fact that there can be several reasons for the same failure.
Launch failure localization order:
- Disable all nodes except the CPU, RAM, power supply and system speaker.
- Check the connections of the connectors and contacts of the power supply (whether all additional connectors are connected).
- Check that there are no foreign objects on the board that can cause a short circuit, as well as in slots and connectors; conduct a visual inspection of discrete elements.
- Run the motherboard with a test working power supply.
- Listen to the sounds of the system speaker, check the rotation of all fans, including the PSU fans.
- Check the temperature of the processor cooler heatsink, the temperature of the north and south bridges, the temperature of power discrete elements.
All motherboards start in the presence of 2 signals: a signal for closing the turn-on circuit (supplied to the power supply) and a high-quality voltage signal (from the PSU to the motherboard).
In addition to the supply voltages, the PSUs generate a Power Good (P.G.) signal - this signal with a level of 3-6 V is generated 0.1-0.5 s after the power is turned on and shows that the PSU output voltages are normal. In the absence of this signal, the Reset signal is constantly generated on the MB, which does not allow the processor to start. The appearance of the PG signal causes the MB to remove the Reset signal from the CPU.
ATX power supplies have added a +5VSB "standby" voltage source for power supply circuits, which supplies a negligible current to the board. The control signal PS-ON # (Power Supply On), coming from the motherboard when the power button is pressed, starts the power supply.
When holding PS-ON at a low logic level, the main voltages +5, +3.3, +12, -12 and -5 V are supplied to the output of the power supply. Instead of the PG signal, a similar signal is used PW-OK. In the ATX power connector: PW-OK - 8 pin (gray), PS-ON - 14 pin (green), + 5VSB - raspberry. The PSU turns on when the PS-ON is shorted to ground.
From all this it follows that if the power supply does not provide sufficient output voltages or when overvoltage protection is triggered in it, the motherboard will not start. This can also happen due to a short circuit on the motherboard, and in the case when it consumes a very large starting current. There is a known case when, due to a breakdown of the diode at the input of the Seagate Barracuda 7200.7 hard drives, which caused a short circuit, the power supply also did not start.
Typical symptoms of a systematic launch failure:
- There are no sounds, the cooler does not spin, the LEDs do not light up.
- Incorrect connection → Check contacts, cables (especially IDE), switching polarity, power supply sufficiency.
- The power supply unit is out of order → Check the presence of power at the output of the power supply unit → start the power supply unit by closing the PS_ON and GND contacts without connecting to the MV → is the power supply fan spinning? → check the voltage at the PSU output with a multimeter → if not, then the PSU is out of order
- If the PSU starts, then the problem is in the MB or CPU.
- There is no sound, the fans are spinning, the LEDs are on.
- Incorrect connection blocks the start → Check the loops on the MB
- Broken BIOS firmware
- Not all MV elements work correctly → check the U ratings at the MV control points, check for overheating and temperature of the microcircuits
- If the processor is cold → the Reset signal is not removed from the CPU → check the Reset signal through the POST card and see if there is a short circuit on the PCI bus and the controllers connected to it.
- If the southbridge is hot → short circuit on the southbridge
- The PSU does not provide sufficient output power or the auxiliary power connector ATX12V 4-pin is not connected.
- The CPU is installed incorrectly → check the temperature of it and the northbridge.
- The computer starts and turns off, no sounds.
- PSU damaged → PSU diagnostics
- protection of the MB from overheating of the CPU is activated → check the correct connection of the cooler.
- Power short, most likely in VRM → check short circuit in VRM
- Long repetitive sounds from the speaker.
- "Broken" RAM → diagnose with Memtest 86+
- Memory module not inserted correctly or bad connection
- RAM power circuit is damaged
- 1 long, 2 short sounds.
- Damaged video card
- Poor contact between graphics card and slot
- Damaged AGP or PCI-E slot
- Continuous speaker tone.
Diagnosis: Problem with memory controller, chipset, wrong voltage
- Repetitive short RF signals.
Diagnosis: Overclocking, overheating, incorrect voltage on the processor
- 1 long, 1 short beep.
Diagnosis: System board problem
- 3 long beeps.
Diagnosis: Keyboard Board
Alexander Dudkin, service engineer
As a rule, Windows 10 diagnostic mode (formerly called safe mode) starts automatically when the operating system does not shut down correctly, as well as during various Windows failures.
Safe Mode - diagnostic mode of the Windows 10 operating system
I would like to note right away as a Windows installer specialist - this mode has undergone significant changes in 10-ke. There has never been such extensive diagnostics and recovery tools in Windows operating systems.
That is why, let's take a closer look at how to work in diagnostic safe mode in order to be able to restore Windows 10. Preparing for such tasks will always come in handy for advanced users and system administrators.
2 Ways to Start Windows 10 Safe Diagnostic Mode
How to enter safe mode in Windows 10? In previous versions of Windows, you could start Safe Mode using the F8 key. And now, in order to start the diagnostic mode in Windows 10 manually, you need to do the following:
In the window that opens, go to the "Recovery" tab, then "Special boot options" and click the "Restart now" button; 
Windows 10 is forced to reboot;

Windows 10 diagnostic mode in action
After we have started a forced restart of the computer in a special boot option, the Windows 10 system does not boot, but a blue “Choose an action” window appears, where we need to decide and choose from the options: 
- "Continue" - in this case, we exit the diagnostic mode, the Windows 10 system boots;
- "Troubleshooting" - by choosing this particular tab, we will be able to carry out a complete diagnosis of the system;
- "Turn off the computer" - accordingly, in this case, the computer is turned off.
We open the 2nd tab, the "Diagnostics" window opens in front of us. Here we can also select tasks from 2 options: "Reset the computer to its original state", "Advanced options". Consider all cases of the development of events, first select "Return the computer to its original state"; 
Everything is clear here without comments, so let's start studying the "Advanced Options" tab, to select which we press the button with the arrow in the upper left corner. 
There are a lot of useful utilities in the "Advanced Options" tab, using which you can revive the Windows 10 operating system. Let's take a closer look at this entire gentleman's set of system diagnostics!
- System Restore - This tab is used to restore the system to a specific point in time. To use this feature, a restore point must be created. Restore points are created automatically (when this option is enabled on the disk) at certain times (for example, after installing a program or updating Windows), you can also create such points manually. A very useful option! I advise, from time to time, to create points in manual mode.
Now let's open the System Restore tab and see what's there. So, we select the account under which we want to open the recovery process, in the next window we enter the password and click the "Continue" button, the "Restore system files and settings" window opens. And we see that there are no restore points on the system drive. By default, "System Restore" is disabled, it must be enabled in the "System Protection" tab, which I will discuss in detail in the overview article "System Restore". 


- Restoring a system image - when choosing this option, you also need to select the account under which the restoration will be performed, then Windows looks for a system image on the disk and displays messages requiring you to specify the location of the backup. We will consider this option in the near future. Follow the news on the site and in the group in VK!

- Startup Repair - When you select this option, the system tries to fix problems that prevent Windows 10 from booting;

- Command line - when this tab is selected, the Windows 10 command environment opens, from where you can perform many manipulations with the system (for example, run the Chkdsk disk check, open the Diskpart hard drive utility, and much more);


- Boot Options - By selecting this mode, you can boot Windows 10 in safe mode, which turns on debug mode, logs the boot, and disables automatic reboot of the system when the system crashes. Starting Windows 10 Safe Mode with these useful options is very simple. You just need to select one of the options using the F4-F6 keys. Next, Windows 10 boots into safe mode;

You have probably already encountered failures, lags more than once and used the services of a service center! It would be easier if you yourself could correctly recognize the malfunction of your PC. In order to identify a malfunction, sometimes you do not need specific education and deep PC skills. It is enough to know the basic concepts, have information about the hardware and understand a little about the programs!
Self-diagnosis of a personal computer!
All of us, when we were at the doctor, and went through the stage of a pre-medical check, this check can be called a diagnosis. You will not be given an accurate diagnosis in the pre-medical office, but they will perform an examination and perform those procedures that will help the doctor make the correct diagnosis. A correct diagnosis is more than half the battle! So why don't you acquire the knowledge that will help you diagnose a computer problem. So you can protect yourself from unnecessary expenses and it will be more difficult to deceive you! Do you want to learn the basics of diagnostics? Take 10 minutes of your precious time!
10 minutes to the honorary title of "Computer Doctor"
The starting point in PC diagnostics is the condition of your PC. Your computer even ? There is a high probability that the problem lies in the hardware of the computer! In general, all computer malfunctions are usually divided into groups. The first such group will be software malfunctions, the second group is considered to be hardware malfunctions.
Finding the source of a software malfunction will be quite difficult. What it will be: non-working, the absence of one small Windows file, and of course the work may well cause the failure of your entire system. The only reason that most people find it difficult to identify a software malfunction is not knowing how and where to look for it. Strange as it may seem, diagnosing such a malfunction is best done using programs, both built-in (task manager) and special ones (AIDA, PC Wizard). Study the task manager, download some diagnostic programs, having studied them, you will make a leap towards knowing and understanding your computer.
Diagnostics of the software part is worth making if you have:
- unstable PC operation;
- slow PC performance;
- ;
- several programs do not work correctly;
- lost settings;
- critical BSOD errors.
Computer hardware diagnostics
Software diagnostics is complicated by the lack of basic knowledge, but hardware diagnostics often comes down to visual observation, and logic where you do not need to have special knowledge. When conducting such diagnostics, basic knowledge of computer architecture will be enough!
PC hardware failures:
The computer does not turn on and the display does not even light up:
no power or defective
a short circuit has occurred
motherboard problem
possibly out of order
computer randomly shuts down:
motherboard failure
accumulated dust
no image on monitor:
out of order
Faulty monitor or power adapter
USB ports not working
strayed
there is a problem with the motherboard
operating system stopped loading:
bad hard drive
corrupted files appeared
LAN, wifi not working
defective wifi module
broken driver
If you cannot identify the problem yourself. You can always turn to a friend or acquaintance, in addition, you can always count on getting a free professional consultation in one of the!
PC does not respond when pressing the power button:
- Check the power supply at the socket
- Replace the cable that is connected to the computer's power supply or test this cable on another device.
If we discard the above options, then the problem is in the motherboard or power supply. It will be necessary to open the system unit and disconnect all devices, except for the processor and the Power button (on the front panel) from the motherboard. Now try turning on your computer. After applying voltage, the cooler on the PSU and processor should turn on. If the coolers twitch for a short time and stop, disconnect the connector that feeds the processor, 4 or 8 pin, the coolers work properly, then the motherboard is out of order. Still nothing happens - disconnect the power supply from the motherboard and measure the signal voltage + 5V SB with a voltmeter - it should be 5 volts.
A lower value will signal a malfunction of the power supply, it will have to be replaced.
The power supply is in order - remove the motherboard from the PC case, clean it (compressed air, blowing vacuum cleaner, brush) and try to turn on the PC again. Pay attention to the capacitors, whether there are swollen and leaky ones. If the computer was overclocked or something was changed in the BIOS, remove the BIOS battery, or switch the CMOS_CLR jumper (Clear CMOS, CCMOS, CL_CMOS, Clear RTC, CRTC, CLRTC, CL_RTC, etc.)
If your computer starts working when you press a button, but immediately turns off, then the problem probably lies in the overheating of the CPU.
BIOS beeps (BIOS)
If your computer, or rather the speaker of the motherboard, makes a set of short and/or long sounds, then the BIOS beep tables below will help you. The most common BIOS from companies: AMI, AWARD and Phoenix. If there is no speaker or it is not connected, it can be purchased, the device costs no more than 100 rubles.
One short beep AMI and AWARD means that the computer is working properly. For clarity, in the tables, the long signal is denoted by the letter "d", and the short one - "k".
AMI BIOS
- * - Malfunction of the power supply (no sound signal)
2k - RAM parity error
3k - Error in the first 64 kB of RAM
4k - System timer malfunction
5k - CPU malfunction
6k - Malfunction of the keyboard controller
7k - System board malfunction
8k - Video card memory failure
9k - BIOS checksum error
10k - Unable to write to CMOS
11k - Faulty cache located on the system board
1d + 3k - Video card malfunction
1d + 8k - Monitor not connected
AWARD BIOS
Signals - Possible malfunction
2k - Minor errors (in most cases these are problems in the CMOS Setup or with the motherboard)
3d - Keyboard controller error
1d + 1k - Errors in RAM
1d + 2k - Video card malfunction
1d + 3k - Keyboard initialization error
1d + 9k - Error reading from ROM
k (repeating) - The power supply is covered
d (recurring) - RAM problems
Continuous signal - Faulty power supply
Phoenix BIOS
Sequential codes are represented in the number of beeps. For example, 1-1-2 - 1 beep, pause, 1 beep, pause, 2 beeps.
Code. Possible malfunction
1-1-3. CMOS data write/read error.
1-1-4. BIOS chip content checksum error.
1-2-1. The motherboard is faulty.
1-2-2. DMA controller initialization error.
1-2-3. An error occurred while trying to read/write to one of the DMA channels.
1-3-1. Memory refresh error.
1-3-3. Error when testing the first 64 KB of RAM.
1-3-4. Similar to the previous code.
1-4-1. The motherboard is faulty.
1-4-2. Memory test error.
1-4-3. System timer error.
1-4-4. Error accessing I/O port.
3-1-1. Error initializing the second DMA channel.
3-1-2. Error initializing the first DMA channel.
3-1-4. The motherboard is faulty.
3-2-4. Keyboard controller error.
3-3-4. Video memory test error.
4-2-1. System timer error.
4-2-3. Line error A20. The keyboard controller is faulty.
4-2-4. Error while running in protected mode. The CPU may be defective.
4-3-1. Error while testing RAM.
4-3-4. Real time clock error.
4-4-1. Serial port test error. Can be caused by a device using this port.
4-4-2. Parallel port test failed. See above.
4-4-3. Error while testing math coprocessor
Start the computer with the speaker (Speaker) connected to the motherboard. Sound signals should be heard (the decoding is presented above), which means the computer is alerting about the absence of memory modules (if there are other signals, then see the table and look for their rationale). The absence of sound signals means the failure of the processor or motherboard. To confirm this, diagnostics in a service center or replacement of components is necessary. If the signal confirms the absence of RAM modules, insert them into the slots after turning off the power completely and turn on the PC again. When the computer detects and initializes the memory, it will signal the absence of a video adapter (if your video card is not built into the motherboard or is located in the video core of the processor), which will be expressed in one long and two short beeps. At this step, we have ruled out a malfunction of the RAM. Also, do not forget to insert RAM modules one by one to eliminate the failed one by changing the slots of their location. If the computer does not boot up and does not emit signals from the speaker, the reason is a faulty memory module, which must be replaced. This outcome will be with two short beeps. After we have verified that the main components are working properly, install the video card in the slot.
When you turn on the PC, the monitor should display the results of the POST test and show what the hang was on (or the result of an unsuccessful OS boot). Often at this stage, problems arise due to the fact that the POST test does not determine the video adapter. In this case, try resetting the BIOS by removing the CMOS battery for a few minutes. Otherwise, you should try testing the video card on another computer.
Diagnostics of a PC with a connected video card
Plug in a keyboard. If during the POST test the speaker starts to “beep”, then this indicates a “sticky” or somehow clamped button on the keyboard. There may also be liquid ingress (drying or exposure to (non-hot) air will help).
After solving a possible problem with the keyboard, you can try to connect the hard drive. If you use hard drives on the IDE bus, then the jumper on the interface side must be in the position “master” (boot disk), the main thing in our business is to pass the POST test.
Now go into the BIOS (when booting - Del or F2, sometimes Ctrl + F2) and try to determine your HDD. During initialization, the PC may freeze after passing the POST test when the OS starts loading. The reason is probably hidden in the damage to the MBR, to restore it, you need to boot from a CD with your version of Windows. Then, you need to enter the restore menu of the installed system and try to restore the OS using Windows. After booting the system (from CD, HDD or USB), it is necessary to perform a surface test of the entire hard disk. You can also use disk. The result of this operation will show whether the hard drive is to blame for the failure of the system. This is a very lengthy process, but after that it will be possible to talk about the health of the hard drive, and in case of a breakdown, replace the HDD. Hidden defects in the first 10 MB of the hard drive are especially dangerous, their detection is possible with a full disk test, and detection is necessary due to constant boot failures for no apparent reason.
Connecting Peripherals
Now connect your mouse. The optical LED will light up. If there is no reaction to connecting to a computer, you must first check the mouse on another machine, and then replace the device and connect it to the required port. Quite often, PS / 2 devices fail when they are connected / disconnected while the PC is running (it is fraught with failure of the motherboard).
PCI devices and USB, LAN ports
The determination of their health is determined after the POST test on the screen, a list of all initialized PCI bus devices is displayed. This test only makes it clear that the PCI controllers on the motherboard work without problems and that they can detect installed devices, but the operation of the devices themselves is not guaranteed. You can check their work only directly in the system. Comprehensive tests will help you find a malfunction in PCI components. If up to this point the diagnostic process has been successful, then you can connect optional components: additional hard drives, Blu-Ray or DVD drives. Sometimes installing these devices causes the system to hang. One loop should have 1 Master and 1 Slave. If you use SATA drives and hard drives do not have such problems, each device of this type is connected with a separate cable (loop) to a separate port on the motherboard. If this does not help, look carefully at the POST test process: if it lasts about 8-10 seconds, the power supply may not be enough. To verify this, disconnect any of the HDDs and restart your PC. Also, in case of a lack of power during loading, you can hear how the hard drive tries to spin up, which happens 3-4 times. You can solve the problem by installing a more powerful PSU.
It often happens that after a long work without failures, the computer completely unexpectedly fails. At the same time, the manifestations of breakdowns and their causes can be very different. In any case, the computer should first be diagnosed for malfunctions in order to understand which element of the PC is to blame for the malfunctions.
PC won't turn on
If after pressing the power button the computer does not react in any way, the problem is most likely in the power supply. A simpler case is the failure of the button itself.
Inspection
It is not uncommon for the switch on the back of the power supply to be set to the "Off" position. In this case, the solution to the problem will be the simplest.
Connectors
If a cursory external examination did not bring results, further diagnostics of the computer for malfunctions will require more complex actions. Remove the system case cover. Don't forget to unplug your PC first.
See if any connectors have come loose from the motherboard. It is best to turn them all off, wipe with alcohol or cologne. Then you will have to refer to the manual that comes with the motherboard. It will indicate where to connect all the wires.
With this approach, several possible causes of a malfunction can be excluded at once: oxidation of contacts; incorrect connection of wires; random breaks in the circuit.
Button
If the previous steps have not worked, troubleshooting the computer should continue after disconnecting the power button connector. As you can see in the process of work, it is connected to two pins of the motherboard. Close them with any metal object, such as a paper clip.
If after that the PC turned on, most likely the power button is broken. To temporarily eliminate the inconvenience caused by this problem, you can simply change the assignment of the "Reset" key by connecting its wire to the "Power On" connector on the motherboard. That is, to the one that was closed with a paper clip earlier. Now, to start the PC, you will need to press the reset button on the system unit.

The second possible malfunction with the same symptom is the "Reset" keys. In order to check this diagnosis, you should simply disconnect the wire coming from the reset button, and then try to turn on the computer in the usual way.
Nutritional issues
If the paper clip didn't work, it's likely that the motherboard isn't getting the power it needs. In this case, computer diagnostics for malfunctions should continue by checking the ATX and P4 connectors.

ATX is a wide connector that has 24 pins. P4 is shaped like a square and has four wires going to it (sometimes up to eight wires). Just unplug and then plug the connectors back in.
power unit
If the previous actions did not lead to a positive result, the PSU failed, but so far the probability of this is not one hundred percent. Further computer diagnostics at home will require connecting a known-good power supply to the PC.
The easiest way to complete this step is if you have several computers at home. Otherwise, you will have to contact the service center. Buying a new power supply to diagnose problems is not the best option, because the device may be working, and the problem manifests itself due to other problems.
Motherboard
After replacing the power supply, the computer does not turn on? We can say that in this case, the computer hardware diagnostics is completed, and the motherboard is out of order. It is best to replace it immediately, the repair of such equipment does not justify itself, since the price of this procedure may be higher than that of a new device.
Work failures
If problems arise unexpectedly and haphazardly during its operation, computer system diagnostics should begin with updating the most important software. It includes OS, drivers, antivirus. If no protection tools are installed, it is worth installing them, and then performing a full computer scan for viruses.
RAM
Often, the stability of the PC is disturbed due to a malfunction of the RAM. There are many applications for checking it. However, Memtest86+ is considered the best. You can download and use it absolutely free.
Before testing, you will need to prepare a bootable USB flash drive.
- Download the distribution package of the program. At this step, it is important to select the USB INSTALLER and not the ISO image.
- After that run the executable. Its extension is EXE and its name starts with "Memtest".
- A window will appear on the screen that will ask if you agree with the terms of the license agreement. Since it is impossible to start the program without confirmation, you should click on the "I Agree" button.
- In the next step, you will need to select the USB drive to which the application data will be copied. Be careful: all information from the flash drive can be deleted during the installation process.
- Now it remains to click on the inscription "Create". Wait for the computer diagnostic program to complete the installation, and then click on "Finish"
Now restart your PC and enter the BIOS. To do this, press the "DEL" button when the computer is just starting to turn on. After launching the BIOS setup utility, go to the "Advanced" menu. In it, select the "First Boot Device" item and switch the parameter to "USB".
Restart your computer again. If all the previous points have been completed correctly, the computer diagnostic program will load. The RAM check should start automatically. It is advisable to follow the messages on the screen, sometimes before the test you will be asked to perform the procedure in safe mode. In this case, you need to press the "F1" button to start.

Memtest86+ runs 11 tests. In this case, after the completion of the latter, the procedure will begin again. If errors are found in the RAM, a red area with their description will appear on the monitor screen. If no problems are found after a full check, the application will display the message "Press ESC to exit".
If errors are found during the tests, the RAM should be replaced. If there are several RAM sticks, computer diagnostics and repair involve checking each of them separately. To do this, you need to install them in the system unit one by one, and after the change, turn on the Memtest86+ utility again. By identifying the failed device, you can continue to use your computer without it, with some performance loss but no crashes.
Cooling system
If problems occur while running resource-intensive applications, it is highly likely that the PC cooling system is not working efficiently enough. The problem is exacerbated by the dust that settles in the radiators. As a result, the flow of cool air blown by the fan becomes unable to blow through all the metal parts of the heat exchanger.
To detect overheating, a program can be used. In this case, diagnosing a computer for malfunctions will require the user only to install the appropriate application and monitor the performance of the sensors.
AIDA64
One of the best utilities for monitoring computer temperature is AIDA64. After starting the program, you will need to select the "Service" item in the top menu, and then - "System stability test". A window with graphs will appear on the screen. They will display the temperature of all major PC components.
After clicking on the "Preferences" button, you can independently choose which sensor data will be displayed on the charts. Since it is impossible to diagnose a computer for overheating when the computer is running in gentle mode, a special test should be run. To check how the PC behaves while using the processor at the maximum level, in the upper left corner, check the boxes next to "Stress CPU" and "Stress FPU".

It is advisable not to leave the device during this check and carefully monitor the data provided by the program. Since diagnosing a computer is only half the battle, in addition to identifying problems, you must also prevent them from damaging your PC. If critical temperatures are exceeded, you should stop the test and think about replacing the cooling system. It will not be superfluous to blow out the radiators from dust, and then check the temperature again at maximum load.
Crashes during games
If computer errors occur during games or other applications that actively use the graphics system, computer diagnostics can be performed using the FurMark program.

After launch, the settings window will open. In it, it is advisable to select the maximum resolution supported by the monitor, and also check the "FullScreen" checkbox. Now it remains to click on the inscription "Stress Test".
A three-dimensional image will appear on the screen, but you should not observe it. The main attention should be focused on the graph, which will be displayed below. It shows the temperature of the video processor. When critical values are reached, press the "ESC" button to exit the benchmark.
Image defects
If the monitor displays incorrect colors during operation, this problem is often solved by simply replacing the cable. Diagnostics and initially involve checking components. Try tightening the screws securing the plug. If this does not help, you can wipe the contacts with alcohol, and also check the operation of the cable on another computer or monitor.
Did the previous steps not work? Update or reinstall your video driver. It is also not superfluous to test the graphics card for overheating, as described above.

No sound
How to diagnose a computer and identify a malfunction if the sound is gone? Typically, these problems appear after installing a new video card or graphics adapter. Almost all such modern devices come with an HDMI output through which sound can be output. And along with the increase in sound-reproducing devices, there is a risk of incorrect auto-tuning.
Launch any player and turn on the music in it. Click on the speaker icon in the system tray, and then click on the inscription "Playback devices". In the left column of the window that opens, right-click on each device, and indicate to the OS that it should be used by default.
If the sound still does not appear, diagnosing a computer at home will require additional steps. Check the wires that connect to the output of the audio board. The easiest way to do this is to disconnect the plug from the computer connector and connect it to any other audio device (player, mobile phone).
If there is still no sound in the speakers, try replacing the cable. The audio system is silent even after this procedure? This means that the computer is fully functional, and the replacement requires "acoustics".
HDD problems
How to diagnose a computer when the hard drive is not displayed in either Explorer or BIOS? Start by checking the cables. The easiest way is to use a cable from the HDD that works stably. If such a measure did not help, there is a high probability of a breakdown of the drive itself. In this case, further attempts to repair at home will not lead to positive results. Data recovery from this HDD can only be performed by a specialist.
If the information from the hard disk can be read, but the OS stopped on it cannot be loaded, then the MBR (boot record) has been damaged. To resolve this issue, boot from the Windows installation disc. In the menu, click on "Repair your computer", and then - "Repair bootloader".
 Realtek HD Audio Free Version Overview
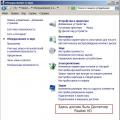 Realtek HD Manager not in Control Panel
 Intel Rapid Storage Technology Driver what is this program and is it needed?