Ability to view images on the screen. Connecting widescreen displays to your computer
Once upon a time, printing photographs required a professional darkroom or at least a darkened room - in addition to the required serious preparation.
But over the past decade, digital cameras and computers have revolutionized photography: Now everyone has the opportunity to print photos at home.
Transferring images from your camera to your computer
Many digital cameras store images on CompactFlash or SecureDigital (SD) memory cards. To view, organize, or print your photos, you need to import them to your computer. Then you can erase the images from the memory card and use it for a new series of photos.
There are two main ways to import images
Connecting the camera to a computer. You can import images by connecting the camera to your computer using a universal serial bus (USB) cable.
The camera must be turned on, so importing images will consume battery power. In addition, for regular imports, you need to keep the cable on hand.
Using a Memory Card Reader. The fastest way to import images is using a memory card reader. Remove the memory card from the camera, insert it into the drive and connect it to the USB port on the computer.
Many computers have built-in card readers that allow you to insert memory cards directly into the computer.

For any method selected, Windows must Automatically recognize camera or memory card reader connected to the computer.
Then do the following actions:
In the dialog box Autorun select Import images and videos using Windows. Windows will find the image (or video) on the memory card.

Reference: Regular photographs can be turned into digital images using a device called a scanner.
Image library and photo viewing
Image Library- This is the main means of searching and viewing images on your computer. To open the Picture Library, click the Start button, then select Images.

Windows Photo Viewer is a Windows tool for viewing and printing digital images. Double-click an image in the Picture Library to open it in Windows Photo Viewer.
Some features of Windows Photo Viewer and Picture Library overlap. For example, you can view pictures, print them, and run slide shows from both the Picture Library and the Photo Viewer. So what should you use?
It is better to search and organize images in the image library. The Image Library allows you to see the entire collection of images and easily view them, sorting them by date, tag or other criteria.
Meanwhile, in the Windows Photo Viewer, you can rotate images, zoom them in, view them at full size, and start a slide show.
Working with Images
Once transferred to your computer, you can work with them. You can view multiple images on one screen, view one image at full size, rotate images, and view them in a slide show.
Using thumbnails
IN image library You can display images as thumbnails—smaller versions of full-size images. To view as many thumbnails as possible, open the image library window to full screen by clicking the Expand button.
To change the size of the thumbnails, click the View button and move the slider up or down. To view large assemblies of images more quickly, you can make thumbnails smaller. You can enlarge the thumbnails to see more detail in each image. Changing the thumbnail size does not affect the full-size version of the image.
To return to medium-sized thumbnails, click the View button and select Medium pictograms.
Rotate an image
The Windows Photo Viewer may display vertical images in landscape orientation.
To correct the orientation, click the button Rotate counterclockwise or button Rotate clockwise.
View images in full size
To expand an image to nearly the entire Photo Viewer window, double-click the image in the Image Library. To view at a larger size, expand the photo viewer window to full screen.
To enlarge part of the image, click the Zoom button and move the slider up. When zoomed in, you can move the image by dragging any part of it using the hand pointer. To return to the normal view, click the Fit to Window button.
Image slide show
Digital images can be viewed in a full-screen automatic slide show.
To start the slide show, open the image in the photo viewer by double-clicking it. Next, click the button Start slide show at the bottom of the photo viewer window. The slide show displays all the images in the current view.
While viewing slides, you can pause the slide show, change the speed, skip forward or backward, and view images in sequence or in random order. To display the controls, right-click the slide show window.
To end the slide show, press the Esc key on your keyboard or the Exit button on the slide show's context menu.
Composing and searching images
If you use a digital camera regularly, hundreds or even thousands of images quickly accumulate on your computer. The Image Library helps you find a specific image in your image collection.
Search images by date
Digital cameras indicate the date the image was taken. In the Image Library, images can be found and viewed by year, month, or day of creation.
To search for images by date, click the search box in the image library, select Shooting date and indicate the year, month, day or other period of time.
![]()
Adding tags to images
Using the Image Library, you can add tags to your images—keywords or phrases to describe the objects depicted and the location you took them. Adding tags makes it easier to search for images later because you can easily view all images with a common tag.
If adding tags to each image takes a lot of time, don't worry—tags can be added to an entire series of images at once. For example, you could add a "Birthdays" tag for 20 or 30 celebration images.
To add tags to images, follow these steps:
- In the Image Library, select the image you want to tag. To select multiple images, click while holding down the Ctrl key.
- In the details pane at the bottom of the image library, select Add a tag, enter a tag name in the field and press Enter. The tag will be added to all selected images. You can add an unlimited number of tags.
You should add tags to images immediately after import. This way you can avoid a build-up of unsorted images that need to be tagged. For more information, see Add tags to make images easier to find.
Search images by tag
If you add a tag to a picture in the Image Library, it's easy to find. You just need to enter the tag in the search field. All images that contain this tag will be found.
For example, by entering the word Animals, we will find all images whose tags contain the word “animals”. In addition, those images will be found whose file names contain the word “animals”.

If you don't remember which tags you've already created, click the search box and select Tags. When you click on a tag, you'll see a list of images with that tag.

For more information, see Image management.
Transferring images to other users
Access to the images means that others can view them on their computers. The most common sharing methods are posting images on a website and sending them via email.
Photo sharing websites
Majority photo sharing sites allow you to publish and save images for free. But note that some sites may remove your images based on their internal regulations. Therefore, please read the site policy.
Sending images by email
Another way to share images is by email. You can start sending pictures by email in your Picture Library or Windows Photo Viewer.
Once you start uploading in an image library, you can resize multiple images at once. If you start transferring in the photo viewer, you can resize only the current image. But no matter where you start, Windows Photo Viewer can automatically compress images (reduce file sizes) so your email message arrives faster and your photos take up less space on the recipient's computer. This does not affect the original images.

To send an image by email, select them in the image library and click the button on the toolbar Email. In the dialog box Attach files select the image size (usually the default size is medium) and click the Attach button.
Windows will open a new message in your email program. The selected images will be attached to the message.

To send an image, enter the recipients' email addresses, subject and write a short message. Then click the Submit button. For more information, see
Viewing angle is one of the key parameters for LCD displays. In the recent past, manufacturers have been actively working to expand it. Wide viewing angles are mainly needed for LCD TVs, as well as for monitors installed in public places, such as monitors in airport or train station waiting rooms. A number of technologies have been developed and implemented to provide wide viewing angles, such as: patterned vertical alignment (PVA), mutidomain VA (MVA), in-plane switching (IPS), fringe field switching (FFS) and OCB (optically-compensated bend) . So why did we need LCD displays with controlled viewing angles, and how can this control be implemented? This article provides answers to these questions.
The variable viewing angle provides new additional options when displaying information on the display screen. Such functions include the following: protection of personal visual information on the display screen of an individual user from unwanted viewing in public places, display of stereo and volumetric information, as well as the ability to simultaneously view two images on the screen for observers located to the right and left of the screen.
Protection of personal information
The topic of protecting against unwanted viewing of images on the screen of a mobile device or laptop by unauthorized persons worries many users. This is especially true when using computer devices with displays in public places, such as waiting rooms at train stations or airports. This problem extends both to the sector of mobile devices with a small LCD display, and devices with a large screen, such as laptops, payment and banking terminals - ATM (automated teller machines), as well as machines that sell transport tickets.
The way to solve the problem is very simple: you need to limit the viewing angle so that the information on the screen is visible only to the owner directly looking at the screen at a right angle. Currently there are no problems doing this for displays of any class. Narrowing the viewing angle is achieved very simply by changing the electro-optical properties of the LCD display (LCD material, its orientation, the orientation of correction filters and polarizers). It does not require the development of new technologies or the use of new types of materials. However, information protection is not always required, and the user would like to maintain a wide-angle viewing mode. The user himself must decide whether to make viewing information on the screen of his information device private or public.
Ways to adjust the viewing angle
The problem statement is as follows: it is necessary to provide two image viewing modes for the LCD display, which the user could switch at will: a public viewing mode with a wide viewing angle (WVA Wide Viewing Angle) and a private viewing mode with a narrow viewing sector with a direction close to to the normal, (NVA Narrow Vieing Angle). At the very least, to implement an LCD display with a switchable viewing angle, you must initially have a display panel with a wide viewing angle and an additional optical element(s), external or built into the LCD panel, to “spoil” the viewing angle and make it narrow. In Fig. Figure 1 shows an example of isocontrast angular characteristics that need to be implemented for two observation modes.
Rice. 1. Isocontrast angular characteristics for two states of the LCD display with adjustable viewing angle
The angular characteristics of an LCD display are determined by key optical display components, which include:
- type of LCD panel technology;
- polarizer orientation;
- type and orientation of phase correction filters;
- backlight luminous flux parameters (flux direction vector, degree of collimation (directivity) or flux scattering).
Currently, two basic methods are widely used to regulate, or rather, to reduce a deliberately wide viewing angle:
- narrowing of the contrast angular characteristic;
- blocking light in directions other than normal.
A combination of both methods can also be used. As stated earlier, to implement switching of angular modes, some optical components are required, let's call them controlled optical filters, which, when a control signal is applied, are capable of changing the conditions for the passage of light flux through the LCD panel.
First, let's look at the currently available basic technologies for LCD displays that can provide a wide viewing angle.
Technologies for a wide viewing angle
Currently, a wide viewing angle for LCD displays can be achieved using three basic LCD display technologies, distinguished by the orientation of the LCD material and the design of the electrodes:
- classical technology with twist nematic type material TN (twist nematic);
- multi-domain vertical alignment VA (multidomain Vertical Alignment);
- horizontal orientation IPS (In Plane Switching).
The last two methods provide a wider viewing angle, but are based on different principles.
In Fig. Figure 2 shows that, based on the totality of indicators, MVA technology is the best “candidate” for use in LCD displays with adjustable viewing angles.

Rice. 2. Comparison of basic technologies of LCD displays
The orientations of the director of an ordinary TN molecule for the two states are not completely perpendicular, which is why it is not possible to obtain a perfectly “black” one for the off state. If intermediate voltages are applied between the voltages corresponding to the “on” and “off” states, the angular characteristics of the display will change and the contrast of the observed image will change.
For an IPS structure, the molecules of the LC material remain in the same plane when voltage is applied, but rotate by 90°. The angular response of IPS is much wider than that of classic TN. However, IPS technology has disadvantages: the presence of a strong spectral dependence and a long reaction and relaxation time during switching, due to the fact that the electric field strength between planar electrodes in this topology is very small compared to the field strength for a system of electrodes located on opposite substrates and in front of each other. The distance between electrodes for TN is much smaller than the distance between electrodes in the same plane for IPS.
According to VAtechnology (Vertical Alignment), the electrodes are located on different substrates, as with TN classical technology. Uses vertical molecular orientation for the OFF state. When voltage is applied, the molecules of the LC material layer rotate parallel to the plane of the electrodes and provide a transparent state (ON). When the voltage is turned off, polarized light passes through the LCD cell unhindered and is then completely blocked by the front polarizer. The VA method provides very good “black” and high performance, however, when applying intermediate voltages (when synthesizing grayscale), this method, like TN, does not allow for a wide viewing angle. This shortcoming is eliminated in the multi-domain vertical structure (MVA).
The angular characteristic is expanded due to the fact that each pixel is divided into several topological zones (domains) with different orientations of the LC material (Fig. 3). Local orientation is specified through the use of orientation coating films. Selective orienting properties are set either by rubbing the polyamide film with brushes or by sputtering a film of silicon dioxide at a certain angle to the surface of the substrate. Each zone provides its own image observation sector. In general, a set of domains with different orientations provides a wide integral angular characteristic. Currently, a four-domain structure is typical (Fig. 4).


A structure that divides a pixel into several zones with different angular characteristics can also be suitable for solving another problem: obtaining a user-controlled angular characteristic.
If you use a multi-domain structure at the pixel level and provide separate control of groups of pixels with different angular orientations, then you can simultaneously form two images on the same screen, which can be separately viewed from different angular positions. In this case, for example, it will be possible to display two TV images for different TV channels on one panel. To separate the sound, each observer on the left and right will have to use Wi-Fi headphones, which is not very practical, but the idea turned out to be attractive and was implemented by Sharp.
Until recently, it was believed that the potential of TN technology to expand the angular response to reach the level of the other two technologies has been exhausted. However, the use of Fujifilm's newly developed WV series phase correction filter has ensured that classic TN displays have the same wide viewing angles as MVA and IPS. But TN technology is much cheaper and simpler! In addition, the speed of TN technology is currently almost as good as MVA. So the technological potential of TN is again in demand in the display industry.
In the past few years, NEC, Sharp and Toshiba have developed several LCD technologies with controlled viewing angle (control vieing angle, switching vieing angle, dual mode switching, VAS viewing angle switching). Known options for implementing viewing angle changing systems can be divided into two classes:
- regular LCD panel with a wide viewing angle + external additional switchable optical filter;
- LCD panel with built-in function for changing the viewing angle.
They use different principles to control the angular response by reducing angular contrast or by angular blocking of light.
Narrowing of the angular contrast characteristic
The implementation of this task is possible by using a controlled phase-correcting filter based, for example, on an additional LCD panel. In one case, when the voltage is turned off, the filter will not affect the wide angular response, but when the power is turned on, it will cause “detuning” of the optical system and deterioration of the angular contrast. This solution is not entirely radical. The contrast for angular directions decreases, the transmission of halftones and colors is disrupted, but the image can still be distinguished and, if desired, read. For additional protection, it is recommended to reduce the brightness to the minimum level that allows the owner to work with the image. More effective in terms of radically narrowing the viewing angle are methods based on angular blocking of light from the backlight source.
First of all, we will consider technologies for controlling the viewing angle of an LCD display using external additional controllable optical filters, or light switches.
Sharp Controlled Viewing Angle Technology
Controlled viewing angle technology for LCD displays (Figure 5) was developed by Sharp Corporation and Sharp Laboratories of Europe, Ltd.

The display structure uses an additional active switchable filter based on an LCD modulator. An additional panel for controlling the viewing angle is located on top of the LCD panel. The filter uses the effect of controlled birefringence. When control voltage is applied, the filter blocks light passing from the backlight source through the LCD display in directions other than normal (left and right). Viewers to the right and left (C and B) cannot see the image on the screen. In July 2005, mass production of laptops and palmtops (“handhelds”) with a built-in viewing angle control system began.
VAP technology (Toshiba)
When using VAP LCD technology (Viewing Angle control for Privacyprotect LCD), unlike Sharp technology, the change in the angular characteristic is provided by two controlled filters at once. In Fig. Figure 6 shows the structure of VAP LCD display.

The VAP display structure consists of:
- top polarizer;
- controlled optical compensator filter (USTCell);
- regular TNTFT panel;
- lower polarizer;
- controlled filter based on dispersed polymer liquid crystal material (PNLCCell);
- collimated light source.
The first filter (USTCell, Variable optical compensator), or optical compensator, regulates the angular contrast, and the second filter (PNLCCell), or controlled light diffuser (variable diffuser), regulates the direction of the light source of the backlight.
The UST cell filter works as a negative type optical compensator for the TN cell and provides an expansion of the viewing angle when voltage is applied.
A controlled light-scattering filter is placed between the backlight source and the LCD panel (Fig. 7). In the absence of voltage, the polymer molecules have a chaotic structure and uniformly scatter the collimated light passing from the backlight source. The diffused light flux provides a wide angular response. When voltage is applied, the polymer molecules acquire an oriented structure and pass a collimated flow without dissipation. The fact that the light must be collimated is very important for the implementation of this option. This blocks the angular components of the light flux and narrows the working angular pattern.

The efficiency of such a filter is very high. So, for example, if in the direction perpendicular to the screen the measured brightness is at 200 cd/m2, then at an angle of 45° the brightness drops to 3 cd/m2, that is, it decreases almost 70 times!

The first optical compensator for the narrow angle mode changes the contrast for an angle of 45° to a level of 2:1 (with a contrast of 10:1 for a right angle). In narrow angle mode, you can reduce the brightness of the backlight source and therefore significantly reduce the power consumption of the display. The combination of two operating factors reducing brightness and contrast provides complete protection of the screen from viewing at angles. True, the selling price is quite high, due to the use of two additional controllable filters. The thickness of the structure increases, but, for example, for a stationary display of a bank terminal this is not of great importance.
Toshiba VASF Technology
Toshiba has used another method to protect against unwanted viewing. The key element of the technology that distinguishes it from similar ones is the synthesis of a background masking image for angular directions.
The VASF (Viewing Angle Control Filter) method is based on the use of a conventional TFT LCD panel and an additional controllable optical filter (Fig. 9). The filter panel is placed in series with the LCD display panel and is a voltage-controlled matrix LCD modulator with a special topology and structure. The modulator matrix consists of three nested matrix zones.

Rice. 9. Operating principle of a VASF LCD display: a) the image is poorly visible against the background of a masking chessboard pattern; b) using an effect to rotate the light
The orientation angles for the three zones are selected in such a way as to provide wide angular characteristics in one state (zones 1 and 3 cover the right and left viewing areas, zone 2 covers the central area). When voltage is applied, the central zone practically does not change the horizontal angular characteristic, and for the side “lobes” the angular contrast decreases. The filter topology implements a checkered alternation of zones with different orientations of LC cells in such a way that for a state with a narrow angular characteristic, the “left” and “right” zones are shifted to an absolutely “white” and an absolutely “black” state. The observerowner will see the entire undistorted image at right angles to the screen. Observers on the left and right will see a low-contrast useful image with a superimposed contrasting image of a chessboard. Moreover, if you look from the left and right, the contrast of the cells will be inverted.
Toshiba engineers experimentally selected the optimal cell size for a masking chessboard image: 8x10 pixels.
An outside viewer sees a superposition of a low-contrast “useful” image and a high-contrast background “chessboard” image. The masking image of the “chessboard” makes it difficult for the visual system to restore the integrity of the low-contrast “useful” image. The local contrast range of the eye is small; the eye is tuned to highly contrasting elements. However, if you use an electronic vision system and software image processing, the original image can be successfully restored, even at acute viewing angles.
The monitoring mode switching function is supported by the LCD driver software. Operational control of the viewing angle of the display can be done using a “hot key” on the keyboard or a soft key on the screen (icon in the Task Tray). VASF support was implemented in the Tecra M3 laptop (Fig. 10).

Systems with an optical viewing angle switch built into the LCD panel
The use of additional filters in the considered angular response control systems leads to an increase in the thickness of the entire display, increasing its cost and consumption. Therefore, these filters cannot be used on mobile devices.
The most attractive methods for implementation are those with an optical structure built into the LCD display to control the angular characteristic. The ideal solution would be to implement two modes for viewing angles in one layer of LCD material. To achieve good performance, it is desirable that for NVA and WVA modes the viewing angles be changed, both vertically and horizontally.
Built-in three-electrode angle control system
Recently, several viewing angle control technologies have been developed that use a combination of both vertical and horizontal electric fields. Field control is achieved through the use of a three-electrode topology. The third electrode is introduced to control the angular characteristic of the LCD cell. The technology does not require additional external optical components that increase the thickness of the display. However, this system has a number of disadvantages, in particular, artifacts associated with image inversion may occur with certain combinations of vertical and horizontal components of electric fields during control.
Architecture based on bistable LCD material
To meet such requirements, a bistable LC material is needed. Until recently, only the memory effect of bistable LCD materials was used, mainly to achieve a reduction in energy consumption in LCD displays. Currently, work is being actively carried out to use bistable LCD material for controlled viewing angles in LCD displays. In Fig. Figure 11 shows the structure and operation diagrams of an IPS display structure with a controlled viewing angle based on bistable LCD material.

Rice. 11. Operating principle of three-electrode control of an LCD cell with a bistable nematic LCD material: a) structure of an LCD display with a bistable material; b) two states for the wide viewing angle mode; c) two states for narrow viewing angle mode
Using three electrodes, it is possible to provide four states for the orientation of the LCD material, corresponding to operating modes with narrow and wide viewing angles. The diagram (Fig. 11b) shows the standard control mode for IPS. The presence of a vertical component of the electric field leads to twisting of the molecules and a decrease in the viewing angle (diagram in Fig. 11c).
Three-electrode systems for PVA technology
PVA (Patterned Vertical Alignment) is a technology using the vertical orientation of the LCD layer and the zone structure of pixels with different orientations. In essence, this is the same MVA technology, only under the brand of a different company. PVA provides a wide viewing angle due to its composite angular characteristic (Fig. 12).

Rice. 12. Classic PVA structure for a wide viewing angle
In a “regular” PVA structure, to ensure a constant wide viewing angle, phase-compensating filter films Cplate and Aplate are used, respectively, with negative and positive characteristics.
If one of the filters, for example Aplate, is replaced with a structure with controlled birefringence, then the angular response can be controlled. This structure is implemented in an LCD modulator. A typical solution is to install an additional separate modulator, for example, under the plane of the display panel, but this solution is expensive, bulky and complex. A more attractive option is one with a built-in adjustable filter function.
A PVA LC cell structure with an additional third electrode was proposed (Fig. 13). In the wide viewing angle mode, the molecules in the LC material layer are located in a vertical plane in both the “ON” and “OFF” states. The position of the molecular director is coordinated with the orientation of the phase-correcting filters and polarizer. To switch to the narrow-angle mode, a control voltage is applied to the third additional electrode. Between the plane of the third electrode and the planes of the two “working” electrodes of the pixel, a horizontal component of the electric field arises, which changes the tilt of the director of the LC molecules. As a result, a mismatch with the vector of the polarizer and phase-shifting films occurs and the angular contrast changes.

However, forming a control electrode for each subpixel is too expensive and, moreover, reduces the useful aperture of the pixel (Fig. 14).

Therefore, the three angle control electrodes were replaced by one (Fig. 15). This significantly simplified the structure of the electrodes.

VIT (Value Integrated Technology) NEC technology
This brand refers to new NEC technologies that expand the capabilities of the display without external components. In this context, the viewing angle control function does not require external filters (Fig. 16), it is built into the LCD panel itself, unlike Sharp and Toshiba technologies, which use additional controlled optical components to control the angular response. The technology was announced in 2007. The built-in filter in one state scatters light, providing a wide viewing angle, while in another state the light passes through the structure only at right angles. This ensures a narrow viewing angle. The principle of controlling the viewing angle by changing the parameters of the light flux is used the same as that of Sharp and Toshiba (VAP), but its implementation is different.

Rice. 16. NEC LCD display with controlled viewing angle: a) wide angle mode; b) mode with a narrow angular diagram
Parallax barrier Sharp technology
Unlike other previously discussed technologies, Sharp's Parallax barrier technology is capable of providing angular control at the pixel group level. Using this control method, you can implement several different functions for the LCD display, expanding its capabilities:
- protection from unwanted viewing of visual private information on the display screen;
- stereo image formation;
- formation of two (and even three!) independent images for viewing by different groups of observers.
Formation of a stereo image on the LCD screen
The parallax barrier is made using an additional LCD matrix. This is an additional matrix modulator, optically combined with the main display matrix. It provides controlled deflection of the light flux from the backlight source to the left and right so that the collimated fluxes precisely fall on certain groups of pixels. Two modulators work synchronously in pairs. Information is supplied to the main LCD panel in accordance with the position of the light key (parallax barrier). Two display modes are possible. When the “barrier” is turned off, the normal two-dimensional mode is implemented and all pixels are visible to both eyes of the observer, and the display turns into a normal one. When the “barrier” is active, a stereo image can be observed on the screen. The formation of two projections of a three-dimensional image in this case is provided by software and hardware. The backlight of the “right” pixels of the TFT matrix is dimmed for the left eye and vice versa. The result is two different images with half the horizontal resolution than the physical resolution of the matrix. The zone for comfortable viewing of stereo images is approximately 51 cm from the screen plane.
Formation of two images on the LCD screen
If, instead of two projections of one stereo image onto the main matrix, we supply information for two images and change the mode of the parallax barrier to expand the zone of deflection of the light beam, then we get another function that can be used to implement a TV with the ability to watch two TV channels at once for viewers located to the right and left of the screen (Fig. 17).

Combining a parallax barrier filter on a TFT LCD panel ensures that the light flux from the backlight source is divided into two separate streams in the right and left directions relative to the screen plane. This makes it possible to synthesize and observe two different images for the left and right observation sectors.
Sharp began serial production of televisions with two images (Fig. 18) in 2005. At that time, this product was awarded the SID Silver Prize in the “Display of the Year” category.

Rice. 18. TV “For him and for her”
Initially, the product was aimed at the automotive sector of the application, allowing the driver to see the GPS navigator map, as well as other navigation information, from his side, and the passenger sitting on the other side to watch movies from a DVD player or television programs. Sharp experts, however, are confident that the technology’s scope of application can be significantly wider than the automotive sector. Moreover, this technology can be successfully used for emissive displays (plasma, OLED, CRT) with large screens, as well as for the mobile device sector. Sharp specialists did not stop there and have already implemented another functionality - viewing three (!) independent images by three groups of observers located in different corner zones (Fig. 19b).

Rice. 19. a) Single image viewing mode; b) new use of the parallax barrier viewing mode of three independent images
Protecting private information on the LCD screen
This function, compared to the two already discussed, is not surprising. It is implemented as a special case of using a parallax barrier (Fig. 20).

Control circuit for LCD TV with two images
The control circuit for a Sharp TV with the function of displaying two different images on the screen was implemented by Jabil Circuit, Inc. The video processor for generating control signals for the LCD display and the parallax barrier was implemented on an Altera FPGA of the Cyclon series (Fig. 21). Video signals from two tuners are supplied in BT656 format to the video processor, which provides buffering, disassembly and distribution of bits across the image planes of the LCD display.
FastStone Image Viewer is a free program for viewing, organizing, editing and converting images. In addition to the convenient viewing function, the program has the necessary tools for working with images.
FastStone Image Viewer has built-in image manager functions for organizing the storage of graphic files on your computer. FastStone Image Viewer is free for non-commercial use.
The FastStone Image Viewer photo viewing program has many useful functionality, it works quickly, the application has a simple and intuitive interface, and easy navigation using the keyboard.
Key features of FastStone Image Viewer:
- support for major graphic formats;
- image editing;
- full-screen view with pop-up menu;
- applying effects to the image;
- comparison of images;
- scaling and cropping;
- batch image processing;
- batch conversion (conversion) of images to other graphic formats;
- creating slideshows with more than 150 transition effects and music;
- support for working with a scanner.
In the FastStone Image Viewer program, you can perform the necessary actions with photos: crop, rotate, resize the image, reduce red-eye, correct colors and lighting, set sharpness or blur, add a watermark, apply effects (relief, sketch, oil painting , lens), add a stencil or frame, batch rename or convert graphic files, etc.
The following graphic formats are opened in FastStone Image Viewer:
- JPEG, JPEG 2000, GIF, PNG, PCX, TIFF, BMP, PSD, ICO, TGA, EPS, WMF, CUR.
Saving is done in the following formats:
- JPEG, JPEG 2000, GIF, PNG, PCX, TIFF, BMP, TGA, PDF.
The program supports various types of RAW formats for popular cameras:
- CRW, CR2, NEF, PEF, RAF, ARW, SRF, SR2, MRW, RW2, ORF, DNG.
All operations to change image parameters are carried out in separate windows. You can immediately see the result and, if necessary, cancel the changes.
You can download the FastStone Image Viewer program from the official website of the manufacturer, FastStone Soft. The download page contains a regular version of the program, which is installed on a computer, and a portable version, which does not need to be installed on a computer. The portable version of the application can be launched from a computer or removable media, for example, from a USB flash drive.
download FastStone Image Viewer
FastStone Image Viewer runs on the Windows operating system in Russian.
FastStone Image Viewer Interface
At the top of the FastStone Image Viewer main program window there is a menu bar for controlling all actions in the program. Below the menu bar is a toolbar with the most popular tools needed to work in the application. The necessary functions are called by pressing the corresponding buttons.
On the left is a folder tree reminiscent of Windows Explorer. Below the folder tree there is a preview area.
Most of the window is occupied by the area in which the contents of the currently open folder are displayed.
FastStone Image Viewer Settings
You can enter the settings of the FastStone Image Viewer program from the “Settings” menu, or using the F12 key. Here you can change the default program settings: change file associations, adjust the magnification ratio of the Magnifier, change settings for saving files in JPEG format, etc.

You can add the “Browse in FastStone” item to the Explorer context menu. To do this, go to the program settings (F12), in the “Settings” window, open the “Associations” tab, check the box next to “Add the “Browse to FastStone” item in the Windows Explorer menu.”
Full screen mode in FastStone Image Viewer
After switching to full screen mode (the “Full screen” context menu item), it becomes possible to view individual images on the entire screen. In this mode, all the program's capabilities for editing, sorting and processing photos are available.
Move the mouse cursor to the edge of the monitor screen to access the necessary functions (individual program controls will pop up at each part of the edge of the screen).

Using the Loupe tool, you can zoom in on a specific area of an image to see more detail.
Taking a screenshot in FastStone Image Viewer
Using FastStone Image Viewer, you can take screenshots (screenshots) without the help of other programs. The Screen Capture function is accessed from the File menu, or by clicking the Screen Capture button on the toolbar.
Select the desired context menu item:
- Capture active window - a screenshot of the active window will be taken.
- Capture window/object - a window or object in the active window will be captured, which is highlighted with a red frame when you move the mouse cursor.
- Capture a rectangular area - capture an arbitrary rectangular area on the monitor screen.
- Capture an arbitrary area - capture an arbitrary area on the monitor screen that is selected by the mouse cursor.
- Full Screen Capture - A snapshot of the entire screen.
Select save location:
- In the viewing window - by default the file opens in FastStone Image Viewer.
- To clipboard - the file is saved to the clipboard, from where it can be pasted into a program or document.
- To file - the screenshot is saved to a file on your computer.

Slideshow in FastStone Image Viewer
Create a slideshow in FastStone Image Viewer for playback using the program, or a slideshow in an EXE file for later viewing of photos without using the program.
First, we will create a slide show to view in the Fast Stone Image Viewer window.
On the toolbar, click on the “Slideshow” button. In the Slideshow window, select the desired settings.
If you do not need information about image files, uncheck the box next to “Show text (name, date/time and EXIF)”. Set the playback order (autoplay, random, repeat in a circle, autoplay by folder).
Add music. Check the box next to “Music”, and then click on the button that appears.

In the “Settings” window, in the “Music” tab, using the “Add” button, select an audio file (or several audio files) from your computer. The program supports the following audio formats: MP3, WAV, MIDI, WMA.
Use the Up or Down buttons to place the audio files in the desired order.

Click the button to select effects. Select the effects you want, their duration, and see how it looks in the preview window.

If necessary, configure the display of text in the slideshow.
After completing the settings, click on the “Start” button to automatically view the slides.
Creating a Slideshow File in FastStone Image Viewer
Enter the “Create” menu, click on the “Create slideshow file” context menu item.
In the “Create Slideshow File” window, use the “Add Files” or “Add Folders” buttons to add images or folders with images.
Add music, the necessary effects, customize the display of images according to your preferences.
You can create an initial window to launch the file. In the initial window, add a title, description, select a cover photo, add, if necessary, “List” and “Export” buttons.

The slide show file will be saved to your computer with the selected name. To start playing the slide show, click on the EXE file, and then click on the “Play” button in the initial window.

Conclusions of the article
The free FastStone Image Viewer program is designed to view, edit and convert images. The application performs the necessary actions for organizing photos, editing images, batch processing, converting image files to other graphic formats, and the program supports creating slide shows.
Instructions
Select the "Options" tab in the window. Here are elements for setting display parameters. Using the “Screen Resolution” slider and moving it with the mouse, change. Set the points you need, while checking the numerical values displayed below the slider.
Set quality. To do this, in the same window, select the desired value in the corresponding drop-down list. After setting all parameters, review the changes by clicking the "Apply" button.
After the display blinks briefly, its resolution will change in accordance with the set data. At the same time, the “Monitor Settings” window will appear on the screen, informing you that the size has changed. If you are completely satisfied with the visualization with the new resolution, click the “Yes” button in this window to confirm saving the parameters. Otherwise, click “No”. Also, by default, changes will be canceled by the system automatically after 15 seconds.

note
The optimal monitor resolution should be selected taking into account its technological features. Some older models cannot support high resolution.
Sometimes, during the process of reinstalling the operating system, or after an application, such as a video game, exits incorrectly, the screen settings are reset. As a result, the displayed screen area on the monitor becomes smaller, the standard resolution is set to 800 by 600 dpi, and black stripes appear on the sides of the screen. In such a situation, it is necessary to restore the screen values to the original settings.
To stretch the screen correctly, you need to right-click on an empty space. In the menu that appears, select the “Properties” command. The Display Properties dialog box opens. Select the “Parameters” tab. In the window that opens, the image on the computer monitor and adjustment scales for selecting screen resolution and color rendering quality will appear. If the resolution scale is set to 800 by 600 dpi, then use the slider to increase the value to the maximum size, for example, 1280 by 1024.
Sometimes the slider is not . This indicates that the computer may be in safe mode, for example, during a forced reboot, or when absent (the slang term is “fly”). In such a situation, in order to stretch the screen correctly, you will need drivers from the disk that came with the video card, or downloaded from the Internet from the equipment manufacturer’s website. But first you need to make sure that this is the problem.
To do this, on the “My Computer” icon, right-click to activate the menu and select “Properties”. Then in the window that opens, select the “Hardware” and “Device Manager” tabs. First, select “Video adapters” from the list and right-click on the “Properties” command. In the window that opens, select the “Driver” tab. We carefully look at the information about the driver update date and the current version. If it says that the driver is missing or not found, you will have to reinstall it. This is a hardware failure that can only be fixed by reinstalling the video card driver again.
If the video card driver is installed and the “General” tab indicates that the device is working normally, then you need to check the monitor driver. We execute the sequence of commands - “My Computer” - “Properties” - “Hardware” - “Device Manager”. In the list, select “Monitors” and right-click on the “Properties” command. In the window that opens, select the “Driver” tab. If it is not there, you will also need to reinstall it.
The monitor screen resolution is responsible for the clarity of images and text, as well as for the correct placement of the picture on the screen. The higher the resolution, the sharper objects appear on the screen, and at the same time, the smaller they become.

Instructions
The smallest resolution on modern computers is considered to be 640x480. The first number indicates the quantity along, the second – vertically. So, at 1280x960 one point at this resolution will occupy 4 pixels, thereby the image will be blurry, bulky, photographs and labels will be angular.
The optimal resolution is 1280 pixels horizontally for monitors with a diagonal of 14-15 inches. Monitors from 17 inches use higher resolution, for example, 1600, 1920 or more horizontal pixels.
To change the resolution in Windows XP, right-click on the desktop and select “Properties” from the context menu that appears. In the window that opens, go to the “Options” tab and move the horizontal slider in the “Screen Resolution” section to the resolution you need. On the right, here you can change the color quality. The desired parameter is 32 bits. After that, click “Apply” and see the result. If you are not satisfied with the image quality on the screen, continue experimenting with the slider.
If you have a computer running Windows Vista or Windows 7, right-click on your desktop and select “Screen Resolution.” In the window that appears, select item No. 2, click on the drop-down menu and move the vertical slider to the desired resolution, then click “Apply” and pay attention to the result. Here you can also change the screen orientation from landscape to portrait or flip the image on the monitor.
Video on the topic
note
In addition to screen resolution, an important option for vision is the screen frequency. The higher the flicker frequency, the less strain your eyes will have.
Sources:
- how to change resolution on TV
Resolution is a monitor setting that determines how information is displayed, measured vertically and horizontally in pixels. At a low resolution, for example 800x600, there are fewer elements on the screen, but they are larger in size. A higher resolution, such as 1280x800, allows more, smaller elements to fit on the monitor. It is best to use a computer with the maximum screen resolution, which is different for each monitor.

Instructions
Use the “Resolution” slider to set what you need. Click OK. The screen will turn black for seconds. The operating system will ask you to confirm the new settings within 15 seconds; if you do not do this, the computer will return the previous settings automatically.
Video on the topic
note
Changing the screen resolution affects all user accounts on that computer.
Helpful advice
For some older games and programs, a screen resolution of 640x480 pixels is required. You can temporarily enable this mode. To do this, right-click on the shortcut of this program and select “Properties”. Go to the "Compatibility" tab and check the "Screen resolution 640x480" box. Click OK. When you close the application, the screen resolution will return to normal automatically.
Now that monitors have become cheaper and more accessible, many users have begun to install two monitors on their computer desk. The advantages of this approach are obvious. You can work on one monitor and simultaneously watch a movie on the other. You can also connect a TV, a second keyboard and a mouse to your computer as a second monitor. Then several users can work on one system unit.

Instructions
With the advent of the new operating system Windows 7, the situation was resolved. But Microsoft has made this solution so non-obvious that many users, especially unprepared ones, will not immediately understand it. There are two ways to solve this problem.
When you select a specific window (of course, when it is in the active state), when you press the key combination “Win+Shift+Left/Right Arrow”, the selected window moves to the right or left.
Video on the topic
Helpful advice
Using a second monitor in the Windows XP operating system created an unsolvable problem. If the second monitor or TV was turned off, then the open windows on the second monitor remain. And you have to carry these windows back and forth manually. Before dragging, you need to turn on the second monitor. There were, of course, some other more successful, some less successful methods, but they differed only in additional “body movements”.
Sooner or later, any user faces the question of changing the screen resolution. This can happen after exiting the game incorrectly or due to a desire to see what is happening on the screen more clearly. Before understanding this process, let's first define what it is and what it is responsible for.

You will need
- Computer
Instructions
Resolution is responsible for the clarity of display of objects, i.e. labels, text, pictures, windows, etc. It is in pixels and depends on the monitor settings. If the user wants comfort for his vision, then he simply must be able to change the screen resolution.
To change the resolution, right-click once on an empty space on the desktop and go to “Properties”. From the five tabs that open: “Themes”, “Desktop”, “Screensaver”, “Appearance”, “Options”, select the last one and use the slider to select the most convenient for your work and the appropriate value.
As you can see, changing the resolution is not so difficult, but it will ensure your comfort while using the computer. In general, we can say that changing the screen resolution is the same in almost every operating system.
Sources:
- as you can see I changed it
Having an expensive video card and a good monitor is not a sufficient condition for comfortable work at the computer, since they need to be configured correctly. An incorrectly configured video system, even the most modern and expensive one, will only cause disappointment and fatigue to your eyes.

You will need
- A computer running the Windows operating system (XP, Windows 7), basic computer skills
Instructions
By moving the “Screen Resolution” setting slider, set the resolution that will allow you to work without stress. The value of this parameter is very individual and depends on the user’s preferences. If at the selected resolution the image is too high, then go to the “General” tab and increase the “Scaling factor” value.
Open the “Monitor Connection Module Properties” window by clicking on the “Advanced” button. On the “Monitor” tab, set the screen refresh rate parameter. The higher this value, the less your eyes will get tired from the flickering of the monitor. Click the “Apply” button for all changes to take effect.
If your operating system is Windows 7, use the dccw.exe application. Launch it from the “Control Panel” “Display” applet by clicking on the “Color Calibration” button. A setup assistant window will open, where you can fine-tune the computer’s video system by following the suggested steps.
Video on the topic
Sources:
- How to change monitor screen resolution in 2018
In Moscow, to get a job, foreign citizens must have registration and a work visa to Russia. In Russia, foreigners can obtain a work visa at their place of residence. If a citizen changes his place of residence, he must register again and obtain a work permit. To register, a foreigner must provide a personal passport and migration card. Registration is usually valid for one year. Upon expiration of the period, foreign citizens are required to renew their registration.

You will need
- Personal passport, migration card.
Instructions
Get permission for a (visa) from the Federal Migration Office if you are a citizen of the CIS countries.
If you are a citizen of countries such as Turkmenistan and Georgia, then first obtain the consent of the employment center. If you are a citizen of Belarus, then do not worry about obtaining a certificate of permission to work in Russia, you do not need it.
If you already have a work permit (for at least 90 days), then within a month submit a medical certificate to the Federal Migration Service, which confirms the absence of HIV and infectious diseases, drug addiction, and alcoholism. If the certificate is not submitted within the specified time frame, the work permit will be invalid.
Video on the topic
note
In Russia, working without documents (registration at the place of residence and work visa) is illegal. It is important to remember that failure to comply with this law will result in heavy administrative fines and deportation from the country. At all stages of employment, it is necessary to comply with the deadlines for submitting and processing documents.
Helpful advice
Today, obtaining a work permit in Russia is mandatory for foreign citizens. It is important to consider the specifics of obtaining a work visa for citizens of different countries. In Moscow, regarding employment issues, you must contact the local Federal Migration Service.
Sources:
- On accepting documents for obtaining a work permit. in 2018
Some users are unhappy with the image displayed by their monitor. Everyone solves this problem in their own way. You can purchase another monitor, configure an existing one, or connect another device instead of the monitor.

You will need
- - video signal transmission cable.
Instructions
First, try expanding your monitor screen by increasing its resolution. Typically, this method allows you to capture more usable screen area. In Windows Seven, open Control Panel and select Appearance and Personalization. Now open the “Display” menu and go to the “Adjust screen resolution” option located in the left column.
In the Screen Resolution menu, set a higher value. This method has several disadvantages: deterioration in the quality of the image transmitted from the monitor and a decrease in the screen refresh rate. If you are not satisfied with the result, then connect an additional monitor. As an analogue, you can use an LCD or plasma TV.
Connect another monitor or TV to the second connector of your video card. This process can be carried out even when the system unit is turned on. To connect a TV, it is recommended to use connectors that transmit a digital signal. Now repeat the procedure for entering the monitor settings menu.
Click the "Find" button and wait until the system detects the additional device. Now select the second monitor graphic and activate the “Set this screen as primary” feature. This will allow you to use a TV (higher quality monitor) instead of a standard device.
To significantly increase your work area, select the "Extend this screen" option. On one of the monitors (the one that is the secondary one), all shortcuts will disappear and only the desktop image will be displayed.
To launch an application on a second screen, simply drag the cursor outside the first monitor (to the left or right). Please note that it is recommended to set the same resolution for both screens. Otherwise, not the entire work area will be occupied on one of the monitors.
Video on the topic
Resolution is a term applied to images in digital form. The desktop “picture” and all the icons on it are also a digital image. The appearance of the desktop and all launched files will depend on what screen resolution is selected (large or small icons of folders and files, their normal or stretched appearance, the appearance of file signatures, and so on). You can return the previous or set a new screen resolution in just a few clicks.

Instructions
To adjust the screen resolution, open Control Panel through the Start menu. When the Category Control Panel appears, select Appearance and Themes. In the window that opens, either select the “Change screen resolution” task, or click on the “Screen” icon. If the control panel has a classic view, immediately select the “Screen” icon by left-clicking on it. The Properties: Display window will open. To switch between Category Control Panel and Classic View, click the corresponding command on the left side of the Control Panel dialog box.
A typical modern "wide" flat-screen TV can not only show regular TV shows, but also show a picture from a personal computer, such as footage from a game, pictures from a digital photo archive, or a video played from a hard or optical drive.
Such TVs work with images in digital format (even an analog TV signal is digitized after reception), which opens up wide possibilities that were previously unavailable.
However, in order to achieve maximum image quality when playing it back from a PC on a connected LCD screen, it is necessary to meet a number of conditions and take into account some subtleties.
In this article, you will learn what you need to pay attention to when connecting an LCD or plasma TV to the video output of a personal computer.
What are the video card requirements?
First of all, the PC video card must have two outputs.
Digital connectors are optimal for image output, so video cards equipped with a pair of DVI connectors, or DVI and HDMI, are best suited for connecting an external screen.
These digital video interfaces provide the best picture quality.
How to connect the display to a computer?
The connection method depends on the “range” of connectors on the TV and the outputs of the PC graphics card.
A digital connection provides the best quality.
Connecting a widescreen TV via analog interfaces such as S-Video or composite (tulip connector) is also possible, but gives less than ideal results.
It is recommended to use it only if there are no other options.
How is the sound signal transmitted to the TV?
Using HDMI (digital interface) or Scart (analog interface) cables, sound is transmitted to the TV simultaneously with the image.
Through the composite interface, as well as VGA and DVI interfaces, only the image is transmitted to the computer.
Thus, when using these interfaces, an additional cable will be required to transmit the audio signal from the sound card to the audio system (built into the TV or external to the latter).
Such cables can be equipped with mini-jack and “tulip” connectors, depending on the type of sound card jacks and audio inputs of the TV.
How to set up a PC to display pictures on a TV?
To achieve a sharp and clear image on the connected display, you must first set the correct resolution (this is done using the video card driver).
Setup is often required in cases where the computer automatically recognizes the TV connected to it.
Only if the graphics card settings exactly match the physical resolution of the TV screen, for example 1366 x 768 pixels, will the image quality be optimal (of course, the graphics card must also support this resolution).
Fewer problems arise when using TVs whose resolution corresponds to PC standards, for example 1280 x 720 pixels - in this case, the number of setup steps can be reduced to a minimum.
Most graphics cards support the high resolution with which the latest TV models work - 1920 x 1080 pixels (Full HD or True HD).
True, a number of widescreen TV models use a resolution that is not typical for computer screens, for example 1024 x 720 or 1024 x 1080 pixels.
Such parameters for a graphics card are often impossible to configure using standard tools in the Image Properties window.
However, there is a solution to this problem:
Using the Powerstrip utility program, you can set almost any resolution.
AMD Radeon Adrenalin 19.7.2 Edition driver with support for the action movie Gears 5

The second July driver, Radeon Software Adrenalin 19.7.2 2019 Edition, has been released to support the Gears 5 beta.
GeForce 431.36 WHQL driver for GeForce RTX Super video cards

Nvidia has released a package of GeForce 431.36 drivers certified by the Microsoft WHQL laboratory.
AMD Radeon Adrenalin 19.7.1 driver with software support for RX 5700
AMD has introduced the Radeon Software Adrenalin 2019 Edition 19.7.1 graphics driver package, providing software support for the Radeon RX 5700 and RX 5700 XT graphics cards.
 Connecting widescreen displays to your computer
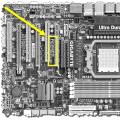 Finding out the model of the motherboard on a computer: an overview of methods
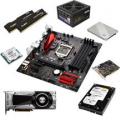 Computers Where is the cheapest place to build a computer?