Installing Windows 10 mbr disk. Windows cannot be installed on this disk - GPT partition style
Hello friends! Yesterday on our website you could read an article about the error "", occurring during the initial phase of installing Windows 10. We figured out that this error occurs if the system installation occurs to hard drive GPT markup, while the interface UEFI is disabled in BIOS. The error will disappear if you enable the option in the computer BIOSUEFI, as on disk The GPT system can only be installed when UEFI is enabled.But you should know that if you turn onUEFI and want to install Windows 10 on a regular hard drive with an MBR master boot record in the future, you will get another error“Windows cannot be installed on this disk. This disk contains an MBR partition table." . How to be in this case?
Windows cannot be installed on this disk. This disk contains an MBR partition table
For example, let’s take a regular computer and enable the interface on it UEFI and then we try to install Windows on a regular HDD with an MBR partitioning table, it will immediately fail

If you click on the warning, an error will appear« Windows cannot be installed on this disk. This disk contains an MBR partition table».

It is very easy to get rid of this error by turning off the UEFI interface in the BIOS. But if for some reason you need UEFI, then simply convert the hard drive from MBR style to GPT and continue installing the OS. There are two ways to do this.
1. In the operating system installation program, select each partition on Disk 0 one by one and select “Delete”. Be careful. If you have several disks in the system, for example there is also Disk 1, then you do not need to delete partitions on it.


When all partitions on the hard drive are deleted and it consists of one unallocated space, select this space with the left mouse button and click on the “Next” button

The normal process of installing Windows on your computer will begin.

2. Second method.
In the system installation window, open the command line using the keyboard shortcut Shift+F10.

In the command line that opens, enter the commands:
diskpart
lis dis (list all drives connected to the computer)
If, when installing Windows 7, 8 or Windows 10 on your computer, you see a message that Windows cannot be installed on this drive because the selected drive has a GPT partition style, below you will find detailed information about why this is happening and what to do. to install the system on this disk. Also at the end of the instructions there is a video on converting GPT partition style to MBR.
The instructions will discuss two options for solving the problem of the inability to install Windows on a GPT disk - in the first case, we will still install the system on such a disk, and in the second, we will convert it to MBR (in this case, the error will not appear). Well, at the same time, in the final part of the article I will try to tell you which is better of these two options and what we are talking about in general. Similar errors: , .

Users installing Windows 7 often encounter problems when installing on a disk with a GPT partition style, but in version 8 you can receive the same error with the text that installation on this disk is impossible.
In order to install Windows on a GPT disk, we will need to meet the following conditions (some of them are not currently met, since the error appears):
- Install 64-bit system
- Boot in EFI mode.
It is most likely that the second condition is not met, and therefore let’s immediately talk about how to solve this. Perhaps one step will be enough for this (changing BIOS parameters), perhaps two (add preparation of a bootable UEFI drive).
First, you should look into the BIOS (UEFI software) of your computer. As a rule, in order to enter the BIOS you need to press a certain key immediately after turning on the computer (when information about the manufacturer of the motherboard, laptop, etc. appears) - usually Del for desktop PCs and F2 for laptops (but may differ, usually on the desired screen it says Press key_name to enter setup or something similar).
The following two important options must be enabled in the BIOS:
- Enable UEFI boot instead of CSM (Compatibility Support Mode), usually found in BIOS Features or BIOS Setup.
- Set the SATA operating mode to AHCI instead of IDE (usually configured in the Peripherals section)
- For Windows 7 and earlier only -
In different versions of the interface and language, items may be located differently and have slightly different symbols, but usually they are not difficult to identify. The screenshot shows my version.

After saving the settings, your computer is generally ready to install Windows on a GPT disk. If you are installing the system from a disk, then most likely this time you will not be informed that Windows cannot be installed on this disk.
If you are using a bootable USB flash drive and the error appears again, I recommend that you write down the installation USB again so that it supports UEFI boot. There are various methods for this, but I would recommend, which will work in almost any situation (if there are no errors in the BIOS settings).
Additional information for experienced users: if the distribution supports both boot options, you can prevent booting in BIOS mode by deleting the bootmgr file in the root of the drive (similarly, by deleting the efi folder you can prevent booting in UEFI mode).
That’s all, because I believe that you already know how to boot from a flash drive into the BIOS and install Windows on your computer (if you don’t, then my website has this information in the appropriate section).
Convert GPT to MBR during OS installation
If you prefer to convert a GPT disk to MBR on a computer with a “regular” BIOS (or UEFI with CSM boot mode), and, apparently, you plan to install Windows 7, then the best opportunity to do this is at the OS installation stage.
Note: The steps below will erase all data on the disk (from all disk partitions).
To convert GPT to MBR, in Windows Setup, press Shift + F10 (or Shift + Fn + F10 for some laptops) to open the Command Prompt. Then enter the following commands in order:
- diskpart
- list disk (after running this command you will need to note the number of the disk that needs to be converted)
- select disk N (where N is the disk number from the previous command)
- clean (disk cleanup)
- convert mbr
- create partition primary
- active
- format fs=ntfs quick
- assign
May also be useful: . Additionally, from another instruction describing a similar error, you can use the second method to convert to MBR without losing data: (only you will need to convert not to GPT, as in the instructions, but to MBR).

If, when you ran these commands, you were at the disk configuration stage during installation, then click “Update” to update the disk configuration. Further installation occurs in normal mode; the message that the disk has a GPT partition style does not appear.
What to do if the disk has GPT partition style - video
The video below shows only one solution to the problem, namely, converting a disk from GPT to MBR, both with and without data loss.
If, when converting using the demonstrated method without losing data, the program reports that it cannot convert the system disk, you can use it to remove the first hidden partition with the bootloader, after which conversion will become possible.
UEFI, GPT, BIOS and MBR - what is it?
On “old” (actually, not so old) computers, BIOS software was installed on the motherboard, which carried out initial diagnostics and analysis of the computer, after which it loaded the operating system, focusing on the MBR boot record of the hard drive.
UEFI software is replacing the BIOS on currently produced computers (more precisely, motherboards) and most manufacturers have switched to this option.
Benefits of UEFI include faster boot speeds, security features such as secure boot and support for hardware-encrypted hard drives, UEFI drivers. And also, what was discussed in the manual - working with the GPT partition style, which makes it easier to support large drives and with a large number of partitions. (In addition to the above, on most systems the UEFI software has BIOS and MBR compatibility functions.)
What's better? As a user, at the moment I do not feel the advantages of one option over the other. On the other hand, I am sure that in the near future there will be no alternative - only UEFI and GPT, and hard drives larger than 4 TB.
Very often, users have problems installing Windows 10 or 8 at the stage of working with partitions due to the fact that the partition style is made using MBR tables, which is completely unsuitable for new operating systems, because they contain new technologies.
Let's try to figure out how to fix this problem and bring the Windows installation to its logical conclusion.
What to do if Windows installation is not possible due to partition style - MBR tables
For reference. First of all, you need to figure out what could be causing the error in question. In general, the reason for this may be a single factor: the installation flash drive or disk with Windows OS is made in EFI mode (typical for the tenth and eighth versions), but the necessary partition for installing the system is MBR style, not GPT. Most often this happens if up to this point the computer was using Windows XP or 7.
To solve the problem, you can use two fundamentally different approaches:
1. Make the transition from MBR to GPT partition style
2. Leave the current style and change the BIOS (UEFI) value from EFI to Legacy in the boot priority menu.
Let's take a closer look at each of the ways to solve the problem.
Change MBR disk to GPT style
To carry out the operation to change the MBR disk style to GPT, call the console and use service commands to complete this procedure, however, it involves deleting all information located on the hard drive. This creates difficulties in transferring important data, but this method is more correct.
1. To perform the conversion using the console, at the stage of the error, click Shift+F10. In the window that appears, type the following commands sequentially:
- Diskpart (call a procedure that should remake a specific disk);
- list disk (after this operation, all available disks for installing the OS will be displayed on the screen. Be sure to remember the number that is displayed next to the disk on which you plan to install);
- select disk N (instead of the N symbol, use the number that marked the disk in the previous step);
- clean (this stage cleans the selected disk, that is, deletes all data);
- convert gpt (direct conversion);
- create partition primary (partition creation);
- assign (direct connection to the system);
- exit (exit the “master” of this procedure).
After these steps have been completed, the Windows installation process will continue as usual. Only sometimes there are cases when a reboot is required to fully install the OS.
If you want to convert an MBR disk to GPT without losing all the information, you need to use one of the special programs, but in the opinion of experts this method is less acceptable.
Solve the problem without converting MBR disk to GPT
This method, in normal language, does not imply changing the partition style, but changing the boot method (from EFI to Legacy). This procedure can be performed in the following ways:
When selecting the device you want to boot from, find and select Boot from removable media, but without the EFI pointer.
You can achieve the desired result in the BIOS by setting the boot priority of a particular device. In the UEFI settings, you can change the EFI parameters to Legacy (this is done in the tab that contains device boot priority items, etc.).
Important, no matter which method you choose, be sure to set the Secure Boot item to “Off” in the BIOS.
Both options have a right to life, but based on personal observations of IT specialists, it is best to use conversion using service commands (with complete deletion of all information in the section).
In recent years, the production of computers has begun on which the outdated BIOS boot input/output system has been replaced by motherboards with a fundamentally new type of long-term storage device firmware. This type is abbreviated as UEFI and has a graphical interface similar to Windows, a more robust system for duplicating and restoring boot data, internal anti-virus protection and the ability to use a computer mouse. This was required due to the increase in the production of hard drives with a capacity of over two terabytes and an advanced partition type (GPT), which are not supported by the BIOS. To administer the bootloader, the built-in UEFI-boot utility is used, which is similar in structure to the BIOS and significantly speeds up the startup of a laptop or desktop computer. When installing Windows 10 on a computer with a UEFI interface, use a USB drive adapted for modernized booting.
Setting up UEFI before installing Windows 10 from a flash card
UEFI is a graphical interface that is responsible for the pre-boot environment of the operating system.
UEFI is essentially a replacement for the outdated BIOS basic input/output system, which has been successfully used in computer technology for decades. The world does not stand still, but moves forward by leaps and bounds, so it’s time to part with an old, trusted “friend” who has repeatedly helped when various problems arise. Created back in 2005 and improved over the past ten years, the “Extensible Firmware Interface” is much more responsive to the requirements of modern computer hardware. The need for its implementation arose a long time ago, and now all new models of personal computers are released with UEFI installed.
The UEFI-boot boot program, which controls the startup of a laptop or desktop computer, similar to the BIOS, begins to start when the computer is turned on before Windows 10 starts. With its support, all components and modules are polled to determine their readiness for operation, and then Windows 10 itself is checked. License code of the program , which prevents viruses from modifying the bootloader and installing pirated copies of Windows 10, can be located in a long-term storage device chip built into the motherboard, in a hidden area of the hard drive, or in its own network storage. UEFI management and debugging are easy to use and tailored to create maximum user convenience.
If you have an idea about BIOS debugging, then there will be no problems setting up UEFI:
After completing this algorithm of actions, you can begin installing Windows 10.
Video: how to configure UEFI before booting Windows 10 from a flash card
Converting an MBR drive to a GPT drive
Before converting an MBR disk to a GPT disk, rewrite the entire block of information to a removableflash card, because all data will be erased. After conversion, the entire block of information is rewritten back to the hard drive.
To convert a hard drive with MBR partitions to GPT partitions, two methods are used:
- Using the Diskpart.exe interpreter:

- Using the standard Disk Management utility:

It is not at all necessary to convert the hard drive when installing Windows 10. It is enough to turn off the “Secure Boot” option in UEFI and install “ten” from a regular flash drive. The whole usefulness of the GPT table is that it supports drives with a capacity of over two terabytes, so if the drive is smaller, then there is no point in converting it.
Video: How to convert MBR drive to GPT and vice versa using Command Line
Creating a UEFI flash card for installing Windows 10
To install Windows 10 from a flash card, you must first assign a boot priority in UEFI. There is a choice of primary boot for both a hard drive with MBR partitions and a hard drive with a GPT table. To assign a priority in UEFI, go to the “Boot priority” block and set the flash card with Windows 10 installation files.

Video: How to assign boot priority in UEFI
Creating a bootable flash drive that supports UEFI
In cases where a bootable flash drive for Windows 10 is created in the MediaCreationTool program, a product of Microsoft Corporation, the FAT32 file allocation table structure is generated automatically. The program simply does not offer any other options, immediately making the flash card universal. Using it, you can install “tens” on a standard hardware with BIOS or UEFI. There is no difference.
If your computer has an integrated boot loader that supports the UEFI interface, you may only use storage media formatted according to the FAT32 standard to install Windows 10.
There is another option for creating a universal flash card using the Command Line administrator console. The algorithm of actions in this case will be as follows:
- Launch the Run service through Accessories services in the Start button menu.
- Type the following commands and confirm them by pressing Enter:

Download the tens ISO image file from the Microsoft website.
Double-click the image file, opening it and simultaneously connecting it to the virtual drive.
After selecting all the files and directories of the image, copy them by clicking the “Copy” button.
Insert everything into the free area of the flash card.
 Copy files to free space on the flash drive
This completes the process of creating a universal bootable flash card. You can start installing “tens”.
 The removable disk is prepared for installing Windows 10
The created universal flash card will be bootable both for computers with a basic BIOS input/output system and for those with integrated UEFI.
Video: how to create a bootable USB flash drive for Windows 10 using WINDOWS 7 USB/DVD DOWNLOAD TOOL, Command Line or Windows Media Creation Tool
Creating a flash card only for computers with MBR partitions that support UEFI
Quickly creating a bootable flash drive for Windows 10 that can be installed on a UEFI-enabled computer requires the use of third-party software. One such program is Rufus. It is quite widespread among users and has proven itself well. Its main disadvantage is the impossibility of creating a universal bootable flash card. Does not provide installation on a hard drive. Allows you to perform a wide range of operations:
- flash the BIOS chip;
- generate a bootable flash drive using an ISO image of Tens or systems such as Linux;
- use on devices with an uninstalled operating system;
- carry out low-level formatting.
To create a bootable flash card using Rufus, you first download software from the developer’s website.
When creating a flash card for a computer that supports UEFI with a hard drive that has MBR partitions, the procedure is as follows:

Video: how to use Rufus
Create a flash card only for GPT computers that support UEFI
When creating a flash card for a computer that supports UEFI with a hard drive that has a GPT boot table, you need to use the following procedure:

The Rufus program is constantly being improved and updated by the manufacturer. The new version of the program can always be obtained from the official website of the developer.
To avoid problems with creating bootable media, you can resort to a more effective option for restoring the “dozens”. To do this, you need to install the system from the Microsoft website. Once the installation is complete, the system will prompt you to create rescue media for recovery. Select a flash card in the media selection and wait until the copy is created. In case of any failures, restore system parameters without deleting documents and installed applications. In this case, there will be no need to re-activate the system product, which disturbs the user with a constantly pop-up reminder.
Standard errors that occur when installing Windows 10 on a GPT disk
When installing the latest generation Windows operating systems - versions 7, 8 and 10 - on a hard drive with GPT partitions, problems arise due to incorrectly selected installation settings.
The first error is when the user tries to install a 32-bit version of Windows 10 on the drive, which is incompatible with GPT disks. As a result, UEFI imposes installation restrictions and stops writing files to the hard drive. You can fix this error by using the 64-bit version, which is accepted by UEFI, when installing Windows 10.
The second error is an attempt to install Windows 10 on a computer when UEFI mode is turned off. To enable it, you need to set the necessary parameters for the bootloader program. Depending on the manufacturer, the interface of the base operating system may differ, but they are present in any version of UEFI.
 To enable UEFI mode, you need to set the correct parameters for the bootloader program
 To enable UEFI mode, follow these steps.
Consideration of the error “there is an MBR partition table on the selected disk”, identification of solutions, and also a description of the solution to the problem regarding disabling the Secure Boot property. The selected disk contains an MBR partition table, which means Windows is installed on this PC.
This problem occurs when, when updating the operating system from Windows 7, XP, Vista to a later version using a storage device, the hard drive remains in the old conversion - MBR.
And Windows 10 and 8 support GPT hard drive orientation because they are an EFI (Extensible Firmware Interface) system, or UEFI, which replaced BIOS as a more advanced base operating system.
Of course, this innovation is countered by arguments regarding the inability to work with devices that support BIOS configuration, older computer models that are still in use, etc.
However, it is not difficult to get out of the situation when the old MBR disk format stands in the way of installing the desired Windows number. That is, ways to solve the problem:
- converting the hard drive to GPT (then the MBR is completely formatted);
- changing the base operating system to BIOS (then EFI, or UEFI, ceases to operate, and related innovations).
Nevertheless, despite some resistance towards the new base OS (and, accordingly, the GPT disk format), it is the conversion of disks or even the sale of disks with the original GPT that is gaining momentum.


How to resolve the error
Read also: TOP 6 Ways to completely clear hard drive “C” of unnecessary files on Windows 7/10
If the disk has an MBR partition table, you can convert it to GPT, after which the information will be completely erased from it, despite the fact that the hard drive consists of several parts.
To do this, you only need the program that installs Windows.
Sometimes the option of making changes to the base OS is used, that is, changing it to the BIOS. But this path will require additionally: a third-party free program, recording this program on a storage device.
How to Convert Hard Drive to GPT
Read also:
To open a line for entering commands, you must press Shift and F10 simultaneously (this manipulation is only suitable for OS 10 and 8 on a PC). On a laptop, an additional Fn button to the above combination may work.
It is important to type the command and then press enter:
- diskpart;
- list disk (when these two words are entered, it is better to note the number of the disk that you are going to install; here it is denoted by H);
- select disk N;
- clean;
- convert gpt.

Upon completion of the process, you need to open the command line again and select update in the window where you select partitions.
After which an empty space is selected, installation continues. By the way, you can first use the creation point to distribute the disk into parts.
Advice: if suddenly the disk is not in the list, you can reboot your personal computer from a flash drive (which is bootable) with the OS and complete the installation.
How to convert a disk to GPT while preserving the information
Read also: We create our own bootable USB flash drive with utilities for Windows (7/8/10)
If the selected partition contains an mbr partition table, you need to convert the disk, and data loss is undesirable, there is a way out.
After which (assuming we load the basic EFI operating system), you can rewrite what is in the image onto a flash drive.
But before that, you need to format it in FAT32 so that it is bootable. Moreover, the Secure Boot parameter must be deactivated in the BIOS.
After completing the boot process from the storage device, you need to launch the program by selecting the appropriate button. When the launch occurs:
1 Select the disk destined to undergo conversion. Please note that this is nothing else, just a disk.
2 In the column on the left you must select the position that corresponds to the goal. conversion

3 Then you need to select Apply and agree to the warning in the window that appears. Then all that remains is to wait for the time proportional to the size of the disk. That is, if it is small in size, the duration will not be prolonged. But when his memory is very full, there are many small components or, conversely, several very large ones, then he will have to be patient.
It happens that when choosing a convertible disk, the computer begins to protest. That is, it gives an error and gives arguments that the disk is a system one and it will not be possible to carry out the user’s intention.
Then you can do the following:
1 Find the Windows loader in the initial stages of the disk, select it (as a rule, it takes up to five hundred megabytes).
2 Find the top line in the menu and click Delete. Then apply the process by clicking Apply. It is recommended to use the freed up space for the bootloader, which will be located in a FAT32 (file system).

After the above described manipulations, you can close the program and install Windows according to the intended scheme.
Changing the base operating system as an option to solve the problem with MBR partitions
Read also: How to Save Passwords When Reinstalling System: 2019 Methods
As described earlier, there are two options for solving the problem of errors regarding MBR partitions.
The first was to change the hard drive format, that is, this MBR should be replaced by GPT, which fully meets the requirements of the basic EFI OS with which new Windows systems work.
But the option of changing not the disk format, but the base OS, is also available, that is, from EFI to BIOS.
Many experts believe that this idea does not correspond to current realities, where it is difficult to survive on a rather primitive OS (compared to the new version).
They think that computers are becoming filled with more and more information, programs, etc. And with the BIOS policy, the PC will not perform its functions, which will ultimately lead to great inconvenience in operation.
But, perhaps, this particular scheme will be more suitable for someone, if only because the PC itself is from older models, and it would be difficult for it to cope with such innovations.
When booting a PC using the installation flash drive, it is important to use the Boot Menu. It should be taken into account that the button that leads to the use of a storage device without a UEFI (EFI) icon is needed. This will cause the computer to start in Legacy order.
By the way, in the settings of the storage device in the BIOS, you can configure parameters with EFI or without using UEFI in the same way.
Moreover, the EFI parameters allow you to deactivate the boot function using UEFI, and then install Legacy or Compatibility Support Mode.
This option is also suitable when using a storage device inserted into a disk drive.
It should be noted that sometimes this option may fail or cause an error, but to fix this, just change the settings in the BIOS to deactivate Secure Boot, sometimes it’s worth checking the OS setting, it should not be Windows.
Guide to disabling Secure Boot
Read also: Windows Installer package error: causes and solutions in 2019
This is not a setting that belongs to any version of Windows, but rather a property of the operating system. It monitors the absence of third-party programs and systems when the computer starts.
That is, in general, this is a necessary detail, but sometimes it gets in the way. And the case where it is impossible to install another OS may be precisely because of the Secure Boot property. What you need to know to deactivate it:
In order to configure the operating system correctly, you need to go to the appropriate window.
So, in Windows 8, you can simply go to change settings through the left panel and find PC settings (UEFI) in additional options.
For each Windows OS number there is an individual path to these properties.
There is also a more universal way: during the process, when the PC turns on, simultaneously use the “delete” and F2 keys. It should be taken into account that Notebook can react to the combination of Fn and F2.
Disabling Asus Hardware from Secure Boot
Read also: How to change the Windows network type: Instructions for all versions (7/8/10)
To disable laptops or motherboards under this name, you need to go to the EFI options, where the boot tab will lead to secure boot, and then you need to select “other OS” in the “type OS”. F10 will help fix the settings.

It should be noted that in certain cases with Asus you should find the security or bot tab, and configure Security Boot there.
 How to use AIDA64 Extreme (review) How to test your PC in AIDA 64
 Rutracker has created an application to bypass Roskomnadzor blocking
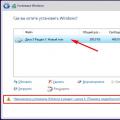 Windows cannot be installed on this disk - GPT partition style