Why flash the BIOS of the motherboard. Why you need a BIOS flashing
All sections of the site site
Video tutorial on how to flash BIOS
bios firmware | flash reinstall bios
Today, there are many myths and legends on the Internet that shroud the process firmware - flashing bios on a computer.
I already wrote more on this topic here - BIOS updateMany users are still wondering and perplexed, so why update (reflash) bios ?
And in short, then, for example, new processors are constantly being released that are no longer supported by old motherboards, and if not flash bios, then the network card will not "see" this processor.
In addition, with each new version of the BIOS firmware, errors are eliminated, support for new devices (devices) is added, and work between devices on the computer is optimized.
asus bios update instructions
So, let's look at the step-by-step process of updating the BIOS of an ASUS motherboard. This will help us with a wonderful video tutorial, which is located below on the page.
Where to start first before you want to upgrade and flash outdated bios? The first step is to visit the website of your motherboard manufacturer.
In principle, the name of the motherboard is not decisive, since bios flashing process all well-known manufacturers of motherboards are almost identical.
However, the names are slightly different. BIOS firmware utilities, but the process itself remains very similar and unchanged.
how to update asus bios
In the video tutorial you will see how go to asus bios... how to find there the utility that we downloaded for new bios firmware how to enter this special update utility.
Many ask the question: how to update bios on laptop? yes, just like on a desktop computer. No difference. Only on different laptop models, the very procedure for entering bios is slightly different.
By the way, on the site, in the computer tutorials section, it has already been described in detail how to enter the BIOS and how not to get lost in the sections of this input and output devices.
Download bios firmware
Where is better download updates for bios? Everything is very simple.
If you have an ASUS motherboard, then go to the website of the manufacturer of the company Asus - their Russian-language resource in Russia www.ru.asus.com
If the motherboard is GIGABYTE TECHNOLOGY (Gigabyte), then download the BIOS update from the official website www.gigabyte.ru
Accordingly, if you need an update for bios toshiba(Toshiba) - go straight to www.toshiba.com.ru, and who has ASER - to the download center www.acer.ru/ac/ru/RU
But on the site www.bios.ru - not a word about bios :))) there is a completely different topic. Apparently, the domain owner does not want to deal with computer hardware :-)
How to find the required (latest) version of the BIOS update is shown in the video tutorial. Just do not forget that it is better to download the BIOS firmware directly from the browser itself (Opera, Mozilla, IE, that is, what you are used to using).
No need download bios firmware some download manager, such as Download Master or ReGet Deluxe. They are, of course, good for downloading large files, in order to download files or archives in multiple streams.
But the bios firmware file is about 2MB, so these streams can only damage it. We will sew the downloaded file into the BIOS memory chip.
asus bios update
There is often heated debate about updating the BIOS. More precisely, these disputes are mainly due to the methods and methods of flashing the BIOS.
Should I use special utilities to flash the BIOS? Is it possible to update the BIOS directly from the Windows operating system?
It is undesirable to update BIOS from the Windows environment! The Windows operating system can freeze, glitch at this most inopportune moment, reboot and the BIOS will be flashed with an error!
The motherboard may fail and have to be refurbished or thrown away. And for many motherboards this is the same :-(((
By the way, right before the BIOS firmware, ASUS motherboards check this file for integrity, is it damaged? This is a very useful feature, and not all motherboards have it (use before updating) BIOS versions.
In general, use only the BIOS flashing method shown in the video tutorial to avoid an unsuccessful and tragic BIOS update errors.
The BIOS flashing procedure itself takes no more than two minutes.
BIOS Recovery
The very operation of flashing the BIOS is quite risky, because if the BIOS is not sewn into the microcircuit correctly, then very deplorable consequences are possible.
That is, the motherboard fails and needs to be restored. True, some motherboards provide for a "rollback" to the previous working state, but unfortunately the number of such motherboards is small.
But ASUS motherboards have such a technology - how can you restore the BIOS. That is, you can "roll back" or restore the previous version of the BIOS firmware.
Just on the motherboard ASUS P7P55D Pro has such a recovery function. How to use it even before flashing the BIOS will be shown at the end of the video tutorial. So that you do not forget and take advantage of this opportunity at the beginning of the BIOS update process.
But if your board doesn't even support this feature, then don't worry too much. If you do everything as shown in the video tutorial, then the update process will go smoothly, like clockwork.
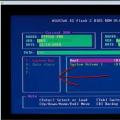
I hope that you have already entered the BIOS before and have an idea about its appearance and settings.
There is not only a description of bios versions of well-known manufacturers Phoenix, award, as well as a detailed description and screenshots.
BIOS flashing lesson
So, even if the firmware file is copied with errors, then before the last stage of updating the BIOS, the ASUS P7P55D motherboard will once again check this file and prevent it from spoiling its working BIOS :))))
update asus motherboard bios
Format a flash drive or other drive and make sure that there are no errors on it ... all this is described in detail and clearly shown in the video tutorial!
Don't forget to turn on the speakers on your computer
If you want to know all the secrets and technical wisdom
work on the computer, I recommend watching these lessons!
BIOS program
After watching the video tutorial on flashing the BIOS, you will surely have no doubts about the complexity of this procedure and the myths that surround the alleged complexity of bios flashing

Some people say that there is no need to update BIOS...
If a new version of the BIOS firmware has been released (and this can be found on the manufacturer's website), then it is desirable to install it to eliminate the errors that were in the previous version of the firmware and to improve the interaction and operation of devices (the so-called "hardware") computer.
The BIOS can only be updated a certain number of times. In principle, this was true many years ago, even in the old BIOS version, which worked on the principle of obsolete flash memory.
Now, BIOS manufacturers have made sure that bios can be updated more than a hundred times... so it's enough to update for our age :)))
Although there will not be so many versions of updates. Manufacturers generally make no more than ten versions bios program updates, then those. Support for this model is ending.
Hello dear readers.
Any computer is a complex system. Sometimes, during the operation of the device, some problems may appear related to the correct performance of its functions in an area such as the BIOS. There are several ways to solve such an ailment - it all depends on the type of error. Later in the article I will tell you how to restore BIOS on a laptop, depending on the type of problem.
Restoring to factory settings
If suddenly the device stops functioning normally, and you have a suspicion that the reason for this is incorrect settings in the area mentioned above, you can try to restore them to the factory settings:
In most cases, this procedure helps. True, sometimes you can meet a simple error that does not allow the OS to start normally. It's easy to fix:

With a password
Sometimes users may encounter a situation where someone or they themselves previously set a password for the area we need, and safely forgot it. As a result of several incorrect attempts, the device will simply cease to function.

Then you need to open the mobile computer itself. By the way, this method will help if it does not turn on:

Important! Before moving on, there are a few key points to clarify. So, in some laptops, for example, Acer Aspire, not two, but three contacts are provided. In this case, you need to set the jumper to another position and wait a few minutes.
In addition, sometimes you can find a special small button that performs the same function in its functions. You just need to press it with a pencil for a few seconds.
Another solution is to remove the battery that keeps all the important data in memory. If you remove it, everything will be reset.
Recovery after firmware
If the problems appeared as a result of an unsuccessful installation of a new version of the software for the corresponding component, you need to perform a series of actions.
Any computer hardware and software, as you know, becomes outdated over time and ceases to meet current requirements. This applies equally to the primary BIOS / UEFI systems, the software of which is integrated into a special chip on the motherboard. When installing new hardware ("hardware"), it may sometimes be necessary to flash the BIOS. On a laptop, on a stationary computer terminal, such a procedure will be performed, it doesn’t matter. The technology is almost always the same. Some users who are unfamiliar with the basics of such techniques believe (and not without reason) that this process is unsafe and difficult. If you can agree with the first statement, then you can argue about the second. In fact, flashing the BIOS of the motherboard is not such a troublesome business. But for the correct implementation of such a procedure, special attention should be paid to some important details and nuances, which depend on the motherboard manufacturer and the programs and methods used for flashing.
Why do I need a BIOS flashing?
In general, if it is not planned, and the whole system is working stably, there is no point in updating the BIOS version.
But when new equipment is installed on the computer, which may not be supported by the primary system only because of its obsolescence (the BIOS simply does not recognize the device), flashing the BIOS becomes an urgent problem. Although many users find this process difficult, nonetheless, anyone who works with a computer will be able to perform such steps on their own. It will take no more than 10 minutes.
Flashing the BIOS of the motherboard: prerequisites
To begin with, pay attention to a few mandatory conditions, failure to comply with which can lead to disastrous consequences.
You should download files and programs for updating primary systems only from the official resources of motherboard manufacturers. In the case of installing an unofficial firmware, no one can guarantee that the process will be successful and the system will work as expected after that.
The second thing to pay attention to is during the update. You need to make sure that there are no power surges or spontaneous disconnection of a computer or laptop from the mains, in advance.
General rules for updating all firmware
Flashing BIOS for almost all models of motherboards involves the use of the same scheme:
For standard BIOS systems, DOS mode is used in most cases. However, for some BIOS versions, as well as for more modern UEFI systems, a special BIOS flashing program created by the motherboard manufacturer can be used, which can even run in the Windows operating system environment without the need to create bootable media.
How can I find out the motherboard modification and the current BIOS version?
The very first thing to do is to determine which model of the motherboard is installed in the computer system, as well as to find out the version of the primary BIOS system (perhaps it is currently relevant and does not need to be updated).

You can view information about the board and BIOS version in the section that is called from the Run console with the msinfo32 command.

For the motherboard, you can also use specialized utilities like CPU-Z (formerly Everest). For a device determined in this way, on the manufacturer's website, you need to find the latest firmware and save the files on your hard drive.
Preparing Bootable Media (General Method)
In the case of using bootable media, when an update from under Windows is not provided, at the first stage it must be created. The usual recording of downloaded files will not work.

To simplify the work, you can use the Rufus utility, which is very easy to learn and creates a bootable USB flash drive in a couple of minutes. You don't need to change anything in the settings. Only in the file system, you should specify FAT32, and use MS-DOS mode in the recording method, be sure to check the box next to the line for creating bootable media. If this is not done, then the device will not be recognized as a bootable device when booting again. Then, in some cases, to install the update, you will need to additionally copy the control program and the firmware file to the media.
Next, the BIOS update process will be considered with examples for motherboards from several well-known manufacturers. Although in general they are very similar to each other, nevertheless, each of them has its own nuances. We assume that the priority in the BIOS settings is already set.
ASUS
Flashing the Asus BIOS can be done in several ways. Among the preferred utilities, it is worth highlighting two programs - AFUDOS and ASUSTeK EZ Flash 2.
When using the first utility, you should create bootable media and make sure that it contains the afudos.exe program file and the firmware itself (for example, p4c800b.rom).

ASUS BIOS flashing is as follows. Boot from flash drive. Since the media was written for DOS mode, the initial line C:\> will appear on a black screen, in which you need to write the command /i p4c800b.rom and press the enter key. Upon completion of the update, a reboot will occur, during which you just need to remove the media from the USB port so that the system starts from the hard drive.
Flashing the BIOS of an ASUS motherboard when using the second utility is somewhat different from the previous version.
Despite the fact that most firmware on the official ASUS website have the .rom extension, sometimes CAB files can also be found. There is nothing wrong with this, since they are used for UEFI systems.

For firmware, you should enter the UEFI settings on reboot, go to Advanced Mode (advanced settings) and select the ASUSTeK EZ Flash 2 line in the service (tools) section. Next, select the media with the program again from the list (line of the same name), after which the desired firmware file will be shown on the right. We select it and agree with the warning twice (first to check the file, then to start the firmware process).
At the end of the process, a notification about the reboot will appear, and at the beginning of the restart, a proposal will be issued to carry out the initial setup. Press F1 and set the desired parameters. Otherwise, just exit the settings without saving the changes.
gigabyte
Flashing the BIOS of Gigabyte systems is quite different from other processes. First of all, this is due to the fact that you can use the online update to install the firmware. But first, consider using the Q-Flash utility, which is considered to be the best for updating firmware.

First you need to enter the BIOS settings and use the option to reset all settings Load Optimized default. After that, you need to save the changes, restart the computer and enter the BIOS settings again. Further, to launch the Q-Flash utility, the F8 key is pressed, and the start is confirmed by pressing the Y and Enter keys. To begin with, it is recommended to save the current version using the Save Bios option, after which you need to use Update Bios. Next, you will be asked to specify the source from which you want to update. HDD 2.0 should be selected as the carrier (this is how the flash drive is displayed in the settings). Then everything is as usual: select the firmware file present on the media and agree with all the warnings.
For an Internet update, you can use the @BIOS utility specially developed by Gigabyte specialists, which runs in a Windows environment. In this case, it is highly recommended to disable Hyper-Threading mode in the primary system settings, as well as deactivate anti-virus and other resident applications, to avoid errors or failures during the upgrade process.
After starting the program, you can immediately save the current BIOS version by clicking the Save Current BIOS button, and then select the Internet Update online update mode, click Update New BIOS and select one of the servers in the list. After that, you will be prompted to specify the model of the installed motherboard, and the program will automatically download all the necessary components and activate the update process.
MSI
Flashing the MSI BIOS, as in the case of ASUS, can be done either from under Windows or from under DOS. For DOS mode, a BIOS-embedded tool called BIOS-MFLASH is used. But the MSI Live Update 5 or 6 application can also be used as an initial management utility. It is noteworthy in that it can also be used to update all installed MSI drivers, as well as flash the BIOS of the corresponding graphics accelerators. Let's start with him.

In the main window, you just need to check the boxes on the necessary elements. Select the MB BIOS component and press the Scan button from the bottom (Scan). If a new firmware version is found, use the Download and Install button, after which the update process will start.

First you will need to select the update environment. To simplify matters, check the In Windows mode item, in the next window click the close button for all programs that appear in the list (Close all listed programs), click the continue button (Next) and in the next window click the process start button.
For DOS mode, select it from the window of the launched update process, after which we indicate the media and agree to the destruction of all data present on it (the process will take no more than a minute, after which a message will be displayed about the successful creation of the boot drive). When you reboot, you will only have to follow the instructions of a kind of "Master".
In the case of updating using the built-in MFLASH mechanism, you will have to download the firmware manually, create bootable media and perform the same actions in the BIOS as described above (select the media and firmware file in the tools menu).
Acer
Flashing the BIOS of Acer systems is surprisingly much easier. You don’t even need to create bootable media, although you still have to format it in FAT32.

To install the update, a special utility called Insyde Flash is used, which is copied to removable media. At the same time, you need to copy the firmware file downloaded from the official website, which has the .fd extension and corresponds not only to the motherboard, but also to the laptop model, to the main directory of the program on the USB flash drive. Please note that the device must contain only one firmware file, otherwise the application will issue an offer to flash only one of several. After running the utility with the power on, you will be prompted to install the update immediately.
The second way is just as simple. First you need to completely turn off the laptop, unplug the cord from the outlet and wait until the power indicator stops blinking. Next, plug the cord into an outlet, insert the USB flash drive into the appropriate port, hold down the Fn and Esc keys and press the power button. As soon as the indicator starts flashing, release the keys. After that, reading information from the drive will begin (this can be seen by the blinking of the LED on the device itself). At the end of the update process, the laptop will reboot on its own.
Video cards
Since GeForce and Radeon are dominant in the video card market, BIOS flashing will be considered using their example.

At the initial stage, you need to download new firmware and control programs for your card on the manufacturer's website. If the system has several video cards, only one should be left for the duration of the update by inserting it into the PCI-Express slot.
For GeForce cards, the NVFlash program is used (two files), for Radeon, the ATIFlash utility (one file). Next, you need to create a bootable USB drive for DOS mode, and then copy the program and firmware files to it.
When starting from a flash drive, you should make sure that the card is single-processor, otherwise the proposed method will not work. For NVIDIA, use the nvflash --list command, for ATI - atiflash -i. If information is given on two cards, then the adapter has two processors, and the proposed firmware method cannot be used (it is better to refer to the manufacturer's website and find instructions there).
At the next stage, flashing the BIOS of the GeForce video card involves disabling protection. This is done with the nvflash -protectoff line.
Further, to start the BIOS update process for GeForce cards, use the nvflash -4 -5 -6 newbios.rom command (the name of the ROM file must match the name of the downloaded firmware), for Radeon cards - atiflash -p -f 0 newbios.rom. After that, we wait for the process to complete and reboot the system in normal mode.
Brief summary
That's all for flashing primary I/O systems. Based on the foregoing, we can conclude that the best option is to install the update exclusively in DOS mode, although special utilities can be used to simplify the work. But they only work if there are UEFI systems, and they are not suitable for standard BIOS versions. You need to be extremely careful with video cards, since incorrect installation of the update or the slightest violation during the flashing process can cause the graphics adapter to fail.
Competent setup and precise actions will help to perform quickly and efficiently. Downloading the updated version can be done from CD-ROM, DVD-ROM or flash drive.
Basic Input-Output System. (BIOS)
- the basis of the system board, it is an input / output base (hereinafter I / O) located on the "motherboard". The existence of BIOS guarantees the ability to configure and adjust the computer.
I / O system, for each PC depends on the "motherboard".
You can determine the BIOS settings for a particular motherboard by looking at them in the motherboard passport.
Important! Incorrect BIOS settings can damage the computer or reduce the power rating.
Information for management.
How to install windows via bios, booting from DVD, USB, HDD depends on several Boot Menu keys:

You need to get into the system: restart the PC and enter "Setup" - the software that is responsible for the initial boot of the computer.
During the reboot, carefully monitor the inscriptions on the monitor screen, you need not to skip the line that appears below, with the following text:
"Press ____ to enter SETUP".

The program tells you how to get into the BIOS, you must press the key that is written on the screen, it can be:
F1, F2, F3, F10, Del, Esc - they differ on different computers, depending on the BIOS version.
Hold down the key until the system redirects to the Basic Input-Output System. A list of tabs will appear on the screen, you need to select the one that says about booting devices - “Boot devices” or “Advanced BIOS Features”.

If it was not possible to perform the prescribed actions the first time, do not despair, you need to repeat all the steps a couple of times.
We select a tab, in order to enter, you need to press the "ENTER" button. After that, in the drop-down list, find the “Boot Sequence” tab and check the correctness of the choice with the information that appears on the right side of the monitor screen. It should be said that the selected tab is responsible for device boot priority.

After the boot tab is determined, by controlling the enter keys, it is necessary to set the priority so that the first in the list is "CD-ROM" or that boot device.
With the help of which the whole process will be carried out. To do this, select "First Boot Device" in the list and after that there was a hard drive.


You need to confirm the correctness of the choice and click the "OK" button.

Thus, all BIOS system settings for loading and reinstalling Windows are ready. This was all done so that the next time the PC is restarted, the OS itself will redirect Windows to boot from the previously selected disk.
If you are experiencing difficulties or you have a special BIOS version, then you can call a computer wizard who will do everything for you:
In order to start the download, you must restart your computer.
Download Windows via flash drive.
To install Windows via the Basic Input-Output System from a USB flash drive, in fact, the whole procedure is similar to the one described above, but it is necessary to select the appropriate menu item from the list of suggested tabs in the I \ V BIOS system or in the OS with a simple option of “overlaying” versions.

The process of installing Windows from a USB flash drive does not start and a black screen is shown on the monitor:
- Switched on;
- The flash drive is formatted in the NTFS system;
- BIOS V\V only supports NTFS partitions, UEFI - FAT 32.
With a new version of the system to boot from a USB flash drive, it asks for permission for automatic mode. It is best to refuse such an offer, otherwise the OS may be installed on the wrong partition or delete some of your personal files.
Before setting the BIOS settings, you must select using "+" or "-" and click on the "Boot" tab.
When choosing settings, you must save them. To do this, you need to press the "F10" key - "Save and Exit". Also, this action can be performed by pressing the "->" key - "Exit Saving Changes", i.e. "quit and save changes".

After the approved and selected option and device boot priority, you need to select the F10 option, and then restart the computer.

For novice users who need reinstalling windows via BIOS experts have developed some tips for a competent and fast flow of the process.
For a successfully configured BIOS system, special attention should be paid to these recommendations:
- PC requirements (assuming Windows 7):
- Memory - at least 1 GB;
- Processor - minimum 1 Hz;
- Video card - at least DirectX 9.
- Time to work in the BIOS.
- PC requirements (assuming Windows 7):
How long does it take to set up and configure a new version of Windows? It all depends on the technical parameters of the PC:
- Speed \u200b\u200b"Clock Speed";
- Number of Cores;
- Main frequency "800/1066/1333/1600 MHz".
On average to install windows via bios it will take one hour.
Clean and simple Windows installation processes
A clean installation is the launch of a disk with the system in manual mode, during computer startup. After that, start, press any button, after the inscription “Press any key” appears on the tap.
If you are unable to install Windows on your own through BIOS, then use the service of a computer wizard to visit your home:
The BIOS indicates the location of the new OS, for example, on a CD / DVD or on a hard disk, so that the old version is not used at all, or has been deleted. The clean version is used for any operating system: Unix, DOS, Windows XP, as well as Linux, Windows 8 and Windows 7.
Downtime is rarely used and is not recommended. This is due to the fact that the new version is launched from a CD / DVD disk already installed with the old OS. So a simple installation is more like an "overlay" process, as the new version is overlaid on the old version.
Installation Process Difference
Easy Windows installation:
- Starting the computer;
- Operating system;
- Installation.
Clean install:
- Starting the computer;
- Installation.
- Clean install.
Operating system hard disk partitions.
Often, during a clean install, all partitions are formatted and old versions and files are deleted. If you need to reinstall a system with several partitioned drives where important files are stored, you can leave the information unchanged.
It is not necessary to format the D drive, however, the C drive with the files of the old version of Windows will be formatted.
Analysis of the hard drive during installation.
Before starting the installation of Windows (with an idle OS, crashes and glitches), you need to try to use the last chance to restore and clean up malware.
In case of pronounced problems with the operation of the PC, it is necessary, first of all, to check the condition of the hard disk, analyze the operation of the segments, otherwise, even during the installation of the system, the formatting process may freeze or work unstably.
Retention of personal information.
Personal data and information is a very important component that is not always recoverable in case of deletion or damage, so before you reinstall anything, you need to take care of their safety.
To save information and personal data when reinstalling Windows, you need to copy and transfer all the necessary files to portable media (disk, flash drive, etc.). It is also very important to save passwords, for this it is recommended to use the Backup program or do it the old fashioned way, manually.
By following the rules and advice exactly, you can understand how to install windows via bios on a computer even to a person, without special skills and experience, in situations of this kind.
The main requirement for proper installation is the accuracy of following the step-by-step guide suggested in the article above. Detailed photographs accompanying the installation steps will help you navigate the BIOS I/O system.
BIOS stands for Basic Input/Output System (basic input/output system). It is a fundamental part of your computer software and contains key control functions.
Why might you need to reinstall the BIOS?
Bios is the firmware through which the basic settings of a PC or laptop are controlled. She is responsible for its inclusion and successful loading. Without a properly working firmware, you will not be able to log into the Windows operating system, as a result of which your computer becomes useless. The BIOS can sometimes become corrupted due to user error or malware activity and your computer becomes unusable. If something like this happened, then you need to flash and. But you must understand that restoring the BIOS will not necessarily solve your problem. In many cases, the computer may not boot due to the fact that it is Windows that needs to be reinstalled.
This is a risky procedure that can completely disable your computer and make it impossible to repair it under warranty. If you are new to computers, then it is better not to do such things. If possible, seek help from specialists who probably know how to start the BIOS.
If you nevertheless firmly decided that you need to reinstall, then first of all you need to start a laptop or computer that is working and has Internet access.
Video instruction for self-flashing BIOS
Determining the motherboard model and searching for firmware
In the case when the BIOS is out of order on your desktop PC, you need to find the website of the company that developed its motherboard through the search engine.

The name of the manufacturer and model of your particular motherboard can be found:
- on a branded box from under it, which, by the way, it is advisable not to lose or throw away.
- to make out the name of the model on the black screen of the monitor shortly after turning on the computer (even before it has time), but not every user will be able to figure it out.
- a radical way is to open the side cover of the system unit and find inside the marking with the name of the motherboard model (usually it immediately catches your eye, so it will be difficult to make a mistake).
On a laptop, everything is even simpler: just find the website of the developer of your device via the Internet. For example, if you have a laptop from ASUS, then the motherboard in it will also be ASUS. You will not be mistaken with the name of the board model, because different motherboards cannot be installed in the same laptop models. The BIOS version you need will be signed on the developer's website not by the model of the motherboard, but by the model of the laptop itself.
Find and download on the developer's website an archive with a BIOS file suitable for your device. Any self-respecting manufacturer of motherboards and laptops has a special web page with drivers, firmware and other useful files for users. These are all free to download, of course.
After downloading the archive, unpack it using any extractor program (7-Zip, WinRar, etc.). In the folder that appears, there will be several files, one of which has the “.bio” extension. No need to think about how to run this file. Just copy its name somewhere in your notebook, because after a while you may need it when you are already setting up the firmware. Copy all files from the archive to a flash drive or any other USB storage device.
BIOS reinstallation process
Now you can return to your computer with a damaged BIOS. Make sure that the power supply is stable, because power surges can permanently ruin the BIOS or even disable the motherboard. If possible, it is recommended to use an uninterruptible power supply through which the computer is connected to the network. You should also not turn off / restart your PC or laptop, or remove the USB flash drive during the BIOS flashing process, as this can lead to undesirable consequences.
It consists of the following steps:

Necessary Afterword
When your PC or laptop is in working order, but for some reason you wanted to not only reinstall, but update your BIOS version to a more modern one, then your procedure should be the same as described above, with the only difference being that an outside computer is no longer needed for this, because you can access the Internet from your device. Installing a new firmware can be useful, for example, if you have replaced the hardware in the system unit with a more powerful one.
Perhaps the most difficult and most important point is determining the motherboard model and finding the right BIOS version through the developer's website. After solving this issue, try to follow the above sequence of actions, experiment less, and then everything should work out for you.
All sections of the site site Video tutorial on how to flash BIOS Firmware bios | reflash reinstall BIOS Today, there are many myths and legends on the Internet that shroud the process ...
On an Asus or Gigabyte motherboard (on a laptop, personal computer). Therefore, to begin with, it is worth discussing why, in general, flash the BIOS? Let's not be verbose and say that, like any update on absolutely any device, the firmware here also serves to make improvements to the product.
You might think that this is already clear, but, on the other hand, judge for yourself: have you ever flashed a BIOS on a motherboard? The answer is likely to be negative. If it is positive, then we can congratulate you - it will be much easier for you to carry out the manipulations described below. However, it is not clear what you are doing on the Internet in search of your answers. So, if you have never flashed a BIOS, then it is better to think again before, perhaps, making a fatal mistake. Why fatal? You can just accidentally disable the software components. Then you can not do without the help of specialists. That's why next we will talk about the points that you should remember before flashing the Gigabyte or Asus BIOS.
Flashing the motherboard BIOS is a very responsible process. Don't do it unless you're sure it's necessary.
What you need to know before flashing BIOS?

Preparing the necessary files

ASUS new BIOS
How to understand that you have a new BIOS? It is very simple to do this: go to the BIOS menu when you turn on the computer, then pay attention to the external interface of the program. If in this window you can work with both the keyboard and the mouse, if the window does not look like a standard BIOS (gray or blue background with a frightening menu), but like a modern application, then you definitely have a modern motherboard with the UEFI standard. This standard replaced the old BIOS system to make it easier for the user to navigate the program space. Therefore, special thanks to programmers and developers for such care.

- In the BIOS window, select the option at the bottom of the "Advanced" page. The program will clarify your action - click OK;
- Now in the top menu, find the "Service" tab and click on it. In this window, we will need just the ASUS EZ Flash utility mentioned above;
- Next, we find the previously recorded firmware file for your motherboard (if you don’t understand what we are talking about, run to read the points “What you need to know before flashing the BIOS” and “Preparing the necessary files”! Do not pretend to be a know-it-all, but rather read the proposed information). Left-click on the file;
- In a new window, the utility will ask you if you need to read it. Click OK;
- Again, a notification pops up, where the BIOS update itself is specified - here we also agree with the OK button;
- We are waiting for the completion of the flashing. This process may take some time, so be patient and do not touch anything. When everything is over, you will see a notification that the update was successful. Click OK again;
- The system will reboot with the BIOS settings reset and the new BIOS version. You can congratulate yourself, because you successfully completed the task!
ASUS old BIOS
If you are sitting disappointed that you have an old version without mouse support and a beautiful interface, do not worry too much. Yes, it will be a little more difficult for you. But this is only in terms of ease of use of the utility. By the way, the update will take place using the same ASUS EZ Flash 2 program! We repeat once again, the difference between the old and new versions of the module is only in the interface. What are you to do?
- Naturally, first we go into the BIOS;
- Next, go through the tabs using the keyboard to the penultimate one, called Tools;
- Here we will need to run our Asus EZ Flash 2 utility;
- Now in the window we select our prepared flash drive with firmware files. This file will need to be clicked twice;
- A notification window will ask you if you are sure you want to update the BIOS? It seems to us that if you have reached this point, then you can safely click Yes. However, if for some reason you change your mind - click No;
- We are waiting for the completion of the flashing. This process may take some time, so be patient and do not touch anything. When everything is over, the computer or laptop will reboot, and you will have a new BIOS version;
- You can congratulate yourself, because you successfully completed the task!
gigabyte
Employees and specialists of this company, when creating software for the BIOS, did not begin to re-invent something new: that is, installing updates for their product will not differ much from the previous instructions. However, it is worth remembering that the program interface may be somewhat different, but the method remains the same. Therefore, for users, this is more of a plus than a minus - you don’t need to learn anything new, and if you are already familiar with BIOS firmware on an ASUS motherboard on a laptop or computer, you definitely won’t have any problems with how to reflash Gigabyte.
Finding the firmware is as easy as actually updating it: all information is freely available on the company's official website on the Internet. You won’t have to search for a long time either, since the developers took care of the convenience of finding the necessary documents and did not hide it somewhere in the site menu. As mentioned above, the company strongly discourages such an operation (that is, flashing the BIOS), unless it is absolutely necessary. With the correct and stable operation of all installed components, why touch anything? As you know, such actions do not lead to anything good. It is also worth remembering that if you are not particularly good with computer technology, then it is better to leave this matter to specialists in different service centers or workshops.
The moment of naming the motherboard module remains important: Gigabyte can give the same designation for different models (for example, if the second one is a re-release of the first one). But for them there will be completely different firmware files: if installed incorrectly, you can simply break the software, disable it. Therefore, we will repeat ourselves and recall that it is not worth flashing the Gigabyte BIOS just like that out of your whim.
Summing up
Flashing or flashing the BIOS on an Asus (or Gigabyte) motherboard on a laptop or computer will allow you to make improvements and fix problems with the device at the software level. Before proceeding with these actions, it is necessary to take into account a number of factors that can protect you from unforeseen problems and breakdowns. It is worth noting that the versions of the BIOS program interface on computers may differ, so do not be afraid, but simply look for a suitable option.
If you are not confident in your abilities, it is better to leave this matter to the master, especially with real problems with the motherboard: perhaps the failure lies not in the hardware, but it is worth replacing the entire board. Do not forget also that if the board on the laptop breaks down, you cannot replace it. Then you can say goodbye to your device. However, we hope that everything worked out for you, and nothing broke. Don't forget to share your opinion and experience in the comments!
The software and operating system need to be updated, but drivers should not be touched unless absolutely necessary. Although fans of video games should, of course, regularly install all the necessary updates for video cards. But do I need to update the BIOS?
Updating the BIOS does not improve the performance and functionality of the PC, and sometimes even causes problems. For this reason, it is required to update only in certain situations, which will be discussed below. But first, let's figure out what the BIOS is.
What is a BIOS?
BIOS is a special program that is built into the motherboard chip and is designed to maintain communication between the motherboard and other devices connected to it and necessary for the normal functioning of the PC. When the PC is turned on, the BIOS comes into play, performs a self-test, and then provides control to the bootloader that launches the operating system. BIOS is the lowest level software. It does its job quietly and almost imperceptibly to the user. In modern models, BIOS is used instead, which plays the same role.
When is a BIOS update necessary?
Although updating the BIOS does not have a big impact on the functioning of the computer, it can sometimes significantly improve its performance. This procedure is appropriate in the following situations:
- If you plan to upgrade your computer. You will not be able to install new hardware without updating the BIOS, since outdated versions may not support it correctly or not at all.
- If the latest version of the BIOS eliminated errors that caused significant inconvenience. For example, there were problems with the launch of the operating system. In addition, in certain cases, the creators of the motherboard or laptop may independently recommend updating the BIOS.
An update is required only when it is really required to ensure the continued functioning of the PC. It is recommended that you create a backup copy of the previous version during the upgrade so that you can quickly roll back if necessary.
BIOS update
Although VIOS is available in all computers, it has its own characteristics depending on the version and creators. For example, BIOS from Phoenix differs significantly from its AMI counterpart. You should choose the version individually for the motherboard. You also need to consider compatibility with other PC elements.
It is not difficult to update, but it is better for inexperienced users not to do this on their own, so as not to harm their computer. The latest version must be downloaded only from the resource of the motherboard manufacturer. Before downloading, make sure that the version you are going to download is suitable for your motherboard. It will also not be superfluous to read the reviews about the new BIOS version, if, of course, there is such an opportunity.
A tiny BIOS chip (BIOS) located on the motherboard inside every personal computer brings the system to life by initializing devices when the PC starts up.
Motherboard manufacturers release firmware packages that update the BIOS throughout their lifespan. What gives the user the possibility of such an update?
Almost every motherboard today has a BIOS / UEFI chip that provides a new environment for interacting with PC components, expanding its capabilities and increasing OS boot speed.
Platforms based on new UEFI chips often receive updates to fix their bugs and also protect the BIOS from virus attacks due to the availability of this interface.

Older BIOS versions may also require updates to support newer devices (such as a processor or video card), resolve compatibility issues, and, in rare cases, improve system performance.
However, if the BIOS of the motherboard has an update, this does not mean that it must be installed. in most cases does not allow the PC to work better or faster.
BIOS/UEFI Update Risks
Updating your computer's BIOS can provide certain benefits, but it's important to understand the risks involved as well.

Each motherboard model requires exactly its own BIOS version. If this or other conditions are not met, the following options are possible:

If you need to install new hardware that is not supported by the old BIOS version, then it is worth the risk of installing a new BIOS firmware.
If there is nothing new in the firmware for the user, then it is better not to use it, because. it will not bring anything new and may cause problems.
Important! In general, it is best not to update the BIOS firmware unless the updated version contains anything specific that the user needs.
However, often users want to stay up to date with BIOS updates if they are using a platform with a motherboard that has just come out and update the UEFI regularly to ensure that this firmware is always in optimal condition.
BIOS/UEFI update

There are three main BIOS update options:
- Download the BIOS file from the manufacturer's website, copy it to a USB flash drive, enter the PC BIOS and find the option to update the firmware in it.
- If the BIOS does not support flashing, it may be necessary to create a working DOS-based USB stick with a BIOS file to boot from.
- Download the flashing program for Windows and run the executable, usually supplied by major PC manufacturers such as Dell, HP, etc.
BIOS update programs:
- @BIOS;
- MSI: Live Update
- Asus: Asus update.
Each manufacturer usually has its own BIOS/UEFI update utilities. To flash the BIOS using utilities, you need to download and run the program and act in accordance with its prompts.

If the PC is built by yourself or purchased from a conventional manufacturer, the 1st upgrade option is used.
Check the BIOS version
Before updating the BIOS, it is important to make sure that the firmware being installed is newer than the existing one on the PC. To do this, open the application "System Information" ("Information about the system").
Step 1. Press the key combination "Win + R" (Win is located to the right of "Ctrl"), type "msinfo32" in the menu and click "OK".

Step 2 In the window that opens, the BIOS version is located on the right under the processor frequency, namely in the "BIOS VersionDate" column ("BIOS Version"). Make a note of the BIOS version number and date so you can compare it with the latest version available from the manufacturer's website.

Prepare USB flash drive
Before the BIOS flashing procedure, you need to prepare a blank flash drive by formatting it to the FAT32 system.
Step 1. Insert the USB flash drive into the USB socket.

Step 2 Open the shortcut "Computer" on the desktop.

Step 3 Right-click on the inserted drive and select "Format" with the left.

Step 4 Select FAT32 from the File System drop-down list and click Start.

Performing a BIOS/UEFI update
To download the new BIOS version, you need to find the motherboard support page on the motherboard manufacturer's website. The latest firmware is usually found in the download section.
ASUS P8H77-V motherboard UEFI update (example).
Step 1. Go to support on the ASUS website at the link: https://www.asus.com/en/support/ and select "Motherboards".

Step 2 Select the platform and model of the board from the drop-down list, then click "Drivers and Utilities" on the right.

Step 3 Click on the "BIOS and Software" tab and click "Download".

Important! Before downloading the BIOS, you need to compare its number and date with the version on the PC. It is also advisable to look at the details of the downloaded version, finding out what it actually updates.
The downloaded file can be seen in the browser's "Downloads" menu.

Step 4 Open the firmware archive file with a mouse click, click "Extract", select the USB drive and click "OK". The file will be placed on the USB drive.

Reference! The archive may also contain a Readme.txt file that explains exactly what needs to be done when updating the BIOS. In this case, you need to open it with a mouse click and read it.
Step 5 Reboot the PC and at the beginning of its boot, repeatedly press the "Del" ("F2", "F1 + Fn" or "Esc") key to enter the UEFI / BIOS.

Reference! Information about the button to enter the UEFI / BIOS can be seen on the PC boot screen or found in its accompanying documentation.
Step 6 After entering UEFI, click "Advanced".

Step 7 Click OK.

Step 8 Select ASUS EZ Flash 2 utility.

Step 9 The utility will open the USB drive. Click on the UEFI BIOS file and click "OK" to agree to read the BIOS file.

Step 10 Click "OK" to agree to the BIOS update.

Important! Be sure to wait for the firmware update to finish, which can take up to several minutes, and the offer to “reboot” (reboot) the PC.
Step 11 Press "OK".
Reference! Updating the old BIOS version is done in a similar way.
Update with special software
Update the BIOS of an MSi motherboard on a desktop PC through the proprietary program Live Update 6.
Important! Do not use the Live Update program to update the BIOS of AIO AIOs and laptops.

Step 2 In the browser's "Downloads" menu or on the desktop, open the archive file with a mouse click.

Step 3 Select the folder with the program with the mouse, click "Extract", select the location of the file in the "Path ..." window and click "OK". The folder will be moved to the specified location.

Select the folder with the program with the mouse, click "Extract", select the location of the file in the "Path ..." window, click "OK"
Step 4 Go to the unzipped folder and run the installer file.


Step 6 Select a folder for installing the program by clicking "Browse ..." or immediately click "Next", "Next", "Install".

Select the folder for installing the program by clicking "Browse ..." or immediately click "Next", "Next", "Install"
Step 7 Launch the program using a shortcut.

Step 8 Go to the "Live Update" tab, select "Manual Scan" and check the "MB BIOS" box. Click at the bottom of the "Scan" window.

The program will search for the latest BIOS updates.

Step 9 The BIOS list will appear. To carry out the update, it is necessary that the version of "Latest ..." (the latest) has a later version number than "Installed ..." ("Installed on a PC"). Check the "MB BIOS" box and click the download button on the right (down arrow).

Step 10 Click "Yes" to confirm saving the file to the specified path.

Step 11 Run the downloaded file. Press "Next" ("Next").

Step 12 Leave the mode "In Windows ..." and click "Next".

Leave the mode "In Windows ..." and click "Next"
Step 13 Click "Close all listed programs", wait a bit and click "Next".
Step 14 Click "Start" to start the update.

The BIOS update process will begin, after which the PC will restart.

If the laptop has no battery
When updating the BIOS of a laptop, it is often required that the charge of its battery be at least 10%. On a laptop with a missing battery in this case, the message “Power check error!” ("Power check failed!").

To remove this restriction, you need to run the flashing file with the undo check key.
Step 1. Press the Win and R keys together. Type "cmd" in the line and click "OK".

Step 2 Type in the window the command to go to the folder with the unpacked BIOS “flasher”, for example: “cd c: bios”.

Step 3 Press the "TAB" key to sequentially display the names of files stored in the selected folder until the file with the .exe extension is selected.

Step 4 Add the "/?" key to the .exe file and press "Enter".

Step 5 In the help list, look for a command similar to /forceit or /force ("forced") or something similar.

Step 6 Substitute one of these keys to the .exe file, for example, by typing "CLB-135.EXE / force" in the window and pressing "Enter". The BIOS firmware file should run without checking for a battery.

Once the computer restarts after flashing, you can continue to use the PC with the updated BIOS.
Video - What is BIOS / UEFI? Do I need to update and how to flash?
Regular PC users are not well versed in the operation of their device, and this is not surprising. They do not need this information, and in which case, they turn to service centers.
Many users are faced with the issue of updating the BIOS. In search of an answer, they turn to IT specialists and people who have experience in working with computers. To understand this topic, you need to understand what the BIOS is and what functions it performs.
BIOS features and properties
This term is an abbreviation Basic Input/Output System(translation: Basic input, output system). The BIOS is responsible for initial boot of the computer and OS. The program allows you to enter and display information using devices. This term refers to a microcircuit installed on the motherboard (printed) board.
After turning on the PC, the base system is called for further instructions. Previously, she was responsible only for supporting input and output devices. Now its main functions include:
- Computer startup.
- System self-test (Power-On Self Test - POST, if problems are found in the computer, an error is displayed on the screen and a special signal sounds).
- Support for input and output devices.
Installing a new version, experts call flashing a PC. As a rule, it is carried out to improve certain functions and properties or to connect modern equipment.

Unnecessarily, you do not need to update the base system. However, there are cases when it needs to be done:
- Installing a New Processor. If an older BIOS version cannot support a modern processor model, it must be updated. Information on updating can be found on the official website of the motherboard manufacturer. The connector for connecting the new processor must be the same as the old hardware.
- Connecting a larger hard drive. The size of the HDD is taken into account when designing the motherboard. Developers create it with a small margin. However, each new version of the hard drive has a larger capacity. In order for the board to support it, the base system will need to be upgraded.
- Chipset expansion. A chipset is a collection of chips on a motherboard. Some of its properties are completely unused. You may need the latest BIOS to activate them. Adding new devices will not work, but it is possible to improve the main ones.
- Operating system change. In this case, it is recommended to update, but this is not a necessary condition for reinstalling a new OS, for example, from Windows 7 to Windows There are frequent cases when installing a new operating system does not need the latest BIOS version. The BIOS update is carried out immediately before changing the OS.
- Speed up your PC. Updating the base system affects the "overclocking" of the motherboard. Often, new versions contribute to an accelerated response of equipment to user commands. However, there are exceptions when the procedure causes an overload, and the PC takes longer to process commands and freezes.
- Occurrence of errors in the codeBIOS. Such failures can slow down the PC and block the functions of devices. You need to check the current status of the underlying system and applications. However, other factors can degrade the functionality of the computer. In this matter, it is better to trust the experts.

When not to update the BIOS, and possible risks
If the user does not intend to change the components of the device, it is better to refuse flashing. For normal work and standard processes, this procedure will not bring drastic changes.
- The user does not plan to change hardware. If a person does not independently change PC components for more modern models, he will not need a flashing. Documents, gaming, and online activities do not require a modern version. Flashing only imperceptibly changes the operation of several programs that the user may not even use.
- The computer is operating normally. The most common reason for flashing is crashes and errors in the PC (but not the fact that the old version is the root of this problem). If the computer does not slow down, the programs work without interruptions, there is no need to update the structure. Also, problems in the PC are not a reason to reflash it. It is best to call a specialist, or give the device for repair, where they will analyze its condition. Inexperienced users are not recommended to change the hardware structure on their own.
- Deterioration after flashing. Sometimes flashing can, on the contrary, adversely affect the functionality of the PC. This happens when the update was carried out by a non-professional or negligent user. Keep in mind that the improvement of the base system must be designed for this model of the motherboard. Otherwise, many programs will malfunction. As a rule, the structure itself checks if the PCB model fits it, but if the check does not start, there is a risk that the computer will not boot in the future.
Also, you should not allow a power outage during the flashing process, otherwise you will have to carry the PC to the workshop and give a lot of money.
An unknowing user cannot update the BIOS on their own. There is a risk that the computer will not work better, but on the contrary, it will freeze even more.
Reflash PC or not?
It depends on the specific case. The best option - Leave your computer in professional hands if it works intermittently. Specialists will identify the cause of the problems, and possibly update the basic system.
If it is a matter of installing a modern processor model or a larger hard drive, then first you need to check the compatibility of the software with the device. The information is on the official websites of the developers. Again, it is better to entrust this matter to professionals. They will pick up a more powerful processor (if the customer wants it), install it and reflash the PC.
 Why you need a BIOS flashing
 Internet browser Google Chrome - full information and free download Russian version
 What to do if the laptop battery is not charging