Where in windows 7 microsoft virtual pc. Installing and configuring Microsoft Virtual PC
In all computer and network security manuals, you can find a warning about installing software. The authors of such guides advise you to carefully install programs downloaded from the network, because installing some of them is fraught with various problems - from virus infection to system failures.
What to do in those cases when you need to constantly install various software? You need to install a PC emulator - a special program (16.5 MB) that creates another computer in your operating system, but only a virtual one, on which you can install new OSes, and not just one, but as many as you like. After installing the operating system, you can install the necessary software, and if necessary, all this can be deleted with literally one keystroke (for this you just need to delete the corresponding file from the disk).
Installing the emulator does not cause any particular difficulties; at the end of the installation, you must specify the location of the files with the program.
The last step is to specify the location of the program files.
After installation and first launch, the program will prompt you to create and configure virtual machines using the wizard.
Options include creating a new virtual machine with all settings specified, using default settings for a virtual machine, or adding settings from an existing virtual machine that is stored on disk as a VMC file.
The next step is to specify the name and location of the virtual machine. By default, the program suggests creating it in the \Documents and Settings\Computer_name\My Documents\My Virtual Machines directory. You need to be very careful here, as this location actually means the location of the virtual machine file. After installing the operating system and the necessary software on the virtual computer, the virtual machine file can reach several gigabytes. Therefore, you must specify such a disk to create a virtual machine that has enough free space.

Be careful when choosing where to place the virtual machine files.
After choosing the location for the virtual machine, you must specify which operating system will be installed on it.
In the next steps, you need to set the size of the RAM of the future virtual computer and the location of the virtual hard disk.
You can install an operating system on a virtual computer only from a bootable CD or from a floppy disk (for the Windows 98 operating system). To install an operating system from a CD, start a new virtual machine and select "CD -> Use Physycal Drive J" (for the first CD drive) or the corresponding item for another CD drive. If a bootable CD with an operating system is installed in the CD drive, the OS installation will automatically begin.

You can only install an operating system on a virtual computer from a bootable CD.
To exchange data between a virtual computer and a regular one, you need to install a special Virtual PC add-on. To do this, start the virtual machine and select "Action -> Install or Update Virtual Machine Addition".
The installation of the add-in is standard; after the virtual machine is rebooted, it will be possible to connect another virtual disk to it, which is essentially a folder on the hard drive of the main machine. It is with the help of this folder that data will be exchanged between the main and virtual machines.
To mount a virtual disk, select "Edit -> Settings" and display the Shared Folders section.

After installing add-ons, you can add folders for data exchange between the virtual and main computer.
After the first launch of the settings, the section will be empty. Using the Share Folder button, add one of the folders on the hard drive of the main computer to the list of available folders, and in the Drive Lette section, select the logical name of the virtual disk that will correspond to this folder on the virtual computer.
Now, after starting Explorer in a virtual computer, another one will appear in the list of its disks, corresponding to the newly created open folder.

The data exchange folder is represented as another drive.
Work with all installed virtual machines is carried out using the Virtual PC console, which appears after the application is launched. Here is a list of all installed virtual machines, buttons for adding new ones, deleting existing ones and viewing settings.

The Virtual PC console is used to manage virtual machines.
Microsoft has developed Microsoft Virtual PC 2007, not least to provide the ability to run Windows Vista as a guest operating system. At the time of writing, Virtual PC 2007 is in the Release Candidate (RC) stage and was downloaded from the Microsoft Connect website. The program was installed in the operating system Windows Vista Ultimate.
Virtual PC 2007 is packaged in a Windows Installer (.msi) package, so installation should be straightforward.
In the installer welcome window, click the button Next.

Accept the license agreement by checking the radio button as shown in the figure and click the button Next.

Enter your username and organization name. Since the program is distributed free of charge, the product key has already been entered. You can choose whether to install the program for all users ( All Users) or only for the current user ( Only for me).

Click the button Next to start installing the program.
Once the installation is complete, launch Virtual PC 2007. The first time you run it, the Virtual Machine Creation Wizard window should appear. If the wizard does not start, click the button New in the window Virtual PC Console.

In the wizard's welcome window, click the button Next.

This article discusses creating a new virtual machine. Set the switch to Create a virtual machine and press the button Next(if you already have virtual machines, you can add them by setting the switch to Add an existing virtual machine).

Specify the virtual machine file name and path. You can use the button Browse for ease of navigation.

Select the operating system that you plan to install on the virtual machine from the drop-down list.

You can specify how much RAM will be available for the virtual machine. You can enter the desired value using the keyboard or move the slider. By default, it is suggested to allocate the recommended 512 MB, but for Windows Vista I decided to allocate a little more.

The next step is to create a virtual hard disk or specify an existing one. Set the switch to A new virtual hard drive if you want to create a new virtual disk.

Specify a file name for the virtual hard disk and a folder where it will be stored. You can use the button Browse for ease of navigation. Then specify the desired virtual hard disk size. For Windows Vista, you need a disk size of at least 8 GB. By default, Virtual PC 2007 creates a virtual disk that will automatically expand if the guest operating system requires more space than originally allocated.
This completes the initial setup of the virtual machine. In general, the configured parameters should be sufficient to successfully install the operating system on the virtual machine. This will be discussed briefly below.

In the window Virtual PC Console press the button start to start the virtual machine. When the virtual machine window opens, drag and drop the ISO image of the operating system into it, which will be used as a boot disk. You can also choose from the menu CD command Capture ISO Image and tell the program the ISO image you want to use, as shown in the figure below.

If everything is done correctly, the installation of the operating system should begin. The description of this process is beyond the scope of this article, but I will mention one nuance.
Overall, installing a Windows Vista guest operating system from a host Windows Vista system went without a hitch. It would be even easier if I knew that you can exit the guest system into the main one by pressing the right ALT key and moving the mouse out of the screen (thanks, Tomatos ;). In VMWare Workstation, in such a situation, you need to simultaneously press CTRL + ALT, which also leads to a return to the main operating system.
I would like to note that after installing Windows Vista on the Microsoft Virtual PC 2007 virtual machine, it was not necessary to make additional settings for network connections. There were no problems with Internet access in the guest operating system, as evidenced by the notification of downloaded updates immediately after installing Windows Vista.

After installing the guest operating system, it is highly recommended that you install the virtual machine add-on package, which provides a number of benefits. Among them:
the ability to drag and drop files with the mouse from the main operating system to the guest and vice versa;
the ability to use shared folders;
optimized video card drivers;
time synchronization;
shared clipboard;
improved guest operating system performance;
Windows Vista compatible sound card driver.
In addition, after installing the add-on package, the aforementioned problem with logging out of the guest system into the main one disappears.
To install the menu add-on package Action select a team Install or Update Virtual Machine Additions.

A dialog box will appear informing you that if the add-on package installation does not start automatically, you will need to open the CD drive in the guest operating system and start the installation manually.

Click the button Continue to continue installing the add-on package.
Before completing the story about installing and configuring the Virtual PC 2007 program, I would like to draw your attention to the fact that you can always configure the additional parameters of the virtual machine by clicking the button Settings in the window Virtual PC Console. The settings window will open as shown in the figure below.

In this window, you can change the parameters of the virtual machine configured during its creation (for example, the amount of allocated RAM).
What's happened virtual computer
virtual computer ( Virtual PC), or an emulator is a special program created "inside" the main operating system. For this virtualyou can install an operating system (and more than one!), application software . If necessary, you can delete this virtual !
At the virtual There is , RAM, hard disk (allocated space on the hard disk of a real ), various peripheral devices can be emulated ("installed"). On one realseveral virtual ones can function.
Purpose of virtual :
- to install software that is incompatible with the operating system installed on the real ;
– to protect information on real ;
- for testing software and / or hardware;
– for emulation of various devices;
– to launch malware for the purpose of its research;
– for emulation of a local computer network;
– ….
Installation Microsoft Virtual PC
- go to website www.microsoft.com/windows/products/winfamily/virtualpc/default.mspx;
- download and run the setup file Microsoft Virtual PC (setup.exe);
- in the window Microsoft Virtual PC Wizard click Next;
I accept the terms in the license agreement –> Next;
- in the next window, enter Product Key –> Next –> Install –> Finish.
launch Microsoft Virtual PC
– press Start –> Programs –> Microsoft Virtual PC;
- in the window New Virtual Machine Wizard click Next;
- in the next window, set the switch Create a virtual machine (Use default settings to create a virtual machine; Add an existing virtual machine) click Next;
- in the next window, enter the name VM( offered New Virtual Machine);
- by pressing the button Browse... select location VM(or accept what the system suggests) –> Save (<буква_диска>:\New Virtual Machine.vmc) –> Next;
- in the next window, in the drop-down list, select the operating system that you will install (by default - Other) –> Next;
– in the next window, by setting the corresponding switch, select the volume RAM (Adjusting the RAM) or accept the one offered by the master - Using the recommended RAM –> Next;
- in the next window, set the switch A new virtual hard disk –> Next –> Next –> Finish.
Installing an operating system on a virtual
- in the window "New Virtual Machine - Microsoft Virtual PC" an inscription will appear "Reboot and Select proper Boot device or Insert Boot Media in selected Boot device";
– insert the installation disc into the drive tray;
- select menu CD –> Use Physical Drive<буква_диска>: ;
– if the installer does not start, select the menu Action –> Reset;
- in the window New Virtual Machine with a message "If you reset this virtual machine, you will lose all unsaved changes. Are you sure you want to reset this virtual machine?” –> reset;
- installation will start , which is practically no different from a regular installation (including choosing a partition for installing the OS, formatting this partition, copying installation files, etc.);
- as you install file New Virtual Machine Hard Disk.vhd will increase in size;
– at a certain moment of installation, a message will appear that pointer movements are now possible only in the window Microsoft Virtual PC. To go beyond this window, that is, to return to the bosom of the native, you must press the right alt, and to return to the window Microsoft Virtual PC- click inside this window);
- after installation, you can do it as usual.
Installation Virtual Machine Additions
To exchange data between the virtual and the main, you need to install a special add-on Virtual PC – Virtual Machine Additions:
- start the virtual machine - in the window Virtual PC Console highlight New Virtual Machine, click start;
- select menu Action –> Install or Update Virtual Machine Additions;
- in the window Virtual machine click Continue;
- in the window Virtual Machine Additions - InstallShield Wizard click Next –> Done –> Yes;
- after restarting the virtual create a folder on the main hard drive for data exchange between the main and virtual ;
- select menu Edit –> Settings in the window Virtual machine(or click the button Settings in the window Virtual PC Console);
- a window will appear Note - Virtual PC with a message "Some settings for this virtual machine have been temporarily disabled and cannot be changed while the virtual machine is running or in a saved state", click OK(you can check the box Don't show this message again);
- in the window Settings for Virtual Machine select Shared Folders;
– press the button Share Folder…;
- in the window Folder overview select the folder created for sharing;
- drop down list drive letter set the letter of the virtual drive that will correspond to this folder on the virtual (or accept the letter suggested by the system);
- check the box Share every time, click OK –> OK.
Now Share Folder will be available on the main, and on the virtual (in the section Network drives – Share Folder on "<буква_диска_на_основном_ПК>:\" (<буква_диска_на_виртуальном_ПК>: ).
How to use CD/DVD- disk drive on virtual PC
When you need to engage in virtual CD/DVD-drive (for example, to install a program), in the window Virtual Machine - Microsoft Virtual PC select menu CD –> Use Physical Drive<буква_диска>: . After that in the window My computer virtualyou can use the disk drive.
To disable the drive, select the menu CD –> Release Physical Drive<буква_диска>: .
To eject a disc, select the menu CD –> Eject CD.
Work with all installed virtual machines is carried out using the console Virtual PC Console. Here is a list of all installed virtual machines, buttons for adding new ones ( New…), deleting existing ones ( Remove) and view/change settings ( Settings).
Very often there is a need to install outdated software that does not want to work in Windows 7.
Previously, I used WMVare virtual machines to solve the generally simple task of running a couple of three programs or old equipment, I deployed a computer in a computer ... Extremely long and not practical. Relatively recently, I once again tried to screw my old scanner and came across one interesting solution - XP mode virtual machine.
Windows XP Mode
Windows XP Mode is a solution based on the Virtual PC platform that allows you to run applications written for XP in the background and invisible to the user virtual session.
- Solves all program incompatibility issues with Windows 7
- Forwarding USB and COM ports
- Support for printers, smart cards, clipboard, shared hard drives, as well as USB and COM ports.
- Easy XP Mode setup
- Transparency for the end user.
- The virtual environment is configured and managed from the familiar Virtual PC interface.
XP Mode distributed absolutely free of charge and does not require special licensing.
XP Mode only Windows 7 editions Professional, Enterprise and Ultimate (Professional, Enterprise and Ultimate) are supported.
For work XP Mode requires hardware virtualization support at the processor level - Intel-VT or AMD-V.
The following list shows some Intel processor models that have hardware support for virtualization:
Pentium 4 662 and 672
Pentium Extreme Edition 955 and 965 (not Pentium 4 Extreme Edition with HT)
Pentium D 920-960 except 945, 935, 925, 915
Core Duo T2300, T2400, T2500, T2600, T2700 (Yonah)
Core 2 Duo E6300, E6400, E6320, E6420, E6540, E6550, E6600, E6700, E6750, E6850 (Conroe)
Core 2 Duo E7600, E8200, E8300, E8400, E8500, E8600 and some versions of the E7400 and E7500 (Wolfdale)
Mobile Core 2 Duo T5500 T5600 T7100 T7200 T7250 T7300 T7400 T7500 T7600 T7600G T7700 T7800 (Merom)
Mobile Core 2 Duo SU9300 SU9400 SU9600 P7370 P8400 P8600 P8700 P8800 P9500 P9600 P9700 T8100
T8300, T9300, T9400, T9500, T9600, T9800, T9900 (Penryn)
Core 2 Quad Q6600, Q6700 (Kentsfield)
Core 2 Quad Q8400, Q8400S, Q9300, Q9400, Q9400S, Q9450, Q9550, Q9550S, Q9650 and some versions of the Q8300
(Yorkfield)
Core 2 Extreme X6800 (Conroe_XE)
Core 2 Extreme QX6700, QX6800, QX6850 (Kentsfield_XE)
Core 2 Extreme QX9650, QX9770, QX9775 (Yorkfield_XE)
Xeon 3000, 5000, 7000 series
Atom Z520, Z530, Z540, Z550, Z515 (Silverthorne)
all Intel Core i7 processors
Pentium Dual-Core E6300, E6500 and some versions of the E5300 and E5400*
Celeron E3000 series
How to install a virtual machine on your computer and most importantly, which virtual machine to choose? Before asking you this question, I wandered around the Internet and realized that the easiest to install and configure are VirtualBox and Virtual PC, but there are also Hyper-V and VMWare. I understand that now you will ask me: “Why do I need a virtual machine?” My answer: "I want to install different operating systems and experiment with them, I'm very interested: Windows XP, Windows 7, but especially Windows 8!" The Windows 7 I have installed works fine with all the applications installed in it, but the hype around the new Windows 8 is only growing and I don’t want to stand aside, so you have already written two dozen articles about the eight on your site and continue to write. I’m thinking of installing a virtual machine (but I won’t choose which one) to install Windows 8 into it and slowly study it like that, and then you look in October, when the final version of Windows 8.1 comes out, I’ll install it as a second operating system. Mark.
Hello admin! on the Microsoft website and wanted to install it on my VirtualBox virtual machine, but the installation fails with the error “ VT-x/AMD-V hardware virtualization features enabled but not functional". What to do?
How to install a virtual machine
Friends, if you have never dealt with a virtual machine, then I will explain to you in a nutshell what it is. A virtual machine is a real computer created inside your main operating system and in this computer you can install other operating systems (several!) and not only Windows. You can, as you wish, experiment with the operating system installed in the virtual machine, go out to the Internet, install various software without fear of infecting your computer with a virus, in short, connect your imagination and you will find a use for it.
For example, one of my friends learned how to reinstall the operating system and divide the hard disk into several partitions only using a virtual machine.
As for the choice of a virtual machine, an article will be written on our website about each of the existing ones. Recommend to you install virtual machine VirtualBox, its capabilities are enough not only for a beginner, but also for an experienced user, besides, it is free. Start with her. Simple and intuitive settings, stable operation, made it one of the most popular.
What are the virtual machines?
Virtual PC is free, very easy to install in Windows 7, follow the link to the Microsoft website, download and install.http://www.microsoft.com/en-us/download/details.aspx?id=3702
paid, costs 222.53 €, but there is a 30-day trial period. This virtual machine is needed primarily for system administrators and software developers.
So it's decided, install the VirtualBox virtual machine. We go to the site https://www.virtualbox.org/ , click "Downloads", select
VirtualBox 4.2.16 for Windows hosts x86/amd64.

The installer of the virtual machine is downloaded, we must run it as an administrator, otherwise in the future you will be plagued by various errors when working with the virtual machine. Right click on the installer and select "Run as administrator"

The program is very easy to install on our computer.


We start the virtual machine as an administrator.

Click on the "Create" button.

First of all, I would like to draw your attention to the fact that if you decide to install Windows 7 64-bit on a virtual machine, select Windows 7 64-bit from the list. If you decide to install another operating system, for example Windows 8.1 64-bit, then be sure to select Windows 8.1 64-bit in the drop-down list and enter a fictional name for the virtual machine, for example Windows 8.1, then click Next.


In this window, you need to specify the amount of memory that you can allocate to the virtual machine. Friends, you must understand that the RAM allocated to a virtual machine will not be available to the operating system installed on your computer. If you have only 2 GB of your own RAM, then you cannot allocate more than 1024 MB to a virtual machine, your operating system, when working with a virtual machine, will slow down a lot. If you are installing Windows 8, then the optimal size for it is just 1024 MB. As you can see, my computer has 8 GB of RAM installed, which means I can allocate more than 1 GB, for example 2 GB.

Create a new virtual hard disk.

File type select VDI

At this stage, we need to specify the format of the virtual hard disk. If you check "Dynamic virtual hard disk" This means that the space on your hard disk allocated for the needs of the virtual machine will not be taken immediately, but as files accumulate in your virtual machine. I recommend that you use this option.

Specify the size of the virtual hard disk. If you are creating a virtual machine for the first time, specify 50 GB, this is enough to install Windows 8. But I personally indicate for myself a larger volume. Why? In the process of working with a virtual machine, I will install many operating systems, so I will indicate the amount of 240 GB.
You can create a virtual disk on a disk other than the system disk, it's very simple, click on the yellow folder and explorer will open, specify any partition on your hard drive to place the virtual hard disk.

We see the outcome. So, we have created a virtual machine, now we need to configure it and finally install Windows 8 into it.
Select our virtual machine and click "Configure".

System. Remove the checkmark from the "Diskette" item. We leave the CD / DVD-ROM as the first boot device, since we will boot the virtual machine from the installation disk or Windows 8 image, we leave the Hard disk as the second device.

The "Processor" parameter is left as is.

"Acceleration" Hardware virtualization must be enabled, for sure you will install a 64-bit operating system.

Display. Video. "Enable 3D Acceleration" and "Enable 2D Acceleration"
Video memory 128 MB

Media. A little of your attention!
Your physical disk drive will be available in the virtual machine, in my case Drive "I" and if you have a Windows disk you can use it to install the operating system, check the Live CD/DVD box.
There is also a virtual drive here, let's connect an image with the Windows 8 operating system, which we downloaded in yesterday's article, to it. In the "Media" option, select "Drive" and "Select optical disc image"

File Explorer will open where you can select the downloaded Windows 8 image, then click Open.

The Windows 8 image will attach to the virtual drive.


What is a USB filter? Imagine such a situation, all USB devices connected to your computer will be detected in the operating system that is installed on your virtual machine. Naturally, you don't need it. USB filters will determine which USB device should be defined in the virtual machine, and which one in your main system. To see how it all works in practice, you must first install the Windows 8.1 operating system in our virtual machine, and then everything will become clear to you, read on.

In order for all connected USB-2.0 flash drives to work properly in your virtual machine, install the VirtualBox 4.2.16 Oracle VM VirtualBox Extension Pack plugin, download it at the office. website https://www.virtualbox.org/
 Who are the minions: the story of funny minions of villains
 What makes it so good to work at Apple - the opinions of employees How is the selection
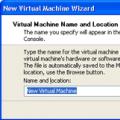 Installing and configuring Microsoft Virtual PC