How to make money in Google AdSense: registration, setup, withdrawal of money. How to make money on YouTube Sign up and create a Google AdSense account
Google Adsense is a service for placing ads from Google on their own websites. Operates in a format of mutually beneficial partnership. Transfers money from ad impressions to owners of web sites to the account in the profile. Provides the ability to withdraw money when the amount of total income in the amount of $100 is reached. The installation of graphic and text banners of various sizes from Google Adsense on web pages is carried out using special scripts.
In this article, you will learn how to register with Adsense, apply for advertising content on your site, and how to link a Youtube channel to this service.
Registration
1. Type in the Google search engine the name of the service.
3. On the opened page:
- click "Login" if you have a Google account;
- Click "Register" if you don't have an account.
Attention! You won't be able to use the service without a Google account.

4. The welcome window (“Welcome to….!”) also provides two login options:

click "Create an account" and register: enter all the necessary data in the form, attach and confirm your mobile number;

enter your login (Gmail mailbox address), click "Next";

in the next panel, enter the password and click "Next" again.

Adding a site to your Adsense profile
1. After logging into your account, in the "My site" line, enter the fully qualified domain name of your web project.

2. Select the content language from the drop-down menu (in which language the banners will be displayed).
4. On the next page, copy the code from the field located under the third paragraph of the instruction.
5. Paste the copied fragment into the HTML code of your site after the tag

6. Return to the Adsense tab. At the bottom of the instructions, under the code field, with a mouse click, check the box "Code added to the site ...".

7. Click Finish.
8. Upon completion of this procedure, the inscription "We are checking your site" will appear. Wait for verification to complete. The service will send the results of the check to Google mail.

If the website passes the test successfully, you can immediately create scripts for ad impressions in your Adsense account and then place them on the pages.
Connecting Adsense to Youtube channel
2. At the top of the page, click on the "Video Manager" link.
3. In the list of sections (left column), open: Channel → Status and features.
4. In the "Monetization" block, click "Enable".

5. On the new page, click "Start" and follow the instructions to complete the Adsense connection. 
Successful registration and good earnings on the Internet!
If you want to start making money on contextual advertising in Google AdSense, then you need to go through a simple registration in this service. Today I will show you how register a new adsense account. To begin with, it is worth noting that if you have registered with any of the Google services, then your account will be valid for all services, including.
Create a new AdSense account
To register go to adsense page

As you can see, the start page is a Landing Page. If you already have an AdSense account, then click the "Login" button, if not, the " Register»
At the second step, you will be met by the new account registration wizard

At the first stage, he will prompt you to either sign in to your Google account or create a new one. If you have previously registered with Google, then simply click on the " To come in» and proceed with registration in AdSense.
The next step in registering with AdSense is to enter the URL of your site in the " My site” and the language of your site content. Then press the button " Save and Continue».

The next page of the AdSense account creation wizard will be filling in your personal details.

The highlighted fields are required and important. Because it depends on the payment of earned money. AdSense pays out money via traveler's check postage and bank transfer. And if the personal data is not true, then you will not receive money. Or it will take a long time to prove to the Adsense administration that you are really you. I went through this procedure, I will say - not very pleasant. I had to send copies of my passport with the place of residence and various other documents to confirm my identity.
You can fill in the fields in Russian. Previously, the fields were filled only with Latin characters, using transliteration. The phone number is required, it will receive an SMS message with a confirmation code when logging into your Adsense account, if the system suspects that you are not trying to log in.
Next, click " Submit an application". Within a week, your application is being considered and you will receive a letter in the mail with a notification of approval of your application for creating a Google Adsense account.
After that, you become a full member of the AdSense contextual advertising system and can start earning money on your site. As you can see create adsense account is not difficult. How to earn? We will talk about this in future articles.
Do the following:
1. Create an AdSense account
2. Activating your AdSense account
If the account is not activated at this stage, you will receive an email explaining the reasons and recommendations for further action.
Further actions
Once your AdSense account is activated, you can start showing ads on your site. Read about how to set it up.
If we can't activate your AdSense account
AdSense account activation is not always possible. In some cases, you can take the necessary measures and repeat the activation procedure. Watch the video and read the information below.
Account not activated due to policy violation
If we find violations of the AdSense program policies on your site, your account will not be activated. You must fix the indicated errors before you try again. You can also use another site to work with AdSense. In this case, specify it during activation.
Google AdSense is a popular and well-known worldwide contextual advertising network from google.com. With the help of Google AdSense, owners of sites and blogs on the Internet can earn money by placing a special Google AdSense code on the pages of their sites, which allows them to broadcast ads with contextual advertising to site visitors. In this article, we will understand in detail how to register with Google AdSense step by step.
Instructions for registering Adsense

On the next page, you must specify your contact information - it will be used to create an account and then send money payments. 
- In the "Country" field - select the country of your residence, in this case, select Russia.
- Select your time zone, depending on the region where you live.
- In the "Account Type" field, you must correctly specify the category of the account. It will not be possible to change this data in the future, it will depend on what type of taxation will be applied to you, and depending on the type chosen, forms of withdrawing funds from the account may also be available.
- In the "Payment recipient's name" field, you must enter your first and last name in Latin characters. The symbols that are available for use can be viewed by clicking on the "Help Center" button, which is located just above the input window. The name provided must match the owner of the bank account, as it may be difficult to change the name of the payee later on.
- In the Address field, enter your home address.
- In the City field, enter your city of residence.
- In the "Region" field - select your area from the list offered.
- In the "Index" field, enter your index.
- In the Phone field, enter your cell phone number.
- Below, select the source from which you learned about Google AdSense and click on the blue "Submit Application" button.
This completes the registration in Google AdSense, now you need to wait for a while until the site you specified will be moderated. In the event that your site does not contain any enlightened content and has natural traffic, i.e. it is visited by users from search engines, then most likely the decision on your site will be positive. After a while, you will receive a notification that your site has been successfully moderated and now you can log into your AdSense account with your username and password and add contextual advertising blocks to the site. Read more about that in a separate article.
Login to your AdSense account
Signing into your Google AdSense account is only available for registered users. If you do not have a registered Google AdSense account yet, then you need to follow the steps described above in this article to register your account. In the event that you have already completed all these steps and are registered users, then to enter your account you must:
After authorization, the main window with all the current data will open in front of you. In it you can see all the earnings received for today, for yesterday, for the last 7 days, and also for the last 28 days. Also here you can see your current balance, as well as information about the last payment received from Google AdSense. All this data will be visible only to those users who have already placed the Google AdSense code on their site and have earned at least the first few cents.
How to withdraw money from adsense
To get earned money from Google AdSense you need to save more than $100 on Current balance. Only in this case you can receive payment. Current balance shows the amount of money earned on the last day of the previous month. Every month Current balance is filled with the amount of earnings in the current month. As soon as the amount on the Current balance is equal to or exceeds $100, you will be able to receive all the money you earn to your payment details automatically.
Money from Google AdSense is transferred after the 20th day of the following month. For example, on May 1, Current balance exceeded $100, which means that from June 20 to June 28, Google AdSense will transfer this money to your account.
In order to receive money, you must correctly fill in your payment details:
When setting up a withdrawal of funds to the Rapida system, you need to keep in mind that this payment can only be made for those Individual Google AdSense accounts. If you specified the type of your account as "Business", then in this case payments to the Rapid wallet will not be available.
Hello dear friends. Today there will be the first article on website monetization using Google AdSense contextual advertising. In this article, we will analyze the process of registering in Adsense, creating and configuring ad units, and installing an advertising code on the site.
It's no secret that every site owner can earn on his resource. There are many ways, one of which is contextual advertising. Perhaps everyone dreams of such a passive income. The main thing is to develop your site and think first of all about the benefits for visitors, and the more visitors you have on your site, the higher your income from contextual advertising.
So, Google AdSense offers to make money on your own websites, YouTube channels and AdMob mobile applications. Moreover, unlike other advertising networks, Adsense does not have an entry threshold for visiting your site. You can start earning on the site from the first day of its existence. Of course, if your site is made for people and does not contain prohibited content (terror, incitement to violence, copyright infringement, etc.).
Signing up for Google Adsense
In general, as such, registration in AdSense is not needed, since Google allows you to use a single account for all of its services. It is enough to create a mailbox on Gmail once and then use this mailbox (as a login) and password to enter any Google service.
I'm sure you already have a Google account. If not, then in my article about there is a detailed scheme for registering an account.
Apply you can on the main page Google adsense. To do this, follow the link and click on the button « Getstartednow".
Don't worry everything is in English. In the next step, you will have the option to select a language.

Here, at this step, you will be asked to log in under your single account or register a new one. Since we already have an account, click on the button "Yes, sign in to your Google account".

By clicking on the button, you will be prompted to enter a password for your account (this is the password for your Gmail mailbox). Enter a password.

Next, in the second step, you need to specify the url of your site and select the main language. Even if you have several sites, now you specify one of them. The rest can be added after confirmation of your application. Language, you also choose the main one, even if you have translated versions as well.
Read the rules and click on the button "Continue".

The next step is to fill in your contact information. The data you can select from the dropdown list will be in Russian. But the fields that you will fill in yourself (name and surname, address) must be entered only in Latin letters. Fill in everything correctly, as in the future a PIN code will be sent to this address, which is required to confirm the address and.
As soon as the data is filled in, click on the button "Apply".

Now it remains to wait. Your site has been submitted for moderation. After about a couple of days, you will receive an email confirming the application and your next steps. By the way, I got a letter the very next day.

Create an AdSense ad unit
After receiving the letter, you need to proceed to the next step - creating an ad unit. Until you create this block and place it on the site, your account will not be verified.
To do this, you need to go to the Google Adsense account, you can do this by clicking on the button "Begin" in a letter or link http://www.google.com/adsense/.
By going to the office, you will automatically find yourself in the section "My announcements". Where, to create a new ad, you need to click on the button "New ad block".

First you need to name the ad unit, select the size and define the type. The name can be assigned by the size of the block or by the place where it will be located. This will make it easier to analyze later. The block size, perhaps, is the only correct one - adaptive. Since if you are your site for mobile users, then the ads should also harmoniously fit into the design. Next to the block sizes that are adapted for mobile devices, there is a phone icon. Select only such blocks, their size will adapt itself depending on the size of the parent container.
Select ad type "Text and display ads", since the system's help itself indicates that this type is the most profitable.

Text ads can be styled so that these ads fit neatly into your site's design. To do this, you can choose one of the proposed options, you can copy it and edit or create your own style.
All the necessary tinctures are available in the subparagraph.

The next important point is setting up client channels. That will allow you to group ad units by size, title, location on the page. Best of all, by specifying a custom channel as the ad placement, advertisers will be able to target ad units on your site. That contributes to an increase in cost per click.
To configure, click on the tab - "Create a new customer channel".

After that, you need to fill in several fields and check the checkbox in the paragraph "Targeting".

And the final step in setting up an ad unit is setting up a fallback ad. By default, this is an empty area. But you can make a single-color fill or connect a graphic screensaver from the site. For example, a banner. Just make sure it matches the size of the ad unit.
And after you deal with this item, click on the button "Save and get code".


Note: By default, all ad serving categories on your site are enabled. But, you can make the necessary changes in the section "Allow/Block Ads".
Inserting AdSense Promotional Code into Sitebar and Articles of WordPress Sites
So, open the WordPress admin panel - "Appearance" – "Widgets"- widget type "Text" and place the ad code in it.


And on the mailbox, you will receive a letter confirming the full activation of your Google AdSense account.

From now on, ads from the Google ad network will be shown on your site.
To do this, in the theme function file, at the very end, before closing ?> paste this code here:
function block1() ( return " Adsense Promotional Code"; ) add_shortcode("adsense1 ", "block1 ");
If you intend to insert several ad units in the article, then paste this code into the file again and change adsense1 and block1 on adsense2 and block2.
In the article itself, in the place where you want to display the ad block, paste this code:
And soon I will prepare an article about the methods on the site both by manual and automatic methods. Trust me, it makes life a lot easier.
I also recommend watching the video version of the article.
Well, friends, that's all for me today. Try, register and monetize your sites. If you have any questions, ask them in the comments, I will be happy to help. I wish you all good luck and see you in new articles and video tutorials.
P.S. By the way, you can also install the AdSense mobile application on your smartphone and you will always have all the statistics at hand.

And in conclusion, I want to congratulate all of you, friends, on Victory Day! War is grief. And the day it ends is truly a holiday! My grandparents went through the entire war. Grandmother is still alive, she is already 93 years old. The horror that they and millions of people had to endure will never be forgotten. It is hard for her to look at what is happening in the world, how angry people have become. They forgot what our ancestors fought for.
I wish you and your families good health, a peaceful sky over your head! And so that the mistakes of the past will never be repeated again. Let there be no war!
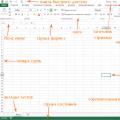 Practical application of MS Excel functions What is Microsoft Office Excel
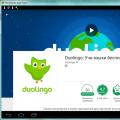 DUOLINGO - online language learning program
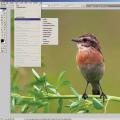 Photo Editing Basics Easy Photo Editing in Photoshop