Plugin for Yandex to save a screenshot of a page. How to take a screenshot of a page in Google Chrome
You can take a screenshot of a page quickly and easily using the Google Chrome browser extension - Screen Capture (from Google).
After installing this extension, you will be able to take a screenshot of a selected area of the screen, the entire site page and the visible part of the screen, as well as take a screenshot of a video.
Install Google Chrome Screen Capture extension:
1. Go to Settings and Controls Google Chrome.
2. Go to Tools- tab Extensions.
3. In the Chrome Web Store search bar, enter the name of the extension Screen Capture(free) and several web page screenshot extensions will appear in the search results. But after trying each of them, I settled on Screen Capture as a more convenient extension. Link to this extension: chrome.google.com/webstore/detail/cpngackimfmofbokmjmljamhdncknpmg?hl=en
4. Click Install and the extension icon will appear in the upper right corner of the browser:

5. After installing the extension, click on its icon and configure the Screen Capture settings ( Options):

6. Specify the screenshot format ( jpeg or png), where to save the file on your computer, enable hotkeys:

7. As soon as you need to take a screenshot of the page, just click on the extension icon and select the required capture from the menu: capture the visible part, the entire page, or a selected area of the screen.
For example, let's take a screenshot of the selected part of the screen ( Screen area capture):

8. Select the desired area and click OK:

The screenshot opens in a new Screen Capture window, where you can edit it (write text, highlight, add arrows, lines):

In the upper right corner of the page opened in the browser, you will see an action menu with a screenshot. It can be saved to your computer, sent to friends, copied or printed.
9. Save the screenshot to your computer. Double click Save:

A screenshot is a capture of the picture that you see on the screen at a certain point in time. This feature is quite useful, as it can help specialists resolve any problems or issues related to your account.
Why use screenshots
Very often, users find something interesting for themselves on various web pages and they need to save the picture they saw in order to use it in the future, since pages on the Internet can be deleted or changed over time.
Or you are absolutely sure that you will no longer see this information, since the page is dynamic. To do this, you can use a screenshot, which will save the necessary information.
Or, if there is some problem with the account, a technical service employee may ask for a screenshot that will help him identify the problem.
How to take a screenshot using Google Chrome
To take a screenshot in Chrome, follow these steps:

Taking a Screenshot in Microsoft Windows
Use the following tips to create a screenshot

Screenshot in Macintosh OSX
In order to take a screenshot you need:
1. The browser window you want to take a picture of should be in the foreground.
3. The screenshot will be automatically saved on your desktop in PNG format.
 Additional features in Google Chrome that will help you take screenshots. There is a special plugin that works with screenshots in Google Chrome - this is Awesome Screenshot Minus. It can be easily installed from the chrome online store, which will not lead to any installation difficulties. It's all quite simple. Click “+free”, follow the given tips and instructions, the application will be installed within a few minutes.
But there is one drawback - this program does not have a Russian version, which is only suitable for users with good knowledge of English. But, in principle, there is nothing complicated there.
Once the installation is complete, when you open your browser, an icon will appear at the top for easy and quick access to all the features of Awesome Screenshot Minus.
How to process screenshots in Chrome
Having a ready-made screenshot, you will be sent to a page where you can process it and get acquainted in detail with the control panel, which is necessary to edit changes to the screenshot.
You will have access to many useful tools, such as: crop, add text, select colors using a brush, circle, arrows. Once you have made all the necessary changes, select Done. In a new window, you will need to decide what to do next with the image. Select a save location or print it immediately.
Many Google Chrome users like this plugin. Users prefer to choose it because it is more convenient and practical compared to screenshots in Yandex.
But do not forget that the more functions an application has, the more resources it needs to use to operate. But, often the entire set of functions is not in great demand if your goal is only to take screenshots of the necessary pages.
Techsmith Snagit is a very interesting extension for the Google Chrome browser that can take a screenshot of any area of the screen, add text, highlight the desired area using an ellipse and square, and record a video in your browser. As soon as I learned about his remarkable abilities, I immediately studied its capabilities and began to use it in my work.
Download extension ( approx. Previously it was possible) in the online extension store Chrome Web Store.
After installation, an icon will appear in the browser; when you click on it, a control panel will appear on the right side of the screen. Techsmith Snagit can:
- capture any area of the screen
- the entire visible area of the screen
- scroll the entire page (the plugin itself scrolls the page and takes a picture of it)
- add text to image,
- highlight text using arrows, ellipse, square
- record screen video moving to any web page
How to take a screenshot
To take a screenshot of any part of the page, click Region and select an arbitrary area. Even after you have selected an area, you can move it anywhere by simply holding down your mouse cursor. Then click on the camera icon (in the lower left corner), or on the cross if you change your mind.

If this is your first time after installing the extension, then Techsmith Snagit will prompt you to sync with Google Drive, which means all your snaps and videos will be stored in a safe place and can be easily found and viewed in Google Drive if needed.
After you click on the camera icon, a photo opens in a new window that you can edit:
- write the file name in the top field
- highlight text in accessible ways

To learn how to take a screenshot of a scrolling page, the following image will clearly demonstrate:

A Techsmith folder will be automatically created in your Google Drive - an application library in which all pictures will be saved, and which you can later share or use for their intended purpose. This folder can be accessed directly from the extension's control panel by clicking My captures at the bottom of the panel.
How to Make a Video Using Techsmith Snagit
The motivating factor for me to install this extension was the ability to make a video very easily and quickly. I know that not everyone can decide to record a video with their voice, and this is a certain psychological barrier for me, including one that I try to overcome.
And the first step towards overcoming my complex was installing the extension and setting the task. I completed the task, but the reality turned out to be much worse than I expected - I didn’t like everything about it. Now I analyze my mistakes, and the next step is to record a video according to a pre-prepared script. First I write the text, read it and develop confidence in my voice. And so on until I can’t do without the test. I believe that a video lesson is well received by viewers if it contains clear, concise and confident speech.
However, the thirty-second video still turned out, and you can watch the video yourself, which was made using the Techsmith Snagit extension.
How to record a video
In order to record a video, click the Screen icon in the extension control panel, and if you want to record a video without sound, then click on the microphone below; if you need sound, then you do not need to click on the microphone. You will be asked to select a video recording format, I usually select full screen mode.


- watch video
- save video to Google Docs
- upload video to Youtube
- convert the video to GIF format and download to your computer (example above)

And one more note: It happens that when using the Google Chrome browser, there are some web pages that will not allow us to open the panel when clicking on the extension icon. In this case, do not worry, because instead of the control panel, a pop-up window will appear that will offer you to either take a screenshot or record a video.

I would like to add a fly in the ointment to all the undeniable advantages of Techsmith Snagit: unfortunately, I was not able to record the entire process of creating a video from start to finish. If anyone knows how to do this, please write in the comments.
Let's sum it up
This extension is very useful because it allows you to very quickly and clearly take a screenshot of any part of the page, mark important elements on it, add text, and send a link to the image to a friend or colleague, as well as record a video lesson, make a presentation for a future event and save the video in video.avi and gif formats.
Moreover, Techsmith Snagit can be successfully used for any learning activity and teamwork thanks to the integration of Snagit for Google Chrome with Google Drive. To work successfully, you do not need to install heavy or paid software on your computer, and using and managing the extension is easy and straightforward.
If your line of work requires you to use a tool for creating and quickly editing screenshots and videos, then I think that this is the case when you can safely expand your toolkit with another great plugin for your browser and appreciate the capabilities of this amazing extension for Chrome - Techsmith Snagit.
Taking screenshots of the contents of a web browser is one of the integral parts of everyday surfing the global network. However, users often encounter the fact that the standard functionality of the operating system is not enough to conveniently and quickly create screenshots. When it comes solely to the transfer of content on a web page, the use of special browser extensions that help create screenshots and quickly share them with people is often in demand. This article will talk about the five most worthy extensions for one of the most popular web browsers in the CIS - Yandex.Browser.
You can download each of the resolutions and install them in Yandex Browser, as is not surprising, from the Google Webstore (Chrome Online Store). This is due to the fact that the browser from the Russian IT giant is written based on Chromium technology. That’s why all extensions from the Chrome Web Store are easily used for . The top five in terms of functionality and internal store ratings include such extensions for screenshots as: Lightshot, Awesome Screenshot, Screenshot Extension, Nimbus Screenshot and FireShot.
Lightshot
To take a screenshot in Yandex.Browser using the Lightshot extension, no intuitive effort is required. It is for its ease of use that many people prefer this extension. In the description of the application, a separate paragraph states that the utility is convenient precisely because of its simplicity and intuitiveness.
Functionally, this extension allows you to take a screenshot in one click and immediately edit it in the browser window. In addition, the finished screenshot can be saved as a picture on your hard drive, but if you wish, you can directly upload it to the cloud from the browser. To create a screenshot of a page, just click on the pen icon in the Yandex Browser extension panel, and then start editing.
Awesome Screenshot
The Awesome Screenshot extension, unlike the first candidate, is much more complex in terms of settings and functionality. However, this is where the utility surpasses most of its competitors. Awesome Screenshot has a number of exceptional additional features, such as: a greater range of screenshot editing, the ability to set functional hotkeys and an expanded list of social networks for transferring the finished image.
In addition, Awesome Screenshot, unlike Lightshot, has the ability to simply copy a screenshot into a dialog box via the clipboard, as in the classic Windows OS application “Scissors”. However, despite all the advantages, setting up Awesome Screenshot will require a little effort. Therefore, this choice is exclusively for those who prioritize functionality over simplicity. The window for selecting and editing a page area is called up in the same way - by clicking on the browser extensions panel
Screenshot Extension
A description of the extension for Yandex Browser called Screenshot Extension could take up a whole separate article with a detailed review. If Awesome Screenshot is a slightly complex and multifunctional browser utility, then this candidate is practically a professional application for editing the necessary pages on the Internet. The Screenshot Extension's range of editing tools and functions is truly extremely rich and is in many ways similar to Adobe Photoshop, only inside the browser.
Nimbus Screenshot
Another one of the most popular extensions for screenshots among Russian-speaking Yandex.Browser users is Nimbus Screenshot. It is almost identical in terms of the average set of functionality to the Awesome Screenshot extension. However, the developers' emphasis is on greater simplicity than the latter. At the same time, without losing high-quality screenshot editing functionality. In appearance, the menu, editing window and even the extension icon are made according to all the patterns of minimalism that is popular today.
A distinctive feature of Nimbus Screenshot is the progressive ability to create video recordings from the screen. This function inclines a huge number of users towards the extension. Since such a useful evolution of screenshots in the browser is not implemented in any of the listed extensions in the Chrome store.
FireShot
The last representative of the most worthy extensions for creating screenshots in Yandex.Browser, perhaps the most optimal option of the above. This is also confirmed by the fact that FireShot, more often than any other extension in the category, is in the first place in the rankings of the Chrome Internet Store. FireShot achieved this by meeting all the necessary expectations of the average user of such extensions. If we are not talking about more professional editing (as is the case with Screenshot Extension), then users most often need to quickly and easily create a screenshot from the browser and send it in a message to any social network.
In fact, every extension copes with this task, but FireShot incorporates both the simplicity of Lightshot and all the necessary functions of Awesome Screenshot and Nimbus. Of course, stylistically, the extension has a clearly defined uniqueness, but the developers’ desire to collect the best features of other web programs is clearly visible. With an incredibly simple editing context menu and fast operation, FireShot has all the standard set of applications that the average user needs. Screenshots taken in FireShot can be:
- Uploaded to web hosting servers
- Saved as PDF, PNG, GIF, JPEG, BMP
- Copied to clipboard
- Printed
- Sent by email
- Exported to another editor (configurable)

If you have often wondered: how to take a screenshot in Google Chrome, then we can make you happy. There is a special extension that allows you to do this in just a few clicks. And you no longer have to use some incomprehensible and resource-intensive programs to create screenshots in the browser.
How to take a screenshot in Google Chrome
This extension is called Lightshot and it is very popular among Chrome browser users. This is due to its ease of use and large number of functions and settings.
Lightshot does more than just take screenshots. They can also be edited in the future. Therefore, if you were unable to take a screenshot as you wanted, or you need to change it, then the developers have prepared special functions for this. Everything is done very simply, no bells and whistles, but only the most necessary options.
After taking a screenshot in your browser, you can save it on your computer or upload it to the cloud.
The application is actually very useful, because now you do not need to use various programs, or take pictures the old fashioned way using the Prt Scr button, and then save it through some photo editors. Everything will become much simpler - press a button, take a screenshot, save. That's all and nothing more!
Another big advantage of Lightshot is that it is very light and fast, works even on weak computers and does not hinder your actions. Moreover, it contains only the most necessary functions, so even a child can understand how to operate it.
 Search engine spam: what it is, main types and methods of detection
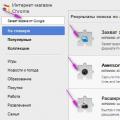 How to take a screenshot of a page in Google Chrome
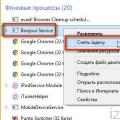 How to completely remove apple software update from your computer