Tips for restoring the performance of New Year's garlands. LEDs for amateurs or DIY-New Year's garland with minimal knowledge of electronics How many volts are the bulbs in the Soviet garland
We are all familiar with Christmas tree garlands, consisting of multi-colored light bulbs. However, in recent years, products based on led light-emitting diodes have become very popular.
How they are arranged, what connection scheme they have and what to do if the garland stops glowing, we will consider in detail in this article.
What is a Christmas tree garland made of?
 What is a garland of LEDs, is it worse or better than usual?
Outwardly, this is almost the same product as before - wires, light bulbs (LED), control unit.
The most important element is of course the control unit. A small plastic box on which all kinds of backlight operation modes are indicated. 
They change with the push of a button. The block itself can be with a fairly well protected level of moisture and dust protection IP44. 
What does he have inside? To open it, use the sharp tip of a knife or a thin screwdriver to pry the latches from the bottom and take off the protective cover. 
By the way, sometimes it is glued, and not just sitting on snaps.
First of all, inside you will see the wires soldered to the board. A thicker wire is usually a mains wire that supplies 220V. 
Soldered on the board:
- controller that creates all the lighting effects
- thyristors, each of them goes to a separate channel of the garland
- resistors
- capacitor
- and diode bridges
 The number of board elements depends primarily on the number of light channels of the garland. More expensive models may have a fuse.
Scheme of the LED garland
The mains alternating voltage through resistors and a diode bridge, already in a rectified form and smoothed through a capacitor, is supplied to the supply controller. 
In this case, this voltage is supplied through the button, which is open in the normal state. When you close it, the controller modes switch.
The controller, in turn, controls the thyristors. Their number depends on the number of backlight channels. And after the thyristors, the output power goes directly to the LEDs in the garland.
The more such exits, the more diverse the color patterns the product can have. If there are only two of them, this means that only two parts (or halves) of the garland will work in different modes - some bulbs will go out, others will light up, etc. 
In fact, these two lines of diodes will be connected via two channels in series. They will be connected to each other at the end point - the last LED. 
If for some reason you are annoyed by the flashing of the garland and you want it to glow evenly with only one color, it is enough on the reverse side of the board to short-circuit the cathode and anode of the thyristor using soldering. 
The more expensive garland you have at your disposal, the more outgoing channels and wires will leave the control board.
At the same time, if you follow the tracks of the board, one of the mains voltage leads is always supplied directly to the final LED of the garland, bypassing all the elements of the circuit. 
Causes of the malfunction
 Situations with malfunctions of the garland are very diverse.
At the same time, remember that the most important element - the microcircuit on the board, "burns" very, very rarely.
Approximately 5-10% of all cases.
- Bad contact on the wires
- LED in one of the bulbs
- Capacitor
- resistance
- One of the diodes
- One of the thyristors
- Controller chip

Bad soldering
If your backlight suddenly stops working, first of all, always check the soldering of the supply and outgoing wires. It is possible that the entire contact was held only by hot melt adhesive. 
It is worth moving the wiring and contact anyway.
The most common problem with Chinese garlands is the use of very thin wires that simply break off at the solder points on the board.
To prevent this from happening, all contacts after soldering must be filled with a thick layer of hot melt adhesive. 
And when stripping such veins, it is advised to use not a knife, but a lighter. Instead of chipping away the insulation with a blade, heat it up a bit and melt it with a lighter fire. 
After that, simply remove the outer layer with your nails without damaging the cores themselves.
LED damage
If the wire contacts are in order and you sin on one of the diodes, how can you check its malfunction? And most importantly, how to find it among the whole series of light bulbs? 
First of all, unplug the garland from the outlet. Start with the last diode. A power cable comes to it directly from the control unit.
An outgoing conductor is soldered to the same leg. It goes to the next branch of the light channel. You need to test the diode between its two power wires (input-output). 
You will need a multimeter and its somewhat modernized probes. 
To the tips of the probes of the tester, tightly wrap thin needles with a thread so that their tip protrudes a maximum of 5-8 mm. 
From above, wrap everything with a dense layer of electrical tape. 
Since the LEDs are soldered, just pulling them out of the light bulb as in ordinary garlands will not work here.
Therefore, you will have to pierce the insulation of the cores to get to the copper cores of the wiring. Switch the multimeter to the diode continuity mode. 
And you begin to sequentially pierce the supply wires near each suspicious diode. 
If your garland is not 220V, but 12V or 24V, which is connected from such a power supply: 
then the working LED from the multimeter battery should light up. 
If this is a 220V backlight, then check the readings of the multimeter.
On the working elements, they will be approximately the same, but the faulty one will show a break.
The method is certainly barbaric and damaging the insulation, but it is quite working. True, street garlands after such punctures are better not to be used outdoors.
Chaotic blinking
 There is a situation when you turn on the garland and it starts blinking randomly, then brighter, then dimmer. Changes channels by itself.
In general, one gets the impression that this is not some kind of factory effect, but as if the garland "has gone crazy."
The most common problem here is the electrolytic capacitor. It may swell a little, swell, and this will be clearly visible even to the naked eye. 
Everything is solved by replacing it. The denomination is indicated on the case, so you can easily purchase and pick up a similar one in radio parts stores. 
If you changed the capacitor, but this did not give an effect, where to look next? Most likely one of the resistors burned out (broken). Breakdown visually determine quite problematic. You will need a tester.
You take resistance measurements, having previously recognized its nominal (normal) value by marking. If it doesn't match, change it. 
Part of the garland does not shine
When any of the channels on the garland does not work completely, there can be two reasons.
For example, a breakdown on one of the thyristors or diodes responsible for it.
To be sure of this, simply unsolder the wiring of this channel on the board from your place and connect the adjacent channel there, which is obviously working. 
And if at the same time another channel also stops working, then the problem is not in the garland itself, but in the components of its board - a thyristor or diode. 
Check them with a multimeter, find the right parameters and change them.
The garland shines dimly
There are also not quite obvious accidents, when the LEDs of a separate channel seem to be on, but rather dimly compared to the rest. 
What does it mean? The controller circuit is working fine. When the button is pressed, all modes are switched.
The dialing by the tester of the parameters of the diode bridge and resistance also does not reveal problems. In this case, it remains to sin only on the wires. They are already quite frail, and when such a stranded wire is torn, its cross section decreases even more.
As a result, the garland is simply not able to start the LEDs in the nominal brightness mode, since they simply do not have enough voltage. How to find this torn vein in a long garland? 
To do this, you will have to walk along the entire line with the handles. Turn on the garland and start moving the wires near each LED until the entire backlight lights up in full force.
According to Murphy's law, this may be the very last segment of the garland, so be patient.
As soon as you find this area, pick up a soldering iron and disassemble the wires on the LED. Clean them with a lighter and re-solder everything. 
Then isolate the place of soldering with heat shrink. 
I admit, I did not plan to write a full review.
Well, I once bought these LEDs, "in reserve". Well .., LEDs ... why write about them? Only a year ago, in one of the comments, he mentioned them, and considered the topic closed.
But literally today at work, an employee, looking at the soldering iron in my hands and the code for the arduino on the screen, complained that there are fathers in the world (they are the majority) who “does not cut” further than a designer with a battery and a light bulb at a labor lesson in electronics . But, for example, "cuts" in something else. But to do something with your own hands, and even on the weekend with your son, would be quite nice. And in fact: this raises the prestige of the father in the eyes of the whole family, it certainly contributes to education, and, most importantly, this is how the foundations of creativity are laid in the emerging personality.
This conversation was the impetus for writing the review. And the theme is obvious: since ancient times in Soviet magazines, starting with "Young Technician" and ending with "Radio", it was in November that homemade products dedicated to the New Year were printed. There is time to think, do and have time for the holiday.
Why is our resource worse?
In today's review, we will build a beautiful iridescent New Year's garland. With my own hands. Without any "arduino", "scripts", "controllers", "datasheets" and other incomprehensibility. I will even try to avoid the words "anode" and "cathode".
Everything will be amateurish, simple and “on the fingers”. Experienced specialists, for sure, will be bored, primitive, "kindergarten" and not interested. Somewhere even funny.
Here he is, the hero of the review: 
The LED is unusual. It doesn't have a single glow color.
It shines like this: it smoothly (chameleon) changes seven colors in a circle: red, through orange and yellow to green, through blue to blue and purple, etc. Each color lasts a second and a half and is smoothly replaced by the next.
The colors are very rich and bright. Even adults are pleased, what can we say about children.
To understand the size, next to the ruble coin: 
The LED itself has the shape of a ribbed "rocket", which, in the presence of children's imagination, is also important.
Since the experts still went under the cut, then here
a few technical details, the rest you can not read
LEDs come sealed in a metallized antistatic bag: 
Label attached by the seller. I suspect that the handwriting is also his. 
Dimensions: L = 13mm, Ø 5mm. 

I measured the current consumption at a voltage of 3.3V.
It fluctuates (depending on the included crystals) within 9-14 mA.
The seller writes 20mA, but I think this is the limit.
I consider the nominal voltage to be 3.2 - 3.4 volts, 5v - the maximum maximum indicated by the seller.
What do we need to know about this LED.
It will operate on any 3 volt source (lithium coin cell battery or a pair of AA/Mini batteries). 
No diagrams or additional details. Only the battery and these diodes. Everything.
In any watch repair shop, you can say: “Give me a 2032 or 2025 battery,” or even like this: “A coin cell battery for the motherboard.”
Connecting is very easy.
The LED has two outputs. And one is longer than the other. The long output is connected to the "plus" of the source, the short one - to the "minus". For a tablet battery, everything is the same - a larger shirt is a plus, a patch-contact is a minus.
If you take several such diodes at once and connect them to a battery, then they, out of sync, will gradually diverge in time; you get a kind of multi-colored rainbow-plasma-placer. You can make lamps, nightlights, well, or something like that with a child; embed where appropriate. This is where creativity and imagination come into play. You can, say, glue figures from thin paper and highlight them (from the inside or outside). Insert into some toys, etc.
In principle, this could be an intermediate point. I told about LEDs how to power them - explained.
But we are building a New Year's garland.
So, let's move on to the second part of the review.
It's time to get out the soldering iron and stock up on other auxiliary materials. I really hope that the word "soldering iron" will not scare away novice designers too much. Perhaps someone in the comments will offer some elegant solution on how to do without soldering. Apart from the Vago terminal blocks, nothing comes to my mind, but it is cumbersome, ugly for a garland and unreliable for a device that will constantly be unwound / pulled out / removed. Therefore, I do not see alternatives to soldering for this case.
But soldering is not so scary. Plus extra experience.
In addition to the soldering iron itself, we will need
- Heat shrink tubing of two diameters (I assume that Ø 2mm and Ø 3mm). You can do without heat shrinkage, replacing it with electrical tape, but it will not be so artistic and convenient.
- Non-cleaning vaseline flux (which will be much more convenient for a beginner). Or rosin, it's more affordable.
- Solder.
- The wires themselves, from which we will make a garland.
I propose to extract the wires from a piece of a “twisted pair” computer cable, preferably with stranded conductors (such cables are softer, as a rule, they are industrially manufactured). I think you can ask a sysadmin friend at work for a couple of meters of "twisted pair" or buy it at the nearest construction market.
The beauty of this solution is that there are guaranteed green and brown conductors, which is very good for a Christmas tree garland - it will be less noticeable. We will not need the remaining six conductors from the gutted pair in this design. It can only be made from a green conductor, but a beginner will have a chance to get confused in the "pluses" and "minuses" of the LEDs in the garland; In my opinion, green and brown - just right. 
It makes sense to pre-cut the wires into segments of the desired length. For myself, I chose an interval of 10-12 cm between adjacent LEDs, although everything is individual.
Each piece of wire is stripped by 3 millimeters from both ends, and, with the help of flux and solder, it is tinned to a brilliant state. I think it is advisable to immediately do this routine work, so that in the process of assembling the garland, this is not distracted. It also makes sense to cut pieces of heat shrink in advance (I will talk about their length a little later). At this preparatory stage can be considered completed. 
The number of LEDs in our garland is determined by the planned length of the garland, patience and desire. Already one and a half to two dozen - it will be beautiful on a small desktop Christmas tree. And fifty diodes will decorate even a one and a half meter forest beauty.
All LEDs are connected in parallel to each other. This means that all long leads of all LEDs must be connected together and connected to a common plus; all short leads are also connected and connected to a common minus.
If you depict it in a diagram, then it is like this: 
With such a connection, damage and burnout of one LED will not lead to a breakdown of the entire garland, everything will work the same way, only without the “dropped out” diode.
Structurally, I propose to assemble the garland like this. We solder one conductor to the LED, isolate it with a heat shrink tube of small diameter. We seat with a lighter or a building hair dryer. Then we solder another conductor, and we isolate everything together with a tube of a larger diameter. We seat the finished connection.
This method will save small diameter tubes (since we isolate only one leg), and make the design neat, since the entire soldering place will be covered by a large tube.
Like this: 
And so, link by link, we collect the whole garland.
Just a few remarks.
Firstly, when soldering the next contact of the LED, obviously, two conductors of the same name will have to be passed into the tube at once - from the previous link and for the current one. So that both wires are crimped at once.
Secondly, the legs of the LEDs will need to be bitten to a length of 6-7 mm and tinned, and it is reasonable to do this not in advance, but immediately before soldering the next diode. In order to see the difference in the length of the legs until the last. Well, or in advance, using a felt-tip pen, set points near the plus legs of the LEDs, then immediately cut and irradiate everything.
Now the length of the tubes has become obvious. Thin ones should be slightly longer than the bitten leg, i.e. about a centimeter. Thick - a little more authentic to cover the entire structure, a centimeter and a half.
Assembly, despite such an abundance of text in the review, is not at all difficult, just routine. But, as you "stuff your hands", the process will accelerate.
An optional, but justified action will be a slight interlacing of the conductors. Twisted conductors do not bulge so much, they look neater and are easier to unwind.
The finished node, upon close and enlarged examination, will look like this: 
During the process of assembling the links, it would be wise to control the process with a three-volt battery to make sure that the polarity of the next soldered LED is not reversed.
It makes sense to make the conductors from the power source to the nearest LED longer.
But how to power our garland - everyone decides for himself.
I offer several options.
Option 1. The best thing I see is a 3.3 volt power adapter. This means that "DC 3.3V" should be written on it. The maximum that can be allowed is 5 volts, but the LEDs will work at their limit. Nine-volt, twelve-volt, etc. power supplies are guaranteed to kill the garland.
You can also try to adapt an old charger from an unnecessary phone if DC 5V is written on it. 
The current values indicated on the power adapter (this is what is in amperes or milliamps, mA) are not important for this case, do not bother yourself.
For specialists who are outraged by the last phrase. Others can't read
Even a 100-milliamp PSU will power a dozen diodes. It is unlikely that a charge with a current of less than 200mA will come across, which, taking into account the desynchronization of the glow of the diodes, will allow a garland of any reasonable number of diodes to work comfortably.
When connecting the power adapter, you will have to figure out where it has a “plus” and where it has a “minus”.
We find out the polarity of the power adapter
If you know how to use a tester, voltmeter or multimeter, then you can turn off this spoiler, the issue is resolved.
For those who don't know what I'm talking about here, let's get started.
Most likely, we will have to analyze the power adapter without a connector. Either it was cut off and bitten off before us, or we still need to cut it off, since we still don’t have reciprocal connectors from old Siemens, Nokia, Samsung and Ericsson. We look at the cores of the wire.
If they are colored, then the plus is usually a “warmer” color. For example, in a red-black pair, the minus is likely to be on the black wire; in a red-blue pair, the minus will be more likely blue.
If the wire looks like “thin wire with a braided jacket around it” (this is called “shielded” or even “coaxial”), then the outer layer is a minus, the inner core is a plus.
In any case - take a separate LED and try to instantly connect it at random to the power adapter - there are two options at most, in one position it will light up, in the other it will not.
Option 2. Batteries. A good option for when there is no outlet nearby. Let's say we decorate a Christmas tree in the yard or in the country. It is best to use batteries or accumulators of the AA format ("finger-type"). They need two pieces, connected by a “train” (this is called “in series”) - in the middle, the “plus” of one touches the “minus” of the other. At the edges, remove the "plus" and "minus" to power the garland. There are special boxes for batteries, immediately with contacts. Well, or in a simple way, assemble them with electrical tape, irradiate the contact pads with flux (it is difficult to tin with rosin) and solder the wires.
An important factor is that the power supply of the garland is reduced and decoupled from the mains voltage (whether it be batteries or a good serviceable power adapter) absolutely fire and electrical safety. The voltage on any part of our decorated Christmas tree will not exceed 3-5 volts, which is absolutely safe.
At the end of the review, of course, I will show a one-minute video with the work of the finished garland.
Anyone who has ever filmed LEDs knows that it is almost impossible to correctly convey the color and brightness of an LED using household video recording tools. Believe me, in reality everything looks much more colorful and beautiful. The colors are vibrant. There is no light near the LEDs themselves, this is a lack of shooting. The flickering in the video during the color change of each LED is a stroboscopic effect from shooting PWM, in reality it is not there either.
I suspect that a lot of 250 pieces will seem redundant for most. I just provided a link from which I bought it myself. This does not mean that you need to buy this particular lot from this particular seller. Surely there will be offers of this product in smaller batches.
Everything in this review I bought myself at different times; no one provided anything for the review and did not set any conditions.
I plan to buy +80 Add to favorites Liked the review +100 +180Where can I get a Christmas garland? Of course, in the store - their choice is small, but disposable Chinese ones, thank God, are enough. But since we decided to be friends with a soldering iron, why not assemble it ourselves, and at the same time gain some practice with theory? If you still decide, then it's time to try.
First of all, let's decide on the light bulbs. There must be many of them, of course. Otherwise, what kind of garland is this? How much will depend on our desire and capabilities. Let's sketch the scheme of our garland:
Suppose we decide to power the garland from a socket (220 V). If all the light bulbs are of the same type (for one voltage and one current, which are written on the base of each device), then, according to Ohm's law, a certain, but the same voltage will drop on each light bulb.
4 bulbs - each will get 220/4 \u003d 55 V. 10 bulbs - 220/10 \u003d 22 V. This is already a garland, since there are 24 Volt bulbs on sale. Did you get the point?
By changing their number, it is easy to assemble a garland of light bulbs designed for any voltage! The only condition, as I said, is that the lamps must be of the same type, otherwise the voltage on them will be distributed differently and the garland will most likely burn out right there.
Now let's build the problem "from the reverse". We have a handful of 6.3 V lamps lying around. How many do you need? Quickly divide 220 by 6.3 = 35 pieces. In order for the garland to work for a year, and five or ten, it makes sense to increase the number of lamps up to 40 pieces. In this case, each bulb will get 5.5 volts, they will all burn not so brightly, but for a very long time. And dimly - it does not matter. We need beautiful, not bright.
And if we don’t have 40 light bulbs at our disposal, can we get by with a smaller number? Quite. Recall that it conducts current in one direction and does not conduct in the other. But we have voltage in the outlet, and if you connect a garland through a diode, then it will skip one half-wave and delay the other. As a result, the garland will have half the mains voltage - 110 V. This means that the number of lamps can be safely halved!
- In fact, the amplitude value will remain at the level of 220 V, and the operating voltage and the average current through the lamps will be halved, but for ease of understanding, we will assume that the voltage will decrease, which, however, will be shown by any voltmeter.
In fact, the amplitude value will remain at the level of 220 V, and the operating voltage and the average current through the lamps will be halved, but for ease of understanding, we will assume that the voltage will decrease, which, incidentally, any voltmeter will show.
The only problem is to choose the right diode so that it can withstand current and voltage. We have a voltage of 220 V, the current is written on the lamp base - when connected in series, it will be the same for everyone. Let's assume 0.1A. So we need a diode that can withstand a reverse voltage of at least 300 V (for a reserve) and a current in the region of 0.2 A (also for a reserve).
We open diode guide and see which of those that are available to us are suitable. KD243G, KD247V, KD105A, KD127A, 1N4004 ... The choice is huge. Since our diode will work in an alternating current circuit, the polarity of its connection does not even matter! We cut pieces of wire, solder all the bulbs in series, isolate their bases well, turn on the diode in the circuit and our garland is ready.

Attention! The design is mains powered, and therefore EVERY light bulb is under life-threatening voltage! Carefully isolate all conductive parts of the lamps and resolder only by disconnecting the garland from the mains!
The times when LEDs were used only as indicators of the inclusion of devices are long gone. Modern LED devices can completely replace incandescent lamps in household, industrial and. This is facilitated by various characteristics of LEDs, knowing which you can choose the right LED analogue. The use of LEDs, given their basic parameters, opens up an abundance of possibilities in the field of lighting.
The light-emitting diode (denoted by SD, SID, LED in English) is a device based on an artificial semiconductor crystal. When an electric current is passed through it, the phenomenon of emission of photons is created, which leads to a glow. This glow has a very narrow spectrum range, and its color depends on the material of the semiconductor.

LEDs with red and yellow glow are made from inorganic semiconductor materials based on gallium arsenide, green and blue are made on the basis of indium gallium nitride. To increase the brightness of the light flux, various additives are used or the multilayer method is used, when a layer of pure aluminum nitride is placed between semiconductors. As a result of the formation of several electron-hole (p-n) transitions in one crystal, the brightness of its glow increases.
There are two types of LEDs: for indication and lighting. The former are used to indicate the inclusion of various devices in the network, as well as sources of decorative lighting. They are colored diodes placed in a translucent case, each of them has four leads. Devices emitting infrared light are used in devices for remote control of devices (remote control).
In the field of lighting, LEDs emitting white light are used. By color, LEDs are distinguished with cold white, neutral white and warm white glow. There is a classification of LEDs used for lighting according to the method of installation. The marking of the SMD LED means that the device consists of an aluminum or copper substrate on which a diode crystal is placed. The substrate itself is located in the housing, the contacts of which are connected to the contacts of the LED.

Another type of LED is designated OCB. In such a device, many crystals coated with a phosphor are placed on one board. Thanks to this design, a high brightness of the glow is achieved. This technology is used in the production of high luminous flux in a relatively small area. In turn, this makes the production of LED lamps the most accessible and inexpensive.
Comparing lamps on SMD and COB LEDs, it can be noted that the former can be repaired by replacing a failed LED. If the COB LED lamp does not work, you will have to change the entire board with diodes.Note!
Characteristics of LEDs
When choosing a suitable LED lamp for lighting, the parameters of the LEDs should be taken into account. These include supply voltage, power, operating current, efficiency (light output), glow temperature (color), radiation angle, dimensions, degradation period. Knowing the basic parameters, it will be possible to easily select devices to obtain one or another illumination result.

LED current consumption
As a rule, for conventional LEDs, a current of 0.02A is provided. However, there are LEDs rated for 0.08A. These LEDs include more powerful devices, in the device of which four crystals are involved. They are located in the same building. Since each of the crystals consumes 0.02A, in total one device will consume 0.08A.
The stability of the operation of LED devices depends on the magnitude of the current. Even a slight increase in current helps to reduce the radiation intensity (aging) of the crystal and increase the color temperature. This eventually leads to the fact that the LEDs begin to cast blue and fail prematurely. And if the current strength indicator increases significantly, the LED immediately burns out.
To limit the current consumption, the designs of LED lamps and luminaires are provided with current stabilizers for LEDs (drivers). They convert the current, bringing it to the desired value for the LEDs. In the case when you want to connect a separate LED to the network, you need to use current-limiting resistors. The calculation of the resistance of the resistor for the LED is performed taking into account its specific characteristics.
Useful advice! To choose the right resistor, you can use the calculator for calculating the resistor for the LED, posted on the Internet.

LED voltage
How to check LED voltage? The fact is that LEDs do not have a supply voltage parameter as such. Instead, the voltage drop characteristic of the LED is used, which means the amount of voltage at the output of the LED when the rated current passes through it. The voltage value indicated on the packaging reflects just the voltage drop. Knowing this value, it is possible to determine the voltage remaining on the crystal. It is this value that is taken into account in the calculations.
Given the use of various semiconductors for LEDs, the voltage for each of them may be different. How to find out how many volts an LED is? You can determine by the color of the glow of devices. For example, for blue, green and white crystals, the voltage is about 3V, for yellow and red - from 1.8 to 2.4V.
When using a parallel connection of LEDs of an identical rating with a voltage value of 2V, you may encounter the following: as a result of a scatter of parameters, some emitting diodes will fail (burn out), while others will glow very faintly. This will happen due to the fact that with an increase in voltage even by 0.1V, an increase in the current passing through the LED by 1.5 times is observed. Therefore, it is so important to ensure that the current matches the rating of the LED.

Light output, beam angle and LED power
Comparison of the luminous flux of diodes with other light sources is carried out, taking into account the strength of the radiation emitted by them. Devices about 5 mm in diameter give from 1 to 5 lm of light. While the luminous flux of a 100W incandescent lamp is 1000 lm. But when comparing, it must be taken into account that a conventional lamp has diffused light, while an LED has a directional one. Therefore, it is necessary to take into account the scattering angle of the LEDs.
The scattering angle of different LEDs can be from 20 to 120 degrees. When illuminated, LEDs give a brighter light in the center and reduce illumination towards the edges of the dispersion angle. Thus, LEDs better illuminate a particular space while using less power. However, if it is required to increase the area of illumination, divergent lenses are used in the design of the lamp.
How to determine the power of LEDs? To determine the power of the LED lamp required to replace an incandescent lamp, it is necessary to apply a factor of 8. So, you can replace a conventional 100W lamp with an LED device with a power of at least 12.5W (100W / 8). For convenience, you can use the data of the table of correspondence between the power of incandescent lamps and LED light sources:
| Incandescent lamp power, W | Corresponding power of the LED lamp, W |
| 100 | 12-12,5 |
| 75 | 10 |
| 60 | 7,5-8 |
| 40 | 5 |
| 25 | 3 |
When using LEDs for lighting, the efficiency indicator is very important, which is determined by the ratio of luminous flux (lm) to power (W). Comparing these parameters for different light sources, we find that the efficiency of an incandescent lamp is 10-12 lm / W, a fluorescent lamp is 35-40 lm / W, and an LED lamp is 130-140 lm / W.
Color temperature of LED sources
One of the important parameters of LED sources is the glow temperature. The units of measurement for this quantity are degrees Kelvin (K). It should be noted that all light sources are divided into three classes according to the glow temperature, among which warm white has a color temperature of less than 3300 K, daylight white - from 3300 to 5300 K and cold white over 5300 K.
Note! The comfortable perception of LED radiation by the human eye directly depends on the color temperature of the LED source.
Color temperature is usually indicated on the label of LED lamps. It is indicated by a four-digit number and the letter K. The choice of LED lamps with a certain color temperature directly depends on the characteristics of its use for lighting. The table below shows the options for using LED sources with different glow temperatures:
| LED light color | Color temperature, K | Use cases in lighting | |
| White | Warm | 2700-3500 | Lighting of household and office premises as the most suitable analogue of an incandescent lamp |
| Neutral (daytime) | 3500-5300 | Excellent color rendering of such lamps allows them to be used for lighting workplaces in production. | |
| Cold | over 5300 | It is mainly used for street lighting, and is also used in the device of hand lamps. | |
| Red | 1800 | As a source of decorative and phyto-illumination | |
| Green | - | ||
| Yellow | 3300 | Lighting design of interiors | |
| Blue | 7500 | Illumination of surfaces in the interior, phyto-illumination | |
The wave nature of color makes it possible to express the color temperature of LEDs using wavelength. The marking of some LED devices reflects the color temperature precisely in the form of an interval of different wavelengths. Wavelength is denoted λ and is measured in nanometers (nm).
Sizes of SMD LEDs and their characteristics
Given the size of SMD LEDs, fixtures are classified into groups with different specifications. The most popular LEDs are in sizes 3528, 5050, 5730, 2835, 3014 and 5630. Characteristics of SMD LEDs vary depending on the size. So, different types of SMD LEDs differ in brightness, color temperature, power. In the marking of the LEDs, the first two digits indicate the length and width of the device.

Basic parameters of SMD 2835 LEDs
The main characteristics of SMD 2835 LEDs include an increased radiation area. Compared to the SMD 3528, which has a round work surface, the SMD 2835 emits a rectangular shape, which contributes to greater light output at a lower element height (about 0.8 mm). The luminous flux of such a device is 50 lm.
The body of SMD 2835 LEDs is made of heat-resistant polymer and can withstand temperatures up to 240°C. It should be noted that radiation degradation in these cells is less than 5% during 3000 hours of operation. In addition, the device has a fairly low thermal resistance of the crystal-substrate junction (4 C/W). The maximum operating current is 0.18A, the crystal temperature is 130°C.
According to the color of the glow, warm white with a glow temperature of 4000 K, daylight white - 4800 K, pure white - from 5000 to 5800 K and cold white with a color temperature of 6500-7500 K. It is worth noting that the maximum luminous flux for devices with cold white glow, the minimum - for warm white LEDs. In the design of the device, contact pads are increased, which contributes to better heat dissipation.
Useful advice! SMD 2835 LEDs can be used for any type of mounting.

Characteristics of SMD 5050 LEDs
The SMD 5050 housing design contains three LEDs of the same type. Blue, red and green LED sources have technical characteristics similar to SMD 3528 crystals. The operating current value of each of the three LEDs is 0.02A, therefore the total current of the entire device is 0.06A. In order for the LEDs not to fail, it is recommended not to exceed this value.
SMD 5050 LED devices have a direct voltage of 3-3.3V and a light output (network flux) of 18-21 lm. The power of one LED is the sum of three power values of each crystal (0.7W) and is 0.21W. The color of the glow emitted by the devices can be white in all shades, green, blue, yellow and multi-color.
The close arrangement of LEDs of different colors in the same SMD 5050 package made it possible to implement multi-color LEDs with separate control of each color. Controllers are used to regulate lamps using SMD 5050 LEDs, so that the color of the glow can be smoothly changed from one to another after a given amount of time. Typically, such devices have several control modes and can adjust the brightness of the LEDs.

Typical characteristics of SMD 5730 LED
SMD 5730 LEDs are modern representatives of LED devices, the body of which has geometric dimensions of 5.7x3 mm. They belong to ultra-bright LEDs, the characteristics of which are stable and qualitatively different from the parameters of their predecessors. Manufactured using new materials, these LEDs are characterized by increased power and high-efficiency luminous flux. In addition, they can work in conditions of high humidity, are resistant to temperature extremes and vibration, and have a long service life.
There are two types of devices: SMD 5730-0.5 with a power of 0.5W and SMD 5730-1 with a power of 1W. A distinctive feature of the devices is the possibility of their operation on a pulsed current. The value of the rated current of the SMD 5730-0.5 is 0.15A; during pulsed operation, the device can withstand currents up to 0.18A. This type of LED provides a luminous flux of up to 45 lm.
SMD 5730-1 LEDs operate at a constant current of 0.35A, with a pulsed mode - up to 0.8A. The light output efficiency of such a device can be up to 110 lm. Due to the heat-resistant polymer, the body of the device can withstand temperatures up to 250°C. The dispersion angle of both types of SMD 5730 is 120 degrees. The degree of degradation of the luminous flux is less than 1% when working for 3000 hours.

Characteristics of Cree LEDs
Cree (USA) is engaged in the development and production of super-bright and most powerful LEDs. One of the groups of Cree LEDs is represented by a series of Xlamp devices, which are divided into single-chip and multi-chip. One of the features of single-crystal sources is the distribution of radiation along the edges of the device. This innovation made it possible to produce lamps with a large glow angle using a minimum number of crystals.
In the XQ-E High Intensity series of LED sources, the glow angle is from 100 to 145 degrees. Having small geometric dimensions of 1.6x1.6 mm, the power of super-bright LEDs is 3 Volts, and the luminous flux is 330 lm. This is one of Cree's latest developments. All LEDs, the design of which is developed on the basis of a single chip, have high-quality color rendering within CRE 70-90.
Related article:
How to make or repair an LED garland yourself. Prices and main characteristics of the most popular models.
Cree has released several varieties of multi-chip LED fixtures with the latest power types from 6 to 72 volts. Multi-chip LEDs are divided into three groups, which include devices with high voltage, power up to 4W and above 4W. In sources up to 4W, 6 crystals are assembled in an MX and ML type package. The scattering angle is 120 degrees. You can buy Cree LEDs of this type with white warm and cold glow colors.
Useful advice! Despite the high reliability and quality of light, you can buy high-power LEDs of the MX and ML series at a relatively low price.
The group above 4W includes LEDs from several crystals. The most dimensional devices in the group are 25W devices, represented by the MT-G series. The company's novelty is XHP model LEDs. One of the large LED-devices has a body of 7x7 mm, its power is 12W, light output is 1710 lm. High voltage LEDs combine small size and high light output.

LED connection diagrams
There are certain rules for connecting LEDs. Taking into account that the current passing through the device moves only in one direction, for a long and stable operation of LED devices, it is important to take into account not only a certain voltage, but also the optimal current value.
Scheme for connecting an LED to a 220V network
Depending on the power source used, there are two types of schemes for connecting LEDs to 220V. In one of the cases, it is used with a limited current, in the second - a special one that stabilizes the voltage. The first option takes into account the use of a special source with a certain current strength. The resistor in this circuit is not required, and the number of connected LEDs is limited by the power of the driver.
Two types of pictograms are used to designate LEDs in the diagram. Above each schematic representation of them are two small parallel arrows pointing upwards. They symbolize the bright glow of the LED device. Before you connect the LED to 220V using a power supply, you need to include a resistor in the circuit. If this condition is not met, this will lead to the fact that the working life of the LED will be significantly reduced or it will simply fail.

If you use a power supply when connecting, then only the voltage will be stable in the circuit. Given the insignificant internal resistance of the LED device, turning it on without a current limiter will lead to the device burning. That is why an appropriate resistor is introduced into the LED switching circuit. It should be noted that resistors come in different ratings, so they should be calculated correctly.
Useful advice! The negative point of the circuits for connecting an LED to a 220 Volt network using a resistor is the dissipation of high power when it is required to connect a load with increased current consumption. In this case, the resistor is replaced by a quenching capacitor.
How to Calculate Resistance for an LED
When calculating the resistance for an LED, they are guided by the formula:
U = IхR,
where U is voltage, I is current, R is resistance (Ohm's law). Let's say you need to connect an LED with the following parameters: 3V - voltage and 0.02A - current strength. So that when you connect the LED to 5 Volts on the power supply, it does not fail, you need to remove the extra 2V (5-3 = 2V). To do this, it is necessary to include a resistor with a certain resistance in the circuit, which is calculated using Ohm's law:
R = U/I.

Thus, the ratio of 2V to 0.02A will be 100 ohms, i.e. this is the resistor you need.
It often happens that, given the parameters of the LEDs, the resistance of the resistor has a non-standard value for the device. Such current limiters cannot be found at points of sale, for example, 128 or 112.8 ohms. Then you should use resistors, the resistance of which has the nearest higher value compared to the calculated one. In this case, the LEDs will not function at full strength, but only by 90-97%, but this will be imperceptible to the eye and will positively affect the resource of the device.
There are many options for LED calculation calculators on the Internet. They take into account the main parameters: voltage drop, rated current, output voltage, number of devices in the circuit. By setting the parameters of LED devices and current sources in the form field, you can find out the corresponding characteristics of the resistors. To determine the resistance of color-coded current limiters, there are also online resistor calculations for LEDs.
Schemes of parallel and serial connection of LEDs
When assembling structures from several LED devices, circuits for connecting LEDs to a 220 Volt network with a serial or parallel connection are used. At the same time, for a correct connection, it should be borne in mind that when the LEDs are connected in series, the required voltage is the sum of the voltage drops of each device. While when the LEDs are connected in parallel, the current strength is added.

If the circuits use LED devices with different parameters, then for stable operation it is necessary to calculate the resistor for each LED separately. It should be noted that two completely identical LEDs do not exist. Even devices of the same model have slight differences in parameters. This leads to the fact that when you connect a large number of them in a series or parallel circuit with a single resistor, they can quickly degrade and fail.
Note! When using one resistor in a parallel or series circuit, only LED devices with identical characteristics can be connected.
The discrepancy in the parameters when several LEDs are connected in parallel, let's say 4-5 pieces, will not affect the operation of the devices. And if you connect a lot of LEDs to such a circuit, it will be a bad decision. Even if the LED sources have a slight variation in characteristics, this will result in some fixtures emitting bright light and burning out quickly, while others will glow poorly. Therefore, when connecting in parallel, you should always use a separate resistor for each device.
With regard to series connection, there is an economical consumption, since the entire circuit consumes an amount of current equal to the consumption of one LED. With a parallel circuit, the consumption is the sum of the consumption of all LED sources included in the circuit included in the circuit.

How to connect LEDs to 12 volts
In the design of some devices, resistors are provided at the manufacturing stage, which makes it possible to connect LEDs to 12 Volts or 5 Volts. However, such devices are not always available commercially. Therefore, in the circuit for connecting LEDs to 12 volts, a current limiter is provided. The first step is to find out the characteristics of the connected LEDs.
Such a parameter as a direct voltage drop for typical LED devices is about 2V. The rated current for these LEDs corresponds to 0.02A. If you want to connect such an LED to 12V, then the “extra” 10V (12 minus 2) must be extinguished with a limiting resistor. Using Ohm's law, you can calculate the resistance for it. We get that 10 / 0.02 \u003d 500 (Ohm). Thus, a resistor with a nominal value of 510 ohms is needed, which is the closest in the series of electronic components E24.
In order for such a circuit to work stably, it is also necessary to calculate the power of the limiter. Using the formula, based on which the power is equal to the product of voltage and current, we calculate its value. We multiply the voltage of 10V by the current of 0.02A and get 0.2W. Thus, a resistor is needed, the standard power rating of which is 0.25W.

If it is necessary to include two LED devices in the circuit, then it should be borne in mind that the voltage falling on them will already be 4V. Accordingly, for the resistor it remains to pay off not 10V, but 8V. Therefore, further calculation of the resistance and power of the resistor is done based on this value. The location of the resistor in the circuit can be provided anywhere: from the side of the anode, cathode, between the LEDs.
How to test an LED with a multimeter
One way to check the working condition of the LEDs is to test with a multimeter. Such a device can diagnose LEDs of any design. Before checking the LED with a tester, the switch of the device is set in the "dialing" mode, and the probes are applied to the terminals. When the red probe is connected to the anode, and the black one to the cathode, the crystal should emit light. If the polarity is reversed, the display should show "1".
Useful advice! Before testing the LED for functionality, it is recommended to dim the main lighting, as during testing the current is very low and the LED will emit light so weakly that in normal lighting it may not be noticeable.

Testing LED-devices can be done without using probes. To do this, in the holes located in the lower corner of the device, the anode is inserted into the hole with the symbol "E", and the cathode - with the pointer "C". If the LED is in working order, it should light up. This test method is suitable for LEDs with fairly long desoldered leads. The position of the switch with this method of verification does not matter.
How to check LEDs with a multimeter without soldering? To do this, solder pieces from a regular paper clip to the probes of the tester. As insulation, a textolite gasket is suitable, which is placed between the wires, after which it is processed with electrical tape. The output is a kind of adapter for connecting probes. The clips spring well and are securely fixed in the slots. In this form, you can connect the probes to the LEDs without soldering them out of the circuit.
What can be done from LEDs with your own hands
Many radio amateurs practice assembling various designs from LEDs with their own hands. Self-assembled products are not inferior in quality, and sometimes even surpass analogues of industrial production. These can be color and music devices, flashing LED designs, do-it-yourself running lights on LEDs, and much more.

Assembling a current stabilizer for LEDs with your own hands
In order for the resource of the LED not to be exhausted ahead of schedule, it is necessary that the current flowing through it has a stable value. Red, yellow, and green LEDs are known to be able to handle higher current loads. While blue-green and white LED sources, even with a slight overload, burn out in 2 hours. Thus, for the normal operation of the LED, it is necessary to resolve the issue with its power supply.
If you assemble a chain of LEDs connected in series or in parallel, then you can provide them with identical radiation if the current passing through them has the same strength. In addition, reverse current pulses can adversely affect the life of LED sources. To prevent this from happening, it is necessary to include a current stabilizer for the LEDs in the circuit.
The qualitative features of LED lamps depend on the driver used - a device that converts voltage into a stabilized current with a specific value. Many radio amateurs assemble a 220V LED power supply circuit with their own hands based on the LM317 chip. Elements for such an electronic circuit are of low cost and such a stabilizer is easy to construct.

When using a current stabilizer on the LM317 for LEDs, the current is regulated within 1A. The rectifier based on LM317L stabilizes the current up to 0.1A. Only one resistor is used in the device circuit. It is calculated using an online LED resistance calculator. Available handy devices are suitable for power: power supplies from a printer, laptop or other consumer electronics. It is not profitable to assemble more complex circuits on your own, since it is easier to purchase them ready-made.
DIY LED DRL
The use of daytime running lights (DRL) on cars significantly increases the visibility of the car during daylight hours by other road users. Many motorists practice self-assembly of DRLs using LEDs. One of the options is a DRL device of 5-7 LEDs with a power of 1W and 3W for each block. If you use less powerful LED sources, the luminous flux will not meet the standards for such lights.
Useful advice! When making DRLs with your own hands, consider the requirements of GOST: luminous flux 400-800 Cd, glow angle in the horizontal plane - 55 degrees, in the vertical - 25 degrees, area - 40 cm².

For the base, you can use an aluminum profile board with pads for mounting LEDs. The LEDs are fixed to the board with a heat-conductive adhesive. In accordance with the type of LED sources, optics are selected. In this case, lenses with an angle of illumination of 35 degrees are suitable. Lenses are installed on each LED separately. Wires are displayed in any convenient direction.
Next, a housing for DRL is made, which simultaneously serves as a radiator. To do this, you can use the U-shaped profile. The finished LED module is placed inside the profile, fixing it with screws. All free space can be filled with a transparent silicone-based sealant, leaving only the lenses on the surface. Such a coating will serve as a moisture protection.
The DRL is connected to the power supply with the obligatory use of a resistor, the resistance of which is pre-calculated and checked. Connection methods may vary depending on the vehicle model. Connection diagrams can be found on the Internet.

How to make the LEDs blink
The most popular flashing LEDs, which you can buy ready-made, are devices that are regulated by the potential level. The flashing of the crystal occurs due to a change in the power supply at the terminals of the device. So, a two-color red-green LED device emits light depending on the direction of the current passing through it. The flashing effect in the RGB LED is achieved by connecting three outputs for separate control to a specific control system.
But you can also make a regular single-color LED blink, having a minimum of electronic components in your arsenal. Before you make a blinking LED, you need to choose a working circuit that is simple and reliable. You can use a blinking LED circuit, which will be powered by a 12V source.
The circuit consists of a low power transistor Q1 (silicon high-frequency KTZ 315 or its analogues is suitable), a resistor R1 820-1000 Ohm, a 16-volt capacitor C1 with a capacity of 470 microfarads and an LED source. When the circuit is turned on, the capacitor charges up to 9-10V, after which the transistor opens for a moment and gives off the accumulated energy to the LED, which starts blinking. This scheme can be implemented only in the case of power supply from a 12V source.

You can assemble a more advanced circuit that works by analogy with a transistor multivibrator. The circuit includes KTZ 102 transistors (2 pcs.), 300 ohm resistors R1 and R4 each to limit the current, 27000 ohm resistors R2 and R3 to set the base current of the transistors, 16-volt polar capacitors (2 pcs. with a capacity of 10 uF) and two LED sources. This circuit is powered by a 5V DC supply.
The circuit works on the principle of a "Darlington pair": capacitors C1 and C2 are alternately charged and discharged, which causes the opening of a particular transistor. When one transistor delivers power to C1, one LED lights up. Further, C2 is smoothly charged, and the base current of VT1 decreases, which leads to the closing of VT1 and the opening of VT2, and another LED lights up.
Useful advice! If you use a supply voltage above 5V, you will need to use resistors with a different rating to prevent failure of the LEDs.

Assembling color music on LEDs with your own hands
To implement fairly complex color music schemes on LEDs with your own hands, you must first understand how the simplest color music scheme works. It consists of one transistor, resistor and LED device. Such a circuit can be powered from a source with a rating of 6 to 12V. The operation of the circuit occurs due to cascade amplification with a common emitter (emitter).
The base VT1 receives a signal with varying amplitude and frequency. In the event that the signal fluctuations exceed the specified threshold, the transistor opens and the LED lights up. The disadvantage of this scheme is the dependence of flashing on the degree of the sound signal. Thus, the effect of color music will appear only at a certain degree of sound volume. If the sound is increased. the LED will be on all the time, and when it decreases, it will flash a little.
To achieve a full-fledged effect, they use a color music scheme on LEDs with a breakdown of the sound range into three parts. The circuit with a three-channel sound converter is powered by a 9V source. A huge number of color music schemes can be found on the Internet at various amateur radio forums. These can be color music schemes using a single-color tape, an RGB LED tape, as well as schemes for smoothly turning LEDs on and off. Also on the network you can find schemes of running lights on LEDs.

Do-it-yourself LED voltage indicator design
The voltage indicator circuit includes a resistor R1 (variable resistance 10 kOhm), resistors R1, R2 (1 kOhm), two transistors VT1 KT315B, VT2 KT361B, three LEDs - HL1, HL2 (red), HLZ (green). X1, X2 - 6-volt power supplies. In this circuit, it is recommended to use LED-devices with a voltage of 1.5V.
The operation algorithm of a self-made LED voltage indicator is as follows: when voltage is applied, the central green LED source lights up. In the event of a voltage drop, the red LED located on the left turns on. Increasing the voltage causes the red LED located on the right to glow. With the resistor in the middle position, all transistors will be in the closed position, and only the central green LED will receive voltage.
The opening of the transistor VT1 occurs when the slider of the resistor is moved up, thereby increasing the voltage. In this case, the supply of voltage to HL3 stops, and it is applied to HL1. When you move the slider down (lowering the voltage), the transistor VT1 closes and VT2 opens, which will power the HL2 LED. With a slight delay, LED HL1 will go out, HL3 will flash once and HL2 will light up.

Such a circuit can be assembled using radio components from obsolete equipment. Some assemble it on a textolite board, observing a 1: 1 scale with the dimensions of the parts so that all elements can fit on the board.
The limitless potential of LED lighting makes it possible to independently design various lighting devices from LEDs with excellent characteristics and a fairly low cost.
The New Year is coming - and Christmas tree decorations and garlands come out of the boxes. And if the toy is simply hung on the place chosen for it, then there are various accidents with garlands. This is especially true for cheap options. Everyone who has ever repaired this miracle of technology knows that the Chinese garland, the scheme of which is simple, has some features.
Features of a garland from China
Most often, the New Year decoration of Chinese masters attracts with a pleasant price (from 150 rubles apiece) and bright lights that flash in several modes. Four types of light bulbs, and sometimes LEDs, are pleasing to the eye and wallet. True, after a while one or several colors stop burning at once. There may be several reasons, but the fact remains - the garland no longer works at 100%.
If the product has deteriorated, it is not necessary to change it for a new one. Although it is customary to enter the New Year in everything new, our hands are not created for boredom. Is it hard to change a burned out light bulb? The point here is not the price and not the time spent on repairs. It's a matter of principle. And every person who first decides to repair a Chinese garland begins to be surprised.
misunderstandings
The most unpleasant surprise during the repair is thin strands of wires. You begin to wonder how it all works and still has not crumbled. It becomes clear both the price of the product and the reliability of operation. This is the Chinese garland. Scheme, repair and search for gaps - this is your further fate. The wiring connection, of course, is the weakest point. Therefore, the search for a gap should begin with a switching box.

In addition to surprisingly thin wiring, the Chinese product can please with a quick failure of the thyristors that control the color lines, as well as the main controller. To replace faulty elements, most often you have to look for domestic analogues or redo the entire circuit.
Types of faults
Consider some of the possible cases when a Chinese garland scheme is not needed. From the course of electrical engineering, only 2 problems associated with electrical malfunctions are known: a short circuit and an open circuit. In the case of a non-working garland, you need to look for a gap. Let's say the blue color is off. 2 options are possible:
- somewhere the wire connecting the blue bulbs broke;
- one of the blue elements burned out.
Now you should find a gap or a burned out light bulb. As a rule, a visual inspection will help us with this. Most often, the gap is visible to the naked eye, and the repair quickly ends there. To connect the two ends of the wire, you do not even need to have a soldering iron on hand - the simplest twist helps. must be wrapped with electrical tape.

Attention! Any repair of an electrical product is carried out without connecting to the network.
If the gap is not visible, you should pay attention to the box with the button. The Chinese garland, the scheme of which does not differ from the standard one, has a control unit in a flat box. By unscrewing 2 or more screws, you can see a small printed circuit board with several elements. 2 wires from the plug are suitable for it: phase and zero, as well as 4 wires with bulbs of four different colors. Breaks most often occur at the junction of the conductors of the wiring.
A number of malfunctions are associated with a malfunction. Here, the mode switch button itself may fail. Such a problem is "treated" by cleaning the contacts or a complete replacement. The Chinese garland, the scheme of which is standard, necessarily includes a controller. It can also deteriorate and can be replaced too. The weak link can be any of the 4 thyristors - one for each color.
Item replacement problem
To replace faulty elements, Chinese colleagues offer their own. The whole problem is that the lamps become obsolete quickly enough, and it can be problematic to find the right version of Chinese production. In this case, the domestic element base comes to the rescue. The most important thing is to choose the right analogue.

To select an analogue of the desired element, it is important to know the parameters of the Chinese product. Often on the forums they look for the PCR406J transistor. The Chinese garland, the scheme of which is made on such elements, is familiar. Only the desired element actually turns out to be a thyristor, and its Russian counterpart MCR100 is almost identical in parameters.
Looking to break the chain
What to do if no breaks are found? The scheme of the Chinese garland is simple. All bulbs are connected in series. So, if the blue line is off, you need to find at least one burned out line. There are two options.
- Check successively all the elements in the chain.
- Search for a faulty light bulb by dividing the line in half. Having found a half that does not pass current, you need to divide it in half again. And so on until a problem is found. After replacing the lamp, all pieces must be reassembled. It is better to do this with a soldering iron, but you can get by with twisting or electrical tape.

The second method can be omitted if you use a multimeter with thin needles attached to the ends of the probes. However, the veins of the conductors used in Chinese products are so thin that they can be torn even with a needle.
It happens that there is no second damaged garland and a new light bulb at hand. In this case, you can simply connect the two ends together. This is fraught with an increase in voltage on the remaining bulbs, since, according to the laws of electrical engineering, in a series circuit, the voltage is divided equally. But if you remove one or two elements, this will not greatly affect the service life. Despite the fact that the Chinese, everything works on general principles.
LED garlands
Such products have become widespread in recent years. In this regard, low-power elements appeared on the garlands instead of light bulbs. The Chinese scheme differs little from the standard one. But, given the fact that the LED is designed for a much lower voltage, each of them will have a resistor in the circuit for a 220 V network. In another option, a step-down transformer will be implemented at the input of the system.

In addition to the usual scheme, where the elements are arranged in series, there is a scheme of a Chinese garland on LEDs placed in parallel. With this option, even the burnout of several light elements at once will not introduce dissonance into the overall picture.
Advantages of LED products
The Chinese garland, the circuit of which is built on LEDs, has a number of advantages.
- Profitability. This is due to the low power consumption of LEDs. The following two advantages immediately follow from this.
- Durability. The service life of LED products is two or more times longer than the service life of incandescent lamps.
- Safety. LEDs, unlike incandescent lamps, can heat up to a maximum of 60 degrees. Therefore, they are less flammable than their counterparts.
- Brightness. Garlands on LEDs are brighter and more pleasing to the eye.
- Frost resistance. LED products can withstand temperatures down to 40 degrees below zero without a change in performance.
- Moisture resistance. Such garlands can be used to decorate bathrooms and wet greenhouses.

LED Chinese garlands are very convenient to use to decorate the outdoor part of the house. Due to the high moisture and frost resistance, such products will please the eye for a long time without repair.
Conclusion
Buying such a product, it is not always possible to please yourself and loved ones with a quality decoration. Sometimes a rather simple and cheap Chinese garland is hidden behind bright lights and attractive prices. Its scheme will be easy to learn and convenient for the application of electrical skills. Repair of the product can also bring moral satisfaction. Everyone decides for himself whether it is worth the time and effort. Or maybe it's better to immediately take the more expensive option? After all, even Chinese garlands for a high price are much better than their cheap "compatriots". The choice is yours!
 Do-it-yourself stabilizer - diagrams and recommendations on how to make a rectifier
 Voltage stabilizer circuit
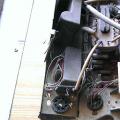 We extract radio components from various electronic trash How to make a radio receiver on a variable capacitor