How to configure the Huawei HG8245 router under Rostelecom. Huawei HG8245h: specifications, router configuration, firmware Huawei hg8245 technical specifications
Not long ago, Beltelecom began installing new and modern Huawei HG8245A and HG8245H-256M modems to its subscribers. The pleasant white body and appearance are pleasing to the eye, and the presence of two antennas provides a good Wi-Fi signal throughout the apartment.
Sometimes we have to configure Huawei HG8245A | HG8245H-256M and wi-fi. In this article, we will share with you how to configure these modem models.
Setting up the Huawei HG8245A modem | HG8245H-256M
To configure the Huawei HG8245A modem | HG8245H-256M needs to be connected to it via the wire that comes in the kit. Usually it is yellowish or gray in color, connect one end of the wire to the port LAN1, and the other into a computer or laptop.

To login to modem HG8245A enter the username telecomadmin password admintelecom and press Login.

To login to modem HG8245H-256M enter the username root and password admin and press Login.

If the window does not appear, you must enter the IP address, subnet mask, default gateway, and dns server in the network card settings.

If everything is done correctly, you will be taken to the menu. To configure it, you need to select the item WAN.
- Selecting a connection 4_INTERNET_R_VID_10.
- WAN Mode: Route WAN.
- Username: enter the contract number.
- Password: enter the password.
- Check the box SSID1 to the position selected.
- We save all entered settings by pressing the button « Apply » .

- Select an item LAN
- In the left menu select DHCP Server Configuration.
- Put a tick in the line Enable primary DHCP Server.
- Put a tick in the line Enable DHCP Relay.
- Put a tick in the line Enable Option 125.
- Enter Primary DNS And Secondary Server(as picture).
- To accept and save the settings, press the button « Apply »

Setting up Wi-Fi on a Huawei HG8245A modem | HG8245H-256M
To configure WIFI, select the tab in the top menu WLAN.
- Check the box Enable WLAN.
- Press the button NEW.
- In field SSID Name enter the name of the wireless network.
- Put a tick Enable SSID.
- Put a tick Broadcast SSID.
- Put a tick Enable WMM.
- Field Number of Associated determines the simultaneous number of connected devices.
- In field Authentication Mode choose WPA2 Pre-Shared Key or WPA\WPA2 Pre-Shared Key.
- In field Encryption Mode put TKIP&AES.
- In field WPA PreSharedKey enter the password for Wi-Fi.
- Save the settings by pressing the button « Apply ».

Set up Huawei HG8245A modem | HG8245H-256M It’s not that difficult if you do everything carefully and slowly according to the instructions written above. We hope that this article helped you and you configured your Huawei HG8245A modem.
Failed to configure?
- Check your account balance.
- Call us, we will set it up.
The products of the Chinese company HUAWEI have gained popularity all over the world, and this is not surprising - they have enviable reliability, high performance and excellent quality. HUAWEI HG8245h is another development from this company, which allows you to organize access to the network. This optical router allows you to configure the Internet using PON technology. Let's take a closer look at what features the device has and how to flash it.
Provider Rostelecom issues routers for its clients
- presence of a USB port;
- the device can be located at a distance of up to 20 km from the transceiver module;
- Wi-Fi;
- 2 POTS ports;
- 2.8*17.6*12.8 cm;
- 0...40 degrees Celsius;
- H.248, SIP protocols;
- 4 Ethernet ports;
- filter by URL, IP addresses, MAC addresses;
- port forwarding;
- 802.11 b/g/n;
- auto-adaptive port;
- VoIP, NAT;
- 60 thousand hours of adapter operation.
According to the manufacturer, the terminal is capable of operating for 23 years, and the maximum power it consumes is 15.5 W.
It is the HUAWEI HG8245h that is issued by the provider Rostelecom for its subscribers. The full name of the product is Echolife HGF8245h.
On the side of the device there are keys for WPS, reset, and Wi-Fi on/off. In addition, here you can see a BBU connector, designed for connecting a backup battery, as well as a USB connector. You can assess the battery charge level directly from the terminal interface.
Connection
Before you start experimenting with the router settings, the device should be connected to the PC and the network. To do this, connect the provider's wire to the router's optical port (located on the left). You can connect to a computer using Ethernet using a patch cord: one end of it is connected to the PC’s network card, the other to the LAN port of the terminal. Ports TEL2 and TEL1 are used if the network is configured for SmartTV or IP telephony.

Internet setup
First you need to open your browser and enter “192.168.100.1” in the line. Using this path you can enter the interface of the HUAWEI HG8245h router. The system will prompt you to enter your password and login. Under the parameters telecomadmin/admintelecom you can perform complete configuration of the equipment, and root/admin will allow you to change Wi-Fi parameters.

Once logged in, go to the “Lan Port Work Mode” item in the “LAN” section. Our task is to select the ports that will be used to connect the network. It is best to check all the ports at once, but to use IPTV services you will need to leave the last port for the set-top box.

Having done this, go to “WAN” and enter the following parameters here:
- Enable WAN;
- Service List - Internet;
- Mode - Route;
- Binding options - SSID1;
- Enable VLAN;
- IP acquisition mode - PPPoE;
- Enable NAT;
- username/pass - enter the information provided in the contract (if the document is lost somewhere, call support);
- Dial Method - Auto.

Don’t forget to also enter the VLAN ID, without which you won’t be able to create an Internet connection. A technical support specialist will tell you the correct ID. The configuration should be saved through the “Configuration File” item in the “System Tools” section.
IPTV
To set up IP television from Rostelecom for the HUAWEI HG8245h router, we recommend creating a new connection in the “WAN” section. As with the Internet settings, here you need to check the boxes next to Enable VLAN and Enable WAN connection. Fill in the remaining fields as follows:
- Mode - Bridge;
- Service List - IPTV;
- Bridge Type - IP_Bridged.
The “Blinding options” parameter is responsible for the port through which the IPTV set-top box will operate, so you need to select a free port (LAN4). It is also important to set priority 4 opposite “802.1p”. The main parameter is the VLAN ID, it is issued by the provider.

In the next step, go to “IGMP Configuration” in the “Network Application” section. All you need to do here is set the Snooping parameter opposite IGMP Work Mode, and enable IGMP (IGMP Enable).
Wi-Fi setup
First you need to open the WLAN tab. Here, the developers of the HUAWEI HG8245h router suggest naming your network (SSID Name) and choosing the encryption type for it. By setting the Authentification Mode parameter to “WPA/WPA2”, a menu with security settings will open. All that remains is to enter the password in the WPA PreSharedKey field. Remember that the boxes next to the WMM Enable, Broadcast SSID and Enable SSID fields must be checked.

HUAWEI HG8245h, provided by Rostelecom, has a short Wi-Fi range, it all depends on the number of networks located around, as well as the thickness of the walls in the house or apartment.
To activate the access point, reboot the equipment.
Firmware
The firmware of your HUAWEI device can be updated to the latest version, this will allow the router to work as efficiently as possible. The firmware is regularly posted on the manufacturer’s website, so first go there and download the file to your PC.

After completing these steps, find the “Firmware Upgrade” item in the system interface tools. The instructions here are elementary - you need to specify the path to the firmware file and start the update process.
Fiber optics is finally coming to every home. Goodbye to low speeds, high ping and freezing of DSL modems. PON technology is somewhere at the “set it and forget it” level in terms of reliability. This manual contains the Talmud of fresh and up-to-date information on the Huawei HG8245H terminal.
Huawei is one of two network monsters that have proven their profitability in the network technology market, along with Cisco. The American company also has a huge market in the Russian Federation, thanks to its excellent quality and huge base of system integrators. A Cisco partner in Russia organizes projects to build SCS in various areas of business. Rostelecom, by the way, also actively uses Cisco equipment at the aggregation level.
ATTENTION! IMPORTANT INFORMATION! On September 02, 2015, 8245H terminals were updated on Rostelecom networks due to problems with the Wi-Fi network among subscribers (small coverage radius). The firmware remains the same - S106. But perhaps they closed the loophole with the superuser. Meanwhile, those who had the S122 firmware continue to work as normal.
Who has firmware V3R015C10S120 - try the previously documented password - telecomadmin/admintelecom
Appearance of HG8245H
Under the spoiler:
Show photo


PON and LOS indicators
PON/LOS
Show
Doesn't light / Doesn't light— No connection to OLT (with provider)
Flashing quickly / Off— Attempting to connect to the OLT (with the provider)
On / Off— Connection with the provider is established (Terminal operating mode)
Off / flashes slowly (every two seconds)— Low optical signal level. You need to check the connection, optical connector, etc.
Flashing fast / flashing fast— the terminal is faulty, you should contact Rostelecom.
Specifications Huawei HG8245H
Terminal characteristics
Dimensions: 28mm x 176mm x 128mm
ISP port: GPON (SC/APC type connector)
Maximum speed from the provider: Upload (Tx) - 1.2 Gigabit/s, receive (Rx) - 2.4 Gigabit/s
Maximum distance of the terminal from the transceiver module in the OLT (from apartment to provider, roughly speaking) : 20 kilometers
User side ports:
— 2 POTS ports ( Plain old telephone service — telephony)
- 4 GE (Gigabit Ethernet - data transmission standard (1000BaseT) over twisted pair, speed up to 1 gigabit). The operating mode is auto-adaptive (automatic detection of the speed at which the port operates). The maximum length of a connected device from ONT is no more than 100 meters.
— 1 USB port
Terminal performance (: ~23 years
Power adapter performance (Mean time between failures, MTBF) : 60,000 hours
Maximum power consumption: 15.5 Watt
Device operating temperature: from 0 to 40 degrees Celsius
Gateway capabilities: NAT, Internet, VoIP, DMZ, Port Forwarding
Standard Wi-Fi operation: 802.11 b/g/n
Safety: Filtering by MAC addresses, IP addresses, URLs. Anti DDoS system.
Instructions issued by the provider
In pictures, under the spoiler:
Instructions from the provider


Instructions in the form of a PDF file from Rostelecom:
Setting up the HG8245H
Before you start! IMPORTANT! To configure services yourself, you need to know the VLAN ID of each of them! If you have not yet reset the terminal settings to factory reset, then they are in the menu item WAN -> WAN Configuration. It is also worth considering that the settings are available only in super-user mode (how to log in through such an account is described in the section "Firmware"). If you still can’t set up the terminal yourself, just call 8 800 100 08 00 and inform about the need to reactivate your services (this is done by level 2 technical support). After this is completed (usually done on the same day), all settings will again be on the terminal.

1. Internet settings
View settings
On the menu WAN -> WAN Configuration press the button New:


Explanation:
2. 802.1p - priority. For the Internet service, by default it should be 0
4. A check mark on the SSID1 item means that the Internet will work via Wi-Fi. Accordingly, if you do not need Internet via a wireless network, you don’t have to check the box
2. Setting up for IP-TV
View settings
On the menu WAN -> WAN Configuration press the button New. Next, set the parameters as in the picture below:

Explanation:
1. VLAN ID, as mentioned above, you most likely have your own. With the fact that the Internet will not work for you in the picture.
2. 802.1p - priority. For the IP-TV service, the default should be maximum, i.e. 7
3. If you have not one, but several receivers, check the boxes in the Binding Options item according to the number of consoles, i.e. if there is one, then only LAN4, if there are two, then check the boxes for LAN3 and LAN4, if there are three – LAN2, LAN3, LAN4
3. Setting up for telephony
View settings
Telephony settings cannot be made without a special password that is registered by the SIP protocol. It fits on the menu Voice -> Voice Basic Configuration and no one, especially the provider’s technical support, will tell you. Therefore, it is not possible to set up telephony yourself.

4. How can I make it possible to use all ports for the Internet?
View settings
To do this you need to go to the menu item LAN -> LAN Port Work Mode and check all the boxes. Then, when editing or creating a WAN connection, Internet services in the menu Binding Options also check the boxes on those ports that are needed for the Internet, respectively.


5. How to do port forwarding?
View settings
We need to go to Forward Rules -> Port Mapping Configuration. Click NEW. WAN Name- select the Internet service, External Start Port- [port no.], Internal Start Port[port no.], Internal Host— internal IP address of the host, Protocol — TCP, External end port- [port no.], Internal end port- [port no.], Enable Port Mapping- put a tick. Click Apply.
Problem with speed or access via WI-FI
If one of your devices does not provide the required speed or cannot connect to the Wi-Fi access point of the optical terminal, then you should do the following:
1. Enable WWM mode
WLAN and select on the left WLAN Basic Configuration:


2. Set the channel width to 40Mhz
To do this, go to the terminal settings at 192.168.100.1 (username - root, password - admin). Next we go to the menu WLAN and select on the left WLAN Advanced Configuration:

Finding the point Channel Width and set the item 40Mhz:

3. Set the radio channel manually + select a region.
To do this, go to the terminal settings at 192.168.100.1 (username - root, password - admin). Next we go to the menu WLAN and select on the left WLAN Advanced Configuration. On the menu Channel choose a number 6, on the menu Regulatory Domain - Russia. Click Apply

4. Disable encryption.
Optical terminals tend to “mope”, for no specific reason, on specific devices (laptops, phones). Therefore, if your device stubbornly cannot connect (or connects without access to the Internet), then you should try disabling encryption.
To do this, go to the terminal settings at 192.168.100.1 (username - root, password - admin). Next we go to the menu WLAN and select on the left WLAN Basic Configuration. In field Authentication mode choose Open. Click Apply

If this method helped, then you still need to think about protection. Another method of protection involves filtering by mac address. There is a menu item for this Secutiry -> Mac Filter Configuration. There in the line Filter Mode we choose Whitelist. And we enter the MAC addresses of devices that will be allowed to access the Internet from this access point.
Firmware HG8245H
The problem with flashing this terminal from HG8245 without letter values is that the telnet functionality has been greatly reduced - there is no access to the shell. Therefore, it is not possible to “pull” the superadmin password from the config in order to download the firmware. The only opportunity to flash hg8245h will be if the standard password from the developers is suitable (see below)
Why flash the terminal? This can help with problems such as:
1. Low access speed
2. Unstable operation of the terminal
3. Unstable Wi-Fi
4. Superadmin rights for fine tuning.
0. Beginning
We look at the current firmware version in the menu Status -> Device Information
Screenshot

1. Download the firmware
At the time of writing, the latest firmware version is HG8245HV300R013C10SPC122
2. Log into the terminal as a superuser.
The standard root/admin account will not give us the opportunity to download new firmware - there simply won’t be such an option there. Therefore, we need the rights of the so-called. super administrator. The login/password combination worked for me - telecomadmin/
NWTF5x%RaK8mVbD. We enter this data on the authorization page at 192.168.100.1
If your login and password do not work, try the following combinations:
Logins and passwords
telecomadmin\admintelecom
telecomadmin\NWTF5x%RaK8mVbD
telecomadmin\NWTF5x%
telecomadmin\nE7jA%5m
root\admin
If none of the passwords match, try to “get” the password via telnet, if it is not locked on the terminal:
http://4pda.ru/forum/index.php?showtopic=557472&st=760#entry426679333. Save the terminal configuration to a file.
Why is this necessary? The fact is that after flashing the firmware, the terminal settings will be reset to factory settings. Setting up the terminal yourself will be very problematic without data that can only be provided by the provider, who certainly will not be happy that you are delving into the inside of the device. Thus, by saving the HG8245H config, we make a kind of backup of all settings. The file is saved as a superuser (see point 1)
Go to the menu System Tools -> Configuration File. Next, press the button Download Configuration File

4. Download new firmware
Attention! It is recommended to carry out this operation by connecting the terminal and PC/laptop with a wire (via LAN1). Do not flash your device over Wi-Fi.
Let's go to System Tools -> Firmware Upgrade. Press the button Browse and select our pre-unpacked firmware.


5. Restoring the functionality of the services (downloading the config)
If after flashing your services stop working, then you need to download the configuration file that we saved earlier (see point 2). You need to restore the configuration as a superuser. So when you dial 192.168.100.1, enter your login/password again - telecomadmin/
NWTF5x%RaK8mVbD. Go to the menu System Tools -> Configuration File. Next, press the button Browse at the bottom of the page near the field Configuration File. Select the desired file and then click Upgrade Configuration File

Telnet can be enabled in the tab Security -> ONT Access Control Configuration. You can only enable it as a superuser. It is worth considering that in the HG8245H model telnet has been seriously curtailed; there is no longer access to the shell.

Often when users first get their hands on Huawei HG8245 router, they believe that now their era of ruling the world has come and to take over the Internet space they will only need to insert a plug into the socket.
However, it is not. To take the first step towards this, you will first have to study, and then.
Design
It is worth noting that the selected router is a fairly good and very popular option due to promotional offers from some service providers.
The Huawei HG8245 router allows you to get the maximum of services provided by the provider, which is what makes it so attractive.
In particular, it can be used not only for, but also as a high-quality IP-TV receiver.
The HG8245 router belongs to the category of optical terminals, and its design is equipped with 4 ports for connecting wires (LAN). and a pair of IP telephony ports.
Some modifications also have, which allows you to connect a wider range of devices, including.
The design of the router is modern and attractive, and you can find models in both dark and light versions.
Its design is compact and extended to 19.5 cm, and the thickness is 3.5 cm.
Thanks to the presence of special mounting holes in the lower part of the case, it can not only be installed on flat horizontal surfaces, but also mounted on walls.
Thanks to its design features, the HG8245 router allows you to connect not only a standard set of office devices, but also IP-TV.
If desired, the functionality of the router can be increased by connecting a USB drive ().
And for additional security, the manufacturer suggests using a proprietary one.

Rice. 1 – Router appearance
First startup and initial setup
The router is connected using two wires. One of them must be optical and connected to the corresponding Optical port.
The other one is connected to the LAN input, and it is to it that the connection must be made when turning on for the first time. After this, the Huawei HG8245 router can be connected to the network.
To supply power you need to use the corresponding button on the case. In order for the router to perform its functions, it must be configured after the initial startup.
After connecting the cable to your PC or laptop, you will need to launch a browser, for example, Internet Explorer or.
In the search line to open the WEB settings interface you will need to enter the local address " http://192.168.100.1", which will allow you to download a form in which you will need to enter registration data.
Depending on the firmware version, the login/password pair may differ. It could be a couple root And admin or telecomadmin And admintelecom.
Try entering a second pair if the first one did not work and the settings window did not load.

Rice. 2 – Welcome window of the WEB interface
Working with WEB interface
Once the settings page has finished loading, you can change the operating parameters from factory default to custom. Initially, you need to enable the LAN ports.
This will require using the "WAN" menu section. To activate them, you need to check the boxes.
On the tab, the ports will be displayed as a line with their corresponding names. To confirm the changes you will need to click “Apply”.
Then, using the “WAN” menu section in the “Modifications” subsection and “Route” in the “servicelist” list, you need to select “INTERNET”.
In order for all entered data to be saved correctly, you need to make a mark in the “System tools” section using the “Save configuration” element.

Rice. 3 – Interface tab “System Tools”
Tweaking your router
The latest versions of popular operating systems make it possible to do without fine-tuning the connection. The appropriate network parameters are set automatically.
But all rules have exceptions, and if automatic does not occur, you will have to carry out a number of operations.
In the open window you will need to select the “Create a new connection” item, and in the dialog - "High Speed".
The login and password received from the service provider must be specified in the following prompts of the setup wizard. There you will also need to enter the WLAN ID, which is also provided by the provider.
Sometimes this is not enough to use the Internet, and therefore you have to add additional parameters and options to the WEB interface.
After launching the Huawei HG8245 profile in the “WAN” section, you will need to fill in the “Username” (login) and “Password” (password) received from the provider.
Upon completion of the operation, you need to create a new connection by clicking “New”.
On the “Mode” and “Route” tabs, select options in the lists: “service list” - “INTERNET”, connection type - “PPPoE”. The “username” and “password” are re-entered.
In the “Blinding options” subsection you will also need to mark the ports and WLANID that were initialized at the initial configuration stage.
For the settings to be saved, you will need to click “Apply”.
At the final stage, you will need to reboot the device, be it a laptop or PC, and use the cable through the “Optical” connector.

But to install it, you must first download it, indicating the full model name indicated on the package.
After downloading, the firmware will be contained in an archive that will need to be unpacked.
To install a new version of the program, you will need to launch the WEB interface. Then you will need to go to the “System tools” tab and click “Update”.
According to the wizard, you need to specify the location of the unpacked firmware and only then start the update.
Important: upon completion of the firmware update, all user settings are erased, so all data will have to be entered again.

Detailed instructions for opening ports on a Huawei hg8245 modem
Setting up Huawei HG8245 Router. [Detailed instructions]
To connect subscribers to the Internet via fiber optic cable (GPON technology), Rostelecom most often uses Huawei optical terminals. Despite the controversy surrounding the quality of this equipment, practice shows that it is completely justified for home needs. At the very least, situations in which the user needs to independently change the configuration of this company’s routers arise extremely rarely. Problems may arise only when connecting to a wireless network. In this case, we have prepared for you instructions for setting up a Huawei hg8245 router from Rostelecom.
What settings can you make yourself?
Devices for connecting access to the global network using GPON and FTTB technologies are called optical terminals. But in the text we will use the word “router”, since most readers are more familiar with it. When connecting to the Internet for the first time, Rostelecom takes care of how to set up the Huawei hg8245 router on its own. And don’t be surprised by the fact that technicians do not go to the settings panel when installing equipment. Routers for optical Internet are usually flashed remotely.
After installing and connecting the device in your apartment, it automatically contacts the provider and downloads the configuration necessary for operation. This approach reduces the likelihood of errors during settings to zero and ensures that all basic parameters will be set on the router in the same way as on the station. Most often, at the end of booting, a new password is set on the device, different from the standard one. This is done so that the subscriber cannot get into the configuration interface and make any changes to the equipment configuration.
If your Internet suddenly stops working, and rebooting the power supply equipment does not bring results, call technical support. The second line operator will start remote configuration of the Rostelecom Huawei router, and the device, as during the initial installation, will receive all the necessary data from the station.
Do not try to change the basic configuration yourself! Firstly, it will not coincide with the one indicated at the station. Secondly, the cause of the problem may not be on your equipment at all, but on the provider itself. But you can set up a wireless connection on routers of this brand yourself. Below we will describe in detail how to do this.
How to log into a Rostelecom Huawei router
To change the router configuration, there is a very convenient and intuitive settings interface. To get into it, open your usual browser (the program through which you usually work with the Internet) and enter the following combination of numbers in the line at the top of the window - 192.168.100.1.
Attention: the period after the last unit is not needed!
These numbers are the IP address of the Rostelecom Huawei router. After typing them, press the Enter key, and the welcome window of the settings system will open in front of you. In the “Account” field enter “telecomadmin” (without quotes), and in the Password field – “admintelecom”, also without quotes. Click the Login button and you will be taken to the setup interface.

The above login and password are standard for Rostelecom optical equipment. But if the credentials were changed during the initial firmware, they may not work. How to enter the settings of the Rostelecom Huawei router in this case? Try a few more password options, which are recommended on the provider’s forums:
- NWTF5x%RaK8mVbD;
- NWTFx5%;
- nE7jA%5m.
These passwords work in conjunction with the telecomadmin login. If the system recognizes them as incorrect, try changing your login to root. The password for it will be admin. If that pair does not work, call RTK technical support at 8-800-1000-800 and ask the operator to provide you with information to enter the equipment settings. But keep in mind that the first line of technical support, where you will be directed to by the telephone number indicated above, does not have such information. They will fill out an application for a consultation with technicians, and you will have to wait about a day for a call from them.
How to set up wi-fi on the Rostelecom Huawei HG8245 router
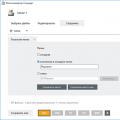
If everything went well with the credentials, setting up a Huawei router from Rostelecom to distribute the Internet via Wi-Fi will not take much time. Once in the web interface, select the WLAN tab in the top menu. Clicking on it will take you to the wireless network settings page. The screenshot below shows the buttons and fields you need to work.

First of all, activate the Enable WLAN checkbox (in other words, click the checkbox next to this inscription). Next, click the New button to activate the fields to fill out. In the SSID Name line (in some firmware versions it may be called Service Set Identifler), enter the name of your Wi-Fi network. You come up with it yourself. Next, check the Enable SSID, Broadcast SSID and WWM Enable checkboxes. In the line marked Associated Device Number, enter the number of users who can simultaneously work on your Wi-Fi network. You can see the maximum value of this parameter in the instructions for the Huawei router from Rostelecom.
To save the declared parameters, click the Apply button at the bottom of the window. Next, in the drop-down lists, set the values indicated in the screenshot above. Enter your Wi-Fi network password in the Pre-Sared Key line and press the button again to save the settings.
Attention: the Wi-Fi password is not the Internet password! It is not specified in the agreement with the provider, and Rostelecom does not have any information about it. You can come up with this password yourself, or use the factory key of your router. For Huawei routers from Rostelecom, the password for the wireless network is usually indicated on a label on the back of the device, preceded by the words pass or key.

Next, go to the WAN tab of the top menu. Here, in the field under the Connection name heading, you need to select the name of your connection, and at the bottom of the page, check the box next to SSID1. Once done, click Apply to save your configuration changes.
The final stage of setting up a Rostelecom Huawei router
To complete setting up the Huawei hg8245 router from Rostelecom for Wi-Fi distribution, go to the LAN item in the main menu. In the column that appears on the left, select the DHCP Server Configuration line. A new window will open in front of you, in which you will need to check the boxes opposite the words “Enable primary DHCP server” and “Enable DHCP L2Relay”.
Just below you will see lines labeled Primary DNS Server and Secondary DNS Server. In them you will need to enter sets of numbers separated by dots, indicating the addresses of DNS servers for your network. These parameters are unique for each macro-regional branch. It is better to clarify them before setting up the Huawei router from Rostelecom on the company’s hotline, or on the website in the “Support” -> “Home Internet” -> “Equipment” section. After setting all the values, do not forget to save the settings with the Apply button.
And the final touch - go to the System Tools tab and select the first item “Configuration File” in the menu on the left. In the updated window, click the large Save Configuration button to save all the parameters you entered in a separate file. After this, you can exit the web interface - the setup is complete.
Attention: if, when exiting the settings mode, the modem or computer asks you to reboot, agree. Some equipment models require this for the updated settings to take effect.
As you can see, Huawei, or, as some call it, Highway router, is easy to set up on Rostelecom. Some DSL models require much more movement from the user when setting up. The main thing is to check with your provider all the data necessary to change the configuration in advance. Then the entire setup process will take you no more than 15 minutes.
 How to make a multi-page TIF file
 What is the MSG file extension?
 Search engine spam: what it is, main types and methods of detection