View ip cameras via rtsp. RTSP video surveillance
According to some data, to date, the world has installed hundreds of millions IP cameras for video surveillance. However, far from all of them, the delay in video playback is critical. Video surveillance, as a rule, occurs "statically" - the stream is recorded in storage and can be analyzed for movement. For video surveillance, many software and hardware solutions have been developed that do their job well.
In this article, we will look at a slightly different application. IP cameras, namely the use in online broadcasts, where required low communication delay.
First of all, let's clear up a possible misunderstanding in the terminology about webcams and IP cameras.
Webcam is a video capture device that does not have its own processor and network interface. The webcam requires connection to a computer, smartphone, or other device that has a network card and a processor.

IP camera is a standalone device that has its own network card and processor to compress the captured video and send it to the network. Thus, the IP camera is a stand-alone mini-computer that fully connects to the network and does not need to be connected to another device, and can directly broadcast to the network.
Low latency(low latency) is a fairly rare requirement for IP cameras and online broadcasts. The need to work with low latency appears, for example, if the source of the video stream actively interacts with the viewers of this stream.

Most often, low latency is needed in gaming use cases. Examples include: real-time video auction, live dealer video casino, interactive online TV show with a host, remote control of a quadcopter, etc.

A live online casino dealer at work.
An ordinary RTSP IP camera, as a rule, presses video into H.264 codec and can operate in two modes of data transport: interleaved And non-interleaved.
Mode interleaved the most popular and convenient, because in this mode, the video data is transmitted via TCP protocol within the network connection to the camera. In order to distribute from an IP camera to interleaved, you just need to open / forward one RTSP port of the camera (for example, 554) to the outside. The player only needs to connect to the camera via TCP and pick up the stream already inside this connection.

The second operating mode of the camera is non-interleaved. In this case, the connection is established using the protocol RTSP/TCP, and the traffic goes already separately, according to the protocol RTP/UDP outside the created TCP channel.

Mode non-interleaved more favorable for broadcasting video with minimal delay, as it uses the protocol RTP/UDP, but at the same time is more problematic if the player is located behind NAT.

When connecting to a player's IP camera located behind NAT, the player must know which external IP addresses and ports it can use to receive audio and video traffic. These ports are specified in the text SDP config that is sent to the camera when an RTSP connection is established. If the NAT was opened correctly and the correct IP addresses and ports are defined, then everything will work.
So, in order to take video from the camera with minimal delay, you need to use non-interleave mode and receive video traffic over UDP.
Browsers do not directly support the RTSP/UDP protocol stack, but support the embedded technology protocol stack WebRTC.

Browser and camera technologies are very similar, in particular SRTP it's encrypted RTP. But for correct distribution to browsers, the IP camera would need partial support for the WebRTC stack.
To eliminate this incompatibility, an intermediate relay server is required, which will be a bridge between the protocols of the IP camera and the protocols of the browser.

The server takes the stream from the IP camera to itself by RTP/UDP and gives it to connected browsers via WebRTC.
WebRTC technology works according to the protocol UDP and thus ensures low latency in the direction Server > Browser. The IP camera also works on the protocol RTP/UDP and provides low latency in direction Camera > Server.
The camera can give a limited number of streams, due to limited resources and bandwidth. Using an intermediate server allows you to scale the broadcast from an IP camera to a large number of viewers.
On the other hand, when using the server, two communication legs are enabled:
1) Between viewers and server
2) Between server and camera
Such a topology has a number of "features" or "pitfalls". We list them below.
Pitfall #1 - Codecs
The codecs used can be an obstacle to low latency and cause a degradation in overall system performance.For example, if the camera gives a 720p video stream in H.264, and a Chrome browser is connected on an Android smartphone that only supports VP8.

When transcoding is enabled, a transcoding session must be created for each of the connected IP cameras, which decodes H.264 and encodes in VP8. In this case, a 16-core dual-processor server will be able to serve only 10-15 IP cameras, with an approximate calculation of 1 camera per physical core.
Therefore, if server capacities do not allow transcoding the planned number of cameras, then transcoding should be avoided. For example, serve only browsers with H.264 support, and offer the rest to use a native mobile application for iOS or Android, where there is support for the H.264 codec.

As an option to bypass transcoding in a mobile browser, you can use HLS. But HTTP streaming is not at all low latency and cannot currently be used for interactive streaming.
Pitfall #2 - Camera bitrate and loss
UDP protocol helps to cope with the delay, but allows video packet loss. Therefore, despite the low latency, with large network losses between the camera and the server, the picture may be corrupted.
In order to eliminate losses, you need to make sure that the video stream generated by the camera has a bit rate that fits into the allocated bandwidth between the camera and the server.
Pitfall #3 - Viewer bitrate and loss
Each broadcast viewer who connects to the server also has a certain download bandwidth.If the IP camera sends a stream that exceeds the capabilities of the viewer channel (for example, the camera sends 1 Mbps, and the viewer can only accept 500 kbps), then there will be large losses on this channel and, as a result, video friezes or strong artifacts.

In this case, there are three options:
- Transcode the video stream individually for each viewer at the required bitrate.
- Transcode streams not for each connected, but for a group of a group of viewers.
- Prepare streams from the camera in advance in several resolutions and bitrates.

Second option is to reduce the load on the server CPU using transcoding groups. The server creates several groups by bitrate, for example two:
- 200 Kbps
- 1 Mbps

Third option involves a complete rejection of transcoding on the server side and the use of already prepared video streams in various resolutions and bit rates. In this case, the camera is configured to output two or three streams with different resolutions and bit rates, and viewers switch between these streams depending on their bandwidth.
In this case, the transcoding load on the server goes away and shifts to the camera itself, because the camera is now forced to encode two or more streams instead of one.

As a result, we considered three options for adjusting to the bandwidth of the viewers. If we assume that one transcoding session takes 1 server core, then we get the following table of CPU load:
The table shows that we can shift the transcoding load to the camera or transfer the transcoding to the server. Options 2 and 3 seem to be the most optimal.
Testing RTSP as WebRTC
It's time to run some tests to reveal the real picture of what is happening. Let's take a real IP camera and test it to measure broadcast latency.Let's take an ancient IP camera for testing D-link DCS-2103 with the support RTSP and codecs H.264 and G.711.

Since the camera lay for a long time in a closet with other useful devices and wires, I had to send it to reset by pressing and holding the button on the back of the camera for 10 seconds.
After connecting to the network, the green light on the camera turned on and the router saw another device on the local network with an IP address of 192.168.1.37.
We go to the web interface of the camera and set the codecs and resolution for testing:

Next, go to the network settings and find out the RTSP address of the camera. In this case, the RTSP address live1.sdp, i.e. The camera is available at rtsp://192.168.1.37/live1.sdp

Camera accessibility can be easily checked with VLC player. Media - Open Network Stream.


We made sure that the camera works and gives video via RTSP.
We will use Web Call Server 5 as a server for testing. This is a streaming server with support RTSP and WebRTC protocols. It will connect to the IP camera by RTSP and take the video stream. Further distribute the stream by WebRTC.
After installation, you need to switch the server to RTSP mode non-interleaved which we discussed above. This can be done by adding the setting
rtsp_interleaved_mode=false
This setting is added to the flashphoner.properties config and requires a server restart:
Service webcallserver restart
Thus, we have a server that works according to the non-interleaved scheme, receives packets from the IP camera via UDP, and then distributes via WebRTC (UDP).

The test server is located on a VPS server located in the Frankfurt data center, has 2 cores and 2 gigabytes of RAM.
The camera is located on the local network at 192.168.1.37.
Therefore, the first thing we need to do is forward port 554 to 192.168.1.37 for incoming TCP/RTSP connections so that the server can connect to our IP camera. To do this, add only one rule in the router settings:
The rule tells the router to redirect all incoming traffic on port 554 to 37 - the IP address.
If you have a friendly NAT and you know the external IP address, then you can start testing with the server.
The standard demo player in the Google Chrome browser looks like this:

To start playing an RTSP stream, you just need to enter its address in the field Stream.
In this case, the stream address: rtsp://ip-cam/live1.sdp
Here ip cam this is the external IP address of your camera. The server will try to establish a connection to this address.
VLC vs WebRTC latency testing
After we configured the IP camera and tested in VLC, set up the server and tested RTSP flow through the server with distribution by WebRTC, we can finally compare delays.To do this, we will use a timer that will show fractions of a second on the monitor screen. Turn on the timer and play the video stream simultaneously on VLC locally and on the Firefox browser via a remote server.
Ping to server 100ms.
Ping locally 1ms.

The first timer test looks like this:
On a black background is the original timer, which shows zero delay. Left VLC, on right Firefox receiving WebRTC stream from a remote server.
| Zero | VLC | Firefox, WCS | |
| Time | 50.559 | 49.791 | 50.238 |
| latency ms | 0 | 768 | 321 |
We took a few shots to capture the delay values.
RTSP (Real Time Streaming Protocol) is a real-time streaming protocol that contains a simple set of basic commands for controlling a video stream.
Connecting RTSP sources and IP cameras in a video conference
The RTSP protocol allows any TrueConf user to connect to IP video cameras and other media content sources broadcasting using this protocol to monitor remote objects. Also, the user can connect to such cameras to broadcast images during a video conference.
Thanks to the support of the RTSP protocol, TrueConf Server users can not only connect to IP cameras, but also broadcast video conferences to RTSP players and media servers. Read more about RTSP broadcasts.
Benefits of using IP cameras with TrueConf software solutions
- By installing an IP camera in an office or industrial workshop and connecting to it at any convenient time, you can monitor the production process of your company.
- You can conduct round-the-clock monitoring of remote objects. For example, if you are going on vacation and do not want to leave your apartment unattended, just install one or more IP cameras there. By making a call to one of these cameras from your PC with the TrueConf client application installed, you can connect to your apartment at any time and see what is happening there in real time.
- TrueConf client applications for Windows, Linux and macOS provide all users with the ability to record video conferences, thanks to which you can record any events during video surveillance and receive documentary evidence of them.
Comfortable viewing of video broadcasts or can be configured using software multimedia players on your personal computer. Today we will look at how to set up an RTSP stream for Dahua Technology network equipment in one of the most popular VLC Media Player.
RTSP (Real Time Streaming Protocol - real-time streaming protocol) is a protocol that allows the user to remotely play a stream of multimedia data (audio and video) using a hyperlink and a multimedia player (in our case, VLC Media Player).
If you need to set up a video stream, use the following steps:


- First of all, you need to download and install VLC Media Player, which is available on the official website for free.
- Click on the menu item Media (Media) - Open Network Stream (Open URL).
- Enter the RTSP network address in the prompt line.
- Press the play button when the video image appears on the screen.
Link decryption RTSP
Example:
rtsp:// :@:/cam/realmonitor?channel= &subtype=
Where :
rtsp://admin: [email protected]:554/cam/realmonitor?channel=1&subtype=1
Dahua Technology IP video cameras support TCP and UDP data transfer protocols. If port 554 has been changed, change it in the corresponding field of the camera settings (web interface).

If you encounter any problems with setting up an RTSP stream, please refer to the appropriate section.
 RTSP video surveillance
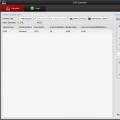 Broadcasting a video stream from an IP camera using WebRTC
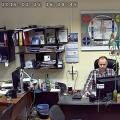 Why doesn't more always mean better?