Recording from ip camera to ftp. Setting up a backup to an FTP server (RVi)
Do you want to create an online store for yourself, but you do not have special programming skills? Now absolutely everyone has the opportunity to create their own online store and no knowledge of HTML or PHP is required.
You can open an online store with a forum for free right now!
In just a few minutes, you can create an online store for your trading company for free. To fully manage its structure and content, no special knowledge is required - you will receive a convenient and at the same time multifunctional admin panel for managing your store. An easily managed and controlled site makes it possible to build a store for yourself and for business tasks!
You have unlimited opportunities to use a ready-made online store, whether it is a clothing store, an online shoe store, children's online stores, an online phone store or an online bookstore.
How to create an online store
Creating an online store is very simple. To do this, just select a name for the store from those not yet taken and register. After registering and confirming your email, you need to log in to the system by entering the name of the store and the password specified during registration, your store immediately becomes available on the Internet at .
You will receive a ready-made online store, a store control panel in which you can customize its appearance, prepare an assortment of products you offer and create the store pages you need. A detailed system of traffic statistics for your online store will become available to you, with the help of which you can accurately track where your potential customers come from.
You can also connect a forum for your online store completely free of charge, where you can communicate with your customers about the conditions of the store, products and promotions, and much more.
Fill your online store with goods and start trading! You will be able to fully manage the store, and our specialists will provide technical support.
To get acquainted with the features of the Store Builder without registration, log in to the system demo and password 7910
Distinctive benefits of using the free online store builder from 7910 e-commerce:
Limitations of the free version of stores
You can remove all these restrictions using the paid services of our company.
Create an online store and expand your online sales!
Get Ready for Success
You must be prepared for the fact that a huge number of Internet users will find out about you, many of whom will become your customers.
We wish you success and hope that your online store created in our system will become a good basis for the further development of your business!
If you have already decided to create an online store, you need to
To ensure maximum security for storing video recordings, it is recommended to additionally use storage for video recordings from all kinds of force majeure circumstances. Reservation of video recordings is usually carried out using an FTP server, because all modern video recorders (or almost all) support this protocol for transferring video files to a server. In this case, I recommend using the FTP server somewhere in a remote location, that is, it is advisable not to locate it in the same location where video surveillance is being conducted. And you should provide for the outgoing speed of the Internet, do not forget about it. Below I will tell you how to install and configure an FTP server using FileZilla software, but I recommend that you allocate an old computer for this task, because. it makes no sense to use a modern productive system unit. And ideally, if you have financial resources, I recommend buying a network-attached storage (NAS) with support for the FTP protocol, and in this case you will get a compact and easy-to-use "server" for backing up video recordings.
And so let's start installing and configuring FileZilla Server. Download FileZilla Server and run the installer. And you accept the license agreement.
Click Next

Here you are asked to specify the installation path. Click Next

Here, too, click Next, in this case, filezilla will be installed as a service, so after rebooting the ftp server will automatically start

Click Install, ftp server will be launched for all users of your computer

Installation completed, let's get started

A shortcut will appear on the desktop to connect to the ftp server so we can set it up. We connect to the FTP server management console, just click connect

The first step is to create a login and password, under which you can connect to the FTP server and start uploading files (that is, our DVR). To do this, as in the screenshot, click Edit-Users

Where the Users field, click Add and, as below in the screenshot, specify the username (for example, nvr_user), under which they will connect


In the Shared folders tab, click Add and specify the folder (previously created) in which videos from the DVR will be uploaded

Next, you need to specify the access rights to this folder for the user nvr_user, because. video files will be uploaded, you need write permissions to this folder. Therefore, specify the rights as below in the screenshot and click ok.

This completes the FTP server setup, you can check it. To check, you can write the following on the same computer in the browser in the address bar: ftp://127.0.0.1 press Enter and you will be asked for a login and password. Login nvr_user, the password you specified. And do not forget that if there is a connection to the FTP server from outside (from the Internet), then on the router you will need to configure tcp forwarding on port 21. You can learn how to set up port forwarding on different routers.
Setting up backup to an FTP server for RVi DVRs earlier
Dear friends!
Today we want to tell you how to set up DVR archive recording directly to a remote FTP server!
For this we need:
1. Video surveillance system (, etc.)
2. Computer
3. Internet
4. Hosting (for example, we used free hosting)
So, first we need to register a hosting account (if you don't already have one) on one of the hostings. Absolutely any hosting will do, here the choice is entirely yours.
Attention! All hostings are different from each other and the process of ordering and setting up can be very different from those described below! For smooth operation, we highly recommend using verified hostings. We chose Hosting for trial example.
We will show you the registration procedure for free hosting Hostinger:
1. We go to the Hostinger website.

2. Go to the Order tab, fill in the form fields and click the Create Account button.

3. After you click on the Create Account button, you will receive a message stating that an email has been sent to the email address you specified to confirm your account. Open your mailbox, find this letter and do everything as it is written there (just follow the link in the letter)


5. After pressing the Order button, a window with hosting account settings opens. Here you need to select the type of Domain (we chose a subdomain for a free demonstration), enter the subdomain itself (the text that will be written in the address bar of the browser), enter or generate a password and click the Continue button.

6. After pressing the button, a window will appear in which the selected domain, tariff plan and cost will be indicated (in our version it is free) and you will be asked to confirm the order. Click on the Captcha and click the Order button.

7. After that, you will see a message that the account has been successfully created. The status will be: Pending installation.

8. Refresh the page after a couple of minutes. You will see the Active status.

9. Click on the plus sign and go to the control tab.

10. You will see the hosting account control panel.

11. Find the Files section on the panel and navigate to File manager.

12. Click: Open File Manager.

13. In the window that opens, right-click and create a new folder where your DVR will record files.

14. Name the created folder as you see fit.

15. After you have named the folder, return to the hosting account management page, find the Files section and go to the FTP Access tab.

16. In the opened window you will see the FTP access settings of your hosting account. You need to enter them in the DVR settings.

17. Now you need to go through the WEB interface to the settings of your DVR.
In the settings, go to the Network - FTP tab where you will need to do the following:
1. Enter the IP address of our FTP server
2. Specify Port (default 21)
3. Enter Login and password to access your FTP
4. Enter the name of the previously created folder for recording the archive
5. Specify the file size (file length) in Megabytes
6. It is also necessary to turn on the recording mode (permanent, motion detection, alarm) on the cameras we need and select the recording period.

Ready! Now your DVR will start transferring data to the FTP server you created, by logging into the hosting account in the folder you created, you will see the video files from your DVR.
Modern servers that are designed for video surveillance cameras allow you to monitor the desired object with greater productivity and increased comfort. Depending on the models of video servers offered on the market ten years ago, the new servers ensure the safety of information much better.
Users who plan to create a video surveillance system on their own in order to save money often do not have the experience and knowledge in self-assembly of such equipment. However, in practice, it happens that not only fails to save money - it also fails to reduce the time for installation and installation.
Therefore, it is recommended to seek the services of exclusively professional specialists in the IT field, who will competently select all system components. The second alternative is to use a ready-made video server for an IP camera.
Features of IP video servers
 The main function for which the video server is intended is the digitization of data transmitted in analog form. This is necessary in order to be able to work with information further:
- Process data.
- Store data in digital form.
- Save videos on external sources.
- Store videos on embedded devices.
- Save information in special storages - cloud or local.
The external interface of the servers that are used for IP cameras allows you to connect a coaxial cable. As a rule, this is possible with two or four inputs. Once the information is converted, it can be recorded, stored and transmitted.
The main operating system in this case is Linux. You can manage settings and options through a virtual interface from your laptop or computer, and you will need to connect via a local network. There are many detectors in software servers, but the most relevant are such sensors as:
- sound level sensor;
- forgotten objects sensor;
- Motion Sensor;
- speed and direction sensor;
- sabotage detection sensor;
- object counter;
- special adaptive sensor.
Watch the video for the first launch of the video server.
Free FTP server for ip camera
Almost everyone knows that a surveillance camera can record data to an FTP server or to the cloud. However, until now, many device owners do not use this functionality, even purchasing a recorder for a single camera. But there is an option not to purchase it by creating the vault yourself.
 Using cloud storage is possible only if the IP video camera has uninterrupted access to the Internet 24/7. At the same time, the issue of price is not so acute due to the fact that many alternative services have appeared that offer free services for storing large amounts of information.
A self-created FTP server allows you to configure the safety of video information even if there is no stable network operation or there are some restrictions. As a server, you can use a router that works with the FTP protocol, or a PC that works smoothly.
If a router is used, you will additionally need to purchase a flash memory card or HDD. In the second case, it is recommended to take care of backup power supply, moreover, at the moment it is not difficult to cope with this task.
Setting up an FTP server for a surveillance camera
Before you start setting up the video server, you will need to configure the router itself. To do this, you need to go to the settings menu and find a special tab - FTP-Server. If we take Sapido brand routers as an example, then you can find such a tab in the AirCloud Storage section. In most cases, the following address is used: 192.168.1.1. After the router is configured, you can deal with the video server.
 The setup procedure includes the following algorithm of simple steps:
- Activate the FTP server function.
- Prohibition of anonymous connection by unauthorized users.
- Settings for external connection to the video server (you can either disable or enable it).
- Specifying a standard port. For FTP, this figure means 21.
- Set the maximum number of possible connections.
- Login and password input. Next, you need to check the box next to the “FTP-Server” option. Here you can use the administrator account.
- Changes must be applied. In the event that a memory device is connected via a USB port, the workflow will start.
If you go to the main page in the router interface, you can find out if the video server is working. The window in which the active “FTP” button appears with detailed information will indicate that everything has been done correctly.
The server is accessed through standard access:
- login: admin (or cloud)
- password: admin (or 12345)
- address: ftp://192.168.1.1
Next, you can proceed to the procedure for setting up a video surveillance camera. It should be connected to the router. You can find the network address on the router or use a special utility that is included in the IP camera software. Often this is the following address: 192.168.1.10.
In order for the video surveillance camera to be able to record according to the events that the motion sensor will register, it is necessary to activate the corresponding function, select the area in which the motion will be detected, and then save the new settings.
In the video settings, you need to make the following changes:
- Activate fixation on the "Video Clip" event.
- Select the type "Motion" in the drop-down list.
- Check the FTP option and function.
- Specify the address 192.168.1.1. and port 21.
- Enter the username and password specified above.
- Specify the folder where the video information will be saved.
- Check if the settings are correct by pressing the test button.
If everything is configured correctly, you can apply the changes.
 RTSP video surveillance
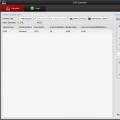 Broadcasting a video stream from an IP camera using WebRTC
 Why doesn't more always mean better?