Clean reinstallation of windows 10. How to reinstall Windows: step by step instructions
Let's consider such a situation. You have Windows 7 or 8.1 installed. Then you upgraded to Windows 10. The system activated automatically. And now you need to cleanly reinstall Windows 10 without losing your license. Will there be activation issues?
"Ten" should be activated automatically if you install the same edition that was installed and activated before (for example, Pro x64 Russian) on the same computer. With the release of the Threshold 2 update, the system activation procedure has been significantly improved and simplified. Activating Windows 10 should now be easier with both a clean install and an upgrade.
Reinstall Windows 10 with license and activation intact
0. Step number zero: before reinstalling the OS, make a backup copy of the boot and system partitions if your license or software installed on the system is extremely valuable to you. Of course, we checked the following instructions, but anything can happen. And it's better to have a backup in order to restore Windows to its current state at any time.
1. Create an installation USB flash drive or disk with Windows 10.
The creation procedure has not changed, however, no matter what time you create a bootable USB flash drive, the distribution package written to it will always be up to date thanks to the proprietary Microsoft Media Creation Tool. Recall that in assembly 10586, the mechanism for activating Windows 10 has been significantly simplified. Now the system can be activated with a key from Windows 7 or 8.1.
2. Connect the flash drive and just restart your computer.
3. from this flash drive.
4. In the window prompting you to enter your product key, select Skip:
OS Reinstall: Skip Entering Product Key
5. Format only the system partition. (In most cases, it will be "drive C:". Be guided by the size of the disk in GB). Other partitions do not need to be formatted.
6. Then select the formatted partition for installing Windows 10 and click Further.

Format the C drive for the subsequent installation of the OS
After installation, the operating system must be activated (if it was legally activated before reinstallation). After a couple of days, when you make sure that the freshly installed OS is working properly, you can free up disk space in order to free up disk space.
Other ways to reinstall Windows 10 on a laptop
If your laptop was sold with Windows 10 pre-installed, then you have another way to reinstall the operating system if necessary. Each laptop manufacturer has its own specific system recovery procedure. For example, if you have an HP laptop, you need to restart it and press the key F11, for Samsung is F4. Lenovo has a special button in general - Novo Button, which is used to enter the BIOS and restore (in fact, reinstall) Windows.

In order to reinstall Windows 10 on Toshiba laptops, you need to hold down the key while the laptop is powered off. 0 (zero) on the main keyboard unit, without releasing it, turn on the laptop with the Power button. Release the 0 key when you hear the sound of the system speaker. Some laptops come with a recovery disc. You need to boot from it and run the Recovery program.
The difference with the procedure that we described in the previous paragraph is that when you reinstall Windows using the restore procedure, you get an operating system without current updates - the same as it was at the time of purchase of the laptop. But the essence remains the same - you somehow perform a clean reinstallation of the system, getting rid of all the failures and problems of the old operating system.
For many users, this process can be difficult. There are several methods for reinstalling the system, each with its own benefits. Consider the most common ways to reinstall Windows 10.
How to back up data
It is highly recommended that you back up your data before reinstalling your system. Windows 10 has built-in tools that make this task so much easier - you don't even need to install additional programs. It is enough to follow the simple steps of the “File History” component.
Step 1: Type “Windows Update” into the Windows search box, select “Windows Update Options” from the lists of results, and then go to the “Backup Service” menu. You can also access the settings by going to the Settings app > Update & security > Backup service.

If the "Automatically back up files" switch is set to "On", then the File History tool is already backing up files, including contacts, desktop items, and files in the OneDrive folder. This feature automatically creates copies of files in Documents libraries , Video, Music, Pictures, so put the desired folders and files in these directories.
Step 2 A: If the “Automatic file backup” switch is set to “Off”, then the first step is to add a disk.
Click the Add Drive button and Windows 10 will automatically search for an external drive that you can use to store your backups.

Select the drive you want to use for File History and Windows 10 will look for external hard drives to back up.

After selecting the drive, the backup service will start automatically. You can click the "More Options" link to change how often files are copied and how long the backups are kept. You can also fine-tune which folders and libraries to copy. Depending on the amount of source data, the backup process may take some time, but you can carry on with your usual activities while the task is running.

You can check the current status of the backup service by clicking the View advanced settings link on the Backup Settings page. As a result, the “File History” window in the control panel will open, in which you can view the status of the service and additional options.

If you prefer to store your backups on an external drive or cloud storage, then you have that option! No matter which method you choose, make sure that all important files are added for copying.
How to restore Windows 10 to previous state
Sometimes, when solving problems with a computer, restoring the system to a certain point in the past can be a great help - say, returning the OS a few days or weeks ago. This is the perfect solution for getting rid of errors related to recently installed applications. Windows 10 offers several options for reverting the system to an earlier state.
Step 1: In the Update & Security window, click the Recovery tab. On the page that opens, you will see the option “Go back to a previous version of Windows 10”. Click the "Start" button and wait a bit.

Step 2: After briefly asking why you went back to a previous build and checking for updates that might fix the issue, Windows will start analyzing what information is available for recovery. Follow the on-screen instructions until the build selection screen appears. In some cases, the operating system cannot find the necessary files that are used to roll back to a previous version, especially if you have recently performed a disk cleanup. In such cases, it is better to look for another solution.
Step 3: If the preparatory operations were completed successfully, then you can roll back the system to the previous build. This measure will get rid of the problems caused by the recent system update. If possible, choose the most stable and working build of Windows 10. In some cases, you will have access to previous operating systems on your computer, such as Windows 8.1.
Using system restore points
You can restore the state of Windows 10 using a system restore point, this method will be especially useful when you want to go back to previous versions of Windows 10, instead of skipping back all builds.
Step 1: Go to the control panel by typing "Control Panel" in Windows search. Turn on View > Large or Small icons and select the “Recovery” section, and then click on the “Start System Restore” link. Then, confirm that you want to switch to this mode. Users can also create new restore points and configure the recovery procedure here .

Step 2: By default, the recommended restore point will be selected with a description of what action was taken before the particular point was created. You can also select other restore points on this screen. Select the “Choose a different restore point” option and click “Next” if you want to see other recovery options.
Note that Windows usually creates a restore point after a major change, such as installing a new program, driver, or update. If you do not see any recovery options available, then system protection may be disabled. In this case, you will have to perform a full reinstallation or look for another solution to the problem.
Step 3: Locate the restore point before the problem occurred in the system. Then click "Next" and confirm the start of the restore operation by clicking "Finish". Please note that this operation should not delete personal files.
How to reinstall Windows 10
Sometimes restore operations may not resolve problems that are too extensive and a full system reset may be required to remove corrupted data or when preparing the computer for sale.
Step 1: Again, go to the "Recovery" section in the "Update and Security" section of the "Settings" application and select the first available option - "Reset your computer". Click the "Start" button to continue.

Step 2: You will have several options available that allow you to customize what data to clear. If you want to fix the problem by continuing to use the computer, then select the option “Keep my files” (and prepare for the second option if the first does not work). If you want to perform a full system reset and have already double-checked the integrity and safety of your backups, then select the “Delete everything” option. If you are selling your computer, then you should restore the factory settings, which will return your computer to its original state. Keep in mind that the latter option is not always available. In this case, the programs that were preinstalled when you bought the computer will be reinstalled.

Step 3: Confirm your choice and wait for a while. If you are resetting on a laptop or mobile device, make sure it is connected to the network. The system will automatically reboot after the restore is completed.
Usually, activation is automatic and does not cause difficulties, regardless of whether you are reinstalling or restoring your Windows 10 system. If you're using a local account, link your Windows 10 key to your Microsoft account for easier reactivation when you update your PC.
If you're having trouble activating, open the Update & Security section in the Settings app and go to the Activation tab. Here you will be able to see your activation status or add another product key. Follow the onscreen prompts to reactivate your Windows 10 installation.

Found a typo? Select and press Ctrl + Enter
The Windows 10 operating system can be downloaded from the official Microsoft website and installed on a computer from a bootable USB flash drive. Next, the user must activate his copy using a license key. Many owners of the purchased version have a question: how to reinstall Windows 10 without losing the license? This problem has several solutions, which we will discuss later.
If you previously installed a licensed copy on a personal computer or laptop yourself, then the OS will add data about your device to a single database that stores information about all PCs from which Windows 10 was activated.
The second reinstallation option only applies to laptops/netbooks with Windows 10 pre-installed. Usually, all laptops are sold with the OS pre-installed and activated.
First you need to determine the version of your Windows 10 and check the activation status. More on that below.
Activation check
To find out if the system is activated, you must follow the instructions provided:
- Open Options. To do this, right-click on the "Start" icon and find the corresponding line in the menu.

- In the window that opens, click on Update and Security.

- Next, go to the "Activation" subsection.

- If everything is in order with the activation and the copy does not need confirmation, then you will see the following inscription:

Now you need to find out the exact version of the operating system. This information will be required when creating bootable media. In the case of desktop computers, you can’t do without a flash drive and a disk. You can find information about the OS as follows:
- Open Options again.

- Now click on the "System" section.

- Go to the section "About the system".

- In the information block you will find all the necessary data. You will need the release and type of system marked in the screenshot.

Clean install
Before starting the installation, you need to create a bootable USB flash drive. The official Media Creation Tool will help us with this. To use it, follow the instructions:
- Open the link in a browser. On the page, click on the "Download Tool Now" button.

- After downloading, run the downloaded file. On the first screen, accept the license agreement.

- Then select the second item and click "Next".

- It is necessary to determine the specific version. Here you can choose Professional or Home for one language, set 32 or 64-bit architecture. We recall the characteristics of your OS and set exactly the same. After that, click "Next".

- The warning window just notifies you that the Windows editions must match, otherwise the system will require a product key. We agree with the "OK" button.

- Next, select the type of media on which the distribution will be written.

- In the list of connected drives, select the appropriate one and start recording. The process will take no more than 30 minutes, depending on the speed of your Internet.
Now you know how to make a bootable USB flash drive. The next step is to set the boot priority in the BIOS. To do this, you need to restart the computer and enter the BIOS menu using the hot key (it will be indicated on the boot screen), and rearrange the port into which the bootable USB flash drive is connected to the first place and exit with saving the changes.

Now comes the installation process:
- On the first screen, select the language, time format, and default input language. Click "Next" to continue.

- Now click on "Install" (1). Please note that on this screen there is an item "System Restore" (2). With it, you can restore the health of your PC and not configure it again. Also, you will save all the files.

- Check the box and click Next again.

- Now you need to select the option "Custom: installation only ...".

- In the next step, you are prompted to select the hard drive or SSD that is connected to your PC (1). There are also tools for formatting, dividing space into sections, etc. (2). With a clean installation, you will not be able to save all the files from the system partition, so we recommend that you make a backup copy to external media or a secondary disk partition in advance.

- Now the process of installing the operating system will begin. This procedure will not take more than 30 minutes. Your computer may restart several times during installation.

The next step is the initial setup. After the installation is complete, remove the bootable USB flash drive and start the PC. On the first screen, you can leave all the default settings completely or set them manually.
After completing the settings, Windows 10 will prompt you to install updates. You must agree that when you connect to the Microsoft server, a copy of the OS can be activated.
Please note that this method of saving a license only works when installing exactly the same version and build of the OS.
Return to original state
There is another option to restore Windows 10 while keeping personal files and settings. For this you need:
- Go to Settings".

- Click on the "Update and Security" section.

- Go to the "Recovery" subsection.

- Click on the "Start" button marked in the screenshot.

- If you want to keep personal files and OS settings, then select the first option, if you want to delete all data - the second.

- Wait for the end of the preparatory process.

- On the next screen, click Reset.

After that, the PC will restart and the recovery procedure will begin. All programs will be removed: Windows 10 will return to its original state, but personal files on the hard drive will remain.
Reinstalling on a laptop
Portable computers with a preinstalled operating system have the ability to recover without using a disk or bootable flash drive. In such cases, the Windows 10 license data is “hardwired” into the laptop BIOS, which is why the key is saved.
The procedure for starting recovery depends on the manufacturer of the laptop and the BIOS version on the motherboard. Space is reserved on the hard drive for system files required for recovery and reinstallation. For example, the laptop manufacturer Lenovo uses the OneKey Recovery utility. With it, you can restore the OS in a few steps:
- When turning on the PC, hold down the Novo button. Other manufacturers may have a different name for this button. On some devices, the key to launch the recovery menu may be written on the initial screen for turning on the computer.

- In the window that appears, select System Recovery.

- To start, you must press Enter. After recovery, you will get a working Windows 10 and save your personal data.
Output
If you are the owner of the license key, then when you reinstall Windows 10, you will not need to reactivate. The most important condition for maintaining a license is to install an identical version of the OS.
Video instruction
The video shows in detail all the guides from this article. With their help, you can easily understand all the stages of installation and will quickly reinstall Windows 10 without reactivation.
Perhaps many PC users do not know that you can reinstall Windows 10 without losing documents, photos, music and other personal data. In this guide, we will look at how to properly reinstall Windows 10 without losing data.
Using Windows 10 since pre-release versions, I won’t say that often, but periodically I received various troubles with the operating system, some could be solved easily, others simply left no options and had to reinstall the system. As a result, the most reliable tool for dealing with system errors has been developed, no matter how ridiculous it may sound - reinstalling Windows 10.
Reinstalling is guaranteed to help if your Windows 10 system keeps crashing or you get one or more errors when opening programs or apps. In short, you will have to reinstall the OS if you have problems that are unrecoverable. For example, if Windows 10 is very slow even after trying possible solutions from the internet, you might consider reinstalling Windows 10.
The presented method of reinstalling Windows 10 does not require you to enter a product key, that is, you can reinstall Windows 10 without a key.
Guide to reinstall Windows 10 without data loss.
This method is only applicable if Windows 10 is booting. If your PC won't boot, you need to perform a clean install of Windows 10.
Step 1: Connect your bootable Windows 10 flash drive to your computer. If you have a Windows 10 bootable DVD, insert it into your optical drive.
And if you have an image file, navigate to the folder containing the ISO file, right click on it, and then click To plug to open the contents of the ISO image in Windows Explorer.
Those of you who don't have a Windows 10 USB, DVD or ISO file should download the Windows 10 ISO image from Microsoft using the official tool. The tool, with default settings, will download the same version of Windows 10 as the one installed on your computer (32-bit or 64-bit).
Step 2: Open This computer(My Computer), right-click on the USB or DVD drive, click .

Similarly, if you have mounted a Windows 10 ISO image, right-click on the mounted drive, and click .
Step 3: Double click on the file setup.exe. Click Yes on the User Account Control dialog box.


Step 4: After a few seconds, and you will see a window - Getting Important Updates with two options:
- # Download and install updates (recommended)
- # Not now
If your computer is connected to the Internet, we recommend that you choose the first one - Download and install updates (recommended).

You can uncheck I want to help improve Windows, to avoid sending anonymous data to Microsoft about the installation process.
Step 5: After pressing the button Further, the installation will check for updates. If the option is selected Not now in the previous step, you won't see this screen.

It may take several minutes to check for updates.

You may see the following screen for a few minutes - Let's see if you're ready to install. At the moment, it is checking that the computer can work with Windows 10, and also checking the space required to complete the operation.

Step 7: And finally, you will see a window - .

By selecting - , we will reinstall Windows 10 without deleting files, check before clicking on the Next button.

Advice: You can also select the first option Keep personal files and apps if you don't want to lose your installed apps from the store. But! if you have problems with one or more modern apps such as Edge , or Store, Photos, Mail, please select the option - Keep only my personal files.
Step 8: You will see the window again - this time feel free to click on the button Install.

Click on the Install button to start installing / Reinstalling Windows 10. During the Windows 10 installation, your computer may restart several times.

Step 9: The next step is setting the parameters. You can choose either Use Default Settings or Customize Settings, which allows you to change the default privacy settings in Windows 10. Of course, you can change these settings later on the system itself.

Upon completion, you will be prompted to sign in with your Microsoft account, or you can create a new local user account.

As mentioned above, the system will not require a Windows 10 product key after reinstallation if it already had one.

All your files will be in the same place where you left them. You will only need to install your favorite programs and applications again.
Let us know in the comments below if you experience any issues while reinstalling Windows 10.
Share the article with your friends
If your version of Windows 10 brings a lot of problems, certain components of the system do not work, or the changes made prevent normal work on the computer, then it's time to reinstall the operating system. With the help of this short guide, you will learn how to quickly and easily reinstall Windows 10 on a computer or laptop.
Consider the program that was installed on the computer along with the Windows 10 Anniversary Update. It allows you to easily and conveniently reinstall the system - without the need to perform additional steps. We will also consider the option of reinstalling the "dozens" if you are not using the Windows 10 Anniversary Update.
Before you start reinstalling Windows 10 on your PC or laptop, you need to make a backed up copy of the system. Even if you don't plan on a full disk format, this procedure can be very helpful. Especially if something goes wrong during the reinstall process. The backed up copy can be saved to an external hard drive or transferred to cloud storage (Dropbox, Google Drive, Box.com, OneDrive, etc.).
Self Install Windows 10
The main way to reinstall Windows 10 on a computer or laptop is to create a bootable installation disk and reinstall the operating system from it. But, before proceeding with the reinstallation, do not forget to write down your Windows 10 version key. If you do not know how to find out the WIndows 10 product key, see below.
First, install the official free Microsoft program on your computer - Media Creation Tool. This application is designed to download and update the "dozens". After launching it, we start downloading Windows 10 to the computer, make sure that the system is loaded in ISO format, which we will then burn to a DVD disc. To do this, check the box "Create an installation disk for another computer".
After burning the ISO image to a CD, start the computer from the boot disk and reinstall the system. During installation, you can choose between upgrading the installed version or installing the system from scratch. If you choose the latter option, you will have to re-enter the activation key.
Refresh Windows Tool
If you have the latest update installed - that is, Windows 10 Anniversary Update, you can use the system tool to update and restore the OS.
Refresh Windows Tool offers an easy way to reinstall Windows 10 on PC/Laptop. After launching the Refresh Windows Tool, options for further actions will appear.
During installation, you will be able to choose whether you want to keep all data on your computer or completely clean the disk and install the operating system from scratch. Depending on which option you choose, reinstallation can take up to several minutes if you don't need to re-enter your product key.
Return to initial settings
You can also use a tool that allows you - as in smartphones - to return Windows 10 to its initial settings. That is, reset all system settings to the initial values, and at the same time all files and documents will remain untouched. This method can be used if something stops working in the OS. But if the system is badly damaged, it is better to reinstall it from scratch.
This tool is built into the Settings section, which can be accessed through the Start menu or using the Win + I keyboard shortcut.
After opening the Settings section, go to the Updates tab, and then open the Recovery tab in the menu on the left side. Here, if the latest update of Windows 10 is installed, there should be a section "Reset your computer to its original state". Press the "Start" button and after entering the password, all settings will be deleted.
 Installing cryptopro Cryptopro csp version 3
 Step-by-step installation of the program without installation disk Cryptopro 3
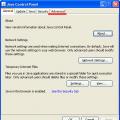 Solving common mistakes in sufd