The required container is not displayed - Contour.Extern. Installing certificates in cryptopro from flash drives Why cryptopro does not see the certificate
Electronic digital signatures (EDS) have long and firmly entered into use both in public institutions and in private firms. The technology is implemented through security certificates, both common to the organization and personal. The latter are most often stored on flash drives, which imposes some restrictions. Today we will tell you how to install such certificates from a flash drive on a computer.
Despite their reliability, flash drives can also fail. In addition, it is not always convenient to insert and remove the drive for work, especially for a short time. The certificate from the key carrier can be installed on a working machine to avoid these problems.
The procedure depends on the version of Cryptopro CSP that is used on your machine: Method 1 is suitable for the newest versions, Method 2 is suitable for older versions. The latter, by the way, is more universal.
Method 1: Installation in automatic mode
The latest versions of Cryptopro DSPs have a useful feature for automatically installing a personal certificate from external media to a hard drive. To enable it, do the following.
- The first step is to launch CryptoPro CSP. Open the menu "Start", in it go to "Control Panel".

Click the left mouse button on the marked item. - The working window of the program will start. open "Service" and select the option to view certificates marked in the screenshot below.
- Click the browse button.

The program will prompt you to select the location of the container, in our case, a flash drive.
Select the one you want and click "Further".. - A preview of the certificate opens. We need its properties - click on the desired button.

In the next window, click on the install certificate button. - The Certificate Import Utility opens. Press to continue working. "Further".

You have to choose a repository. In the latest versions of CryptoPro, it is better to leave the default settings.
Finish working with the utility by clicking "Ready". - A message will appear indicating that the import was successful. Close it by clicking "OK".

Problem solved.


This method is by far the most common, but in some variants of certificates it is impossible to use it.
Method 2: Manual installation method
Older versions of CryptoPro only support manual installation of a personal certificate. In addition, in some cases, the latest versions of the software can take such a file into work through the import utility built into CryptoPro.
- First of all, make sure that the USB flash drive that is used as a key has a certificate file in CER format.
- Open CryptoPro DSP as described in Method 1, but this time choosing to install certificates..
- Will open "Personal Certificate Installation Wizard". Proceed to choose the location of the CER file.

Select your flash drive and a folder with a certificate (as a rule, such documents are located in the directory with the generated encryption keys).
After making sure the file is recognized, press "Further". - In the next step, review the properties of the certificate to make sure the selection is correct. After checking, press "Further".
- The next step is to specify the key container of your .cer file. Click on the appropriate button.

In the pop-up window, select the location of the desired one.
Returning to the import utility, press again "Further". - Next, you need to select the storage of the imported EDS file. click "Overview".

Since we have a personal certificate, we need to mark the appropriate folder.
Attention: if you are using this method on the latest CryptoPro, then do not forget to check the box "Install a certificate (certificate chain) into the container"!
- Exit the import utility.
- We are going to replace the key with a new one, so feel free to press "Yes" in the next window.

The procedure is over, you can sign the documents.


This method is somewhat more complicated, but in some cases it is the only way to install certificates.
As a summary, we remind you: install certificates only on trusted computers!
As paper workflow is being replaced by electronic, such a tool as an electronic signature is becoming increasingly important and becoming more widespread. Already, many departments exchange documents exclusively in electronic form, with each legally significant document signed by an electronic signature. It is used when working on electronic trading platforms, when interacting with state information systems (such as GIS GMP, GIS housing and communal services and others) and can even be used for authorization on government portals (such as gosuslugi.ru). There is no doubt that in the future the expansion of the scope of electronic signatures will continue, and therefore it is extremely important for IT specialists to understand the principle of operation of an electronic signature and be able to take the necessary measures to install and configure software for working with an electronic signature.
Of course, the study of this issue would be worth starting with the federal law "On Electronic Signature" ( http://www.consultant.ru/document/cons_doc_LAW_112701/
), which provides definitions of concepts, the legal status of an electronic signature, the procedure for its use and other useful information. However, the purpose of this article is to show how quickly, without going into details, to install an electronic signature, which in some cases, in cases where there is no time for proper study, will be very useful.
We will install on a computer running the Windows 7 Professional operating system, the private key of the electronic signature on the eToken carrier, and we will use CryptoPro CSP as a crypto provider.
Let's start by installing the required software:
- CryptoPro CSP version 3.6 or higher;
- Media driver (when using eToken or Rutoken).
The driver for eToken can be downloaded free of charge from the following link http://www.aladdin-rd.ru/support/downloads/etoken/
, the driver for Rutoken is available for download from the link http://www.rutoken.ru/support/download/drivers-for-windows/
.
Other devices, such as a flash drive, smart card or registry, can also be used as a carrier of key information, however, it is not recommended to use them because they do not provide a sufficient level of protection of key information from unauthorized access.
Installation of the electronic signature key certificate.
After the eToken driver (Rutoken) and the CryptoPro CSP crypto provider are installed, we can begin installing the certificate of the electronic signature verification key.
We launch the CryptoPro CSP program, go to the "Service" tab and click the "View certificates in the container" button.
In the window that opens, click "Browse", select the desired owner and click "OK". 
In the next window, do not change anything, click "Next". 
A window will open in which we can see a summary of the user certificate (information about the owner, certificate validity period and its serial number). 
To view detailed information, click "Properties". If the root certificate of the certification authority has not yet been installed (as in our case), then in the general tab we will see a message as in the figure below. The current root certificate of the certification authority, as a rule, is available for download on the website of the certification authority (the organization that issued the electronic signature). 
We return to the previous window and click "Install" to continue installing the user certificate. A message appears stating that a certificate installation is in progress. Confirm the installation by clicking the "Yes" button. 
A message will also appear from the eToken PKI, asking you to write the certificate to the eToken. We refuse, we press "Cansel". 
The certificate is installed in the certificate store. Click "Finish" to complete the installation.
Installing the root certificate of the certification authority.
Double-click the file of the root certificate of the certification authority (with the .cer extension) and click the "Install certificate" button. 
The Certificate Import Wizard opens. Click "Next". Then check the "Place the certificate in the following store" checkbox. 
Through the "Browse" we specify the folder "Trusted Root Certification Authorities". 
Click "OK" and complete the installation. A message will appear indicating that the operation was successful. 
Now, having opened the properties of the user certificate, we will not see the previous error. 
We just need to test the private key container.
Testing.
Open CryptoPro CSP, and in the "Service" tab, click "Test". 
We find the key container through "Browse" or by the corresponding certificate and click "Next". You will be prompted to enter a pin code for the container. Enter the password and click "OK". If you check the "Remember pin-code" checkbox, the system will not ask for it every time you access the key container (including when signing a document), which is not recommended in order to protect against unauthorized access.
Next, a window will open with information about the presence or absence of errors. 
Installing an electronic signature in the registry.
It is possible that the private key of the electronic signature needs to be multiplied in order to be used on several computers. In such cases, the best solution would be to install the private key of the electronic signature in the registry. For the container created in the registry, it will be possible to set a password and thereby restrict access to the private key of the electronic signature stored in the container. Removable media, after installation, can be transferred to another user. I note that such a measure is justified in cases where, for example, several employees of the same organization (department) use the same signature (for example, the signature of an authority). In other cases, resorting to such measures is not recommended.
Installing the "Register" reader.
The first thing to do is to install the reader. This is quite easy to do using the reader installation wizard (adding and removing readers is done under an account with administrator rights). If, when installing CryptoPro CSP, you checked the “Register the Registry” reader box, as in the figure below, and it is present in the list of readers, you can immediately proceed to copying the private key container to the registry. 
We launch CryptoPro CSP, in the "Hardware" tab, click the "Configure readers" button. 
In the window that opens, click "Add". 
The reader installation wizard will start, click "Next". 
From the list in the window on the right, select "Registry" and click "Next". 
Then we set the name of the reader, or leave it unchanged as in our example and click "Next". 
We complete the wizard, click "Finish".
Copying the private key container to the registry.
The reader has been prepared, now you need to copy the container with key information from the eToken removable media to the registry. To do this, go to the main menu of CryptoPro CSP and in the "Service" tab, click the "Copy" button. Through the "Overview" we specify the container that we want to copy to the registry. 
Then the system will ask for a password to access the container on removable media (eToken). We enter the password, and in the next window we set the name for the key container that will be created in the registry. 
In the next window, the program will prompt you to select the media on which you want to burn the container. Select "Registry" and click "OK". 
Now you need to set a password for the container, which we placed in the registry. 
Enter the password, confirm and click OK.
Now, having launched the function of testing the private key container, except for the container on removable media, we will see the created container on the "Registry" reader.
We complete the procedure for testing the container. If no errors are found, proceed to the installation of the electronic signature key certificate (if it has not been done earlier). The procedure for installing a certificate from the registry is similar to the procedure for installing from removable media, moreover, if the certificate of this owner has already been installed from removable media, then it will not be required to install it again after copying the container to the registry.
If none of the solutions below resolves the problem, the key media may have been damaged and needs to be restored (see ). It is not possible to recover data from a damaged smart card or registry.
If there is a copy of the key container on another medium, then you must use it for work, after installing the certificate.
Diskette
If a floppy disk is used as the key container, the following steps must be performed:
1. Make sure that there is a folder at the root of the floppy disk containing the files: header, masks, masks2, name, primary, primary2. The files must have the .key extension and the folder name format must be xxxxxx.000.
the private key container has been corrupted or removed
2. Make sure that the “Drive X” reader is configured in CryptoPro CSP (for CryptoPro CSP 3.6 — “All removable drives”), where X is the drive letter. To do this:
- Select the menu "Start" > "Control Panel" > "CryptoPro CSP";
?).
3. In the CryptoPro CSP window "Selecting a key container", set the "Unique names" radio button.
4.
- Select the menu "Start" > "Control Panel" > "CryptoPro CSP";
- Go to the "Service" tab and click on the "Delete remembered passwords" button;

5. How to copy a container with a certificate to another medium?).
Flash drive
If a flash drive is used as a key medium, the following steps must be performed:
1. Make sure that in the root of the media there is a folder containing the files: header, masks, masks2, name, primary, primary2 . The files must have a .key extension and the folder name format must be: xxxxxx.000 .
If any files are missing or not in the correct format, then the private key container may have been corrupted or deleted. You also need to check if this folder with six files is contained on other media.
2. Make sure that the “Drive X” reader is configured in CryptoPro CSP (for CryptoPro CSP 3.6 — “All removable drives”), where X is the drive letter. To do this:
- Select the menu "Start" > "Control Panel" > "CryptoPro CSP";
- Go to the "Hardware" tab and click on the "Configure readers" button.
If the reader is missing, it must be added (see How to configure readers in CryptoPro CSP?).
3.
4. Delete remembered passwords. For this:
- Select the menu "Start" > "Control Panel" > "CryptoPro CSP";
- Mark the "User" item and click on the "OK" button.
5. Make a copy of the key container and use it for work (see How to copy a container with a certificate to another medium?).
6. If CryptoPro CSP version 2.0 or 3.0 is installed at the workplace, and Drive A (B) is present in the list of key media, then it must be removed. For this:
- Select the menu "Start" > "Control Panel" > "CryptoPro CSP";
- Go to the "Hardware" tab and click on the "Configure readers" button;
- Select the reader "Drive A" or "Drive B" and click on the "Delete" button.
After removing this reader, work with the floppy disk will be impossible.
Rutoken
If a Rutoken smart card is used as a key carrier, the following steps must be taken:
1. Make sure the light on the rutoken is on. If the lamp does not light, then the following recommendations should be used.
2. Make sure that the "Rutoken" reader is configured in CryptoPro CSP (for CryptoPro CSP 3.6 - "All smart card readers"). To do this:
- Select the menu "Start" > "Control Panel" > "CryptoPro CSP";
- Go to the "Hardware" tab and click on the "Configure readers" button.
If the reader is missing, it must be added (see How to configure readers in CryptoPro CSP?).
3. In the "Select key container" window, select the "Unique names" radio button.
4. Delete remembered passwords. For this:
- Select "Start" menu > "Control Panel" > "CryptoPro CSP" ;
- Go to the "Service" tab and click on the "Delete remembered passwords" button;
- Mark the "User" item and click on the "OK" button.
5. Update support modules required for Rutoken to work. For this:
- Disconnect the smart card from the computer;
- Select the menu "Start" > "Control Panel" > "Add or Remove Programs" (for Windows Vista \ Seven "Start" > "Control Panel" > "Programs and Features");
- Select "Rutoken Support Modules" from the list that opens and click on the "Delete" button.
After removing the modules, you must restart the computer .
- Download and install the latest support modules. The distribution kit is available for download on the Aktiv website.
After installing the modules, you must restart your computer.
6. You should increase the number of Rutoken containers displayed in CryptoPro CSP using the following instruction .
7. Update the Rutoken driver (see How to update the Rutoken driver?).
8. You should make sure that Rutoken contains key containers. To do this, you need to check the amount of free memory on the media by following these steps:
- Open "Start" ("Settings") > "Control Panel" > "Rutoken Control Panel" (if this item is missing, then update the Rutoken driver).
- In the "Rutoken Control Panel" window that opens, in the "Readers" item, select "Activ Co. ruToken 0 (1,2)" and click on the "Information" button.
If the rutoken is not visible in the “Readers” item or when you click on the “Information” button, the message “ruToken memory status has not changed” appears, which means that the media has been damaged, you must contact the service center for an unscheduled replacement of the key.

- Check what value is indicated in the line "Free memory (bytes)".
As a key carrier, service centers issue rutokens with a memory capacity of about 30,000 bytes. One container occupies about 4 KB. The amount of free memory of a rutoken containing one container is about 26,000 bytes, two containers - 22,000 bytes, etc.
If the amount of free memory of the rutoken is more than 29-30,000 bytes, then there are no key containers on it. Therefore, the certificate is contained on a different medium.

Registry
If the Registry reader is used as a key carrier, the following steps must be performed:
1. Make sure that the "Register" reader is configured in CryptoPro CSP. For this:
- Select the menu "Start" > "Control Panel" > "CryptoPro CSP";
- Go to the "Hardware" tab and click on the "Configure readers" button.
If the reader is missing, it must be added (see How to configure readers in CryptoPro CSP?).
2. In the "Select key container" window, select the "Unique names" radio button.
3. Delete remembered passwords. For this:
- Select the menu "Start" > "Control Panel" > "CryptoPro CSP";
- Go to tab « Service" and click on the "Delete remembered passwords" button;
- Mark the "User" item and click on the "OK" button.
- built-in (valid for 1 year, manufactured and valid with a signature, does not require a license number to be entered)
- annual (valid for 1 year, requiring a license number)
- permanent (unlimited - unlimited in terms of use, requiring the entry of a license number).
CryptoPro CSP does not see the signature?
Make sure the signature is installed on the computer.
Launch CryptoPro CSP => Tools tab => View certificates in container button => Browse button. If the list is empty, try a different USB port on your computer. If this does not help, then you need to install the driver in accordance with the type of media and the bit depth of the Windows system. The type of media is written on the case of the media: eToken or ruToken, and the bit depth of the system can be viewed by right-clicking on the computer icon and selecting Properties: 32 or 64 bit system Windows.
You can download drivers here.
The site / portal does not see the signature?
Launch CryptoPro CSP => Tools tab => "View certificates in container" button => "Browse" button.
If the signature is not defined, then see the answer to question number 2 above.
If the signature is determined, then click the "Next" button, then the "Properties" button, open the "Certification Path" tab. The chain of certificates must consist of the Certification Authority and the full name of the EDS owner (certificates must not have crosses or exclamation marks).
If the CA certificate has a red cross, select it by clicking on it, click View certificate, then the "Install" button (you must specify the Trusted Root Certification Authorities store in the import wizard).
If the certificate has an exclamation point, the certificate of the certification authority must be downloaded //here and also installed in trusted certification authorities.
If the cross has not disappeared, you need to update the version of CryptoPro CSP (for Windows 10 there is a //special version of CryptoPro CSP 4.0)
If the certificate chain is displayed correctly in CryptoPro CSP, then there are problems in the InternetExplorer settings (see the answer to question #4 below).
Setting Internet Explorer (IE)?
For InternetExplorer to work correctly, a plug-in for working with an electronic signature must be installed (you can download it //here)
Automatic updating of InternetExplorer must be turned off, otherwise the settings will go astray. You can turn it off in the Help menu => About => uncheck Install new versions automatically.
ActiveX settings must be enabled on your computer, this can be done in the Start menu => type Internet Options in the search bar and select this item => in the window that opens, select the Security tab => click on the Trusted sites (sites) zone so that it is highlighted => then click the Other button (find the list of ActiveX Controls and Plugins and set the option for each to Enable).
We go to the site where an electronic signature is required for work, and add this page to the Trusted sites / sites through the Browser Options, the Security tab, highlighting the Trusted sites / sites zone and clicking the Sites / sites button. The Add button should be active, you need to click on it, on the checkbox: For all sites in this zone, server verification is required (https:), you must uncheck it. If the Add button is grayed out (inactive), then the page has already been added to the list of websites and you do not need to add it again. Close the properties. Refresh the page in the browser with the F5 key. If messages about add-ons appear at the bottom or top of the browser, then you need to allow them to run.
Can't login to the site (certificate not matched/authorized)?
Review question 3, if the problems are not related to the settings, then when you enter the site you will receive a message: The client certificate is not associated with the system user (or the selected electronic signature is not authorized).
Perhaps you have not passed accreditation on the site, if so, then see // instructions for accreditation on the electronic site. If accreditation is still passed, but you received a new signature, for example, due to the fact that the old signature has expired, then you need to link it to your personal account, for this you need to fill out an application for adding a new user on the site and attach it to the application the following documents:
For legal entities: either a decision on the appointment of a head, if the signature is for the head of the organization, or a power of attorney for an employee of the organization, if the signature is made for the employee (in this case, an archive is attached to the site with a decision on the appointment of a head and a power of attorney from the head to the employee). For commercial sites, a copy of the TIN of the organization may additionally be required.
For individual entrepreneurs / individuals: passport, TIN.
Examples of the page for adding members on popular sites:
Sberbank-AST (in the section For Participants => Registration => Adding a new user) http://www.sberbank-ast.ru/freeregister.aspx
ZakazRF (in the section Registration => Registration of a new user of the organization) http://web.zakazrf.ru/Participant/RegistrationUser
MICEX (in the section For Participants => Registration of a power of attorney) https://app.rts-tender.ru/supplier/lk/Accreditation/EmployeeRequest.aspx
RTS-Tender (button Login => Accreditation => Submit a request to add a new user) https://app.rts-tender.ru/supplier/lk/Accreditation/EmployeeRequest.aspx
Roseltorg - on this site, you must first log in with a login and password or with an old still valid electronic signature, information with the name of the organization and username with icons will appear at the top right. You must click on the pencil next to the username, a menu with buttons will appear, among which you need to find the button: Link a new EDS.
B2b-center - you need to go to your personal account (using your login and password or the old valid signature). Select in your personal account Information about the organization => My electronic signatures => Upload a certificate through the tab => Registration of certificates. You must check the checkbox: The certificate is already installed on the computer.
Fabrikant - you need to go to your personal account (using your login and password or the old valid signature). Select the Certificates line in your personal account. Upload the certificate through the Upload new ES tab.
What is the password for the container of my signature?
When using an electronic signature for the first time, a window pops up: Enter the password for the container
The default password is 12345678.
The password for the container can be changed. If you have a ruToken carrier, then you need to install // Rutoken control panel. After starting the program, enter the administrator's PIN in the Administration tab (by default, the administrator's PIN is 87654321). Next, click the Unlock => Change button, select a user and set a password.
If you have an eToken carrier, then you need to install // the eToken driver in accordance with the bitness of the Windows system (you can see the bitness of the system by right-clicking on the computer icon and selecting Properties: 32 or 64 bit Windows system). Launch eTokenProperties, click on Detail View (gear icon on the top right). Select the name of the eToken from the list on the left (the name will be highlighted before the eTokenPKIClient Settings line). In the window that appears on the right, you must click on the icon: Change password (in the form of a pencil and keyboard).
How to register on the GIS-housing and communal services?
The GIS housing and communal services service authorizes organizations through the public services portal. Therefore, all accounts must be created on the gosuslugi.ru website. First you need to register the head as an individual. The created account is activated using an electronic signature issued to the organization. After activating an individual, you can add an organization. Confirmation is carried out using the same EDS. If necessary, you can add employees of the organization (they must also have an individual account on the gosuslugi.ru website, confirmed by the same electronic signature). After that, the head of the organization needs to log into the personal account using the EDS and, having selected the role of the organization, add an employee from the account of the legal entity. In the personal account of the organization, the manager can assign administrator rights.
How to understand what type of signature is needed to work on a particular site?
Tell the consultant the exact name of the site (electronic address of the site) for which you need an electronic signature.
How long does it take to produce an EDS?
An electronic signature is made within 1 business day after payment is received and a minimum package of documents (copies of a passport and SNILS) is provided.
Is it possible to update the electronic signature remotely without visiting the center for issuing electronic signatures?
Issuing and re-issuing an electronic signature remotely is not possible. This is contrary to the safety requirements established by the current legislation of the Russian Federation. To obtain an electronic signature, it is necessary to verify the identity of the recipient in //any ES issuing center.
How to sign a document using an EDS?
Word documents can be signed with an electronic signature in the following cases:
1. If the document was created in Microsoft Office 2003/2007, then no additional software is required.
2. If the document was created in Microsoft Office 2010/2013, then you will need to install the CryptoARM program additionally - this is a program that meets the requirements of Russian law in terms of ensuring a legally significant status. After signing the document, a file with the .sig extension is created, which unambiguously confirms the fact of signing the document.
What is a certificate chain?
The chain of certificates is used to confirm the authenticity of the ES certificate. The chain includes certificates of the parent certification authority, intermediate certification authorities (including the CA that issued the user's ES certificate) and the user's certificate. If the certificate chain is built incorrectly (in the certificate properties window on the Certification Path tab, the certificates of the main and intermediate certification authorities are missing or marked with a cross), then the end user certificate is considered untrusted and cannot be used.
What is Capicom / Cadescom?
Capicom and Cadescom are extension programs for Internet Explorer. They are necessary to work with the electronic signature in the browser. CryptoPro EDS BrowserPlug-in includes both of these extensions.
How to add a site to trusted nodes (sites)?
In order to add the site of an electronic site to trusted sites in a browser, go to the site of the site through the Internet Explorer browser and open "Internet Options". On the Security tab, click on the Trusted Sites zone and click the Sites button. Uncheck "All sites in this zone require server verification (https:)". Click the "Add" button, then close the "Trusted Sites" and "Internet Options" windows and refresh the browser page by pressing Ctrl + F5.
How to enable ActiveX settings?
Go to the site site through the Internet Explorer browser and open the browser properties. On the Security tab, click the Trusted Sites zone (Trusted Sites in Internet Explorer 8) and click the Custom button. In the list of options, find the "ActiveX controls and plug-ins" section. For all options in this section, select Enable. Click "OK", confirm the request to save the settings. Close the Internet Options window and refresh the page by pressing Ctrl + F5.
Is CryptoPro CSP a free program?
CryptoProCSP is a paid product. The free trial period of the product is three months from the date of the first installation. After this period, you must purchase a license to continue working with the program.
What to do if the license for CryptoPro CSP has expired?
When the CryptoPro CSP license expires, you must purchase a new license. As a rule, the license expires together with the validity of the electronic signature, so you may encounter such a situation very rarely. However, if you encounter a problem, then you have three types of CryptoProCSP licenses to choose from:
- Annual, the license is valid for 1 year.
- Perpetual, permanent.
- Embedded in the ES, it is valid during the entire validity period of the ES and cannot be used separately from it.
How to enter the serial number of the CryptoPro CSP license?
To enter the CryptoProCSP license serial number, run the program. On the General tab, click the Enter License button. Enter the license number in the "Serial number" field.
What should I do if I cannot enter the CryptoPro CSP license serial number?
If you are unable to enter the serial number of the CryptoProCSP license, then your serial number does not match the version of the installed program. The serial number of the CryptoProCSP license must match the product version. For version 3.9, the serial number must start with 3939, for version 4.0 - with 4040. You must install the version of CryptoProCSP that matches your license number.
How to remove CryptoPro CSP?
Uninstalling CryptoProCSP takes place in two stages. First, uninstall the program using standard tools, through the "Control Panel", then run the cspclean.exe utility. After the utility completes, you must restart your computer.
How to update CryptoPro CSP?
To install a newer version of CryptoProCSP, run the installer and confirm the update request. You do not need to uninstall the currently installed version of the product.
How to copy an electronic signature?
To copy an ES, launch CryptoProCSP, go to the "Service" tab and click the "Copy" button. By clicking "Browse", select the signature you want to copy. Click OK, then Next. Enter a name for the container to be created. It must differ from the original container name by at least one character. Click Done. Select "Registry" from the media list and click "OK". You can set a password for the new container, or leave the password fields blank.
In what cases is it necessary to reissue an electronic signature?
An unscheduled reissue is carried out in cases where the data that is in the signature changes. For legal entities, such data are: abbreviated name of the legal entity, legal address, TIN / KPP / OGRN, user's full name, position, SNILS and email. For Individual Entrepreneurs: full name, TIN/OGRNIP, registration address, SNILS, email. For Individuals: full name, TIN, registration address, SNILS, email. If the data has changed, the signature can still be used, but it loses its legal force, so you may be rejected in electronic auctions with such a signature.
How to reissue a signature?
The procedure for re-issuing (renewal) of an electronic signature is the same as for the initial production of an electronic signature. You need to re-submit copies of documents and, upon receipt of a signature, verify your identity in our office.
CryptoPro CSP license expired / can't enter license?
CryptoPro CSP is a paid product and requires the purchase of a license. After receiving the electronic signature, you will be given a set of documents with the SCPEP revocation card, which indicates the type of license and serial number, if it was purchased.
The license is:
The built-in license is recognized by CryptoPro CSP versions 3.9 R4 and all versions 4.0.
The serial number of the annual or permanent license must be entered if this has not already been done.
The serial number must match the product version. The product version can be viewed in the CryptoPro CSP program on the “General” tab at the top right (4040Х-ХХХХХ-ХХХХХ-ХХХХХ-ХХХХХ for CryptoPro CSP 4.0 and 3939Х-ХХХХ-ХХХХХ-ХХХХХ-ХХХХХ for CryptoPro CSP 3.9).
 Installing cryptopro Cryptopro csp version 3
 Step-by-step installation of the program without installation disk Cryptopro 3
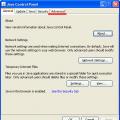 Solving common mistakes in sufd