Electronic budget planning setting. Login failed
Problem
When trying to enter the personal account of the GIIS "Electronic budget", an error message appears:
Can't display this page
Enable the TLS 1.0, TLS 1.1, and TLS 1.2 protocols in the Advanced Options section and try connecting to the https://ssl.budgetplan.minfin.ru webpage again. If the error persists, contact the website administrator.
Solution
It is necessary to check the workplace settings according to the document.
The instructions do not mention a few things:
- You need to install CryptoPro EDS Browser plug-in and check it out on the demo page.
- It is necessary to disable SSL / TLS protocol filtering in the antivirus settings, in other words, for the site you are looking for, you should make an exception for checking a secure connection. In different antiviruses it can be called differently. For example, in Kaspersky Free you need to go "Settings>Advanced>Network>Do not scan secure connections" .
D="P0001" CLASS="formattext topleveltext">
MINISTRY OF FINANCE OF THE RUSSIAN FEDERATION
User's guide for working with the subsystem of budget planning of the state integrated information system for managing public finances "Electronic budget" for the formation of an expense report form, a source of financial ...
User's guide for working with the subsystem of budget planning of the state integrated information system for managing public finances "Electronic budget" on the formation of a form of a report on expenses, the source of financial support for which is a subsidy (budget investments, interbudget transfers) and their coordination for the main managers of federal budget funds
Version 2017.01
List of terms and abbreviations
|
Budget classification of the Russian Federation |
|
|
the Russian Federation |
|
|
State Integrated Information System for Public Finance Management "Electronic Budget" |
|
|
Full Name |
|
|
Federal executive authority |
1 Start System
To start working with the System, you must perform the following sequence of actions:
- launch the "Internet Explorer" Internet browser by double-clicking the left mouse button on its shortcut on the desktop or click on the "Start" button and select the item corresponding to the "Internet Explorer" Internet browser in the menu that opens;
- in the address bar of the Internet browser, enter the address: http://budget.gov.ru/lk;
Figure 1. Unified portal of the budget system
On the page of the Unified portal of the budget system, you must click on the button "Transition to the subsystem" Budget planning "(Figure 1);
Note. If the transition to the "Budget Planning" subsystem was not carried out, it is necessary to enter the address in the address bar of the Internet browser: https://ssl.budgetplan.minfin.ru/http/BudgetPlan/.
Figure 2. Button "Login with certificate"
In the window that opens, click on the "Login with certificate" button (Figure 2).
After selecting the authentication method "Certificate login", the System automatically requests the certificate of the electronic signature verification key and the certificate pin code, then the user-owner of the certificate is searched, and the main window of the System is opened.
Figure 3. Login button
After choosing a login, you must click on the "Login" button (Figure 3).
Note. If different users use the same certificate for authorization (for example, one authorized person has different roles), the System will prompt you to select a specific user.
Figure 4. Main window of the System
As a result, the main window of the System will open (Figure 4).
2 Formation of report templates according to agreements
Formation of report templates according to agreements is carried out in the register of templates.
Figure 5. Switching to the register of agreement templates
To go to the registry of templates, you need (Figure 5):
- select the "Menu" tab (1);
- select subsection "Reference books" (3);
- open the item "Register of templates" (4).
Figure 6. Template Registry tab
As a result, the "Register of templates" tab will open, in which you need to go to the "Report templates" tab (Figure 6).
Figure 7. Function buttons
To work with the registry of agreement templates, the following functional buttons are implemented in the System (Figure 7):
- "Add" - adding a report template;
- "Print document template" - generating a printed form of the report template on the user's workstation with *.pdf extension;
- "Agree" - approval of the report template;
- "Edit" - editing the report template;
- "Delete" - deleting the report template.
Figure 8. Report template columns
Information about report templates is presented in the following columns of the table (Figure 8):
- "FOIV";
- "Status";
- "Full name of the approver/approver";
- "Template number";
- "Date of creation";
- "Date of change";
- "Type of agreement";
- "Name of the template".
Figure 9. List sorting
If it is necessary to display hidden columns, press the button (1), select the item from the drop-down list
(2) and check the box next to the columns that you want to display on the screen (3) (Figure 9).
Figure 10. Search by value in columns
To quickly search for records, the System implements search fields by column values (Figure 10).
2.1 Create an agreement report template
Figure 11. Add button
To create a template for reports on agreements, you need to click on the "Add" button in the template registry (Figure 11).
Figure 12. "Report template entry form" window
As a result, the "Report template entry form" window will open, containing tabs (Figure 12):
- "Basic information";
- "Heading part";
- "Sections of reporting";
- Signatures.
In the "Basic information" tab, in the "Requires approval" field, you must check the box if the agreement report template requires approval.
The "Template number" field is filled in automatically and is not editable. The template number has the format РРР-ТТ-NNN, where РРР is the code of the Chapter in accordance with the budget classification of the Russian Federation from the reference book "Chapters on BC", TT is the type of agreement, NNN is the template number in order.
The "Created Date" field is filled in automatically and is not editable.
The "Agreement Type" fields are filled in by selecting a value from the drop-down list.
The "Template Name" field is filled in manually by the user.
The "Template numbering option" field is filled in by selecting a value from the drop-down list.
Figure 13. "Add TAG" button
The "Internal number mask" field is filled in manually or by pressing the "Add TAG" button (Figure 13).
Figure 14. Insert button
As a result, the "Select a tag" window will open, in which you need to select a tag with one click of the left mouse button and click on the "Select" button (Figure 14).
The "Form code, by:" field is filled in by selecting a value from the drop-down list.
The field "Form code, number" is filled in manually from the keyboard.
Important! The fields "Agreement type", "Template name" and "Template numbering option" are mandatory.
To save the entered data, you must click on the "Save" button (Figure 15).
Figure 16. New line
As a result, a new line will be displayed in the register of agreement templates (Figure 16).
To fill in the "Header", "Reporting Sections" and "Signatures" tabs, you need to open the added line by double-clicking the left mouse button.
2.1.1 Filling in the "Header" tab
Figure 17. Add Title Row Button
To form a line, in the "Heading part" tab, click on the "Add a header line" button (Figure 17).
Figure 18. "Edit object" window
As a result, the "Edit object" window will open (Figure 18).
The "Part Number" field is filled in automatically and is not editable.
Important! The fields "Line number" and "Line name" are mandatory.
To save the entered data, click on the "Save" button (Figure 19).
Figure 20. Header Tab
As a result, a line will be added in the "Heading part" tab (Figure 20).
Figure 21. Move row "Up" and "Down" in order
To move the title bar "Up" and "Down" in order, select the row and click on the corresponding button or (Figure 21). The rows will be displayed in the printed form of the report in the specified order.
Next, you need to go to the "Reporting Sections" tab.
2.1.2 Filling in the "Reporting Sections" tab
Figure 22. Reporting sections tab
The "Report name" field is filled in manually from the keyboard (Figure 22).
Figure 23. Add button
To add a section, click on the "Add" button (Figure 23).
Figure 24. "Edit object" window
As a result, the "Edit object" window will open (Figure 24).
The "Order number" field is filled in automatically and is not editable.
The field "Name" is filled in manually from the keyboard.
Important! The field "Name" is mandatory.
Figure 25. Adding a column
To add a column, click on the "Add column" button and select the appropriate item (Figure 25).
Figure 26. Line in the Edit Object window
As a result, a line will be added in the "Edit Object" window, in which the "Column name" and "Width" fields are filled in manually from the keyboard (Figure 26).
Figure 27. Moving column "Up" and "Down" in order
To move the column "Up" and "Down" in order, select the row and click on the corresponding button or (Figure 27). The rows will be displayed in the printed form of the report in the specified order.
To save the entered data, click on the "Save" button (Figure 28).
Figure 29. Preview button
To preview and send the report template for printing, click the "Preview" button (Figure 29).
Figure 30. Preview window
The "View" window that opens will display the field data of the report template section (Figure 30).
Figure 31. Closing the Preview window
To close the "View" window, click on the window close icon (Figure 31).
Figure 32. Close button
To close the "Edit object" window, click the "Close" button (Figure 32).
Figure 33. Row in the "Reporting Sections" tab
As a result, a line will be added to the "Reporting Sections" tab (Figure 33).
Next, you need to go to the "Signatures" tab.
2.1.3 Filling in the "Signatures" tab
Figure 34. Add Row button
To add a line, click on the "Add line" button (Figure 34).
Figure 35. "Edit object" window
As a result, the "Edit object" window will open (Figure 35).
The "Line number" field is filled in manually from the keyboard.
The "Line part number" field is filled in automatically and is not editable.
The fields "Line name" and "Line content" are filled in manually from the keyboard.
Important! The fields "Line number" and "Line content" are mandatory.
Adding a tag is carried out similarly to the description above.
To save the entered data, click on the "Save" button (Figure 36).
Figure 37. Line in the "Signatures" tab
As a result, a line will be added in the "Signatures" tab (Figure 37).
Figure 38. Move row "Up" and "Down" in order
To move the heading line "Up" or "Down" in order, select the line and click on the corresponding button or (Figure 38). The rows will be displayed in the printed form of the report in the specified order.
To save the entered data and close the "Report template entry form" window, click the "Save" button (Figure 39).
2.2 Formation of the printed form of the agreement report template
Figure 40. Button "Print document template"
To view the printable form of the agreement report template, select the appropriate record with one click of the left mouse button and click on the "Print document template" button (Figure 40).
As a result, a printed form of the agreement report template with the *.pdf extension will be downloaded to the user's workstation.
3 Affixing a resolution to the agreement report by the organization that provided the subsidy
A resolution is put down on the report under the agreement by the organization that provided the subsidy, is carried out in the register of reports on the implementation of expenditures, the source of financial support for which are subsidies (budget investments, interbudgetary transfers).
Figure 41. Transition to the register of subsidy expenditure reports
To go to the register of subsidy expenditure reports, you need (Figure 41):
- select the "Menu" tab (1);
- select the "Agreements" section (2);
- select the subsection "Register of reports on subsidy expenditures" (3).
Figure 42. Tab "Register of reports on the implementation of expenditures, the source of financial support for which are subsidies (budget investments, interbudgetary transfers)"
As a result, the tab "Register of reports on the implementation of expenditures, the source of financial support of which is subsidies (budget investments, interbudgetary transfers)" will open, in which you need to go to the tab corresponding to the budget cycle with which you will work (Figure 42).
Figure 43. Function buttons
To work with the register of reports on the implementation of expenditures, the source of financial support for which is subsidies (budget investments, interbudgetary transfers), the following functional buttons are implemented in the System (Figure 43):
- "Refresh" - page refresh;
- "Version":
- [Version View]- viewing the version of the report under the agreement;
- "Seal":
- [Print Registry]- formation of a printed form of the register of reports on the implementation of expenses, the source of financial support for which is subsidies (budget investments, interbudgetary transfers) to the user's workstation with the *.xls extension;
- [Print Document]- formation of a printed form of the report by agreement on the user's workstation with the *.pdf or *.doc extension;
- "Create a resolution" - the formation of a resolution ("Agreed" or "Not agreed");
- "Confirmation of the report" - creation of an approval sheet, approval (if necessary) and approval of the imposed resolution;
- "Document Signatures" - viewing electronic signatures;
- "History of resolutions" - view the history of resolutions.
Figure 44. "Create Resolution" button
To form a resolution, it is necessary to select the corresponding line with one click of the left mouse button and click on the "Create Resolution" button (Figure 44).
Note. If the report under the agreement was not previously brought to the status of the Recipient "Approved", then it is not displayed for the user of the federal executive authorities.
Figure 45. Solution window
As a result, a decision window on approval will open (Figure 45).
The fields "Date, time of receipt for approval" and "Name of the GRBS, position, full name" are filled in automatically.
In the field "Budget appropriations distribution" it is necessary to select the value "Agreed" or "Not agreed" from the drop-down list by pressing the button.
Important! The field "Distribution of budgetary appropriations" is mandatory.
The field "Text of the decision on approval" is filled in manually.
Important! The field "Text of the decision on approval" is mandatory if the value "Not approved" is selected in the "Decision" field.
The field "Name, position, structural subdivision of the author of the resolution" is filled in automatically.
After filling in the fields, you must click on the "Save" button (Figure 46).
3.1 Formation of the approval sheet
Figure 47. "Acknowledge report" button
To generate an approval sheet, you must click on the "Report Confirmation" button (Figure 47).
Figure 48. Approval sheet
In the "Approval sheet" window that opens, you need to add approvers and approvers by clicking on the "Add" button in the appropriate blocks (Figure 48).
Figure 49. Select button
In the "Select users" window that opens, you must select the appropriate entry with a single left-click and click the "Select" button (Figure 49).
Important! It is possible to select several approvers and one approver from the list. There can only be one approver. The approval sheet cannot be saved if no approver is selected.
Figure 50. Saving the approval sheet
After selecting approvers and approvers, you must click on the "Save" button (Figure 50).
As a result, the status of the document will be set to "Under approval".
Prior to the start of the approval process, the author of the approval sheet can edit the list of approvers and approvers.
Important! Removing a previously selected approving or approving person is possible only with the subsequent replacement of the approving or approving person.
Figure 51. "Edit" button
To change the approving person, click on the "Edit" button (Figure 51).
Figure 52. Delete button
After that, you must click on the "Delete" button (Figure 52).
Figure 54. Add button
After that, to add a new approving person, you must click on the "Add" button (Figure 54).
To save the changes made, click on the "Save" button (Figure 56).
Editing a previously selected approver is carried out in the same way as described above.
After the formation of the approval sheet, those included in the list of approvers and approvers consistently approve the document in accordance with clauses 3.2 and 3.3 of this user manual.
3.2 Harmonization
Figure 57. "Acknowledge report" button
To approve the document, the approver needs to select the appropriate line with one click of the left button and click on the "Report Confirmation" button (Figure 57).
If necessary, the approving person may appoint another person responsible for approval as described in clause 3.1 of this user manual.
Figure 58. Agreed button
In the window "Approval sheet" that opens, you must click on the "Agreed" button (Figure 58).
In the "Edit object" window, if necessary, fill in the "Comment" field and click the "Save" button (Figure 59).
The document will then change to the "Agreed" status.
To refuse approval of a document, the approver must select the appropriate line with one click of the left mouse button and click on the "Report Confirmation" button (Figure 57).
Figure 60. "Inconsistent" button
In the window "Approval sheet" that opens, you must click on the "Not approved" button (Figure 60).
In the "Edit object" window, fill in the "Comment" field and click the "Save" button (Figure 61).
Important! The "Comment" field is required.
After that, the document will go into the "Not approved" status.
3.3 Approval
Figure 62. "Acknowledge report" button
To approve the approved document, the approver needs to select the appropriate line with one click of the left mouse button and click on the "Report Confirmation" button (Figure 62).
If necessary, the approver may appoint another person responsible for approval as described in paragraph 3.1 of this user guide.
Figure 63 Approved button
In the window "Approval sheet" that opens, you must click on the "Approved" button (Figure 63).
The document will then change to the "Approved" status.
To refuse to approve a document, the approver needs to select the corresponding line with one click of the left mouse button and click on the "Report Confirmation" button (Figure 62).
Figure 64. Not approved button
In the opened "Approval sheet" window, click on the "Not approved" button (Figure 64).
After that, the document will go into the "Not approved" status.
Editing and re-approval
Figure 65. "Acknowledge report" button
To eliminate comments and resend the document for approval, it is necessary to select the inconsistent line with one click of the left mouse button and click on the "Report Confirmation" button (Figure 65).
Figure 67. "History of Approval" button
To view the approval history, in the "Agreement sheet" window, click on the "Agreement history" button (Figure 67).
Electronic text of the document
prepared by Kodeks JSC and verified against:
official website of the Ministry of Finance of Russia
www.minfin.ru, 18.04.2017
User's guide for working with the subsystem of budget planning of the state integrated information system for managing public finances "Electronic budget" on the formation of a form of a report on expenses, the source of financial support for which is a subsidy (budget investments, interbudget transfers) and their coordination for the main managers of federal budget funds
| Document's name: | User's guide for working with the subsystem of budget planning of the state integrated information system for managing public finances "Electronic budget" on the formation of a form of a report on expenses, the source of financial support for which is a subsidy (budget investments, interbudget transfers) and their coordination for the main managers of federal budget funds |
| Host body: | Ministry of Finance of Russia |
| Status: | current |
| Published: | The document has not been published. |
| Acceptance date: | 07 April 2017 |
| Effective start date: | 07 April 2017 |
When drawing up a FCD plan in 2020, it is necessary to be guided by the requirements of the Order of the Ministry of Finance No. 186n.The formation of a financial and economic activity plan for 2020 should be carried out by federal institutions in the GIIS "Electronic Budget".The rules for reporting on the results of operations and the use of property are regulated by the Order of the Ministry of Finance No. 114n, taking into account the updates made on December 26, 2018 No. 287n, which entered into force on January 1, 2020.Since 2020, the budget classification has also changed. The Ministry of Finance has prepared comparative tables with 2019 codes, as well as linking 2020 codes to each other.
Purpose of the courseexplain the procedure for working in the "Electronic Budget" system when drawing up a FCD plan, provide comments on new legal documents.
The course is designed for heads of financial and economic departments,accounting services of federal and regional executive authorities, GRBS and their subordinate institutions, federal budgetary and autonomous institutions.
_____________________
- Planning the financial and economic activities of state (municipal) institutions, taking into account the provisions of the order of the Ministry of Finance of Russia No. 186n . Features of the current legal regulation in terms of the procedure for the formation and financial support of the state assignment, current changes in the relevant legal acts. Rules for the formation, maintenance and approval of the All-Russian basic (industry) lists, Federal lists, Regional lists of state (municipal) services and works, on the basis of which the state (municipal) task is formed. The main reasons for the refusal of the Ministry of Finance of Russia to agree on projects of services and works, problems and errors in the formation of these lists. Requirements for regulatory legal acts establishing the rules for granting subsidies (targeted, NPOs, grants) in the implementation of National Projects.
- Methodological issues of the formation and maintenance of the FCD plan in institutions . PFCD for 2020, comments to Order 186n dated 08/31/18. The procedure for compiling and approving PFCD. Indicators on receipts and payments. An updated procedure for compiling, approving and amending the FCD Plan in accordance with changes in legislation.
- Institutional Income Planning . Features of the application of budget classification in income planning. Justification of planned income indicators. Substantiation of planned indicators of other income. New rules and sample justifications for the FCD Plan. Ataccounts receivable for income and advances received.
- Institutional cost planning for CWR . Update of the budget classification of expenditure types, comparison.
- Calculations of planned indicators for payments. Calculation of payments for the payment of taxes, the object of taxation for which are the income (profit) of the institution. Substantiation of expenditure indicators.
- Plans of FCD in the course of reorganization of budgetary and autonomous institutions . What should be taken into account when drawing up the FCD Plan.
- The procedure for posting informationincluding the approved FCD plans, in accordance with changes in legislation on the official website of state (municipal) institutions bus.gov.ru. Regulatory Regulation. Implementation of website functionality development in 2020. Using stakeholder analytics tools.Provision procedurereport on the implementation of the plan of financial and economic activities. The procedure for filling out information about targeted subsidies.
- Centralized service for treasury support of targeted funds and payments in the Electronic Budget system. Target model of information flows on treasury support. Information and technological support of treasury support. Target scheme of cooperation. Creation of a centralized service for treasury support of targeted funds in the GIIS "Electronic budget". The procedure for making payments within the framework of treasury support of targeted funds.
- Features of planning the limits of budgetary obligations in 2020 for the adoption and execution of budgetary obligations to ensure the performance of the functions of institutions. Formation and approval of the budget estimates of the institution in accordance with the General requirements approved by order of the Ministry of Finance of Russia 112n. Peculiarities of allocating expenses by sections of the budget estimate. Filling in justifications (calculations) of planned estimated indicators. The procedure for amending the budget estimate. Planned changes to the order of the Ministry of Finance of Russia 112n.
- Budget Spending in 2020: Limitations and Opportunities . Budget appropriations, limits of budget obligations: distribution (finishing), increase, redistribution. Remains: need, features of use, return. Conclusion of contracts in 2020: acceptance of budgetary (monetary) obligations, advance payments.
- Features of posting information on a single portal of the budget system of the Russian Federation budget.gov.ru (EPBS) by the chief administrators of the federal budget funds, as well as the financial authorities of the constituent entities of the Russian Federation, in accordance with the provisions of the order of the Ministry of Finance of Russia dated December 28, 2016 No. 243n. The functionality and capabilities of the portal integration with the subsystems "Electronic budget". All-Russian, federal and regional Lists of state and municipal services and works: changing the procedure for the formation of state and municipal assignments. Letter No. 21-03-04/82833/07-04-05/14-948 dated December 12, 2017 from the Ministry of Finance of Russia and the Federal Treasury. Draft Federal Law "On the Federal Budget" on the Single Portal. Connection procedure for posting information on the Single Portal. Communication services of the Unified Portal. Data Designer and Report Designer. Calculators. Scheme of the business process of information placement. Development of the EPBS in 2019-20.
The program will feature employees of the Ministry of Finance of Russia,Federal Treasury, specialists in budget accounting.
_________________
Form of education: full-time - part-time : April 13 (full-time part, 8 academic hours),14th of April (correspondence part, 8 academic hours).
lk.budget.gov.ru/udu-webcenter- if you have landed on this page, it means that you tried to log in to your personal account of the Electronic Budget, but could not do it.
Why? Let's try to answer the question.
1. First of all, we check whether you also have the Jinn and TLS Continent programs installed (At the time of this writing, version 1.0.920.0 was installed). I advise you to immediately switch to

2. - The main reason why you could not enter the Electronic Budget when all the programs necessary for work are installed is not a configured browser (Mozilla Firefox, Internet Explorer, Google Chrome, Opera). Let's look at the example of popular browsers for working in EB.
Browser settings for working in the E-Budget after switching to the TLS 2.0 Continent are not required!!!
I advise you to set everything to Internet Explorer!!!
a) Internet Explorer
1. Open the properties of the web browser.
2. Go to the "Connections" tab.
3. Press the "Network settings" button.
4. In the "Proxy server" section, set the fields Address: 127.0.0.1, Port: 8080.
5. Press the OK button.
6. Go to the "Security" tab.
7. Select a zone for setting "Trusted Sites".
8. Press the "Sites" button.
9. In the "Trusted Sites" window, uncheck the box "All sites in this zone require server verification (https:)".
10. In the "Add the next node to the zone" field, set the value "http://lk.budget.gov.ru" and click the "Add" button.
11. In the "Trusted Sites" window, click the "Close" button.
12. In the "Internet Options" window, click the "OK" button.
b) Google Chrome
1. Open web browser settings.
2. Go down the settings window and activate the link "Show advanced settings".
3. Click the "Change proxy server settings" button.
4. Repeat steps 4-12 of section "a) Internet Explorer".
c) Mozilla Firefox
1. Open the "Tools" menu and select "Settings".
2. Go to the "Additional" section on the "Network" tab.
3. In the “Connection” settings section, click the “Configure…” button.
4. In the connection parameters window that opens, set the "Manual proxy service configuration" value.
5. Set the values of the HTTP proxy fields: 127.0.0.1; Port: 8080.
6. Press the OK button.
7. In the "Settings" window, click the "OK" button.
d) Opera
1. Open the Settings\General settings menu.
2. Go to the "Advanced" tab, select the "Network" settings section.
3. Click the "Proxy servers..." button.
4. In the connection parameters window that opens, set the value "Manually configure proxy server".
5. For the HTTP protocol, set the values of the proxy server fields: 127.0.0.1; Port: 8080.
6. Set the value to "Use a proxy server for all protocols".
This program is designed to increase transparency and openness in the main activities of government bodies and is responsible for managing public finances.
With the help of the planning program of the GIS "Electronic Budget", the quality of management of government agencies is improved through the introduction of information and communication technologies and the creation of a single information space in the environment of managing state, municipal, public finances.
The concept of developing the creation of the GIIS "Electronic budget" was confirmed in RP No. 1275-r dated 07/20/2011. Regulates the operation of the system Government Decree No. 658 of 06/30/2015.
The system consists of several subsystems aimed at the implementation of certain goals in the financial sector:
- procurement management;
- personnel management;
- budget planning;
- cash management;
- income and expense management;
- management of regulatory reference information, etc.
The following users must register and work in the program:
- bodies of state power and local self-government and state non-budgetary funds;
- organizations that are participants in the budget process and financed through the state budget and legal entities that receive funds from the budget of the Russian Federation;
- individuals and other persons - participants in the budget process;
- organizations carrying out procurement activities in accordance with the norms of 223-FZ.
Placement of schedules is carried out using the "Financial Management" subsystem, if the customer is the Russian Federation. BU, AU at the federal and municipal levels and other customer organizations form and publish schedules directly in the Unified Information System. Institutions must duplicate all procurement documentation in the EB (Order of the Ministry of Finance No. 173n dated December 29, 2014), and then transfer it to the Pacific Fleet.
"Electronic budget" of the Ministry of Finance and the Federal Treasury
The entrance to the certificate "Electronic budget" of the Ministry of Finance is carried out at the link http://ssl.budgetplan.minfin.ru. With the help of subsystems located on the website of the Ministry of Finance, the following actions are carried out:
- study information on filling out forecast forms;
- to form the state task and budget estimates;
- implement procedures for accounting and budgetary accounting for institutions;
- view various registries and reference information;
- fill in the information and documentation on the procedures of the state order and procurement activities;
- ensure information exchange;
- create, save and send to the authorized body documentation on planning and execution of the budget and on the implementation of control measures, etc.
In the system "Electronic budget" of the Federal Treasury the following functionality:
- maintaining a consolidated register of UBP and NUBP;
- interaction with the official website www.bus.gov.ru;
- development and maintenance of various industry lists;
- work with the Unified portal of the budget system of the Russian Federation;
- procurement management;
- accounting and reporting;
- cost management.
Connecting and getting started
The regulation for connecting, entering the "Electronic budget" (personal account) and starting work in it is enshrined in the letter of the Ministry of Finance of the Russian Federation No. 21-03-04 / 35490 dated 06/17/2016. First of all, the organization must issue an order on the appointment of persons responsible for the work in the ES, the definition of employees authorized to prepare documentation placed in the subsystems. The order must approve the duties of each responsible employee. Under the order, there must be signatures on the familiarization of each employee with the contents of the internal organizational document.
In order to start working, the user must:
1. Complete diagnostics and preparation of automated workstations for work with GIS "EB" in accordance with the requirements established in Appendix 1 to the Connection Procedure.
2. Prepare qualified EDS keys for each performer. New keys are obtained only for those who have not previously worked in the EIS. The rest use EDS operating in the Unified Information System.
3. Install the Windows Installer software, all the necessary drivers for the user certificate information carrier, the Continent TLS Client and Jinn-Client programs.


4. Fill out and send to the TOFC an application for connection in a special unified form (letter of the Ministry of Finance No. 21-03-04 / 61291 dated 10/20/2016). The application must be accompanied by an order on the appointment of responsible persons, files of EDS certificates, consent signed by each responsible employee for the processing of personal data, an application and a power of attorney for obtaining CIPF in the form approved by the Ministry of Finance (letter No. 21-03-04 / 35490 dated 06/17/2016) .
5. Wait for the results of checking the package of documents submitted to TOFK with an application for connection, and, if necessary, make all corrections and additions.
6. Upon successful verification, install CIPF at the workplace, register new executors in the EIS, install new EDS key certificates and enter data on responsible employees into the EB system with the simultaneous definition of the roles of each executor.


7. Connect to the "Electronic budget" system, enter your personal account and start working in it.
 Installing cryptopro Cryptopro csp version 3
 Step-by-step installation of the program without installation disk Cryptopro 3
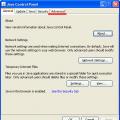 Solving common mistakes in sufd