Front panel audio not working. What to do if the headphones on the front of the PC do not work? Connecting the headset to a PC
Recently, a friend contacted me with a question why her front sound panel does not work. She bought a computer not so long ago, everything works, she is happy with everything, connected and set up the Internet. But there was a problem.
She bought headphones with a microphone to talk on Skype. After she connected them to the front panel, she found that neither the headphones nor the microphone were working. Moreover, if you connect them to the rear panel, then everything works. And there are many such cases. What is the problem? Maybe this is a marriage and you need to use warranty service?
Not everything is as bad as it seems. In fact, in almost every case, users simply don't look closely at the settings. The connectors located in the front are in working order and break extremely rarely!
What to do if there is no sound on the front panel
In the lower right corner of the monitor, click on the speaker icon. We are looking for a driver designed to play sound on a computer. I have it called "Realtek HD". If suddenly it is not there, then we turn to the control panel and look for it on it. If it is missing there, then you just have a different driver.
We start the found driver. The sound settings window will appear on the monitor. Select the “Speakers” tab (if you are the owner of Windows XP, then you will have the “Sound inputs / outputs” tab)

As soon as you do this, sound will appear on the front panel.
All of the above applies to Windows 7. Therefore, if you are the owner of the XP version, then your control panel will be slightly different. When you go to the “Audio I/O” tab, you will see that next to “Analog” there is a small wrench in a blue circle. You need to click on it, then a window will appear on the screen, as for the version of Windows 7. And then according to the instructions.
Did you like the material?
Share:
Rate:
Most modern computers have additional USB, IEEE1394, and 3.5 mm minijack ports on the front panel of the case. headphone and microphone jacks. This was invented specifically for convenience, so that users do not climb behind the system unit to connect a USB flash drive or audio speakers. Unfortunately, sometimes it can happen that a negligent PC builder forgot or was too lazy to connect them when assembling the system unit. And now the front headphone jacks don't work. What to do? Call the master and pay money? No! You can do everything yourself.
We disconnect the system unit from the electrical network. Unscrew the right side wall of the case and remove it.
We look at what cables go from the case to the computer motherboard - usually this is a small bundle of wires that are responsible for the power button, "reset", USB ports, etc. Among them will be the cable from the front headphone and microphone jacks. They are usually labeled "AC'97" or "HDAudio".

Now you need to carefully inspect the motherboard - you need to find the socket marked "F-Audio":

On some models, the socket may be signed as "FP_Audio":

Or "HDAudio":

Now you need to connect the front headphone and microphone connector to the outlet:

Please note that the plug and socket are connected only in one position due to the special arrangement of the pins - the key. You won't be able to connect them otherwise.
We assemble the computer case, put it in place and turn it on. Now you can connect speakers or headphones to the front panel ports and check the operation.
Recently I collected all my hardware in a new building. The case is equipped with a front panel with USB outputs, microphone and headphone jacks. But here's the problem: sound on front panel not working! USB works, the "rear" connector (on the motherboard) plays sound, but the front panel is silent. It’s not convenient to climb under the table every time, so by trial and error I found all the possible reasons why the sound might not work!
Causes, Why can't sound work?
If the sound on the front panel of the case does not work, there may be several reasons for this and, accordingly, solutions:
Solution 1: Check if the front panel connector is properly connected to the motherboard.

Note:
There are 2 audio standards:AC"97 (short for Audio Codec "97) is an audio codec standard created in 1997. This standard is commonly used in motherboards, modems, sound cards, and cases with front-panel audio output. AC"97 supports sampling rates of 96 kHz when using 20-bit stereo resolution and 48 kHz when using 20-bit stereo for multi-channel recording and playback. In 2004, AC"97 was replaced by Intel® High Definition Audio (HD Audio) technology.
HD Audio
The Intel® High Definition Audio audio subsystem is based on a specification released by Intel in 2004 to enable more channels to be played at higher audio quality than was possible with integrated audio codecs such as AC"97. HD Audio based hardware , support 192 kHz/32-bit sound quality in dual channel and 96 kHz/32-bit sound quality in multi-channel (up to 8 channels).Microsoft Windows Vista only supports High Definition acoustic peripherals (such as front panel audio solutions).
Solution 2: Update your sound driver.
Download the driver from the official website of realtek, or the manufacturer of your motherboard.
You can also use the automatic driver update program.
The sound may not work because there is simply no driver for your sound card. Or the software on your audio device is not installed correctly.
Solution 3: Properly configure the software (driver) for your audio device.
If sound is not working on Windows 7, try the following:
Go to Start -> Control Panel -> Sound -> Digital Audio select default.

Realtek HD Manager --> Connector Options --> check the box next to "Disable front panel jack detection"

Check the box to disable front panel jack detection.
4. Other solutions:
BIOS setup
In BIOS "e, you can try to enable AC" 97 instead of HD Audio, or vice versa.

Replacing (soldering) the front panel
You can try to directly connect the audio output to the motherboard.
motherboard pinout (from Intel, usually standard)

The pinout for each case manufacturer is different, so see them on the manufacturer's websites.
Alternatively, find a front panel from another manufacturer :)
Change case
As a radical way - to change the body to another manufacturer. On Thermaltake cases, the sound on the front panel always works! Confirmed by practice.
Few users of modern devices do not know how to connect headphones to a computer, but not everyone can solve the problems that arise when connecting. Consider some of the nuances of connecting and configuring headphones for their quality work on various operating systems.
Connecting headphones to a computer is not a difficult task, but sometimes there are difficulties directly when setting up the equipment. Almost all PC models have sound card. It can be built into the motherboard, or you need to connect to it through a special connector. In any case, the gadget can be connected either to the back of the computer or to the front (if there are appropriate sockets).
By looking at the figure below, you can understand how to connect headphones with a microphone to your computer.
The headset output is always green, and the microphone input is always pink.. Since gadget plugs are also colored in the appropriate colors, it is very difficult to make a mistake and insert them into other connectors. It is required to insert the green plug into the green socket, and the pink plug, respectively, into the pink one. In the pink socket, you can connect both a microphone from headphones and a third-party microphone to the computer. After that, the connected equipment is configured using special software (in Windows 10, as well as in versions 8 and 7, the configuration should take place automatically).

On a laptop, gadgets are connected in the same way. The manufacturer may place connectors on front panel device or on the left.

Headset jacks are sometimes made tight on laptops to increase their lifespan. Therefore, do not be afraid that the plug does not fit well into the socket.
It should be noted that it is the headset plugs designed for computers that are color-coded if a microphone is provided on the headphones. The plugs of the rest of the headset have no difference in colors. There is a headset, for example, for phone, which has not 2 plugs, but one, in which the contacts for the microphone and audio channels are combined. It clearly shows 3 strips separating the contacts. Two contacts are used for connecting audio channels, and one for a microphone.

New laptop models have combination socket, to which you can connect headphones with a microphone that have one plug.

A special marking is placed near such a connector. If there is no such socket, but there are 2 standard ones, then such a headset can be connected via special adapter.

Thus, it becomes clear how to connect headphones from your phone to your computer. Headphones on the front panel are connected according to the same principle: if there is a microphone on the headphones, then it is connected to the pink jack, and the audio channels to the green one.

Connecting the headset to a PC
Now you know how to connect headphones to your computer. But this action is not enough for the gadget to work properly, although most often it immediately starts working, and nothing needs to be configured. But there are times when the connected gadgets do not work, so you need to take some action.

Connecting a headset on Windows 7
Before setting up the headphones on a Windows 7 computer, you need to connect them on the back or front panel of the device to the appropriate connectors (you already know how to connect it correctly). Then you need to start playing the music file. If there is sound in the headset, then the connection can be considered completed. If there is no sound, do the following in the headphones on the computer (this instruction is also suitable for setting up the gadget on a laptop).

The above settings can also be applied to the Windows 10 (Windows 10) operating system if you do not know how to turn on the gadget directly in it.
Microphone setup
Before using the microphone in Windows 7 or 8, as well as in Windows 10, it must be configured.
There are also headphones with a microphone that can be connected to a computer via a USB connector. In most cases, after connecting them, the configuration occurs automatically.
The new operating system from Microsoft is good. Compared to previous versions, Windows 10 is faster and more stable. You quickly get used to the good, so users react painfully to new problems with this OS. One of these troubles is the lack of sound in the headphones after installing or updating the operating system. Usually the reason lies in the damage or incompatibility of drivers, so you should not blame the developers of the new OS. Let's take a look at how to set up your headphones on your Windows 10 PC and bring music back to your headset speakers.
Checking the physical connection settings
Sometimes no special action is taken to eliminate the problem. It is worth checking the primary causes of the problem - perhaps the solution lies on the surface.
Attention! After installing the chipset software, reinstall the audio driver.
Ways to set up headphones
There are two methods for setting up the headphones.
Driver update
This is the main way. 90% of all audio playback problems are due to a problematic driver package.

Configuring the Realtek Manager
If driver updates did not help, go to the second method.

- Lack of codecs for playing high quality music files. You can download them.
- Physical damage to connectors or sound card. In this case, you must contact the service center.
That's all. Now you know how to set up your headphones in Windows 10 and diagnose what is causing the problem.
This is not the first time I have received an email asking:
Sergey, why do I have no sound on front panel?
So yesterday I received an email from a visitor to my site:
“Good day, Sergey!
Two weeks ago I bought a computer, everything works well, set up the Internet - in general, I'm happy with everything. It's good when a computer - movies, music, games, the Internet - you can have a great time!
The thing is, yesterday I bought headphones with a microphone, . I connected them to the front panel, but for some reason they do not work - neither a microphone nor headphones. On the back, everything works safely, but on the front - for the life of me. Maybe it's a marriage? Do I need to apply for warranty?
Please tell me. I will be very grateful to you!
Sincerely, Vadim S.
Well, I answer
Dear Vadim, and other visitors, I want to tell you that in 99.9% of cases, you just looked at the settings badly, and the front sound connectors are in working condition. This connector rarely breaks!
What to do if there is no sound on the front panel?

Everything is done very easily and simply, in the lower right corner:
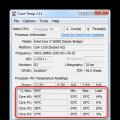
Click on the speaker icon. This is the driver for playing sound on your computer - “ Realtek HD”.
If it is not there, go to the control panel and run it from there. If it's not there, then you have a different driver
In general, when you launched it, a sound settings window will appear in front of you. You need to select the tab "" (for owners of Windows XP - Tab “ Audio inputs/outputs”):
Click image for a larger view.

Then click on the folder Connector parameters”, and a window with the same name will appear in front of you, there you need to put a check box on the item“ Disable front panel jack detection”.
Once you check the box there and confirm your choice - there will be sound on the front panel.
PS: I have Windows 7, so whoever has XP - the panel may be slightly different. Going to the tab " Audio inputs/outputs”, there, near the inscription “ analog”, there will be an image of a small wrench in a blue circle, click on it and the same window will open in front of you, well, then follow the instructions
Front panel audio problems are most often caused by incorrect settings. In the case when there is no sound on the front panel, do the following ...
These recommendations are suitable for the latest Windows operating systems - XP, 7 and 8. The soundbar should work correctly if there is a correctly installed driver for sound playback - Realtek. If you have it and configured, then it should be highlighted on the taskbar. If the driver icon is not on the taskbar, go to Start, from there to the Control Panel, where you will find “Realtek Manager”.


If you did everything correctly, then the front audio panel should work. If this does not happen, there may be a malfunction in the computer. Contact the experts.
Hello. The front panel with USB and audio outputs is one of the most important parts of a computer for a modern user. Why? Well, think for yourself, it’s not so easy to insert a USB flash drive into the USB port, which is located on the back of the case, then you take the drive with the wrong side, then you just can’t get into the port, in general, some inconvenience.
With sound, of course, everything is simpler, but sometimes the connected headphones lack the same length of the cord, which is so necessary for a comfortable location behind the workplace. And here everything is at hand, you need to connect a USB flash drive, please, or maybe headphones or a microphone, also no problem. Although, what I'm telling you, you yourself are probably well aware of these big and fat pluses of the front panel.
What am I leading to? The thing is that sometimes on some computers this panel works only half. That is, only USB ports function, but for some reason there is no sound, this applies to both the connected headphones and the microphone. As a result, exactly the inconveniences that I mentioned in a few sentences above are created.
Therefore, now we will try to find the reason why the sound does not work when headphones are connected on the front panel and fix it to restore the full functionality of our panel.
Diagnosing why the sound on the front panel does not work
So, the first conclusion can be drawn immediately. If the USBs are working, then the panel itself is working. Of course, there is a small chance that the port for connecting the headset and microphone burned out right away, but this happens very rarely.
Well, first of all, we connect headphones or speakers to the green connector, which is located on the back of the case and check if there is sound. If not, then you need to download the sound driver for your audio device and reinstall it (). If, on the contrary, everything is in order, we immediately proceed to the next step.

Another reason why the sound on the front panel may not work is that it is not connected correctly or not connected at all. In this case, we read and follow all the recommendations that I gave in that article.


There is one more thing, the connection connectors can be separated one by one, which may affect the correct connection. In this case, you will have to look for a manual for working with the motherboard and, using the examples in the form of a picture, connect in the same order. If so, let me know in the comments how I can help.

So, the panel is connected, or if everything has already been connected, move on. First, I will give an example for Windows XP. We go to the "Control Panel" and find the sound settings "Sound and audio devices". Having opened them, go to the "Audio" tab, where from the list of devices used by default, select "HD Audio" (or Realtek AC97).

But, this choice may depend on which connector you connected to the motherboard. If it was AC 97, then you need to select the same driver, if with the HD Audio signature, then select the driver with this name accordingly.

If there was only one connector when connecting, then most likely it is HD Audio, therefore, in the example, I will use it. We do the same in the lower field, selecting the main device for recording and clicking "OK" to close the window.

In Windows 7, everything is simpler, here the driver is selected automatically, mainly Realtek HD AUDIO.
Having selected the necessary firewood, we start restarting the computer and after that, we try to enter the BIOS using the keys " F2" or " DEL". Going to the tab " Advanced» select the item « Onboard Device Configuration". In the menu that opens, by going to the item " High Definition Audio» set the value « Enabled", And in the next line "" select " HD Audio» ( or AC97, if it was selected in the Windows settings), that is we have installed the same driver in the system.

The main principle of all this customization is that the same type of software is selected in Windows and in Windows. Well, if it is different, then you yourself already understand that a system conflict will occur as a result of which there is a problem with no sound on the front panel.
I also note that if you do not have these items in the BIOS, this means that you do not need to configure anything in it. In such cases, if the sound on the front panel does not work, check again whether the selected driver is suitable for your sound device and whether the connectors on the motherboard are connected correctly.
Well, summing up, I want to say that if you set the same driver in both cases, everything will work as it should. Also, sometimes this setting can fly along with the system time due to the fact that the battery that supports them runs out in the computer during the PC off mode. If anything, you can find out how to replace it here, with all the details and examples in the form of pictures.
Sound does not work on the front panel, fixes
After switching to the "ten" or its next update, many users are faced with a problem due to which the headphones do not work on a computer in Windows 10, or the system cannot see the sound playback device.
For the most part, the source of the snag is the sound driver - the software responsible for the functioning of the sound card. Why does it suddenly stop working with installed drivers after updating Windows?
Most likely, in the process of receiving the update, the driver itself was also updated, and it was not downloaded from any other place than from Microsoft servers. This means that instead of official software, a product created by a software corporation was downloaded to the user's computer, and third-party software has never been stable and 100% compatible.
The reason that the laptop does not see the headphones is, first of all, an outdated or third-party sound driver. Consider how to get rid of it and get official software.
Headphone setting options
When faced with a problem, you should not immediately blame the drivers for everything. You may just need to adjust your headphones. Let's start with this.
1. If the device is connected to a PC via a connector on the speaker system (speakers), you should make sure that this port is functioning by connecting, for example, another audio playback device.
2. We check the headphones by connecting them to another laptop or smartphone, they may not work on their own.
3. Make sure the plug is connected to the correct socket (colored green).
4. Try to use a different audio input, the front one may not work, for example, it is not connected.
5. Make sure the pinout is correct, because the AC'97 connection type will not work on Windows 10, it should be replaced with progressive HD Audio.
6. Go to Device Manager and check for a driver for the motherboard chipset.
Updating the driver from the developer's site
Downloading device management software is only necessary from official resources, despite Microsoft's recommendations to update drivers using the Windows 10 toolkit.
1. Find out the manufacturer of the sound card (most likely it's Realtek).
3. Download the installer with a package of libraries and applications to control the sound device.

4. Run the installer and follow a couple of instructions, removing the old software.
5. We restart the computer and check if installing the driver helped solve the problem.
1. Open the Device Manager by holding Win + X and clicking on the item of the same name in the drop-down menu.

2. Open the context menu of the sound device and click "Update drivers ...".

3. We choose the Internet as the source of content.

4. Upon completion of the update, we reboot and check if our device is working.
Headphone setting
If installing the latest software version does not solve the problem, then the problem lies in the incorrect configuration of the speakers. Let's see how to enable headphones for sound playback in the Control Panel.
1. We call the applet "Realtek Manager" or "Sound Manager" through the context menu of the tray icon.

2. Go to the settings.

3. Check the box next to the option responsible for dividing the sound into two streams, each of which will be played through its own device connected to the front and rear jacks.


After that, everything should fall into place.
 Computer restarts while playing games or watching videos
 How to restore Windows on a Sony laptop
 Creating a multiboot flash drive with multiple Windows How to write two Windows to a USB flash drive