Google's first tablet with Asus. Google's first tablet with Asus Asus nexus 7 won't connect to computer

Camera or player?
If the problem is with the Nexus 7, then you can try to connect it as a PTP device, not MTP. If this works, then you can then return the tablet to MTP mode (without disconnecting) and continue working.
The difference between PTP and MTP is how the computer sees the mobile device. In the first case, he considers it as a digital camera (Picture Transfer Protocol), and in the second - a portable multimedia player (Media Transfer Protocol).
To clarify the current mode and change it, go to Settings, go to the Memory section. Tap on the Menu button (three dots in the upper right corner) and select the USB connection to the computer. There are two options here: PTP (Camera) or MTP (Media Device). Try choosing MTP. This connection option is more flexible, so in many cases this technique works.
Install the correct driver
There is another algorithm that involves installing an alternative driver. In some cases it works.
- Download the driver from http://koush.com/post/universal-adb-driver and install it on your computer. In most cases, the first step is sufficient, but if this does not help, then proceed to the next steps.
- Go to Settings -> About device and tap on the build number until the debug menu appears. Here, activate USB debugging mode.
- Put the tablet into MTP mode and connect it with the Micro-USB cable to the PC. Launch Device Manager on your computer. Look here for your tablet. It may be referred to as "Android Device", "Android Tablet", "Android Device", etc. If something similar has appeared, it's already good. Expand this group (click on the small "+" sign. It should be something like "Google Nexus ADB Interface", but the exact name may again differ from this. Right-click on this item and select "Properties" .
- Click the Driver tab.
- Click the Update Driver button.
- Select the option to independently search for a driver on the computer.
- Select USB composite Devices and install this driver.
Happy owners Google Nexus7
Do not always have access to a Wi-Fi connection,
so I want to copy files from the tablet to the computer and vice versa without the participation of the Internet in this process (using the included USB cable).
IN Windows XP this task is solved like this:
- Enable "developer mode" on the tablet:
Settings -> About tablet -> Build number - click 7 times (thus turning on the developer mode)
Now Settings -> Developer Options will become available.Enable USB debugging mode:
Settings -> Developer Options -> Debugging -> USB debugging - Download USB driver: https://dl-ssl.google.com//android/repository/latest_usb_driver_windows.zip
Unpack to any folder. - We are looking for the file C:\WINDOWS\inf\wpdmtp.inf (if it is not there, this may indicate that Windows Media Player 11 is not installed, oddly enough, but it is needed to connect Google Nexus 7 via Media Transfer Protocol - then run download Windows Media Player...)
- In the file C:\WINDOWS\inf\wpdmtp.inf after the lines
%GenericMTP.DeviceDesc%=MTP, USB\MS_COMP_MTP add a line
%GenericMTP.DeviceDesc%=MTP, USB\VID_18D1&PID_4E42&MI_00 - Save.
- We connect the Nexus7 with a cable to the USB port (port NOT on the front panel of the system unit is recommended).
- Windows will ask where to get the driver from, select the option not from Windows Update, but from the specified folder, select the folder where the driver was unpacked in step 1 (the usb_driver subfolder).
- After that, everything should work! Going into My Computer, you can see the new Nexus 7 device, which has an "internal memory" disk, where all the folders and files of the tablet are presented with the ability to copy in both directions, create folders and files on the tablet, delete them from there.

On Windows 7 the same algorithm works, only without points 3, 4, 5.
Happy connection!
UPD: There are alternatives - programs like
http://www.wondershare.com/android-manager/ (paid, with free trial period)
http://www.moborobo.com/ (free),
which provide a beautiful user interface for working with the device.
However, working with the file system directly looks more reliable and obvious.
UPD 03/22/2014: For convenient work with the file system via MTP protocol in Far Manager
use PortaDev plugin http://plugring.farmanager.com/plugin.php?pid=933
Thanks to him, Nexus7 will be displayed as a normal disk by Alt + F1 / Alt + F2:

This article will focus on the first tablet, Google Corporation in conjunction with Asus. Today we will talk about the asus nexus 7 tablet device. This is a compact and quite functional tablet computer that perfectly copes with the tasks assigned throughout the day.
Appearance and equipment
Asus Tablet PC
Before us is a seven-inch tablet, of course, it did not please us with any revolutionary design features. However, all other design elements are very cleverly and correctly placed throughout the device. The Nexus 7 tablet itself is made of plastic, the back side has a special coating that is very pleasant to the touch. You can forget about scratches and fingerprints altogether, of course, if you do this on purpose. Everything is so harmoniously combined that there are no non-tactile and non-visual irritations.

Tablet box
The original box does not differ in anything, as it is supposed to, it contains the corresponding names of the development companies and the names of the model.

Equipment
The factory equipment is modest: the Asus Nexus 7 tablet itself, an instruction manual, a charger and a micro-USB to USB cable for charging and synchronizing with a desktop computer or laptop.

Back side of the tablet

Front side
On the reverse side you can find the manufacturer's name and device model, at the bottom there is a built-in speaker.
On the front side, as it should be, there is a front camera eye, the display is framed in black plastic, the tablet case has rounded corners. We can say that now all 7-inch devices have a similar design.

Left side
On the left side face there is a special connector for connecting the docking station, and next to it is one of the built-in microphones. This model of the device is also equipped with a slot for a SIM card.
Right side
On the right side, you can find the volume control button and the power button of the tablet.

Down side
On the lower side face there is a micro-USB connector for recharging and connecting to a PC, as well as a headset jack (3.5 millimeters). Unfortunately, there is no slot for a memory card and a rear camera for shooting. By the way, this is understandable, since Google tried to bring the google nexus 7 tablet as close as possible to people at the lowest price among similar devices.
Specifications
As expected, the asus google nexus 7 tablet has a pre-installed Android version 4.1 operating system - this is one of the best OS among the already released versions, it combines all the best, while retaining its originality and originality. The tablet PC is equipped with a very powerful and modern NVIDIA Tegra 3 microprocessor with four cores and a clock speed of 1200 MHz. Unfortunately, we were not very pleased with the RAM, only 1024 MB. The graphics processor is based on the ULP GeForce chip with a frequency of 416 MHz.
It is important to know that only 60-70% of the RAM will be available during operation, the rest goes to support the OS.
As mentioned above, the Nexus 7 tablet has a seven-inch IPS screen with a resolution of 1280x800 pixels, support for up to ten simultaneous touches. The screen cover is glossy. The built-in memory, depending on the assembly, can be 8, 16, 32 gigabytes, and in this case we are considering an asus nexus 7 32gb tablet.
Unfortunately, there is only one 1.2 megapixel front camera for talking through the Skype program. It also does not have a slot for a memory card, however, there is support for 3G mobile Internet and a wireless network via the Wi-Fi module is optional. It has screen orientation sensors and a light sensor, as well as a GPS navigator. When testing, I was very pleased with the battery life of the Google Nexus 7 tablet device for almost 10 hours, but this is subjective, since the operating modes can be different.
The weight of the tablet with dimensions of 198.5x120x10.45 millimeters is 340 grams, so you can always take it with you on the road and for a walk.
Operating system and various settings
Despite the fact that this is already OS version 4.1, the desktop did not succumb to any significant changes, all the previous graphic elements remained in their original places.

Desktop
As you can see, this is a horizontal screen scan, all elements are adjusted depending on the screen orientation.
Consider the main elements of the desktop:
At the very top there is a notification panel where the device user can monitor the process of downloading any applications, updates and other OS activities. You can also see the current time, battery level, active connections: Wi-Fi or 3G;
In the central part are: graphic elements - widgets (time, weather, temperature), shortcuts to installed programs and games. On both sides of the screen there are quick access menus: on the left - voice and regular search, on the right - the transition to Settings and the main application menu, if you change the screen orientation, they all change position clockwise;
At the bottom are the function keys: active applications, desktop (home), back button.
To access the main menu directly, in the right menu, click on the icon six squares in a circle.

Application menu
This picture shows the vertical scan of the screen. In the main menu, you can already find a number of pre-installed programs and applications, the purpose of which at the initial stage of operation is to help the owner deal with the operation of the operating system and the Google Nexus 7 tablet device itself, for example:
Calculator;
downloads;
To go to the settings menu, we look for a blue settings shortcut among applications, use your finger and horizontal movements to scroll through the pages.
The picture below actually shows the settings menu. For the convenience of users, all settings of the asus 7 tablet device are divided into corresponding thematic subgroups, for example:
Wireless network;
Device;
Personal data;
Accounts.
To enable Wi-Fi wireless communication, you should switch the slider to the continuous operation mode, namely, press the “ON” item with your finger, as shown in the picture. The window will start searching for wireless access points, which will then appear in the form of a list, you just have to select the one you need and connect to it. To turn on Bluetooth, follow the same steps.
Settings

Item about Tablet PC
To make sure that you bought exactly the device you intended, visit the tab about the tablet computer at the very bottom of the list of settings, where you will see the name of the tablet in the model column. As you can see on this device, the nexus 7 32gb tablet has been updated to version 4.2 of the operating system, so that you can also update using the “network update” item at the top of the list.

Memory information
In this paragraph, the owner will always be able to track where his free memory goes on the tablet, while showing in detail which type of data used more space. As you can see, a little less than 28 GB remained on this tablet, and more was used by applications, that is, about 200 MB by installed programs.

Battery Information
In this menu, you can see a detailed scale of battery usage, how much time is left until the end of charging, and also see the ratio of energy use by various programs and functions, for example, 76% of the total available charge was spent on screen brightness.
Mobile internet on a tablet
To begin with, we will choose a mobile operator, since the performance and speed of the mobile Internet will depend on this. It is best to choose the one with a large coverage map (thick) - this information is specified in the center of the mobile operator when buying a SIM card. Next, as shown in the picture, place the card in the slot.

Card installation
Now let's reboot the asus nexus 7 3g tablet so that it accepts a SIM card and makes contact with it, the tablet itself will notify you about this.


Internet setup
Now let's move on to the mobile networks item, as we see in this tab, you can use the tablet as a wireless point, as well as connect to other devices via a Wi-Fi network.

Mobile networks menu
Be sure to turn it on, that is, put a tick in front of the data transfer, since without this the actual mobile Internet will not work. And so that the traffic is not wasted during the inactivity of the 3G Internet, again uncheck the box and the network stops working, thereby you will save yourself from unnecessary costs. After connecting, go to the access point item, then press the "Functions (three horizontal bars)" button and create a new access point.
To do this, you will need to use the data of the mobile operator, which will fill in the corresponding fields in the list. You can take the data to fill in from the list below, but it is recommended to check them on the official website, as they may change against our will.
You have the right to choose the name for your created point, however, all other data must be filled in in accordance with the rules.
http://4pda.ru/forum/index.php?s=6577f960eb8afe83a22dc71a4d99e3f1&showtopic=448197&st=40&p=21344507entry21344507.
There are also pictures of the updated settings menu, which was supplemented by a huge range of new features that open up great opportunities for the owner of the tablet.
In addition, the author and the site management do not bear any responsibility for all the consequences of the firmware.
Yes, for everything that will be done by you during the firmware and the update process will be only on your conscience, so it is not recommended to carry out any manipulations without experience, and even more so with “crooked” hands.
Video review of Asus Nexus 7 tablet
Google has pleased lovers of portable electronics with its tablet Google Nexus 7 manufactured by Asus. The characteristics of the device in the current tablet market were expected to be among the leaders. Potential buyers were confused by several nuances - support for microSD cards (or rather, its absence) and the absence of a 3G module. Which for many some was the reason for refusing to buy this tablet.
In this article, I want to take a look at what the tablet is capable of and find out if 3G is really a problem. And a little more "fool around" with various devices.
Preparation
The following actions required us to have root rights on the tablet. Therefore, I will give a brief description of the ongoing actions to obtain these rights. Rooting a tablet, like other Android devices, takes place in 3 stages: unlocking the Bootloader, installing custom Recovery, installing the necessary software through Recovery to get root rights.
Unlock Bootloader
Attention! This operation resets the tablet to factory settings, completely clearing the contents of its memory. Temporarily move your content to PC.
- Download ADB drivers from the link at the end of the post ( usb_driver_r06_windows.zip).
- tools.zip.
- Turn off the tablet.
- We connect the cable to the tablet port and the USB port of the computer and quickly hold down the "Volume Up" + "Volume Down" + "Power Button" keys and hold for about 1 - 1.5 seconds. This will boot into Fastboot mode.
- In the system, the tablet will be defined as an unknown device with the name Android, manually install the downloaded drivers.
- After the drivers are successfully installed, unpack the tools.zip archive.
- Open the command line (cmd) and go to the folder unpacked above.
- Enter on the command line: fastboot devices. If we see the serial number of the device in response, then everything is going as it should, if not, there is a problem with the drivers. Try unplugging/plugging the device and trying to install the drivers again.
- Enter on the command line: fastboot oem unlock. A warning about a possible loss of warranty will appear on the tablet screen, select Yes with the volume keys and confirm your choice with the power key.
The first stage has been completed.
Installing a third-party Recovery and getting root rights.
- Download from the link at the end of the post SuperSU-v0.95.zip and put on the device in the root of the folder /sdcard.
- We enter the device into fastboot mode (we repeat steps 3-4 of the section about unlocking).
- We check if the device is recognized by the command in the console: fastboot devices.
- For example, I used the recovery ClockWorkMod touch version.
- Download from the link at the end of the post CWMTouch_6.0.1.0.img and place it in the previously unpacked folder tools on the computer.
- In the console (cmd) we type the command: fastboot flash recovery CWMTouch_6.0.1.0.img. We will see the process of flashing Recovery in the console.
- On the tablet, use the volume rocker to select recovery mode and go into it by pressing the power button.
- Choose an item mounts and storage and mount the folder /system selecting an item mount /system.
- Next, on the command line on the computer, we write commands separated by an enter: adb shell
cd /system
mv recovery-from-boot.p recovery-from-boot.p.old - Select the recovery menu item unmount /system, go up a level, select the item install zip from sdcard, further paragraph choose zip from sdcard, select file SuperSU-v0.95.zip and observe the process of installing the application. Everything, root rights are received.
- We overload the device.
- Using RootExplorer or another explorer with root rights, go to the folder /etc and rename the file install-recovery.sh V install-recovery.sh.old
If in the future, when you try to enter Recovery, there will be nothing but the inscription Google, hold down the power button for 20 seconds, reboot the device. Install the QuickBoot application, and already using it, go to Recovery.
Everything, the preparatory work is done.
Let's start fooling around!

A tablet is a device with a touch panel for entering information. But, since we decided to play pranks, we will connect everything that comes to hand. Purely by chance, a Logitech wireless mouse turned out to be at hand. Using the OTG microUSB-USB adapter, we connect the mouse receiver to the tablet, and in less than a second, a neat black cursor was displayed on the screen. It is worth noting that connecting a wired mouse also turned out to be a commonplace thing for a tablet, the mouse worked like a native one. The scroll works, the right key is useless, single tap and long tap are done with the left mouse button, similar to finger control.
Further more, the girlfriend of the mouse, the keyboard, went into action. I didn’t have a simple keyboard at hand, I had to try the Logitech G15, I had a premonition that the tablet would refuse to work with it, after all, the display, a bunch of incomprehensible keys, and, probably, not the easiest freeloader in terms of nutrition. But no, everything went like clockwork, the keyboard was determined immediately, and all the standard keys worked.

Input was in the language selected on the tablet. Change layout using the on-screen keyboard.

Change the keyboard layout by Ctrl + Space or ShiftGr + Space.
To make life easier with changing the layout, I can offer this option.
- Install the Russian Keyboard application from the market.
- Applications -> Settings -> Language and keyboard.
- We mark "Russian keyboard" and also mark it as the default layout.
- Go to the settings "Russian keyboard" -> "Hardware keyboard" -> "Select layout".
- Select "External Keyboard" or "External Keyboard".
- Here we also set up a combination for switching layouts.
Let's go through the input devices, let's go through the drives. Luckily, there are more options here.


If this drive was connected for the first time, you will see a dialog box asking if you want to mount the drive automatically next time. By default, all drives are mounted at /sdcard/usbStorage/sda**. If the drive is divided into several partitions, then they will be mounted accordingly as sda1, sda2, etc.

For Windows users, there is an unpleasant nuance - the names of files and folders in Cyrillic are displayed in the android system as ????????????. If you create a folder on the tablet, the Cyrillic alphabet is perfectly displayed. The picture shows how the file and folder are displayed on the tablet and when viewing content on a PC (Windows). The same goes for the content of the files. The created text file with Cyrillic in UTF-8 encoding was perfectly readable on a tablet, other encodings had to be selected manually or converted on a tablet. Applications more powerful than a regular notepad on a tablet themselves suggested which encoding to read in (for example, Kingsoft Office determined that a text file was saved in cp1251 encoding and displayed a dialog when opening the file). The test used several flash drives from 2 to 16 GB, more were not at hand. Fat32 and NTFS file systems were read without problems.

Actually, there is nothing special about this, but for the sake of the purity of the experiment, it was necessary to check. USB card readers, like conventional flash drives, connected and worked without problems. Therefore, having several card readers for different card formats or one combine, you can, for example, transfer it to a tablet and immediately share photos from the camera by simply connecting the card to the tablet. Unfortunately, it was the card reader that was not at hand, but there was an old modem containing a slot for microSD cards, the 32 GB card was perfectly recognized and mounted.

But a flash drive by today's standards "will not be enough, ma-lo-va!". Therefore, tanks were used, the first to be thrown into battle were Light Tanks, or rather a 2.5 ”hard drive with 250 GB in the holder. But again, without perversion, nowhere, there is not the most ordinary “screw”, but a holder with a twist - Zalman ZM-VE200 SE. The idea was as follows - if you can connect this one, then any other store screw will connect without problems. Of course, it was not possible to connect right off the bat. When connecting the hard drive with a native cord, clicks were heard, which I regarded as a lack of power, so I changed the cable to a bifurcated one. I took additional power for the test from a charger with a USB output. Attempt number 2, but again does not want to, an empty folder is mounted. For 3 seconds to think, and there is an idea. This holder can be connected and defined in 3 modes (“HDD Only” (HDD Mode), “Disk Image Emulation Only” (ODD Mode) and the mode in which both the hard drive and the virtual drive are connected (Dual Mode). switch down and try to connect in the “Only hard drive” mode. Hurray, it happened, the hard drive was successfully mounted. Files, music, movies are read perfectly.
But we are still not enough. Using tank terminology, TT should be used, since the tablet is a trifle in the teeth.

Please don't be afraid. This is a regular 3.5” WD Green 2 TB hard drive. We take a USB-Sata / IDE adapter with external power and assemble it. It is worth noting that with a 2 TB hard drive, not all adapters worked correctly, by trial and error they settled on this. With this patient, everything went even easier than with his younger brother. Connection and definition is instant, files are written and read, 10GB movies are played without brakes. But I would like to point out one point that left questions. If the "screw" is partitioned, they are mounted as I described above, but empty folders appear. In my case, 2 partitions were mounted as sda4 and sda5 and an empty sda. Would love to hear what that could be.
seed

For some, the lack of 3G in the tablet is like a bone in the throat, they really want this tablet, but 3G is a big problem. In practice, I will tell and show with pictures how to solve this problem.

For experiments, 2 modems were taken. Huawei E1550(branded but unlocked) and Vertex VW 110(branded, locked under the operator). Why exactly them? Because they use different communication standards and different card standards. The first one quietly works with SIM-cards and provides connection both via GPRS / EDGE and 3G (in order not to go into details, let's call it that, without specifying the technology). The second modem only works with RUIM cards.
Now we need to install the PPP Widget application. We allow the use of root rights. We place the widget on the desktop.
Now I will tell you how I got connected using a Huawei modem, UTEL SIM cards (U’try package) and Kyivstar (noname prepaid tariff with 1 Mb internet = $1).
We connect the modem. Since the modem is connected for the first time and contains a slot for a memory card, a dialog will appear prompting you to select a program for further work. We choose PPP Widget this time.

We observe how the widget signals us about the process of determining the modem. As soon as the Configure button becomes available, click and get into the program settings.
Let's move on to the Connection Parameters section.
– Access Point Name- enter the name of the access point, issued by the provider. I typed for UTEL " 3g.utel.ua", for Kyivstar " www.ab.kyivstar.net».
– username– You must enter a username to connect. Providers often ignore this field and indicate that this field should be left unchanged. But in this application, it is not allowed to leave the field empty, otherwise we will get an error. Enter a space for both providers in this field.
– Password– password for connection. Here the situation is similar to the Username field. If you need to enter a specific value - enter it, if not - put a space.
– Dialing Target- call number. issued by the operator. For UTEL I entered " *99#
", for Kyivstar " *99***1#
". Check with the provider.
To track errors, I turned on logging.
Exit the settings and press the button Connect. And here, perhaps, you will receive the message that I received - in the screenshot, Figure 2. I was connected to a Wi-Fi point, the widget asks us to turn off the Wi-Fi module before connecting. Turn off and press Connect. We are waiting for a long 3 seconds and, not believing our eyes, we see the connection status Connected.
If it doesn't work, check if the PIN code check should be disabled on the SIM card.(At the stage of trial and error, I tried another operator's card, the PIN check was disabled, all the parameters were entered correctly, but the connection attempt was repulsed. And both on the tablet and on the computer using the same modem. So do not blame only the tablet, if it doesn't work).
But when we picked up the second modem, we were disappointed. The second modem was not even recognized by the system as a device. Inserting a card from it into the first modem does not work, Huawei's chip does not support RUIM cards.
It would seem that this could be the end of it. But at least one person stopped, having achieved the desired result? Would like to try something else.

It was purchased, and with him for the company 2 starter packages for the Internet. The modem supports a huge number of frequencies and standards, but for the test we were interested in 2 options for connecting to the Internet: CDMA technology (data is flashed into the router, no SIM or RUIM cards) and GSM (regular SIM card). Intertelecom was chosen as the CDMA operator, and UTEL, described above (now "3 mob"), as the GSM. If I am mistaken in technologies, I apologize, I hope I conveyed the essence.
There are no problems with the connection at all, at the output we get a Wi-Fi access point (by the way, you can connect up to 5 subscribers to 1 such router). Admin panel via the web, from there switching to the desired access technology.
In the tests, Intertelecom turned out to be better, but the tests will have to be carried out specifically at the place where the tablet is constantly used. Tariffs are specially selected without a monthly fee.
As a final word, I want to mix and add, salt and let it brew. More precisely, if the device is low-power, connect without problems. The device needs more power - either use an externally powered USB hub or supply additional power to the device itself. Always unmount the drive before removing it, there is a special item for this. Save the tablet port (I used a hard adapter). If you are not careful, you can break the port, and these are already unnecessary problems. On sale a bunch and more adapters with wire.
Also, to play around, I connected an external DVD drive (ASUS SDRW-08D1S-U), the drive was determined and calmly read the movie disc. It remains only to find Nero for Android :-D
The Bluetooth keyboard from Duna also worked without problems.
"Your Nexus 7 is officially upgraded and charged for long and productive work!"

I thank the members of the State Examination Commission and the guests for their attention. The report is over.
Files
We take the files necessary to perform the above actions
If you find an error, please highlight a piece of text and click Ctrl+Enter.
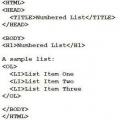 Nested lists in html. Numbered list. List marker in the form of an empty circle
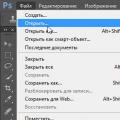 Description and purpose of the Photoshop toolbar Photoshop toolbar meaning
 Excel for Dummies - Changing Columns, Rows and Cells How to set the desired column width