Adding a user to the infobase. Adding a user to the infobase Adding users to 1s
The process of adding a user to 1C:Enterprise Accounting for Ukraine (for example) begins with starting the program in configurator mode. After launching the program and logging in, we perform simple steps. On the control panel at the top of the 1C interface, select the "Users" button.

In the "Users" window that opens, there is a list of 1C users and tools for editing them become available here. Press the "New Item" button or the Insert key on the keyboard.


The dialog for adding a new user opens. Assign to user
— Full name: in this field it is desirable to indicate the Last name, first name and patronymic of the added user to avoid confusion in the future.;
— Working directory: the directory where the user's service and possibly personal files will be stored. We recommend placing such a catalog in the catalog with the main infobase, but this is not critical.;
- Rights: select the rights to read and edit data in 1C. The rights must be organized in advance in the configuration window on the "Rights" tab;
- Interface: Select an interface for the new user. In the interface, you can impose restrictions on panels and menus in the 1C visual shell accessible to the user. The interfaces must be arranged in advance in the configuration window on the "Interfaces" tab;
 Press the "OK" key.
By default, the user is configured as empty. To change the password, you need to right-click on the user and select " Change». Enter and confirm again the set of characters for the password.

We confirm saving the list of users on exit.
This completes the creation of a new user in 1C:Enterprise 7.7.

Let's turn to creating a new user in 1C:Enterprise 8.2
Since the programs 1C:Enterprise 7.7 and 1C:Enterprise 8.2 are similar in functionality and released by the same organization, it is easy to assume that the process of creating a new user in 8.2 will be similar to that in 7.7.
We launch the configurator 1C: Enterprise 8.2. After opening the main interface, select the "Administration" button in the main menu and the "Users" menu item

Press the "+" button or the Insert key. In the window that opens, fill in the necessary parameters for the new user

 Fill in the data on the first tab:
— Name: an arbitrary name that will be displayed in the 1C:Enterprise authorization window;
— Full name: in this field, specify the Last name, first name and patronymic of the added user;
- Password and password confirmation: code character set, the purpose is obvious;
- The user is not allowed to change the password: you can specify if you do not give the user the right to change the password;
The second tab is "Other". It is obligatory or highly desirable to fill in "Available roles" (you can select several roles if necessary), "Main interface" and "Language";
The remaining parameters on both tabs, if you have no idea what is at stake, then they should not be filled out.

After pressing the “OK” button, a new user with the specified permissions and parameters will be created.

This completes the creation of a new user in 1C:Enterprise 7.7 and/or 1C:Enterprise 8.2.
Hello dear blog readers. I had to delay a little with the next article due to intensive reporting and a large number of incoming questions about this. By the way, you can also ask your questions in the chat or send messages directly to my mail. But enough advertising) Today we will talk about new useful and interesting features that gives us new platform 1C Enterprise 8.3 and configurations built on its basis: Payroll and HR 3.0 And Accounting Enterprise 3.0.
The article will talk about how to configure user access only to those documents, directories and reports that he needs to work and restrict access to the rest. This will help us command interface with flexible settings, which appeared in the programs 1C edition 3.0. Discuss Features access rights on program objects, we will be based on the 1C ZUP 3.0 configuration, but the same mechanism can be successfully used for the 1C Enterprise Accounting 3.0 software product. Actually, I studied this issue when I provided user setup in Booh 3.0.
How to create a user in the normal user mode of operation 1C edition 3.0
✅
✅
✅
I want to note right away that we have to work both with the usual user mode of the program operation and with the configurator mode. There is nothing terrible and complicated in this, you don’t have to program) I’ll also immediately note that the screenshots in this article will be presented from a new one that recently appeared in programs 1C edition 3.0 of the Taxi interface. To switch to it, just open the service menu and find the parameter settings there. In the options window, in the "Appearance" radio button group, select the "Taxi" interface and restart the program. Although anyone can comfortably stay in the regular interface, all the documents, references and settings that I will discuss in the article are identical in these interfaces.
Let's analyze the situation when you don't have the required user yet. The user must be created in normal user mode. We go to the section of the main menu "Administration" and there we find the item "User and rights settings".

If required, you can immediately set a password.

Now, regarding the permissions for this new user. You don't need to install them. Access rights can be accessed directly from the form in which the user is configured. It is enough to click on the link "Access rights" in its upper part. So, it is necessary that in the access rights (and on the tab "Access Groups", and on the tab "Permitted Actions (Roles)") was empty. We will configure the rights not in user mode, but in the 1C configurator, a little later.

But there is an important feature in this respect. It is necessary that the database has at least one user who has administrative rights. My username is Administrator. He belongs to the access group "Administrator" and has roles "System Administrator" And "Full rights".

Now we should go to the configurator mode and continue the configuration in it. To do this, when starting 1C, select the desired database and click the "Configurator" button. Just don't log in as a new user. He does not yet have any rights, and the work will be impossible. You should log in as a user with full rights, in my case it is "Administrator".
 |
After opening the configurator window, let's make sure that the new user we created is also displayed here. The user list in the configurator is stored in the "Administration" -> "Users" section of the main menu.

Note that the user has a question mark. This means that no roles are defined for it, i.e. in other words, no permissions have been set. "Roles" is a configuration object. In each role, a set of documents, directories, reports is installed, to which the user with this role has access. We can see all available roles if we open the user and go to the "Other" tab.

Let me remind you that we need to configure employee access to an arbitrary set of documents, directories and reports. At the same time, I did not even begin to specify what set we are talking about, this is not so important. And the important thing is that for such cases in the configuration there is not and cannot be a suitable role. 1C developers are not able to provide for all possible options for restricting access to objects that are encountered in practice. And the requests from the end user are very extravagant.
Editing mode of a typical configuration in 1s
✅ Seminar "Life hacks for 1C ZUP 3.1"
Analysis of 15 accounting life hacks in 1s zup 3.1:
✅ CHECK LIST for checking payroll in 1C ZUP 3.1
VIDEO - monthly self-check of accounting:
✅ Payroll in 1C ZUP 3.1
Step by step instructions for beginners:
As you probably already understood, I am leading to the fact that we will have to create your own role. In this case, one important detail should be discussed. Creating a new role means making a change to the default configuration. For those whose configuration has already been finalized and is not typical, nothing will change. To begin with, I will tell you how to determine the typical configuration or not already.
First, you need to open the configuration. To do this, in the "Configuration" section of the main menu, press "Open Configuration". After that, a window with a tree structure of all infobase objects will appear in the left part of the configurator. Secondly, also in the "Configuration" section of the main menu, go to the "Support" -> "Support settings" item. The window of the same name will open. If the window looks like in the screenshot, then you have a typical configuration. By this I mean the presence of the inscription "Configuration is under support" and the presence of a button.

So, if you have a typical configuration, then we will have to enable the ability to change it, otherwise we will not be able to create a new role. Separately, I want to note that from the point of view of updating, there will be no particular difficulties, since we will create a new role, and not change existing ones, so all typical configuration objects will remain typical. To enable the possibility of editing the configuration, in the window "Support Setting" click on the button "Enable Change".
Perhaps in the next publications I will write in more detail about such updates. So, in this window we need to answer "Yes".

Next, the "Setting support rules" window will open, where you need to select the "Supplier object is edited with maintaining support" radio button. For our task, this will be quite enough. Just keep in mind that after clicking "OK" you will have to wait a bit before continuing.

After that, the locks should disappear in the configuration object tree (remember, when we opened the configuration, it opened on the left side of the configurator), and the inscription "Support settings" will appear in the "Support settings" window "The configuration is under maintenance with the ability to change."

How to create a new role in the 1C configurator
✅ Seminar "Life hacks for 1C ZUP 3.1"
Analysis of 15 accounting life hacks in 1s zup 3.1:
✅ CHECK LIST for checking payroll in 1C ZUP 3.1
VIDEO - monthly self-check of accounting:
✅ Payroll in 1C ZUP 3.1
Step by step instructions for beginners:
Now we can start creating a new role. Once again I will explain what a "Role" is - this is a set of rights that determine the ability to view or edit directories, documents and other configuration objects. View and edit are the most straightforward options for access rights, but there are many more. To make it clearer, let's select the "Full rights" role in the object tree (General -> Roles -> Full rights). The settings window will open. In this window, on the left, all program objects (directories, documents, reports, and others) are listed, and on the right, those rights that are defined in this role for each of the objects. You can see it on the screenshot.

Now let me remind you the problem. We need to ensure that the user can work only with a limited range of documents, reports and directories. The most obvious option is to create a new role and define access to only the required objects. However, the configuration contains a large number of all kinds of service objects, such as constants, common forms, common modules, registers for various purposes, and for normal user work, it is necessary to have access to these common objects. There are quite a few of them and it is very easy to miss some object. Therefore, I will offer a slightly different approach.
Let's create a new role by copying the generic "Full rights" role. We will call this new role "Role_Frolov". To edit the name of the role, you need to go to the properties and enter a new name without spaces.

Now let's install this role for the user "Frolova". Before that, we need to save the infobase so that the newly created role appears in the list of available user roles. Press the F7 key or click the corresponding button in the toolbar. After that, you can install this role to our user. We go to the list of users (Administration -> Users) and on the “Other” tab, check the box next to the “Frolov Role” role. Click "OK".

While this role is completely identical to the original ("Full rights"). In this form, we will leave it. Bye. And we will configure access to documents and directories, using the flexible configuration of the command interface of the 1C program.
How to set up command interface elements in 1C
Now we have to return to the normal user mode of operation, i.e. as in normal work in 1C. We need to start under our new user - Frolov S.M. This can be done from the config. However, you must first set the setting so that when starting the Enterprise from the configurator, it is requested by the user under which it should be launched. To do this, select "Service" -> "Settings" in the main menu and on the "Launch 1C: Enterprise" tab in the "user" section, set the "Name" switch, click OK and we can start the user mode directly from the configurator. To do this, use the command from the main menu "Service" -> "1C:Enterprise". And do not forget that we must choose the user Frolov.

When the program is launched under the user Frolov, all objects will be available to him, since his role was created by copying full rights, and we did not change anything. Let's assume that for this user it is required to leave only the capabilities of personnel accounting, but not all, but only the reception, movement and dismissal. First you need to remove all unnecessary sections and leave only one - "Personnel".

To do this, go to the service menu View -> Section bar customization. In the window that opens, transfer all unnecessary sections from the right column to the left.

Now pay attention that we will have only 2 sections "Main" and "Personnel". We cannot remove the “main” one, therefore it is necessary to leave only the necessary links in this section. To do this, go to this section and in the upper right corner click "Navigation Settings". This window is similar to the one in which we removed unnecessary sections, and it works in the same way. In the right column, we leave only the necessary documents and reference books.

And as a result, in the “Main” section, we will get only the set of documents, reports and reference books necessary for the personnel officer.

As for the “Personnel” section, it can be left in its original form or set up more finely if, for example, a personnel officer does not have to deal with sick leave, vacations and maternity leave. That is exactly the same in the navigation bar, these documents can be removed. I will not dwell on this in detail, since it already depends on the specific task.
I will only note one more element that also needs to be configured in order to avoid the possibility of a user accessing data that is closed to him. This element is "Home page or whatever it is called "Desktop". It automatically opens when user mode starts. To set up the start page, open the service menu View -> Set up start page. A window will open in which you can configure the composition of the left and right columns from the list of available forms. The choice of available forms is not that great. So, for example, for our situation, where an employee is engaged in personnel, one should not give him access to such a form as “Payroll: Form”. But I decided to remove all forms altogether, so as not to tempt the user once again. The start page will be blank.

Final setting of the user role in the 1C configurator
So, let's assume that we have set up access to all the necessary documents and directories for our personnel officer, using the capabilities of the command interface. Now the main question is how to make it so that the user himself could not open the interface settings and give himself access to prohibited documents. To do this, return to the configurator and select General -> Roles -> Frolov_Role in the configuration object tree. Open this role. Now in the window that opens, we position the cursor on the inscription "Salary and Personnel Management", and in the "Rights" column we look for the setting "Saving user data". Uncheck the box next to this setting. This means that the user himself will not be able to customize the contents of the section panels, the navigation bar, and the desktop, which means that he will not be able to access prohibited sections from the command interface.

To verify this, you can go to the database under the user Frolov and try to open the settings for sections or navigation. At the same time, you will not find the “View” item in the service menu. It became unavailable because we removed the right to "Save user data" from the Frolov user role.

Thus, we limited the user's visibility of objects to only those directories, documents and reports that he really needs to work. At the same time, in the configurator mode, only one checkmark was edited in the rights of this employee.
However, this is not all. We have restricted explicit access to prohibited objects. However, the user may end up in an unwanted directory or document from a document available to him. So our personnel officer Frolov from the document “Employment” can open the directory “Organizations” and accidentally or purposefully change some data there. To prevent a similar situation from happening, you should view and analyze all objects that are associated with documents and directories available to the user. And then, in the configurator, open the role of our user and prohibit editing or even viewing unwanted objects. It is up to you to choose the specific option, depending on the task at hand.

That's all! We solved a rather difficult problem in a not very complicated way. Anyone who has read to the end can rightfully be proud of himself) If I missed something and you have comments, I will be glad to see them in the comments to the article.
New interesting materials will appear on.
To be the first to know about new publications, subscribe to my blog updates:
By default, when creating a database on the cloud from a template, you must select a user to enter the program Administrator, with blank passwords.
It is not recommended to use this account for daily work.
To differentiate access rights and increase the level of security, it is recommended to create user accounts and specify certain permissions for working with the database.
Creating users for 1C 8.2 databases
To create a list of users, open the database in mode Configurator.
Go to the "Administration / Users" menu. To manage the list of users, you must have Full rights in the database. 
Click the "Add" button. 
In the window that opens, fill in the fields:
Name- the name that will be displayed in the user selection list.
Full name - the name that will appear in the database when performing operations.
flag Authentication 1C:Enterprise- allows you to set a password under which the user will enter this database.
flag Show in selection list- allows you to hide or show the user in the launch window. If the user is hidden in the selection list, then you can go under his data directly by entering the name and password. 
flag Operating system authentication allows you to link an account for 42 Clouds with an account in the 1C database.
When setting this option, you will need to select from the list your login on the site 42 Clouds(tip: start typing your username to search the list). 
On the "Other" tab, you must specify the roles that users can perform in the database.
The list of roles depends on the responsibilities of the user.
Note! To run the database on the cloud, check the "Run thick client" and "Run thin client" flags. 
After setting the required settings, click OK. Now the created user can work in the database.
Creating users for 1C 8.3 databases
Creation of new users in such configurations as Trade Management 11.1, Enterprise Accounting (version 3.0) takes place in the database mode, in the Users directories. The created users will be automatically sent to the Configurator after they are created. 
Go to the menu "Administration / User and rights settings / Users". Click the Add button. To manage the list of users, you must have Full rights in the database.

Enter a name, give permission to access the database (by checking the box) and select the authorization method (either entering a login and password, or logging into 1C under a domain account). Fields "Individual" "Department" are optional, used for analytics.

To work with the database, you need to add rights to the user in the section: “Access rights”. The set of groups can be changed and edited in the User Group Profiles directory.

Disabling database access
To disable access to the 1C user database, just uncheck the "Infobase access is allowed" flag or change the password.
When setting up a user through the Configurator (for 1C 8.2 bases), it is enough to remove the user from the list.
Creating users for 1C 8.3 databases (Taxi Interface)
To set access rights, log in to the database in 1C Enterprise mode on behalf of the Administrator and go to the User and rights settings / Access group profiles section, click Create group.
Enter the name of the group and tick the roles available to users of this group. An example of a group that will allow users to use external processing includes the following roles:
- Interactive opening of external reports and processing
- Use of additional reports and processing
Click Burn and Close

Return to menu Users and select an employee from the list, click Access rights. In the list of profiles, mark the previously created profile. Click Burn.
2016-12-01T13:37:17+00:00The correct setting of the list of users and their access rights to the 1C: Accounting 8.3 database (version 3.0) is necessary for any number of people working with the program. Even if only you work with it!
This setting allows you to further answer questions such as "Who made these or those changes to the database", "How to give access to the database for viewing only for the reviewer", "Who allowed the assistant to change the accounting policy settings" and the like.
In the third edition, such a setting, in my opinion, has become easier and more intuitive. Today I will tell you how to better configure users and their rights. I will try to consider the most general case.
So, we will configure the following users:
- Administrator : a user who has full rights to the base and has no restrictions. You do not need to use this user for daily work. The administrator password should be given to programmers and administrators who set up or update the database for us. Since only they will work under this user, in the future we will always be able to separate their changes in the database from the work of other users in the registration log. This is useful in the case of "debriefing".
- Chief Accountant : A user who has no less rights than an administrator, but is a separate role with its own password. Under this user you will work yourself.
- Accountant: if you have assistants or other accountants under your supervision, then this user is suitable for them. What are the limitations of this role?
- Prohibition to change accounting parameters.
- Prohibition to change accounting policies.
- Prohibition to change the chart of accounts.
- Prohibition to edit the list of users.
- Prohibition on setting up item accounting accounts.
- Prevent deletion of items marked for deletion.
- Prohibition to change the date of the prohibition of data modification.
- Checker : this user will only have rights to view the database. He can't change anything about her.
1. Go to the "Administration" section and select the "User and rights settings" item there ():
2. In the panel that opens, select the "Users" item:

3. By default, the user "Administrator" should already be in this list. Double click on it to open its settings.

4. Make the setting as shown below. Create a password yourself - you need to repeat it twice. Please note that each user must have their own password. It remains to click "Save and close". Ready!

Chief Accountant


4. In the rights settings window, check the boxes next to the "Administrator" and "Chief Accountant" items. It remains to press the "Record" button. Ready!

Accountant
1. Return to the user list and click the "Create" button on the toolbar.
2. A window with a new user will open. Specify the settings as shown below, just create your own password.

4. In the rights settings window, check the boxes next to the "Accountant" item. It remains to press the "Record" button. Ready!

Checker
1. Return to the user list and click the "Create" button on the toolbar.
2. A window with a new user will open. Specify the settings as shown below, just create your own password.

Software products based on the 1C platform have many functions, both specialized and applied, that is, administrative. The profile functionality (of course, depending on the purpose of the solution) concerns such areas as the purchase of goods, their sale, warehouse, operational and management accounting, accounting, CRM, and in the case of complex solutions - all together.
Naturally, one employee is not able to control all the business processes of the organization, even if they are automated. Therefore, 1C system administrators have to deal with tens and hundreds of users working with certain system functionality. Each of them has to set up special rights so that they have at their disposal all and only the documents, functions and reports they need. And here we begin to consider the applied or administrative functionality of 1C solutions, which just includes setting user access rights.
User settings 1C 8.3
For user rights in 1C 8.3, special objects of the configuration structure are responsible - "Roles". In most typical configurations, there is already a certain list of standard roles created. You can use them when creating accounts and setting access rights for them. If the standard set does not suit you, then you can change it or add your own roles.
Each user can be assigned several roles that are responsible for specific rights. In order to set up 1C user rights, you need to find out what roles they have now. This information can be obtained in two ways:
- Through the configurator. This option is suitable for any configuration;
- In some configurations, through the "Enterprise" mode.
Run the configurator of your 1C base under a username with full rights and open the "Administration" -> "Users" menu. To find out the rights of a particular user, you must double-click on the line with his last name and go to the "Other" tab. Those roles that are available to the user will be marked with a checkmark. To add or remove a specific role, change the checkboxes and click OK.


If after the analysis you realize that the standard roles will not be able to fully satisfy the requirements for the differentiation of rights, then you need to change them. To do this, find the required role in the configuration tree and open it by double-clicking. In the left part of the window that opens, you will see a list of all configuration objects. In the right part, checkboxes mark those actions, the rights to which are laid down in this role, in relation to the selected object on the left.

You can not only give and remove permissions for certain actions with configuration objects by checking and unchecking the boxes. In addition, a very convenient mechanism is built into the 1C platform, which is responsible for restricting user rights at the record level - RLS. It allows you to set a condition, only under which the user will see infobase data. Using RLS, user rights in 1C 8.3 can be configured so that, for example, each specific storekeeper will see information only for his warehouse.
Another way to add rights to an object to a user without changing the standard roles is to create a new role. To do this, click on the "Add" button, being in the "Roles" configuration branch, and name the new object. In the window that opens, find the necessary configuration objects on the left, and set the necessary rights and restrictions on the right. After saving the new role, you need to update the configuration, go to the user list and add a new role to certain users.
The responsibility of the 1C infobase administrator is not limited to creating users and distributing rights. Employees can change, responsibilities can be redistributed, and administrators must respond quickly to all these changes. If an employee who performed certain functions in 1C quits, then you need to disable the 1C user so that former colleagues do not use the account. The list of users will help us with this, which can be opened in the configurator in the "Administration" menu.

Having opened the 1C user settings, you need to uncheck the checkboxes responsible for finding the employee's name in the selection list and authentication. Thus, you will prohibit logging in under the name of the departed employee and save the access rights settings in case the employee returns. Also, these settings will come in handy if all the powers are transferred to a new employee - you do not have to reconfigure the roles.
Completely deleting a user is also not recommended due to the fact that in the system in various documents there are links to the responsible user. If you delete an entry, then there will be broken links and misunderstandings about who created specific documents, which can lead to confusion. It is much more efficient to disable the 1C user from logging into the system, and in some cases completely remove rights (roles). Also, in some companies, there is a practice to mark inactive users with a certain icon in the "Name" field, for example: "*IvanovaTP".
In some cases, the 1C administrator may need to urgently “throw out” users from the 1C database. This can be done in two ways:
- Through the "Enterprise" mode from a user with administrative rights. Not supported by all configurations;
- Through the application server using the 1C server cluster console.
To use the first option, you need to go to "NSI and Administration", open "Maintenance" and launch the "Active Users" form. We will see a list of active users and the “Finish” button on top, clicking on which will forcefully end user sessions. In addition, in this list, you can see the computer name and start time, which will help track hung sessions.

The second option to disable active users requires more attention and responsibility, since most often the cluster console is placed on the application server. If you have access to this server control panel, then you can end the user session in the following way:
- Open the cluster console;
- We go to the list of infobases and open sessions of the one we need;
- We find the desired user in the list;
- We call the context menu by pressing the right mouse button, there will be a function - "Delete".

In the 1C platform, developers have a convenient mechanism for setting rights and managing users. Therefore, the described features are available to owners of all configurations, even those written by themselves. Another advantage is the undemanding to the presence of deep knowledge of the 1C system. Any responsible and attentive administrator is able to handle these operations.
 Selection of nomenclature according to characteristics
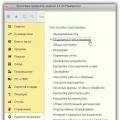 How to make an archive 1s 8.3. How to set up a backup. way: by copying the configuration file
 What is the .epf file extension?