There can be no more logical disks. Hard disk partitions and file systems
No matter how advanced an operating system is, it cannot be booted without having two sectors on the hard drive that contain the code needed to run any operating system. The first sector is called the Master Boot Record (MBR); it is always located at: sector 1/cylinder 0/head1 and is the very first sector of the hard drive. The second most important sector is the Boot Sector (boot sector), located in the first sector of each volume.
Master Boot Record
The Master Boot Record is the most important disk structure; this sector is created when the disk is partitioned. The MBR sector contains a small code called the Master Boot Code, as well as a disk signature and a partition table. At the end of the MBR sector is a two-byte structure indicating the end of the sector. It has a value of 0x55AA. The disk signature is a unique number located at offset 0x01B8 that allows the operating system to uniquely identify the disk.
The code located in the MBR sector performs the following actions:
- looks for an active partition in the partition table;
- looks for the starting sector of the active partition;
- loads a copy of the boot sector from the active partition into memory;
- transfers control to the executable code from the boot sector.
- invalid partition table;
- Missing operating system.
Partition table
The partition table is a 64-byte structure used to determine the type and location of partitions on a hard drive. The content of this structure is unified and does not depend on the operating system. The information about each partition is 16 bytes, so there can be no more than four partitions on a disk.
Each partition information starts at a specific offset from the start of the sector, as shown in tab. 1.
Offset
| |Meaning
|Description
0x01BE| 1 byte| 0x80| Boot Indicator - Indicates if the volume is the active partition. May have the following values: 00 - not used for loading; 80 - active partition
0x01BF| 1 byte| 0x01| Starting Head
0x01C0| 6 bit| 0x01| Starting Sector - bits 0-5 are used. Bits 6 and 7 are used by the next field
0x01C1| 10 bit| 0x00| Starting Cylinder - 10-bit number with a maximum value of 1023
0x01C2| 1 byte| 0x07| System ID - defines the volume type
0x01C3| 1 byte| 0xFE| Ending Head
0x01C4| 6 bit| 0xBF| Ending Sector - bits 0-5 are used. Bits 6 and 7 are used by the next field
0x01C5| 10 bit| 0x09| Ending Cylinder - 10-bit number with a maximum value of 1023
0x01C6| Double word| 0x3F000000| Relative Sectors - offset from the beginning of the disk to the beginning of the volume, expressed in the number of sectors
0x01CA| Double word| 0x4BF57F00| Total Sectors - number of sectors in the volume
Now that we are familiar with the structure of the partition record, let's take a closer look at some of the fields in this record.
Boot indicator field
The first entry in the partition table, the Boot Indicator field, indicates whether the volume is an active partition. We remind you that only the primary partition of a disk can be active. It is possible to install different operating systems and different file systems on different volumes. Using utilities such as FDISK (MS-DOS), Disk Management (Windows 2000), or third-party utilities, you can activate the primary partition and set the appropriate value for this field.
System ID field
This field contains the system identifier and indicates which file system - FAT16, FAT32 or NTFS - was used to format the volume, and also allows you to find out some of the characteristics of the file system. In addition, this field indicates whether an extended partition exists on the disk. Possible values for the System ID field are shown in tab. 3.
Partition type
|Explanations
0x01| Primary partition or logical drive FAT12. Volume has less than 32,680 sectors
0x04| Partition or logical drive FAT16. The volume has 32,680 to 65,535 sectors, or a size of 16 to 33 MB
0x05| Extended section
0x06| BIGDOS FAT16 partition or logical drive. Size from 33 MB to 4 GB
0x07| An NTFS partition or logical drive. Installable File System
0x0B| FAT32 partition or logical drive
0x0C| FAT32 partition or logical drive using BIOS INT 13h extensions
0x0E | BIGDOS FAT16 partition or logical drive using BIOS extensions INT 13h
0x0F| Extended partition using BIOS INT 13h extensions
0x12| EISA section
0x42 |Dynamic Disk Volume (Windows 2000)
Note that only volumes with a System ID field of 0x01, 0x04, 0x05, or 0x06 are available under MS-DOS. However, volumes with a different System ID in this field can be deleted using the FDISK utility.
Cylinder, Head and Sector fields
The fields Starting Cylinder, Ending Cylinder, Starting Head, Ending Head, Starting Sector, and Ending Sector (commonly called CHS) are optional entries in the partition table. The boot code uses the values of these fields to find the boot sector and activate it. The Starting CHS fields of inactive partitions indicate the boot sectors of the primary partitions and the extended boot sector of the first logical drive in the extended partition.
On rice. 2 showing the Master Boot Record (containing the code, partition table, and signature) and boot sectors for a four-partition drive.

rice. 2
The Ending Cylinder field in the partition table has a size of 10 bits and allows you to describe cylinders with numbers from 0 to 1023. The Starting Head and Ending Head fields have a size of 1 bit and can contain head numbers from 0 to 255. Since the Starting Sector and Ending Sector fields occupy 6 bits each, they can contain values from 0 to 63. Since the sector numbering starts from 1 (and not from 0, as for other fields), the maximum number of sectors per track is 63.
With low-level formatting, all disks are set to a standard sector size of 512 bytes, so the maximum disk size described in the partition table can be calculated as follows:
Code:
Maximum Size = Sector Size x Number of Cylinders x Number of Heads x x Number of Sectors per Track.
Using the maximum allowable values of these quantities, we get:
Code:
512 x 1024 x 256 x 63 (or 512 x 224) = = 8,455,716,864 bytes, or 7.8 GB.
Thus, without the use of the INT 13h extensions, known as Logical Block Addressing (LBA), the size of an active primary partition cannot exceed 7.8 GB, regardless of the file system used.
The maximum volume size under FAT16 depends on the geometry of the disk and the maximum values in the partition table. Possible values with and without LBA are shown in tab. 4. The number of cylinders in both cases is 1024 (0-1023). In the event that the primary partition or logical device occupies an area beyond the 1023rd cylinder, all fields in the partition table will have the maximum allowable values.
LBA mode
|Number of heads
|Sectors/Track
|Max. partition size
Forbidden| 64| 32| 1 GB
Allowed| 255| 63| 4 GB
To get around the 7.8 GB limit described above, Windows 2000 ignores the values in the Starting Sector and Ending Sector fields and instead uses the values in the Relative Sectors and Total Sectors fields.
Relative Sectors and Total Sectors fields
The Relative Sectors field contains the offset from the beginning of the disk to the beginning of the volume, expressed as a number of sectors. The Total Sectors field indicates the total number of sectors in the volume.
Using the values of these two fields (which together is a 32-bit number), we get an additional 8 bits to store the total number of sectors compared to the CHS scheme described above. In this case, the number of sectors can be represented as 232. When using the standard sector size (512 bytes) and the 32-bit representation of the number of sectors, the maximum partition size is limited to 2 TB (or 2,199,023,255,552 bytes). This scheme is used only in Windows 2000 with NTFS and FAT32 file systems.
Note that when creating partitions under Windows 2000, the correct data is also entered in the Starting Cylinder, Ending Cylinder, Starting Head, Ending Head, Starting Sector, and Ending Sector fields. This allows for compatibility with MS-DOS, Windows 95, and Windows 98, as well as the INT 13h functions used by the BIOS when the computer boots.
Enhanced Boot Record
The Extended Boot Record (EBR) consists of an extended partition table and a signature, a two-byte structure with a value of 0x55AA. An extended boot record exists for each logical device in the extended partition. It contains information about the first side of the first cylinder for each logical device. The boot sector of a logical disk is usually located in relative sectors numbered 32 or 63. If there is no extended partition on the disk, then there is no extended boot record and no logical devices.
The first element of the extended partition table for the first logical device points to its boot sector, the second element points to the EBR of the next logical device. If the next logical device does not exist, then the second element is not used - it contains a set of zeros. The third and fourth elements of the extended partition table are not used.
On rice. 3 shows how the extended boot record works. Three LUNs are shown in the extended section.

rice. 3
Except for the last logical device in the extended partition (see rice. 3), the extended partition table format described in tab. 5, repeated for each logical device: the first element describes the boot sector of the logical device, the second element points to the next extended boot record. For the last logical device, elements two through four are not used.
Extended partition table element
|Content
First element| Information about the current LUN in the extended section, including the start address for the data
Second element| Information about the next LUN in the extended section, including the address of the sector containing the EBR for the next LUN. This field is not used if there are no following logical devices
Third element| Not used
Fourth element| Not used
The fields of each entry in the extended partition table are similar to those of the regular partition table described above.
The Relative Sectors field in the extended partition table specifies, in bytes, the offset from the beginning of the extended partition to the first sector of the logical device. The number in the Total Sectors field allows you to find out the number of sectors allocated for the logical device. The value of the Total Sectors field is equal to the number of sectors from the beginning of the boot sector to the end of the logical partition.
Due to the critical importance of the information stored in the MBR and EBR sectors, it is recommended to periodically check the disk using the appropriate utilities and create data backups.
boot sector
The boot sector, located in sector 1 of each volume, is the structure that enables the computer to start. This sector contains the executable code and the data that the code requires, including information about the file system used on the volume. The boot sector is created when the volume is formatted. At the end of the boot sector is a two-byte structure called the end-of-sector marker. This structure always contains the value 0x55AA.
On computers running Windows 2000, the boot sector of the active partition is loaded into memory and calls the operating system loader - NTLDR , which performs all the necessary steps to boot Windows 2000.
In Windows 2000, the boot sector contains the following elements:
- assembler instruction JMP;
- manufacturer identifier (OEM ID);
- a data structure called the BIOS Parameter Block (BPB);
- extended BPB structure;
- executable code that starts the operating system.
The BPB structure contains the physical parameters of the volume, the extended BPB structure starts immediately after the standard BPB. The length of the BPB structure and the information it contains depends on the type of boot sector - NTFS, FAT16 or FAT32.
The information stored in the BPB and the extended BPB structure is used by device drivers to read and configure volumes.
The BPB extended structure is immediately followed by the boot code.
Download process
The computer boot process consists of the following basic steps:
- On power-up, a BIOS and Processor Verification Test (POST) is performed.
- The BIOS looks for a boot device (usually a disk).
- The BIOS loads the first physical sector from the boot disk into memory and transfers control to the address where this sector is loaded.
If there is a disk in drive A, the BIOS loads the first sector (boot sector) of that disk into memory. If the disk is bootable (contains the base files of the operating system), the boot sector is loaded into memory and uses code to transfer control to the file IO.SYS, the base file of the MS-DOS operating system. If the disk is not bootable, the executable code in the boot sector issues the following message:
- Non-System disk or disk error
- Replace and press any key when ready
Types of boot sectors
As we already know, MBR transfers control to the boot sector. Therefore, the first three bytes of this sector must contain a valid instruction for the CPU. This instruction is a jump instruction that redirects code execution. The JMP instruction is followed by an 8-byte manufacturer identifier (OEM ID), a string describing the name and version number of the operating system used to format the volume.
To maintain compatibility with MS-DOS, Windows 2000 writes the identifier "MSDOS5.0" for the FAT16 and FAT32 file systems. For the NTFS file system, the identifier contains the characters "NTFS".
Windows 95 uses the "MSWIN4.0" identifier, while Windows 95 OSR2 and Windows 98 use the "MSWIN4.1" identifier.
Immediately following the manufacturer ID is a data structure called the BIOS Parameter Block (BPB). It contains the information needed to locate the NTLDR file. Since the BPBs are usually located at the same offset, the standard parameters are easily found. Since the JMP instruction bypasses the BPB structure, its size can be increased in the future if any additional information needs to be stored here.
Now let's look at what boot sectors look like for the three main file systems - FAT16, FAT32 and NTFS.
FAT16 boot sector
IN tab. 6 the description of the boot sector for the FAT16 file system is given.
Offset
| |0x00| 3 bytes| JMP instruction
0x03| 2 x LONG| OEM ID
0x0B| 25 bytes| BPB
0x24| 26 bytes| Advanced BPB
0x3E| 448 bytes| Boot Code
A specific example shows the contents of the FAT16 boot sector. There are three sections here:
- bytes 0x00-0x0A contain the JMP instruction and OEM ID (in bold);
- bytes 0x0B-0x3D contain BPB and extended BPB;
- the rest of the bytes contain the boot code and end-of-sector marker (shown in bold).
The following two tables show the contents of the BPB ( tab. 7) and extended BPB ( tab. 8) for FAT16. The given values correspond to the boot sector shown in fig. 4.
Offset
| |Meaning
|Description
0x0D| 1 byte| 0x40| The number of sectors in the cluster. Because FAT16 supports a limited number of clusters (up to 65,536), larger volumes require more sectors per cluster. The default value of this field depends on the size of the volume. Valid values are: 1, 2, 4, 8, 16, 32, 64, and 128. Values that increase the cluster size beyond 32 KB (the number of bytes per sector times the number of sectors in the cluster) can cause errors.
0x0E| 2 bytes| 0x0100| Reserved sectors - the number of sectors before the first FAT table, including the boot sector. The value of this field is always 1
0x11| 2 bytes| 0x0002| The total number of 32-byte file and directory names that can be stored in the root directory of the volume. Typically, the value of this field is 512. One element is always used to store the volume label, so the maximum number of files and directories does not exceed 511
0x13| 2 bytes| 0x0000| The number of sectors in the volume, expressed as a 16-bit value. For volumes with more than 65,536 sectors, this field is not used and its value is 0
0x16| 2 bytes| 0xFC00| The number of sectors in each FAT copy. The value of this field, the number of FAT copies, and the number of reserved sectors are used to calculate the location of the root directory. By knowing the maximum number of entries in the root directory, you can also find out where the user data starts.
0x1A| 2 bytes| 0x4000| Number of heads. Used for low-level formatting of disks
0x1c| 4 bytes| 0x3F000000| The number of "hidden" sectors - the number of sectors before the boot sector. Used at boot time to calculate the absolute offset of the root directory and data
0x20| 4 bytes| 0x01F03E00| The number of sectors in the volume, expressed as a 32-bit value. Used for volumes with more than 65,536 sectors
Offset
| |Meaning
|Description
0x24| 1 byte| 0x80| The physical number of the device. Contains 0x00 for floppy disks and 0x80 for hard disks. Used INT 13h to access the disk. The value of this field is only meaningful for the boot device.
0x25| 1 byte| 0x00| Reserved. For FAT16, the value of this field is always 0
0x26| 1 byte| 0x29| Signature of the extended boot sector. For Windows 2000, this field must be 0x28 or 0x29
0x27| 4 bytes| 0xA88B3652| The serial number of the volume. Random number generated when formatting a disk
0x2B |11 bytes| NO NAME | Volume label. In Windows 2000, the volume label is stored in a special file
0x36| 2 x LONG| FAT16| File system type. Depending on the format of the disk, this field may contain FAT, FAT12, or FAT16 characters.

rice. 4
FAT32 boot sector
The FAT32 boot sector has much in common with the FAT16 boot sector, but BPB contains additional fields, and those fields used in FAT16 are located at different addresses. Thus, disks formatted under FAT32 cannot be read by operating systems that are not compatible with FAT32.
IN tab. 9 shows the contents of the boot sector for the FAT32 file system.
Offset
| |Meaning
|Description
0x0B| 2 bytes| 0x0002| The number of bytes in the sector is the size of the sector. Valid values are 512, 1024, 2048, and 4096. For most drives, the value of this field is 512
0x0D| 1 byte| 0x40| The number of sectors in the cluster. Because FAT32 supports a limited number of clusters (up to 4,294,967,296), very large volumes require more sectors per cluster. The default value of this field depends on the size of the volume. Valid values are 1, 2, 4, 8, 16, 32, 64, and 128. In Windows 2000, volumes up to 32 GB are supported for FAT32. Larger volumes created with Windows 95 OSR2 and Windows 98 are available from Windows 2000
0x0E| 2 bytes| 0x0200| Reserved sectors - the number of sectors before the first FAT table, including the boot sector. The value of this field for FAT32 is usually 32
0x10| 1 byte| 0x02| The number of FAT table copies for this volume. The value of this field is always 2
0x11| 2 bytes| 0x0000| The total number of 32-byte file and directory names that can be stored in the root directory of the volume (FAT12/FAT16 only). For FAT32 volumes, this field must be 0
0x13| 2 bytes| 0x0000| The number of sectors in the volume, expressed as a 16-bit value (FAT12/FAT16 only). For FAT32 volumes, this field must be 0
0x15| 1 byte| 0xF8| Media type. The value 0xF8 indicates a hard disk, 0xF0 indicates a high density floppy disk. This field is not used in Windows 2000
0x16| 2 bytes| 0x0000| Number of sectors in each FAT copy (FAT12/FAT16 only). For FAT32 volumes, this field must be 0
0x18| 2 bytes| 0x3F00| The number of sectors in a track. Used for low-level formatting of disks
0x1A| 2 bytes| 0xFF00| Number of heads. Used for low-level formatting of disks
0x1c| 4 bytes| 0xEE39D700| The number of "hidden" sectors - the number of sectors before the boot sector. Used at boot time to calculate the absolute offset of the root directory and data
0x20| 4 bytes| 0x7F324E00| The number of sectors in the volume, expressed as a 32-bit value. Used for volumes with more than 65,536 sectors
0x24| 4 bytes| 0x83130000| Number of sectors in FAT (FAT32 only)
0x28| 2 bytes| 0x0000| Extended flags (only for FAT32). Separate bits of this word have the following purpose: bits 0-3 - number of active FATs; bits 4-6 are reserved; bit 7 is 0 if FAT "mirroring" is in progress; equals 1 if only one FAT is active; bits 8-15 - reserved
0x2A| 2 bytes| 0x0000| File system version (FAT32 only)
0x2c| 4 bytes| 0x02000000| Cluster number for the first root directory cluster (FAT32 only). Usually the value of this field is 2
0x34| 2 bytes| 0x0600| Sector number with boot sector backup (only for FAT32). Typically, the value of this field is 6
0x36| 12 bytes| 0x000000000000000000000000| Reserved (FAT32 only)
tab. 10.
Offset
| |0x00| 3 bytes| JMP instruction
0x03| 2 x LONG| OEM ID
0x0B| 25 bytes| BPB
0x24| 48 bytes| Advanced BPB
0x54| 426 bytes| Download Code
0x01FE| 2 bytes| End of sector marker (0x55AA)
tab. 12.
For NTFS volumes, the fields following the BPB are the extended BPB. The data contained here helps NTLDR locate the MFT table during boot. Unlike FAT16 and FAT32, the MFT is not located in any fixed location - its location can change, for example, when bad sectors are detected. If the MFT cannot be found, Windows 2000 assumes that the drive is unformatted.
IN tab. 13 BPB and Extended BPB fields for NTFS volumes are introduced. The fields with offsets 0x0B, 0x0D, 0x15, 0x18, 0x1A, and 0x1C are identical to those for FAT16 and FAT32 volumes. The values shown correspond to the boot sector shown in rice. 6.
Offset
| |Meaning
|Description
0x0B| 2 bytes| 0x0002| Number of bytes in a sector
0x0D| 1 byte| 0x08| Number of sectors in a cluster
0x0E| 2 bytes| 0x0000| Reserved sectors
0x10| 3 bytes| 0x000000| Always 0
0x13| 2 bytes| 0x0000| Not used in NTFS
0x15| 1 byte| 0xF8| Media type
0x16| 2 bytes| 0x0000| Always 0
0x18| 2 bytes| 0x3F00| Number of sectors per track
0x1A| 2 bytes| 0xFF00| Number of heads
0x1c| 3 bytes| 0x3F000000| Number of “hidden” sectors
0x20| 4 bytes| 0x00000000| Not used in NTFS
0x24| 4 bytes| 0x80008000| Not used in NTFS
0x28 |2 x LONG| 0x4AF57F0000000000| Total number of sectors
0x30| 2 x LONG| 0x0400000000000000| Logical cluster number for $MFT file
0x38| 2 x LONG| 0x54FF070000000000| Logical cluster number for file $MFTMirr
0x40 |4 bytes| 0xF6000000| Number of sectors in a file record segment
0x44| 4 bytes | 0x01000000| Number of clusters in index block
0x48| 2 x LONG| 0x14A51B74C91B741C| Volume serial number
0x50| 4 bytes| 0x00000000| Check sum
Before I start talking about the answer file options that control the creation and formatting of hard disk partitions, I would like to lay out some basic information about partitions. In addition, I will touch on terminology issues, which should also help you understand the answer file parameters, which are called in English. If you consider yourself a fairly experienced user (well, of course you do :), you can skip the first section of the article.
On this page
Introduction to hard disk partitions
As you know, a new hard drive just taken out of the box, which is commonly called physical disk, from the point of view of operating systems and programs is unallocated space. In order to install an OS or use a disk for storing files, you must create at least one chapter. In English, the section is called partition, which is why some people call partitions partitions.
You can create multiple partitions on one physical disk. As a rule, partitions are created in order to be able to install several operating systems or transfer user files to a partition other than the one on which the OS is installed. There are two types of sections - basic(primary) and additional(extended). A disk can have up to four primary partitions, and if there is a secondary partition, there can be a maximum of three primary partitions. The extended partition acts as a container in which one or more logical drives. The difference between primary and secondary partitions is that the primary partition can be used to launch operating system, and the OS cannot be started from the logical disks of the additional partition. The section that contains the files necessary to start the operating system is marked and called active. There can only be one active partition on a physical disk. A partition containing OS system files Windows is called bootable, and there may be several such partitions (for example, in configurations with several installed operating systems).

In the screenshot you can see the primary and secondary partitions (one logical drive has been created on the secondary partition).
When a partition is created, it is assigned letter. The first partition on the first physical disk is assigned the letter C, the second partition is D, and so on, following the English alphabet. First, the main partition is created, and the additional (if necessary) already follows it, after which, in principle, you can create other main partitions. To use an extended partition, you must create at least one logical drive on it. It and the following logical drives will also be assigned letters in alphabetical order.
To install an OS or place files on a partition or logical drive, it must be formatted. Windows uses NTFS and FAT32 file systems. Windows Vista can only be installed on a partition formatted in NTFS. A formatted primary partition or logical drive is called volume. That can be assigned label, which will be displayed, for example, in a window My computer.
Before you start configuring a hard disk, you need to decide how many partitions or volumes you want to have on it in the end. If no more than three, then it makes sense to create only the main sections. Subsequently, it will be easier to work with them if you need, for example, to merge two sections into one. In the Windows Vista Disk Management snap-in, this will be easy to do, but merging a primary partition with an additional one is not a trivial task.
I hope you are now fully prepared to configure the hard disk partition settings in the Windows Vista answer file.
Adding components responsible for configuring hard disk partitions
Unlike Windows XP, Windows Vista Setup allows you to configure the creation and deletion of partitions on a physical disk. To perform these operations, you must add several components to your answer file.
Add the following components to the answer file.
| Component | pass | |
| Microsoft-Windows-Setup | disk configuration | disk | CreatePartitions | --> | 1 windowsPE |
| Microsoft-Windows-Setup | disk configuration | disk | ModifyPartitions | --> | 1 windowsPE |
| Microsoft-Windows-Setup | ImageInstall | OS Image | InstallTo | --> | 1 windowsPE |
Editing Response File Options
Partitioning requires unallocated space. In this article, I will consider an example of creating two sections - the main and additional. One logical drive will be created on the extended partition. If you need to create more primary partitions or more logical drives, you can do it by analogy.
Attention! The example considers complete removal of all partitions of a physical disk before performing operations to create and format new partitions. Please do not use disks with data that you feel sorry for losing for experiments.
From a logical point of view, the order of working with the parameters of the answer file is approximately the same as if you were working with hard disk partitions interactively. To perform the task set in the example, you must perform the following operations.
- Delete all partitions on the disk.
- Create a main section.
- Create an additional section.
- Create a logical drive on an extended partition.
- Set the file system format for the partition or logical drive, as well as the drive letter and volume label.
Deleting all partitions on a disk
windowsPE | Microsoft-Windows-Setup | disk configuration | Disk("0")
Component Disk("0") is responsible for the overall configuration of the first physical disk.

- Disk ID- disk identifier. Meaning 0 denotes the first physical disk
- WillWipeDisk- deleting all hard disk partitions. Attention! If set to true, all partitions will be deleted. It is this value that must be set to perform the operations described later in the article.
Partitioning a Disk
windowsPE | Microsoft-Windows-Setup | disk configuration | Disk("0") | CreatePartitions
With the help of this and the component (and its child components) the creation of sections is carried out. Right click on the component CreatePartitions Insert new CreatePartition.

Repeat this action twice more so that you have three components CreatePartition. Why three? Because for the configuration in our example, you need to perform three operations - create a primary partition, an additional partition, and a logical drive on the additional partition. If two main partitions were created, two operations would suffice.
Creating a Primary Partition
Click the first component CreatePartition

- Extend true, the section will be expanded. If set to false, you must specify the size using the parameter size.
Attention! For each section, either the parameter value is set Extend, or the parameter value Siz e, but not both. Because more than one partition is going to be created in this example, the extension is not used.. - Order- sequence number of the operation to create a partition on the disk. The numbering starts from one. The example specifies the value 1 , i.e. the partition will be created first.
- size- partition size in megabytes. The example creates a 50,000 MB partition, which is just under 50 GB. Specify the partition size of your choice. Since Windows Vista will be installed on the first partition, don't make it small. The minimum requirement for installing this OS is a 40 GB hard drive, so it is not recommended to create a smaller partition.
- type- section type. You can create a main Primary) or optional ( Extended) chapter. In this example, the first section will, of course, be the main one.
Create an additional partition
Click the second component CreatePartition in the list and set options for it.

The second section in this example is an additional one, and it is the last one (no more sections are planned to be created). To make it take up all the remaining free unallocated space, for the parameter Extend value is set true(and the parameter size not set). The section will be created second, as reflected in the parameter value Order. Finally, an additional partition is created, so for the parameter type value is indicated Extended.
Creating a logical drive on an extended partition
Click the third component CreatePartition in the list and set options for it.

Because only one logical drive is created on the extended partition, it must take up all of the available unallocated free space. Therefore, for the parameter Extend value is set true(and the parameter size not set). Since a logical drive is being created, for the parameter type value is indicated Logical.
Set the file system format, drive letter, volume label, etc.
For each created partition and logical drive, you need to specify a number of parameters, such as the file system format, drive letter, etc. These operations are performed using the ModifyPartitions and its child components. This component can be used not only to configure the parameters of newly created partitions, but also to change the parameters of partitions that already exist on a physical disk.
Right click on the component ModifyPartitions and select the command from the context menu Insert new ModifyPartition.

Do this one more time so you have two components ModifyPartition. Why two? Because for the configuration in our example, you need to perform two operations - set the parameters for the main partition and the logical drive on the secondary partition.
Click the first component ModifyPartition in the list and set options for it.

- Active- makes the section active. The assignment is set to true. Since on the main partition (namely, we are configuring it now - this is set by the parameter Order) will install Windows Vista, this partition should be set to active.
- Extend- expanding the partition to the size of all free unallocated space on the disk. If set to true, the section will be expanded. You have already seen this option when creating a partition. Since the component ModifyPartition can also be used to change the parameters of partitions that already exist on a physical disk, the parameter Extend available here too. However, you should not extend a partition that was already given an extension when it was created. Moreover, in our example, we set a fixed size for the main section. Use value false for this setting.
- Format- file system format. Windows Vista can only be installed on the NTFS file system.
- label- volume label. Install as you wish.
- Letter- drive letter. It is logical to set the letter for the first section C.
- Order- sequence number of the operation to change the partition. The numbering starts from one. The example specifies the value 1 , i.e. the partition will be modified first. Obviously, the sequence number of the operation according to change section in this case must correspond to the serial number of the operation according to creation section.
- PartitionID- section identifier, in fact - its serial number. The numbering starts from one.
Click the second component ModifyPartition in the list and set options for it.

Since the parameters of the logical disk are set on an additional partition, the value for the parameter Active should be false(besides, there can be only one active partition on a physical disk, and we have already assigned it). The rest of the parameters have been discussed above.
On this, the operations for creating and modifying hard disk partitions can be considered completed. But this is not the end of our story - there are a few more parameters to be configured.
Microsoft-Windows-Setup | ImageInstall | OS Image | InstallTo
Component Configuration OS Image and its child components InstallFrom And metadata discussed in a previous article. Therefore, it remains to deal with the child component InstallTo. From its name it follows that it indicates where to install Windows Vista. Indeed, it can be used to specify the physical disk number and partition number for installation.

In this example, the operating system will be installed on the first partition of the first physical disk. Please note that the numbering of physical disks starts from zero, and the numbering of partitions on a disk starts from one.
Note. Component InstallTo must be configured if the component has OS Image parameter InstallToAvailablePartition has the meaning false.
Important note about configuring hard disk partitions
You may have noticed that the installer needs to specify the exact physical disk number and partition number for installation. This is a simple task if the system has a single physical disk. However, in configurations with several hard drives, and even those connected via different interfaces (IDE and SATA), it can be difficult to determine the partition number in advance. Given that the installer is configured to remove all partitions from the physical disk, miscalculation can lead to loss of all hard-won gains. In this regard, for configurations with multiple hard drives, it is recommended not to automate the process of creating and formatting partitions, but to perform it manually.
XML snippets for various hard disk partition configurations
The Examples article provides several XML snippets for the section
So, we have all the parameters of the answer file set, including the configuration of the hard disk partitions. Now, you can move on to the article, which discusses validating and saving the response file, as well as the issues of its placement.
Partitioning a hard drive using Windows 7
 Partitioning drive C:\ in Win7
When buying a new computer or laptop with a pre-installed Windows 7 operating system, many users are faced with the problem of dividing a hard drive into several partitions.
Partitioning a hard disk into several partitions is important both in terms of ease of use of the system interface and the ability to save data after reinstalling or restoring the operating system.

Main partition C:\
As you know, when you reinstall the operating system, all data located on the C:\ drive is lost, while data remains intact on the remaining sections of the hard drive. All important files can be easily used even after system recovery.
Partitioning a hard disk is also convenient because programs and applications are installed on the C:\ system partition. If the C:\ drive is the only one, then when all kinds of files and folders are added to it, confusion arises between system files and regular folders added by the user. In this case, it is easy to get confused in the files and inadvertently delete some important system file. Therefore, partitioning the hard disk is necessary.
In order to partition a hard drive in Windows 7 into several partitions (logical drives), many use specialized programs like Partition Magic and the like. With the help of such programs, you can split the disk into several partitions. But Windows 7 provides the ability to split it using system utilities. In this case, the need for third-party programs is completely eliminated.
To partition a hard drive in Windows 7, you need to go to the computer control panel.
You can do this in two ways:

It is clear that the first way is easier.
In the "Disk Management" tab, you can view all the information on our HDD and its partitions. In addition to the main C:\ partition, it is possible to find a hidden recovery partition.

Primary C:\ and Hidden Recovery Partition
The recovery partition is used to store information to restore the operating system in the event of a serious failure when the system does not boot. It is not marked with a letter. It is worth noting that the amount of memory used for recovery files can reach several gigabytes (usually about 15GB). Also, besides it, there is a partition on the disk System Reserved , 100 megabytes. These sections are official, since they are not used by the user in any way and serve for the normal functioning of the operating system.
So, let's turn our attention to the C:\ drive, which is to be partitioned into sections - additional logical drives.
In order to split it, we click on the conditional image of the disk with the right mouse button. In the drop-down menu, select " Shrink Volume…”.

Item "Shrink Volume..."

After the request is completed, a window will appear in which the compression parameters will be specified. If the disk has not been partitioned before, then by default the utility will offer to split it approximately in half. If the original HDD had a memory capacity, for example, 1.8 Terabytes, then after splitting, two partitions are formed with a volume of approximately 900 GB each.
The window that appears shows the size of the C:\ volume before compression (in megabytes) and the size of the space to be compressed. The size of the compressible space is the amount of memory of the new partition that will be created. The total size after shrinking is the size of the C:\ volume after shrinking. It will be slightly larger than the newly created one. As already mentioned, the system will offer to divide the available memory approximately in half.

If there is a desire and self-confidence, then you can specify your numbers and divide the disk according to your needs. In any case, it will be possible to carry out the reverse procedure - volume expansion and return everything to its original state.
After reviewing the splitting options, click the “Compress” button. After a short process, another partition will appear on the HDD with the inscription “Unallocated”.

Item "Create a simple volume..."

The "Create a Simple Volume Wizard" will start. Click "Next". The “Specify volume size” window will appear - click “Next” again. In the next window, select the letter of the new volume in the item “ Assign drive letter". You can choose any letter you like.

Assigning a letter to a new partition
We confirm the choice and in a new window we specify the file system. In point " Format this volume as follows:” specify the file system NTFS , leave the cluster size as default. Put a tick in the checkbox " Quick Format” and click “Next”. A window will appear with all the specified parameters. If everything is correct, then click the “Finish” button.

If you are not satisfied with the default settings set by the system, then, of course, you can set your own. But in most cases this is not required.
After a few seconds, the new HDD partition will be formatted, it will be given a letter, and “Healthy (Logical Disk)” will appear in the legend field. Now the C:\ drive will be divided into two.

New HDD Partition - New Volume (E:)
If you wish, you can change the name of the new section, and instead of “ New volume”, give another. You can do this in several ways:
1 .In the computer control panel in the disk management window, select the one whose name we want to change. Right-click and select " Properties". In the name field, enter a new name and confirm by clicking OK.
If you have a solid-state drive (SSD) instead of an HDD in your system, then the partitioning technique is similar.
An entire hard disk can be divided into several partitions, with each partition presented as if it were a separate disk. Partitioning is used, for example, when working with two operating systems on one disk. At the same time, each operating system uses a separate partition for work and does not interact with others. Thus, two different systems can be installed on the same hard drive. Without the use of partitions, in this case, it would be necessary to purchase a second disk.
From the point of view of disk managers such as Norton PartitionMagic and Acronis PartitionExpert, there are three main types of hard disk partitions:
primary (Primary partition);
extended (Extended partition);
· logical (Logical partition).
The primary partition of a hard drive can contain the operating system, applications, and user data. In each session of working with a computer, only one primary partition can be active, i.e. the one from which the operating system is loaded.
Many operating systems, including DOS and Windows, can only boot from an active primary partition. If you intend to use several different operating systems on your computer, you may need to create several primary partitions on the disk. A maximum of four primary partitions can be created on a hard disk. Some operating systems, such as OS/2, do not see primary partitions other than those they boot from.
An extended hard disk partition creates logical disks, which are called logical partitions in the terminology of disk managers. Moreover, it is possible to create any number of logical partitions (disks). But all of them will be located, we repeat, only in the extended section.
Logical partitions (disks) are almost the same as primary partitions. They can host applications, user data, and install some operating systems that do not require a primary partition to boot, such as Linux.
Primary partitions are best used to boot operating systems and store only system folders and files on them. You can store all other information on logical partitions, since these partitions will be accessible from most operating systems. In addition, if you plan to use several different operating systems on your computer, then those that can boot from logical partitions should be installed there so that they do not occupy primary partitions, the number of which is limited.
Primary and logical partitions are the main types of partitions. A physical hard drive can contain up to four primary partitions, or up to three primary and one extended partition, where you can create an unlimited number of logical drives.
Information about partitions on a hard disk is recorded in a special area of the disk called the Partition Table. It is located in sector zero of cylinder zero, head 0. This sector is called the Master Boot Record (MBR). The first 446 bytes of the MBR are occupied by the master loader program. It is followed by the Partition Table, which is 64 bytes long. The last 2 bytes contain a "magic number" that is used to check if the given sector is bootable.
Each primary, extended, and logical partition also contains its own Partition Table, which is stored in the boot sectors of their partitions (partition zero sector). The partition's boot sector also contains the operating system loader. The main loader and the partition loader are related as follows: the function of the main loader is to find the position of the first (boot) sector of the active partition, load the code contained there into memory and transfer control to it. Further actions to boot the operating system are carried out by the bootloader of the active partition.
To understand exactly what instructions the master loader (partition loader) code contains, you can use the Debug program, which is included with DOS and Windows. This program allows you to both read any disk sector and disassemble the code contained there, that is, translate the machine code into assembly language. Of course, understanding the instructions received will depend on how familiar you are with assembly language.
The limitation on the number of primary partitions on a disk described above is due to the capacity of the Partition Table, which consists of only four entries of 16 bytes each.
Partitioning a hard disk into sections is carried out by special programs or system utilities. As a rule, such programs allow:
create a primary partition containing a single logical drive;
create an extended partition and split it into an arbitrary number of logical partitions (disks);
· set the active partition - the partition from which the operating system is loaded.
After installing the Windows XP operating system, referring to the Control Panel (Control Panel), you can call the administrative console, the tools of which (Disk Management) will allow you to delete a partition, create a partition (primary, extended, logical) on free (unallocated) disk space, format chapter.
But you cannot change the partition structure using system tools. To do this, you will need a specialized program, such as Norton PartitionMagic or Ac-ronis PartitionExpert. Unlike system tools, these programs will allow you to resize a partition or move it to another location on the disk, make it invisible or change the sign of activity, create a copy of the partition and perform other operations on partitions without losing data or any disruption to the operating system and applications .
7. Classes of malware: trojans.
Trojans come in three main types:
May Sender is a type of Trojan that works by sending information to the "master". At the moment, this is a very common type of Trojan. With the help of this type of “horses”, the people who set them up (well, the author, of course) can receive Internet accounts, ICQ passwords, email passwords, passwords for CHATs by mail, in short, by running such a “honey” on their computer , you can lose everything that is so sweet and dear to the heart of the user :), And this is at best. At worst, you won’t even know that someone (here’s a nit!) Reads your mail, logs into the Internet through your account (damn! Why did my account go down?), Uses your UIN "ICQ for distribution of the same Trojans to users of your own contact list (Masha! No! I didn't send you THIS!). performs everything according to plan (send - sleep, send more, etc.).
Novice users often have no idea at all about their hard disk partitions and hard drive logical drives. At first, this does not interfere with their work on the computer at all, although it does not allow them to use it more productively. But sometimes you have to deal with more responsible things, and then ignorance of simple rules can turn into serious problems, up to the complete inoperability of the operating system and the loss of important data.
In fact, it is enough to remember a few simple things and keep this information in mind during any actions with hard disk partitions.
What is a section
To begin with, a new, freshly purchased hard drive is completely unsuitable for work without prior preparation. In order to be able to save data to it and read them, for this data you must first create special "storages" - partitions, and prepare these "storages" for "storage" and storage of your files - format, i.e. create a file system on them. Once at least one partition has been created and formatted, it can already be used.
Sometimes it happens that the hard drive has only one partition that occupies the entire hard drive. Especially often this can be observed in newcomers who have just bought a computer. This option is the simplest, but also the most unsuccessful, because. and the operating system and your data are stored in one place, and in case of any problems with the operating system, or when reinstalling the OS, you risk losing everything at once.
More practical is the option when the hard drive is divided into several partitions - at least two. The operating system itself is on one partition, and your files are stored on the other. In this case, in case of problems or reinstallation of the operating system, only the partition on which it was installed will suffer. Everything else will remain untouched.
In addition, the division into several sections will allow you to more conveniently organize the storage of files - you can, for example, allocate a separate section for music or video if you have a lot of them; or if you often work with torrents, you can allocate a separate piece of your hard drive for them.
It also simplifies computer maintenance - for example, it is much easier and faster to defragment several relatively small partitions in turn than one huge piece. Similarly - and with scanning of a disk by an antivirus.
In general, we figured it out with convenience - here everyone is free to contrive to the best of their needs. However, there are a few simple rules, the violation of which is fraught with complete data loss.
I'll start in order.
Rule #1
Just one hard drive can have no more than 4 main sections Less is possible, more is not. These requirements do not depend on any operating system - they are dictated by the current level of development of the computer's electronic filling. And you won't be able to overcome them. If more than 4 sections are required, then another rule comes into force.
I was not in vain to mention MAIN sections - this is not just a word, it denotes one of two types of sections. In addition to the main one, the section can also be additional (extended). And in this regard, the rule about 4 partitions is somewhat transformed - on one hard disk there can be up to 4 main sections, or up to 3 main sections plus one additional(there can be only one extended partition on a disk).
What does this give us? The fact is that an additional (extended) partition, in fact, is a container inside which you can create an UNLIMITED number of logical disks. And for the user there will be absolutely no difference between working with the main partition and working with a logical disk. Thus, by creating an extended partition and logical disks inside it, we can divide the hard drive according to our needs as we need.
Please note that if you delete an extended partition, all logical drives included in it will also disappear.
Rule #2
One of the sections is required it should be active (in Linux - have the flag boot). It is on it that the boot files that will run the operating system are located. At the same time, the system itself can be located elsewhere, but the files from which its launch begins are only there.
Most often, the first partition of the hard disk becomes active (disk C:/ on Windows), but this is not required. In addition, you can always manually reassign any other main partition as active, but you should not forget to move the boot files there too, otherwise the operating system will not start.
Rule #3
If you are going to install several operating systems on one computer, then each of them should be installed in a separate partition ( theoretically, you can put it in one, but subsequent problems after that cannot be avoided). Operating systems of the Windows family can only be installed on primary partitions. Accordingly, if you are going to install two Windows in multiboot mode, then they will take up two main sections from you. Linux operating systems do not have this limitation and can be installed anywhere.
File systems
Before you can use a partition, you need to format it - create a file system on it (mark it in a special way).
There are a fairly large number of file systems now, and all have different characteristics.
Operating systems of the Windows family can only work with FAT, FAT32 and NTFS file systems.
FAT is a very outdated system, and its use today is hardly justified. FAT32 more modern, but has serious limitations. that hinder its full use. For example, the maximum file size that FAT32 supports is about 4 GB. That is why, if you try, for example, to copy an image of a full DVD disc to a flash drive ( which are formatted in FAT32 by default) You will receive a message about the lack of free space, although in fact there is still plenty of space. Because of this, it is practically impossible to use it on partitions where video is being processed ( and under the section with torrents it is problematic to use).
The best choice for working under Windows today would be the file system NTFS. It does not have such restrictions as FAT32, has additional security features, is more stable and reliable.
For UNIXs, which includes Linux, there are many more file systems. Each of them has its advantages and disadvantages and is more suitable for certain tasks. The default on Linux is ext4, but you can use any other. You can easily find information on which of the Linux file systems is most suitable for your tasks on the Internet.
A few words about compatibility
Windows does not understand any other file systems than its own. Access from under it to Linux partitions was possible only with the help of special programs or a plugin for Total Commander. Unfortunately, a plug-in for Windows has not yet been written for the most modern Linux file systems.
Linux, on the other hand, has always understood FAT and FAT32 perfectly, and in the last 2-3 years it has been working with NTFS without problems through a special driver. NTFS-3g, both for reading and for writing. Plus, it supports most of the additional features of NTFS. So from Linux you will always have full access to Windows partitions.
Mention should be made of various household appliances - DVD players, satellite receivers, etc. All this technique can only work with FAT and FAT32. NTFS, and even more so UNIX file systems ( with extremely rare exceptions) is completely incomprehensible to her. This should be remembered if you exchange data between such equipment and a computer.
Tools for the job
A few words about the tools for working with partitions.
I'll start with Windows. Includes standard tool Disk Management. It can be reached via Control Panel or by right-clicking on the icon My computer => Manage and selecting in the left column Disk Management.
Note that three partitions in the screenshot are marked as unknown partitions. These are partitions with Linux - Windows sees them, but it can neither determine nor even work with them.
also in Disk management you can clearly see the main and additional sections, as well as the active section ( tagged as System- it contains download files; the OS itself is installed in the partition marked as - i.e. Windows swaps labels). Of all the features, this tool provides only creating and deleting partitions, as well as reassigning the active partition and changing the drive letter ( functionality has increased slightly in Vista and Windows 7). If nothing else was at hand, then sometimes this is enough.
Important to remember , What Disk Management- the tool is inconvenient, poorly functional and extremely dangerous, especially in inexperienced hands. It is assumed that the user who uses it knows exactly what he is doing, because. any changes are applied immediately, without question, and it is impossible to see in advance what certain actions will lead to.
Therefore, I advise you to use it only in extreme cases.
Much more opportunities, convenience and security have various programs from the cohort Partition Magic-ov, for example, . There are a fairly large number of such programs, they are all different, and in recent years many of them have changed owners-developers and their name. Therefore, if you decide to pick up one of them for yourself, you will have to attend to an independent search on the wide expanses of the Internet. This is not difficult, especially since the leaders in this area can be counted on the fingers.
Acronis Disk Director Suite
In my opinion ( exclusively on mine - because. many may have a different opinion on this matter), the most powerful and convenient program for working with a hard disk and partitions is .
The program is Russian (although its variants with English are occasionally found) and is very easy to use. At the same time, it fully provides the full range of possible operations with a hard disk. In addition, almost all of your actions on sections occur without losing the information that is on them.
All operations that you carry out on sections are instantly displayed in a graphical form so that everything can be evaluated visually. But the actions themselves are not performed at the same time - only after you evaluate everything yourself, and the result completely and completely satisfies you, you can press the button " Apply". Up to this point, you can undo all actions step by step.
If several hard drives are connected to the computer, all of them will be shown in the program window - one above the other. Primary partitions are marked with green flags, and the active partition is marked with a red flag.
In addition, when starting Acronis Disk Director Suite offers a choice of two modes of operation - automatic, in which all operations can be carried out with the help of "masters", and manual mode, in which all power is at the mercy of the user. The second mode, IMHO, is more convenient and flexible, but beginners can also use the automatic one.
Also in the program there is a complete and very detailed help.
One more possibility should be mentioned - from the program window you can create and burn a special boot disk that will contain files Acronis Disk Director Suite. This thing is very convenient and extremely useful in the household - after all, having this disk, there is no need to install the program itself and even the presence of an operating system. From this disk, you can boot your computer and perform any operations with partitions.
Now about the unpleasant. It lies in the fact that the program is relatively rarely updated, so sometimes situations arise when it cannot work with the most modern hard drives. This is more about its version on the boot disk, because. If Acronis Disk Director Suite installed in the operating system, then it will use the drivers from the Windows kit to work with the disk. She also has some problems with Unix file systems - she does not understand the most modern file systems ( You can see it in the screenshot below.), although it works "with a bang" with the old classic ones.
A new version has just been released Acronis Disk Director Suite for English-speaking users (there is no new Russian version yet), which already works without any problems with the newest hard drives. But the problems with modern Unix file systems in it have not yet been resolved.
GParted
Another powerful and versatile tool for working with a hard drive is a program GParted from the Linux box.
It can be found on almost all Linux Live-CDs.
The story about the possibilities of the program can be fit in one phrase: "Almost everything can." The interface is simple and unpretentious, and the work is absolutely transparent and understandable. All your actions are also first displayed visually, and are performed only after pressing a special button, when you decide that everything suits you.
Besides, GParted supports a much larger number of file systems, including the most modern ones.
If you have several hard drives, only one will be shown in the program window at a time. To work with others, use the drop-down list on the panel (on the right), which lists all connected hard drives.
GParted cannot work with partitions that are currently mounted (there will be a warning icon next to such a partition). To perform any actions with such partitions, they must first be unmounted.
A few notes about the programs that are included in the installers of operating systems and can be used when installing the OS.
When installing Windows, all partitions of the hard disk will be seen exactly the same, without dividing into basic and extended. The differences will be only in marks and sizes, and it is extremely easy to get confused. Therefore, it is advisable to use it only if you are installing an operating system on a new hard drive for the first time. If your disk has already been used, and there is some information on it, it is best to take care of everything in advance in a third-party program, and reduce the actions in the installer only to selecting the desired partition and formatting (if necessary).
The situation is similar when installing Linux. Although everything is defined correctly there, it is not displayed very clearly, and the work is less transparent than in the same GParted.
So it’s best to create partitions of the right size in the right place before installation and format them into any Linux file system, and when installing the OS, ignoring the proposed automatic options and choosing manual partitioning, simply mount them in the right places and change the file system to another if necessary , by simply putting a "tick" in the column Format in front of their sections.
For greater clarity, I recommend carefully studying the screenshots to the article ( screenshots are clickable - when you click on them, full-size pictures will open in separate tabs). I draw your attention to the fact that everywhere is depicted THE SAME hard disk, only in different programs. On this disk, two operating systems are installed in parallel in multiboot mode - Windows and Linux, which coexist quite peacefully on one computer. Each of the operating systems is allocated 3 sections ( separation is not perfect, but quite acceptable). Carefully review what and how it looks in each of the programs.
 The Elder Scrolls V: Skyrim, Alchemy
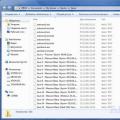 Why can't I launch Skyrim?
 Cheats in Skyrim for ingredients: how to get game items without problems Skyrim cheat for ingredients