Definition of VPN. What it is? What is vpn in iPhone, how to set up, enable or disable video: VPN setup using Betternet
This tutorial demonstrates how to connect to VPN Gate relay server using OpenVPN client on Windows XP, 7, 8, 10, Server 2003, 2008, 2012 systems.
1. Install the OpenVPN client application for your operating system. Run the installation file. The installation wizard will open. Follow the prompts on the screen to complete the installation of the application.
2. Download and upload the OpenVPN connection configuration file (.ovpn file)... This procedure is required only when setting up a connection for the first time.
You can download the configuration file (OpenVPN Config file) on the page of the list of open free relay servers http://www.vpngate.net/en/. Select the VPN server you want to connect to and click on the corresponding * .ovpn file to download it to your desktop or download folder.

After saving the file to your computer, it will be displayed as an OpenVPN icon. However, you will not be able to establish a connection simply by double-clicking on the file.
You need to move the * .ovpn file to the “config” folder of the main OpenVPN installation directory.
Open the C: \ Program Files \ OpenVPN \ config folder and copy the * .ovpn file into it.

Right click on the “OpenVPN GUI” icon on your desktop and select the “Run as administrator” option. Otherwise, the VPN connection will fail.

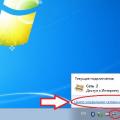
The OpenVPN GUI icon will appear in the notification area of the taskbar (system tray). In some cases, the icon may be hidden, click on the arrow icon to show all hidden icons.
Right click on the OpenVPN GUI icon and click Connect.

VPN connection starts. The connection status will be displayed on the screen. If you see a dialog box asking for username and password. Enter “vpn” in both fields. This window appears very rarely.

If the VPN connection is successfully established, a pop-up message will appear as in the screenshot.

4. Internet without limits
When the VPN connection is established, a virtual network adapter TAP-Windows Adapter V9 is created on Windows. This adapter will receive an IP address that starts with “ 10.211 ”. The virtual adapter will receive the default gateway address.

You can check your network configuration by running the ipconfig / all command from a Windows command prompt.

When the connection is established, all network traffic will go through the VPN server. You can verify this using the tracert 8.8.8.8 command in the Windows command line.

As shown in the screenshot above, if packets go through "10.211.254.254" then your connection is relayed through one of the VPN Gate servers. You can also go to the main VPN Gate page to view the global IP address.

You will be able to see the location visible from the network, which will be different from your actual location.

Setting up OpenVPN for MacOS
This tutorial demonstrates how to connect to a VPN Gate relay server using the Tunnelblick application. Tunnelblick is a GUI version of the OpenVPN client. for macOS systems.
1. Install the Tunnelblick app
Download and install the latest Tunnelblick app. During installation, instructions will be shown on the screen.

After the installation is complete, the following screen will appear. Select the "I have configuration files" option.

The screen will show instructions for adding a configuration to Tunnelblick.

Click OK to close the window.
2. Download and upload the OpenVPN connection configuration file (.ovpn file). This procedure is required only when setting up a connection for the first time.
A configuration file of the * .ovpn format is needed to connect to the VPN Gate relay server via the OpenVPN protocol.
You can download the configuration file (OpenVPN Config file) on the page of the list of open free relay servers http://www.vpngate.net/en/. Select the VPN server you want to connect to and click on the corresponding * .ovpn file to download it to your Downloads folder.

To install the * .ovpn configuration file, drag it to the Tunnelblick icon in the menu bar, or to the list of configurations in the Configurations tab of the VPN Details window. If you need to install several configuration files at once, select all of them and then drag and drop.

During the addition, you will need to enter the username and password for your MacOS account.
Click on the Tunnelblick icon on the top toolbar of MacOS and select the “Connect [configuration name]” option. The VPN connection will start.

The VPN connection status will appear as shown in the screenshot. After successful connection establishment, the “Connected” status will be shown in the main Tunnelblick window.

4. Internet without limits
When the connection is established, all network traffic will go through the VPN server. You can also go to the main VPN Gate page to view the global IP address. You will be able to see the location visible from the network, which will be different from your actual location.
When connected to a VPN, you will be able to visit blocked websites and play blocked games.
In order to use Opera's built-in ad blocker, the feature must first be enabled in the browser. To enable Opera's ad blocker, or to turn off ad blocker:
- Open Opera and go to.
- Under Block ads, click the switch. This will enable ad blocker.

The blue ad blocker badge on the right side of the combined address and search bar shows that the feature is enabled. The badge has no color when ad blocker is disabled.

Click the ad blocker icon to open the ad blocker pop-up window. In this window you can disable ad blocker for the current web site and find a link to the settings page for ad blocker.

Whitelist a website in Opera's ad blocker
Some websites request that you disable ad blocker so you can visit and fully enjoy their webpage. Instead of having to completely turn off Opera's ad blocker to visit one site, you can whitelist the requesting website.
To do this, open the ad blocker pop-up window in the combined address and search bar and click the Turn off for this site button. This will stop ad blocker on that site.

Opera's ad blocker pauses when you visit a whitelisted website and resumes when you navigate to another website, allowing for an uninterrupted browsing experience.
The whitelisted website's domain is added to your ad blocking exceptions list. Read below to learn how to manage exceptions for Opera's ad blocker.
Managing filter lists for Opera's ad blocker
You can choose which filter lists Opera's ad blocker uses when the feature is enabled. EasyList and NoCoin are enabled by default. To manage lists in Opera's ad blocker:
- Go to Settings.
- Under Block ads, click Manage lists.
- Check the boxes next to the lists you want enabled for ad blocker.
Opera updates your selected lists automatically. You can update the lists manually by clicking the Update button at the top of the page.
These lists, also known as filter lists, contain rules that tell ad blockers which content is likely to be an ad. The most popular and commonly used list for removing ads on international websites is EasyList. Opera includes additional lists, such as EasyPrivacy, NoCoin, and lists for multiple languages, in order to remove ads.

NoCoin is a cryptocurrency mining protection filter list which stops crytpojacking scripts from running on your computer. Read more about Opera's cryptocurrency mining protection.
VPN
Normally, your browser connects directly to websites, allowing websites to identify your IP address and approximate location. With VPN, you connect to websites via a VPN (virtual private network) server. As a result, your apparent location changes to the location of the server. To enable VPN:
- Go to Settings.
- Click Advanced Features.
- Under VPN, turn on Enable VPN.
When you enable VPN, it starts automatically, and a VPN badge appears in the combined address and search bar. Click on the badge, and you will see an on / off switch, information about the amount of data transferred, the virtual location, and the virtual IP address.
From the point of view of websites, your browser is now located in the region given by the virtual location. To change your virtual location, select a region from the list. If you do not choose a region, you are automatically assigned an optimal location... To turn off VPN, flip the switch in the badge.
Because the connection from your browser to the VPN server is encrypted, even if the local network is not, VPN enhances your privacy on the local network. You can hide your browsing activities from other users of that network.
To enhance your privacy with regard to websites, making it more difficult for them to track you, you need a combination of features. The issue is cookies. Even if you disguise your location, websites can still identify you if they have set a cookie. Notice, however, that by blocking ads you block the source of many tracking cookie. At the end of a private browsing session, when you close the browser, all cookies from that session are deleted.
VPN is a free service, and the amount of data you are allowed to transfer is unlimited.
Private window

Private browsing ensures that your internet history and activity data is removed as soon as you close all private windows.
When you close all private windows, Opera will clear the following associated data:
- Browsing history
- Items in cache
- Cookies
After being closed, a private tab or window cannot be recovered from the Recently Closed list in the tab menu.
While private windows do not leave any record of the websites you visit, if you deliberately save data - for example, if you save an item to your Speed Dial, save a password, or download a file - it will still be visible after the window is closed.
Clear browsing data
By default, Opera stores certain browsing data to help speed up connections, load common page elements, and improve your interaction with the sites you visit. You may wish to remove traces of your browsing habits by clearing your browsing data. To clear browsing data:
- Go to Settings.
- Click Advanced in the left sidebar, and click Privacy & security.
- Under Privacy and security, click Clear browsing data.
- Select a time range and the types of data you wish to clear, and click Clear data.
Browsing history- A list of sites you have visited.
Download history- A record of the files you’ve downloaded. Clearing this will not delete the file you downloaded, only the record of where and when.
News usage data- Information on the frequency and the length of time you spend on a news article from the personal news page, which is used to customize what news you see.
Cookies and other site data- Data from websites you visit which is stored on your computer, such as site preferences and login status.
Cached images and files- Data stored on your computer by applications or websites to make processes and site loading faster. Should be cleared periodically.
Passwords and other sign-in data- Data related to logging into websites and applications. Allows you to be signed-in automatically.
Autofill form data- Information like credit-card numbers, names and phone numbers, which you can choose to store on your computer in order to have forms filled in automatically.
Site settings- Permission data for websites, such as whether they can access your microphone or send you cookies.
Hosted app data- Data stored by extensions you have installed in your browser. Clearing this data will reset the extension to its default.
Clearing your browsing history will delete any stored location information about the pages you have viewed and the times you accessed them.
Clearing download history will empty Opera's record of the files you’ve downloaded through the browser. This will not delete the file from your local machine, only the record of when and where you downloaded it.
Deleting cookies and other site data will remove any tracked site data. ...
Emptying your browser's cache will delete any temporarily stored data from websites. The cache is used to briefly store page elements such as images or search queries. Cached data also helps reduce loading times when you wish to access a recently visited site. Emptying cache will clear up space on you local disk.
Clearing data from hosted apps will delete any data stored by extensions you have installed in the browser. For example, if you installed a weather extension on Speed Dial and set your location in its settings, clearing this data will reset the extension to its default and you will have to tell the extension your location again. Note: Take care not to erase useful data inadvertently. If you are not already familiar with it, try private browsing. The data for private browsing is automatically cleared when you close all private windows.
Managing how Opera stores private data may be useful, as an alternative to clearing all private data. Read more about setting web preferences.
Security badges
Opera warns you about suspicious pages by checking the page you request against a database of known phishing and malware websites. To protect yourself when entering sensitive information, always look for the lock in the security badge to the left of the combined address and search bar.
Badges indicate details about the page you are viewing. When a badge appears in your combined address and search bar, click it to see more information, including security certificates and more.
| Icon | Indicates ... |
|---|---|
| Compressed connection | |
| Ads are blocked | |
| Camera access | |
| Extension | |
| Fraud or malware warning | |
| Local file | |
| Location access | |
| Microphone access | |
| Opera page | |
| Secure connection | |
| Unprotected connection | |
| MIDI access | |
| VPN is on |
When the connection is secure, a lock is displayed in the security badge, implying that no one else can read the information that passes between you and the site. Opera uses certificates to verify the identity of the site owners. A lock means there is good encryption between you and the recipient, and the recipient's identity has been verified.
If a website is blacklisted, you will be presented with a warning page, and you can decide whether to visit the website or to go back safely to the previous page. Fraud and malware protection does not cause any delay in the opening of pages.
Unblock and allow insecure content
If you are browsing on an encrypted connection (https: //), Opera will check to ensure that all parts of the site are encrypted. If Opera detects that any live elements of the page, for example scripts, plugins, or frames, are being served by an open connection (http: //), it will block the insecure content. This means parts of the page may not display properly.
Opera advises against allowing insecure content to load into an encrypted connection. The best way to protect your sensitive information is to interact only with secure content. When Opera detects insecure content and blocks it, a warning will appear on the right side of the combined address and search bar.
If you do not care about the security of your connection with the site, you can click the warning to show an Unblock button. This button will allow the blocked content to be loaded onto the page, and the security badge will change to show an open padlock, reminding you that you’ve allowed insecure content to display on an encrypted connection.
Manage security certificates

HTTPS (Hypertext Transfer Protocol Secure) is a widely used technology that provides encrypted communication and identity assurance on the Internet. Security certificates are used to verify the ownership of Internet domains. If you see a green padlock security badge in your combined address and search bar, then according to your operating system's configuration, you are securely connected to the website. However, it is still your responsibility to make sure that the address is correct. When in doubt, type the address by hand.
If you’d like more information about a site’s security certificate, click on the security badge and click the Certificate (Valid) link. Opera will provide the certificate's issuer, the type of certificate, and whether the issuer is publicly-known and valid.
Publicly-known issuers and their certificates are validated against a number of security and identity checks. Opera will warn you if some part of a publicly-known issuer’s certificate is questionable. You may choose to proceed but Opera cannot guarantee your security.
To see which HTTPS / TLS certificates are used by your Opera browser and how Opera handles them:
- Go to Settings.
- Click Advanced in the left sidebar, and click Privacy & security.
- Under Privacy and security, click Manage certificates.
A note about local certificate issuers
Some connections can be certified by certificates from local issuers, either from apps on your machine or other non-public sources (such as a local intranet). These issuers can be used to verify secured connections in the browser. Most of these connections are valid. For example, debugging applications, third-party security scanning, and parental filters may rely on locally-issued certificates.
Connections certified by certificates from local issuers aren’t screened by the same security standards as publicly-known issuers and certificates. Such screening is too strict and may not allow connections to work as intended. Malware or viruses may use these certificates to view encrypted information or inject ads.
If you wish, you can configure Opera to warn you about public sites that use certificates from local issuers. If you continue to browse on these connections, be aware that some security measures, such as certificate pinning and Certificate Transparency, will be disabled for all such connections during your browsing session.
Invalid certificate warnings in Opera

If Opera cannot verify the identity of the server for a website you wish to visit, you will see this pop-up. Click Show certificate to review the certificate yourself. When reviewing the certificate, check that the certificate's validity date is current and that the issuer of the certificate is trusted.
Click Continue anyway to proceed to the website.
If you do not trust the server or the certificate and you wish to not proceed to the website, click Cancel.
A note about Extended Validation (EV) certificates
The best guarantee of a website's identity is provided by Extended Validation (EV) certificates. Extended Validation means that the details of the organization buying the certificate have been audited by an accountable, third-party entity, who can therefore verify that the certificate owner is who it claims to be. EV websites are indicated by a green with a padlock in the address field.
Extended Validation certificates are designed to endorse a company’s validity as a reliable, rather than transient, business. For example, to obtain a certificate, a company must provide three years of tax records and other financial information to the Certificate Authority. This certification provides peace of mind and security for Internet shoppers.
Opera has already implemented procedures and processes for EV certification and is at the forefront of complying with standards. We have built-in procedures to automatically verify that everything in a certificate for a website is correct when someone visits a page on the site and that the certificate has not been revoked.
Tell sites to not track your activity
Most sites track your behavior while you visit them. If you do not like this idea, Opera can send an additional header with every request: “DNT: 1”. This is a flag to websites that the user does not want to be tracked. Some countries have DNT legislation that will legally protect your request and most well-behaved websites will respect this additional header.
You can set Opera to tell sites you prefer to opt-out of online behavioral tracking. To set this:
- Go to Settings.
- Click Advanced in the left sidebar, and click Privacy & security.
- Under Privacy and security, turn on Send a “Do Not Track” request with your browsing traffic.
A note about phishing and malware
Opera's fraud and malware Protection warns you about suspicious web pages and is enabled by default. It checks the requested page against several databases of known phishing and malware websites, called blacklists. Although it is not possible to totally eliminate the risk of encountering an unidentified phishing or malware website, the risk is minimized.
Note that checking against the database does not delay the opening of web pages.
Phishing
The growth of Internet commerce has given online criminals an opportunity to steal your passwords, your credit card numbers, and other personal information by impersonating authority figures from your bank or other institutions you frequent. This is known as phishing.
You will be encouraged to log in and “verify” your customer information: in other words, to reveal your password, credit card number, or other private data. The best defense against this threat is to be aware of the problem and to be alert when transacting business online.
Malware
For the same reason that you have anti-virus software installed, you may want protection from websites that distribute viruses or other malicious software, collectively known as malware. The concept of malware encompasses not just viruses, but also scripts that may run automatically when you load a web page.
VPN (VPN) - virtual private networks, today on everyone's lips. Many inexperienced users imagine them as a magic key for accessing blocked web resources: they clicked the button and the site was opened. The beauty! Yes, site unblocking is one of the most popular VPN functions, but far from the most important. The main purpose of virtual private networks is to protect data transmitted over the Internet from interception by people for whom this data is not intended.
Let's talk about what virtual private networks are, what functions they perform, where they are used and what are their disadvantages. We'll also explore the capabilities of several popular VPN apps and browser extensions that can be used on both PCs and mobile devices.
For a better understanding of the essence of VPN technology, let's imagine the Internet as a network of roads along which post vans with letters and parcels travel. They do not hide at all where they are going and what they are taking. Letters and parcels are sometimes lost on the way and often fall into the wrong hands. Their sender and recipient cannot be 100% sure that the contents of the package will not be read, stolen or tampered with by someone, since they do not control the delivery process. But they know that in terms of security, this method of transfer is not very reliable.
And then a closed tunnel appeared among the roads. The vans that pass through it are hidden from prying eyes. Nobody knows where the car goes after entering the tunnel, what and to whom it delivers. Only the sender and recipient of the correspondence know about this.
As you may have guessed, our imaginary tunnel is a virtual private network built on top of a larger network - the World Wide Web. The traffic passing through this tunnel is hidden from outsiders, including the provider. The provider, if anyone does not know, under normal conditions (without a VPN) can track and control your actions on the Internet, as it sees which resources you visit. And if you dive into a VPN, you can't. In addition, the information sent through such a channel becomes useless for lovers of someone else's good - hackers, since it is encrypted. This is the essence of the technology and the simplified principle of VPN operation.
Where are VPNs used?
What is it for, this VPN, I hope it's clear. Now let's see where, how and what it is used for. So, you can't do without a VPN:
- In corporate networks. Here it is necessary for the exchange of confidential data between employees or network resources of the company and customers. An example of the second case is managing accounts through applications such as bank client and mobile bank. VPN is also used to solve technical problems - traffic separation, backup, etc.
- On public Wi-Fi networks, such as a cafe. Such networks are open to everyone and the traffic passing through them is very easy to intercept. The owners of open access points do not provide VPN services. The user himself must take care of the protection of information.
- To hide visited web resources, for example, from the boss or system administrator at work.
- To exchange classified information with other people, if there is no trust in a regular Internet connection.
- To access blocked sites.
- To maintain anonymity on the Internet.
Providing access to the World Wide Web via VPN is also widely used by Russian Internet providers when connecting subscribers.
VPN varieties
As you probably know, the functioning of any computer network is subject to the rules that are reflected in the network protocols. A network protocol is a kind of set of standards and instructions that describes the conditions and procedure for exchanging data between participants in a connection (we are not talking about people, but about devices, operating systems and applications). VPN networks are distinguished by the type of protocols on the basis of which they work, and the technology of construction.
PPTP
PPTP (Point-to-Point Tunneling Protocol) is the oldest virtual private network data transfer protocol, more than 20 years old. Due to the fact that it appeared a very long time ago, almost all existing operating systems know and support it. It almost does not load the computing resources of the hardware and can be used even on very old computers. However, in the current environment, the level of its security is very low, that is, data transmitted over the PPTP channel is at risk of hacking. By the way, some ISPs block applications that use this protocol.
L2TP
L2TP (Layer 2 Tunneling Protocol) is also a fairly old protocol based on PPTP and L2F technologies (the latter is specially designed for tunneling PPTP messages). Provides a higher degree of traffic protection than just PPTP, as it allows you to set access priorities.
L2TP is widely used to this day, but usually not in isolation, but in combination with other security technologies such as IPSec.
IPSec
IPSec is a complex technology that uses many different protocols and standards. It is constantly being improved, therefore, when used correctly, it provides a fairly high level of communication security. Can be combined with other network security systems without causing conflicts. These are his strengths.

The disadvantages of IPSec are the laboriousness in setting up and relying on only trained professionals (misconfigured, it will not provide any acceptable protection). In addition, IPSec is quite demanding on the hardware resources of computing systems and can cause lags on weak devices.
SSL and TLS
SSL and TLS are mainly used to securely transfer information on the Internet via web browsers. They protect the confidential data of site visitors from interception - logins, passwords, correspondence, payment details entered when ordering goods and services, etc. The addresses of sites that support SSL begin with the HTTPS prefix.
A special case of using SSL / TLS technologies outside of web browsers is the cross-platform OpenVPN software.
OpenVPN
OpenVPN is a free VPN implementation designed to create secure client-server or point-to-point communication channels between Internet users or local area networks. In this case, one of the computers of the connection participants is assigned as a server, the rest are connected as clients. Unlike the first three types of VPN, it requires the installation of special software.
OpenVPN allows you to create secure tunnels without changing the parameters of the main computer connection to the network. Designed for advanced users, as its configuration is not easy to call.
MPLS
MPLS is a technology for multi-protocol data transfer from one node to another using special labels. The label is a part of the service information of the package (if you represent the transmitted data in the form of a train, then the package is one carriage). Tags are used to redirect traffic within the MPLS channel from device to device, while the rest of the packet headers (the same as the email address) are kept secret.
To enhance the protection of traffic transmitted over MPLS channels, IPSec is also often used.
These are not all types of virtual private networks that exist today. The Internet and everything that comes into contact with it is in constant development. Accordingly, new VPN technologies are emerging.
Vulnerabilities in virtual private networks
Vulnerabilities are security holes in the VPN channel that can leak data out to the public network. Unfortunately, absolutely impenetrable protection does not exist. Even a very well-built channel will not give you a 100% guarantee of anonymity. And it's not about hackers who break encryption algorithms, but about much more banal things. For example:
- If the connection to the VPN server is suddenly interrupted (and this happens quite often), but the connection to the Internet remains, some of the traffic will go to the public network. To prevent such leaks, VPN Reconnect (automatic reconnection) and Killswitch (Internet disconnection when VPN connection is lost) are used. The first is implemented in Windows, starting with the "seven", the second is provided by third-party software, in particular, some paid VPN applications.
- When you try to open a site, your traffic is first directed to the DNS server, which determines the IP of this site from the address you entered. Otherwise, the browser will not be able to download it. Requests to DNS servers (by the way, unencrypted) often go beyond the VPN channel, which breaks the mask of anonymity from the user. To avoid this situation, specify the DNS addresses provided by your VPN service in the Internet connection settings.

- Data leakage can be created by the web browsers themselves, more precisely, their components, for example, WebRTC. This module is used for voice and video communication directly from the browser, and it does not allow the user to choose the method of network connection himself. Other Internet-facing applications can also use unsecured connections.
- VPN works on networks that are based on the IPv4 protocol. In addition to it, there is the IPv6 protocol, which is still at the implementation stage, but in some places it is already being used. Modern operating systems, in particular Windows, Android and iOS, also support IPv6, even more - on many of them it is enabled by default. This means that the user, without knowing it, can connect to the public IPv6 network and his traffic will go outside the secure channel. To protect yourself from this, disable IPv6 support on devices.
You can close your eyes to all these flaws if you use VPN only to access blocked web resources. But if you need anonymity or data integrity while transmitting over the network, they can create serious problems for you if you do not take additional protection measures.
Using VPN to Bypass Blocks and Anonymize Traffic
The Russian-speaking audience of the Internet most often uses VPN precisely in order to freely visit blocked Internet resources and maintain anonymity on the network. Therefore, the bulk of free VPN-applications and services "sharpened" just for this. Let's get to know some of them better.
Opera VPN
The developers of the Opera browser were the first to implement the VPN module directly into the product itself, saving users from the hassle of finding and configuring third-party extensions. The option is enabled in the browser settings - in the "Security" section.
 Once enabled, the VPN icon appears in the Opera address bar. By clicking on it, a settings window opens, including an on-off slider and a choice of a virtual location.

The traffic volume through Opera VPN is unlimited, which is a plus. But the service also has a drawback - it protects only the data that is transmitted via the HTTP and HTTPS protocols. Everything else goes through an open channel.
The Opera, as well as the Yandex browser, has another function with similar capabilities. This is the turbo traffic compression mode. It does not work with VPN, but it opens up access to blocked resources quite well.
The Browsec browser extension and mobile app is one of the most famous VPN services out there. It supports all popular web browsers - Opera, Google Chrome, Firefox, Yandex, Safari, etc., provides a fast and stable connection, does not require configuration, and has no limit. Users of the free version are offered a choice of 4 servers: in the UK, Singapore, the USA and the Netherlands.

A paid Browsec subscription costs about 300 rubles per month. Users of this tariff receive a higher connection speed, technical support and a large selection of servers around the world, including Russia, Ukraine, Latvia, Bulgaria, Germany.
Hola
Hola is Browsec's main competitor in the form of apps and browser extensions. Versions for Android, desktop systems and browsers work on the basis of peer-to-peer technologies (peer-to-peer network), where users themselves provide resources for each other. For personal non-commercial use, access to them is provided free of charge. The choice of servers is quite large.
 The iOS version of Hola is designed as a browser with an integrated VPN service. It is paid, it costs about $ 5 per month. The trial period is 7 days.
Zenmate is the third most popular VPN service, released as an extension for Opera, Google Chrome, Firefox, Maxthon Cloud Browser (Mac OS X only) and several other browsers. And also - in the form of mobile applications for Android and iOS. With free use, the speed limit is noticeable, and the choice of servers is very limited. However, all traffic passing through the Zenmate VPN is securely encrypted.

Customers who purchase premium access have a choice of over 30 servers around the world. Plus, connection acceleration is turned on for them. The subscription price starts from 175 to 299 rubles per month.
Like other similar services, Zenmate does not need to be configured - just install and run. Working with it is intuitive, especially since the interface supports the Russian language.
Tunnelbear is another user-friendly VPN for different devices - PCs running Windows, Linux and OS X, smartphones running Android and iOS. It is released in the form of applications (both mobile and desktop) and browser extensions. Has a very useful function of blocking traffic when the VPN connection is broken, which prevents data leakage into the open network. By default, it selects the optimal communication channel, taking into account the user's location.

The capabilities of the free versions of Tunnelbear are no different from the paid ones, except for one thing - the traffic volume limit is up to 500 Mb per month. In a phone, this is probably enough, if you do not watch movies online, but on a computer it is hardly.
Neither the paid nor free versions of Tunnelbear collect any user data. You just press a single button and you have access.
HideMy.name
HideMy.name is a reliable and relatively inexpensive paid VPN service. Provides a consistently high connection speed even when watching online HD videos and playing games with network toys. It well protects traffic from interception and provides complete anonymity on the network. NideMy.name servers are located in 43 countries and 68 cities around the world.

HideMy.name supports any device that can connect to the Internet: not only phones and computers, but also routers, set-top boxes, SmartTVs, etc. With one subscription, you can use the service simultaneously on all devices.
HideMy.name apps are released for Windows, Mac OS X, Linux, iOS and Android. As said, they all cost money, but you can only pay for the days you use the VPN. The cost of a daily subscription is 49 rubles. License for 1 year - 1690 rubles. The free trial period is 1 day.
Is a long-standing VPN application, one of the few that has always provided services for free and without traffic restrictions. The limit of 500 Mb per day for "free" use appeared relatively recently. Also, "freemen" have access to only one VPN-server, which is located in the United States, so the connection speed through Hotspot Shield is not very high.
 The cost of a paid subscription to VPN Hotspot Shield is $ 6-16 per month.
More and more cafes, hotels and other public places are acquiring their own Wi-Fi networks. But by using unsecured traffic, device owners compromise the security of their own data. Therefore, the relevance of private networks is also increasing. To be on the safe side, you can create a VPN connection. Read about what it is and how to configure it correctly in Windows 7 in our article.
What is a VPN connection and why you need it
This technology means a secure network built on top of an unsecured network. The VPN client, using a public network, connects to the VPN server through special protocols. The server accepts the request, verifies the identity of the client, and then transmits the data. This is provided by means of cryptography.
VPN capabilities allow you to use it for the following purposes:
- Hide your real IP and become anonymous.
- Download a file from a network that restricts access to the IP addresses of the user's country (if you use the IP address of a country that has access to this network.
- Encryption of transmitted data.
How do I set up a connection?
- Through "Start" open "Control Panel", then start "Network and Sharing Center".
Select the "Network and Sharing Center" area
- Follow the link "Setting up a new connection or network".
To create a new connection or network, you need to click on the corresponding line in the list
- Click "Connect to workplace".
Select "Connect to the workplace"
- Select "Use my Internet Connection (VPN)".
Select "Use my Internet Connection (VPN)"
- In the "Internet address" field, enter the address of your VPN server.
- To find it out, you need to run the Run tool (Win + R) and enter cmd.
You need to enter cmd in the line and press "Enter"
- Then write the ipconfig command, run it and find the line "Default gateway", which contains the required address.
You need the address that is in the line "Default gateway"
- Now you need to insert the address and tick the box "Do not connect now ..." and click "Next".
Enter the received address in the field, put a tick in front of the item "Do not connect now ..."
- Enter the login and password provided by the provider and click "Create".
Enter username and password
- Close a window.
- Open the Network and Sharing Center again and click Change adapter settings.
- The VPN connection icon appeared here. To make a connection, you need to right-click on the icon and click "Connect". To disable - also right-click on the icon and click "Disable".
There is a VPN connection icon here, through which you can connect or disconnect
- In the window that opens, you need to enter your username and password and connect.
Enter your username and password (if necessary) and click "Connect"
Video: Create and Configure a VPN
Possible errors and solutions to problems
400 Bad Request
- Disable a firewall or other program that affects security and network activity.
- Update the version of the browser you are using or use a different one.
- Delete everything that the browser writes to disk: settings, certificates, saved files, etc.
611, 612
- Restart your computer and check if the local network is working. If this does not solve the problem, then call the technical assistance service.
- Close some programs to improve system performance.
629
Check firewall settings. As a last resort, you can disable it, but this is undesirable, as the level of security will decrease.
630
Reinstall the network adapter driver.
650
- Check if "Local Area Connection" is working.
- There is a problem with the network card or network cable.
738
- Perhaps the username and password were stolen by hackers.
- The session "hung up". After a few minutes, try to connect again.
752
- The local firewall is incorrectly configured.
- Access attributes changed (international phone number instead of VPN server address).
789
Open the VPN connection settings, go to the "Network" tab and select "Automatic" or "Point-to-Point Tunneling Protocol (PPTP)" from the available VPN types. Then reconnect.
800
The cable, router or router may be damaged. If they are ok, then you need to check the following:
- LAN connection properties. Perhaps they got lost or were removed. You need to open the properties of the VPN connection, select "Internet Protocol Version 4 (TCP / IPv4)" and open its properties. Then check the correctness of the parameters: IP address, subnet mask, default gateway. As a rule, they are specified in the provider's Internet connection agreement. Alternatively, you can check the box next to Obtain an IP address automatically and Obtain DNS server address automatically.
- If a router or router is used, then the "Default gateway" field is 192.168.0.1 (192.168.0.1). Read more about this in the instructions for the router. If it is known for sure that the access point has a default gateway of 192.168.0.1 or 192.168.1.1, then the IP addresses are in the range from 192.168.0.100 (192.168.1.100) and above.
- Conflict of IP addresses (there is a yellow exclamation mark on the monitor icon in the tray). This means that there is a computer on the local network with the same IP address. If there is no router, but there is a conflict, then the IP address is not the one specified in the contract with the provider. In this case, you need to change the IP address.
- There may be a problem with the subnet mask or DNS server. They must be specified in the contract. In cases where a router is used, DNS is often the same as the default gateway.
- The network card is turned off or burned out. To check the device, you need to click "Start", select the "Run" tool and enter in the line mmc devmgmt.msc. In the window that opens, click on "Network adapters". If it is disabled (crossed out), then you need to start it. If the card does not turn on, it means that it has burned out or came out of the slot (the second option is possible only if the card is not built into the motherboard). If the card works, then turn it off and start again. As a last resort, you can remove the network card from the configuration and click on the "Update hardware configuration" icon. The system will find the network card and install it.
- Invalid VPN server address. It must be indicated in the instructions. If there is no such information, then you need to contact the technical service. If the Internet works without a VPN connection, then go to the provider's website and find the address of the VPN server. It can be either alphabetic (vpn.lan) or in the form of an IP address. To see the address of the VPN server, you need to open the properties of the VPN connection.
- There is no money on the personal account.
Regardless of the error, if you cannot fix it yourself, you will have to contact the technical support service.
How do I enable automatic launch?
- In order for the connection to start automatically, you need to go to "Control Panel" - "Network and Internet" - "Network Connections".
Find VPN in the control panel
- We find the VPN, open the properties, then go to the "Options" tab and uncheck the "Show connection progress", "Prompt for username, password" and "Enable Windows logon domain" checkboxes.
- Then you need to open the Windows Task Scheduler. Go to "Control Panel" - "System and Security" - "Administrative Tools" - "Task Scheduler". Or you can go through the registry: Win + R, enter the line taskschd.msc.
Opening the task scheduler
- In the menu, select "Action", then "Create a simple task".

On the Internet, you can face a situation when you cannot get to the site you need due to the fact that you have limited territorial access to it. That is. the site is not available to the citizens of Russia, for example. But in such a situation, there is a solution, and setting up a vpn will help here.
Virtual Private Network is translated as virtual private network. This setting allows you to encrypt your Internet connection, and you can use any opportunity to get online without fear of virus attacks. At the same time, you will always be anonymous on the sites you visit.
Initially, such a connection was used by companies to enable personnel to access systems remotely. For example, while on a business trip or from home. Now such connections are used by individuals to obtain a secure Internet connection in public access points to the network. Or to be able to use the Internet in countries with limited access.
Why VPN on iPhone 6?
How vpn works is pretty simple. Your phone generates a request to connect to a VPN service. After that, he gets off the net. Whereas, all traffic goes through the VPN. Figuratively, it is an imaginary link between your device and the entire Internet that allows you to obtain an IP address. This address masks your actual position.
How to set up vpn on iPhone 6?
There are several ways to enable vpn on your iPhone. The simplest and most popular is the installation through the special TunnelBear application. You can install it for free from the Internet. When the application download is complete, you will be automatically prompted to install the utility profile. Next, you need to select a country from the proposed list, the server that you are going to use and connect to.
If this option did not suit you, you can download a free application in the App Store for IOS - Cloak. The principle of operation is the same here. You download, install and set parameters. The VPN enable will be displayed in the upper corner of your device in the form of corresponding letters. If you often need to use public Wi-Fi networks, then having such applications on your phone comes in handy.
There is also a free application for setting up a VPN on a smartphone - Betternet. Simple and easy-to-use design: two disconnect buttons and connect ... With the first launch, you will need to install a profile. You won't have to do this with the subsequent entry into the application. Actions will be used: connect or disconnect. The application does not have a limit on the volume of traffic, which is a plus in comparison with the programs above.
You can also set up a VPN on the phone itself without installing special applications from the Internet. To do this, you need to go to the main settings of the device and go to the VPN attachment and click "add VPN configuration" here. Next, you need to fill in the "description" column with a lowercase letter in Latin, for example, supermyvpn. Next, fill in the "server" column, for example, us.suprfreevpn.com. In this case, the first pair of letters indicates the country for which your IP address will be replaced.
In the blank field for the account, write a name for the user. After that, select the desired password and additionally duplicate it somewhere so as not to forget. Next, you need to set "auto" in the encryption tab. "For all data" we put on. Click "on" for the "proxy" field. After all these actions, you need to click "save".
 Installing a printer on Windows 10
 Windows Password Recovery: utility to reset Windows account password
 How to set up virtual private networks (VPN) Vpn extension for chrome android