Installing a printer on Windows 10.
Many of us have had problems setting up a printer. However, Windows 10 makes it quick and easy to discover, install, and configure your printer. In this article, you will learn how to detect and connect a printer in Windows 10.
Although we are writing this guide for Windows 10, it can be applied to most versions of Windows.
If you have any advice on setting up a printer in Windows 10, please share it in the comments below.
Connect your printer to your computer
The first thing you need to do is connect your printer. We don't know the exact model of your printer, so it's best to follow the manufacturer's directions. Most modern printers connect via Wi-Fi or Ethernet. Thus, you can control the printer from different devices, such as a computer and a smartphone.
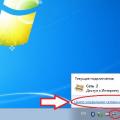
If you are unable to connect your printer to your computer over a network, then you should use Homegroup... To do this, right-click on the network icon and select " Network and Sharing Center ".

Then go to the section " Change advanced sharing options».
 Select the option " Enable file and printer sharing».

Screen home group may look different depending on whether you have a homegroup or not. Click " Create a home group" or " Join", Depending on your situation. Then follow the instructions on the screen.

Make sure that in the window " Share with other homegroup members" Near " Printers and Devices"The parameter" General access».

Add your printer
Press the keyboard shortcut Windows + I to open the settings and go to the section Devices> Printers & Scanners... Here you will see a list of all connected devices. To add a new printer, click " Add printer or scanner».

Then the system will start searching for available printers. If the printer you want appears in the list, select it and click the " Add device».
Windows will then automatically load the drivers and configure the printer. As you can see, it's very simple!
But, if your printer does not appear in the list, click on the line “ The printer you want is not listed". A new window will open with various options to choose from.

- If you have an old printer, then select the first option, after which the Windows operating system will try to help you find the printer.
- If you know the exact name of the printer, select the second option, then enter the name of the printer, or click on "Browse" and select your printer in Explorer.
Still can't find your printer? Then we will look at a slightly more complex option using an IP address.
Use an IP address
If you know the IP address of your printer, select the third option " Add a printer by its TCP / IP address or hostname". First, you need to find out the IP address of your printer. Read the manufacturer's instructions carefully or look for the IP address on the printer display under setup or network.
Once you've found the printer's IP address, go back to the settings on your computer. You have chosen the third option, and the following window will open for you:

In line " Device type»Select« Auto detect”, Then fill in the IP address and port. Make sure you check the box next to “ Query the printer and select the driver automatically».
Change printer settings
Now that you've added your printer, you can customize the settings to your liking. Select your printer under Printers & Scanners and click on Manage. If you want the device to be automatically selected when printing, click the " Set as default».
Select Printer Properties to change the printer name and other settings.
That's all! We hope our guide helped you set up your printer in Windows 10.
After upgrading to Windows 10, many users are faced with problems with their printers and MFPs, which the system does not see, does not recognize, or they do not print as they did in the previous version of the operating system. If you have a similar situation, then we will look at several additional ways that can help fix the problem.
How to connect a printer to a laptop
Using the Windows 10 Control Panel Diagnostic Utility, you can try to automatically fix problems with your device.
To start, you need to open the control panel, select "Diagnostics", click on the item "Troubleshooting", then in the "Hardware and Sound" section click on the item "Using the printer" (another way: "go to devices and printers" - by clicking on the desired option - "Troubleshooting"). You can also download the file from
A diagnostic utility will run, which automatically checks for all typical problems that may interfere with proper operation, and if problems are found, fix them.
The program will check for new drivers, the operability of the necessary services, connection problems with the device, print queues.
It is recommended to try this method first of all, there is no guarantee that it will give a positive result.
Add printer to windows 10
If the automatic diagnostics did not help or the printing device does not appear in the list at all, you can try adding it manually, for older models in Windows 10 there are additional detection options.
In the first case, you need to click on the notification icon, select "Options".

You can press the keys "Win + I", then select "Devices"
"Printers and Scanners".

Press the "Add a printer or scanner" button and wait, perhaps Windows 10 will find the device and the drivers for it will start to be installed automatically, if there is an Internet connection, it may not find it.

In the second case, you will need to click on the item "The required printer is not in the list", it will appear under the search progress indicator. It will be possible to perform the installation using other parameters: specify its address in the network, mark that it is already old (in this case, the system will search for it with the changed parameters), add a wireless printer.

How to install the printer driver on windows 10 manually
Go to the official website of the manufacturer of your device, there you need to find the section "Support" / "Support", and there are available drivers and download them to your computer. Before starting the installation, it is recommended to go to the "Control Panel" - "Devices and Printers", if your printer is detected there, but does not work, then you need to right-click on it, click "Remove" and wait until all components are removed from the system ... Then run the installer.
How to uninstall a printer driver
If the installation of firewood did not help, then you need to delete the printer files, you need to follow these steps. Through Start, find the "Printers and Faxes" command, select "Server Properties" from the file menu. In the "Drivers" tab, select the parameter to be removed, click the "Remove" button.
Only a completely removed driver will not interfere or harm the installation of a new one.
Installing drivers with Windows 8
If, after a thorough search, the driver is not found, then one thing is obtained, either the manufacturer has not yet released it, or its high-quality work on the new Windows 10 operating system has not yet been ensured.
Then it remains only to try to find and install firewood for the previous version of the system. Windows 10 has backward compatibility with Win 8 and 7. Microsoft officially confirmed that if the drivers work on Windows 7 and 8, they will work with Win 10. Adding firewood from previous operating systems can solve the problem.
You will have to go back to the manufacturer's website, look for a driver for Windows 8 by the model name, download and install it on Windows 10.
Information from printer manufacturers on Windows 10 support
HP (Hewlett-Packard) guarantees that most devices will work. Those that worked on Windows 7 and 8.1 will not need to be updated. If you encounter problems, you can download the driver from the official site for Win 10. The HP site has instructions for solving problems with components of this manufacturer in new operating systems.
Epson promises support for printers and MFPs in Windows. The required drivers for the new system can be downloaded from their official website.
Canon says most printers will support the new operating system. Firewood can be downloaded from the office. site by selecting the desired model.
Panasonic is promising to release drivers for Windows 10 in the near future. Xerox writes about the absence of problems with the operation of their printing devices in the new OS.
Installing a Printer Using the Driver Disc
When you connect a printing device via a USB cable, Windows 10 automatically finds the driver almost always. But what to do if you need to connect a new printer to a PC without access to the Internet.
In this case, you can use the driver disc that came with the printer. For example, let's connect Printer Canon PIXMA G3400 to a computer via USB.
You will need to insert the optical disc into the DVD drive and start it up. The start window will open. In this window, click the "Printer Setup" button, then accept the license agreement.

The next step is to allow the installation wizard to do everything.

Select a USB connection for the printer.
The installer will start the installation, upon completion, the system will display a new installed Canon PIXMA G3400 inkjet.
When there is one printer and several computers within the same room, it is very often necessary to use this printer as a network printer. That is, so that from any computer you can send a document to it for printing over the network. To do this, you need to perform a number of actions, which we will discuss in more detail in this article.
How to make a printer on a network in Windows 10?
To do this, on the computer to which the printer is connected by wire, you need to select "Devices and Printers" there.
Opening the control panel in windows 10

Go to "Devices and Printers"
In the window that opens, find the printer you need (the one that will be networked), right-click on it and select "Printer properties".


Enabling Networked Printer Access
In order for the drivers to be automatically installed when the printer is connected to other computers on a network, you need to click on the "Additional Drivers" button.
In the window that opens, if possible, check the boxes opposite x64 and x86. Next, in all open windows, click "ok".
If, when trying to connect a network printer on another computer, it appears in the form of a login and password, then it must be disabled. This is done on the computer to which the printer is connected with a cable.

Disable password-protected access
It is also worth paying attention to the fact that in order to successfully connect the printer over the network, it is necessary that the computers are in the same local network and the same workgroup.
Additionally, check if the printer is enabled in the sharing settings.
To do this, in the control panel go to the Network and Sharing Center.

Network and Sharing Center
Many users this year began to switch to the new operating system Windows 10. However, many of them began to experience problems with peripherals, for example, with printers or MFPs.
They either start to print incorrectly, print but don't scan, or don't work at all.
Now we will try to understand the reasons and solve this problem.
We look at the USB port
Of course, first, make sure that the USB port is working and a wire from the scanner / printer is plugged into it (it may have a different wire or connector).
If everything is in place, and the printer does not work, then most likely you have a burned out USB port and you should rearrange the cable from the printer to a different connector.
You should also check if the printer itself is turned on, if it has run out of ink. Now let's move on to the software level.
Diagnosing problems
First you need to try to solve the problem using the built-in problem diagnostics. It is available both in Windows 10 itself and on Microsoft's website, but we have to say that they work differently, and therefore you should try both.
The built-in can be launched from the Control Panel. To do this, click on the item "Troubleshooting".
After that, the utility will start and check for any errors. You only need to follow the instructions of the wizard.
The program will check drivers, services, and PC connections, print queues and printer. The program helps in rare cases, but it is possible that you have just such a case, which means you should try.

Adding a Printer in Windows 10
If the program does not see the printer, or if it is not in the list of installed ones, then you should try to install it.
There are two ways.
First: you need to go to the parameters using the keyboard shortcut Win + I, then select "Devices" and "Printers and Scanners".
Now click the Add Printer or Scanner button and wait.
 Sometimes Windows 10 detects a connected printer and installs it. Make sure you have an Internet connection.
Second: click on the inscription: "The required printer is not in the list", which will appear under the green search line.
 You should now be able to install the printer using filters. You will be able to install a wireless printer, or mark that it is already old.
You can also specify the path to the drivers on the site so that the program itself downloads and updates them.
Installing drivers manually
If none of the above helped you, then installing the drivers manually will help.
To do this, go to the official website of your printer manufacturer (HP / Samsung / Xerox and others) and download the driver from the “Support” item. If the drivers are for Windows 10, then this is great.
It should be noted that many manufacturers have long begun to post drivers for the new operating system on their websites, and therefore you can easily find them.
If there are none, then do not worry: the company should soon release such, but for now, try downloading drivers for Windows 7/8 / 8.1.
 It is highly recommended to first uninstall your old printer / scanner driver. If this is not done, then errors will occur (for example, Word will see two printers instead of one).
You can remove the driver by going to the "Devices" item in the Settings, left-clicking on your printer and selecting "Remove device".
We hope that all of the above methods helped you. If not, then most likely the problem is with the printer and you should send it in for repair or replace it. Until next time !!!
The Windows 10 operating system (32 Bit, 64 Bit version) from Microsoft supports both wired and wireless printers. You just need to connect the device to your computer or add it to your home network and wait until the drivers are automatically installed. In some cases, they will have to be downloaded from the manufacturer's official website or downloaded from a disc (supplied in the kit). If in the process you have difficulties or errors appear, then below, we will tell you how to connect a printer to Windows 10. Consider wired and wireless (Wi-Fi) devices.
Newer models of devices are connected via Wi-Fi interface. To connect such office equipment to OS Windows 10, you need to do the following:
If you connect the device via Wi-Fi, then make sure that the router supports WPS technology. You can find out from the instructions for it.
- Activate WPS. To do this, go to its settings through the address bar of the browser (access data is in the instructions), find the corresponding menu and make sure that opposite WPS is "Included" or "Activated" (Enabled). Here you can also change or add a PIN code for access.
- Connect the device to the network and start the wireless network search mode on it (depends on the specific model). For some models, it is enough to press the Wi-Fi button, for others - hold it until the indicator changes its appearance or starts flashing. This means that the addition was successful. Then you need to click on the icon "Search" and manually enter the keyword "Options" to get to the desired menu.
- Enter in an empty field "Printers" and click on the line that appears.
- Press the button Add Printer to start searching for your device. After that, a blue inscription should appear:. Click on it.
- In the window that appears, select. Relevant for office equipment that uses a network (Wi-Fi) interface.
- The search for available models will start, after which the required one will appear in the list.
Then Windows Update will automatically find and download the correct drivers.
If you do not know how to connect a printer to a laptop without an installation disk, then the driver can simply be downloaded via the Internet. To do this, start the browser and go to the official website of the brand of technology (for example, Canon or HP), find the section and select the type of device, as well as its model. When the file is downloaded to your computer, simply run it and wait for the installation to complete.
If you know the IP of the office equipment (the information is indicated in the instructions), then to add it, click on the gray "Plus" icon and wait for the words to appear. After that:
- In the window that opens, select "Add by TCP / IP address".
- Enter the Name or TCP / IP address of the device, port (from the instructions) and click "Further".
- The system will automatically add office equipment.
If, through viewing devices and printers, you cannot install office equipment using a wireless connection, then try creating a home network and only then connecting the device to it (using the instructions above).
Sharing
Manufacturers of modern printers make it possible to manage them over the Internet. Thus, you can interact with one device from several computers, smartphones or tablets. But for this you need to include it in the homegroup and make it visible.
What to do:
- Open up "Start" and in the menu that opens, find the folder. Run the app "Control Panel".
- Click on the icon "Network and Sharing Center", there is also an icon "Equipment and Sound".
- A new window will appear. On the left side of the screen, find and click the caption Change advanced sharing options... Here you can "share" (open to other users on the subnet) other directories and applications.
- Scroll down to the block. Turn it on and save any changes you made.
- Go back to the previous center page. Here click on the blue text.
- A window for managing and configuring group parameters will open. Click. The wizard for creating new groups will start. Read the information and click "Further".
- Set the parameter opposite the column. To do this, click on it and select the one you need from the drop-down list. Here you can provide access to other files and programs. Click on "Further".

After that, try to reconnect the wireless office equipment to the computer through the menu "Options"... If you did everything correctly, then it will appear in the list of active devices.
Additionally, you can connect other laptops, scanners, faxes via a local network (through a homegroup). Some may require you to enter the password (which you saved).
Connecting a local printer
If you are using a fairly old printer (for example, HP LaserJet 1010, HP LaserJet 1100, HP LaserJet P1102), then it can be connected via USB or LTP interface. All required cords are supplied with the device. To add office equipment to your PC, you must perform the following steps:
- Plug the USB or LTP cable into the desired connector on your computer (on the back of the system unit) or laptop (all inputs are located on the side or on the back, depending on the model). Turn on the printer. Then left-click on the icon "Start" and click the gear icon. Here in the list of programs, find the classic app "Options" and run it.
- A new menu will appear. Here select a sub-item "Devices".
- In the window that just appeared, select from the list on the left side of the screen. A list of devices connected to the PC will be displayed on the right. If what you need is not displayed and the computer or laptop does not see the printer via USB or LTP, then click on the gray plus sign to add it.
Windows will automatically start installing the dedicated software. After that, the office equipment will be ready for printing. If for some reason it does not connect, and the list is not updated (does not work), then try downloading the driver from the manufacturer's official web resource or boot disk, and then searching for it again.
If you have connected a device, but do not know why some errors appear, then we suggest that you familiarize yourself with the most popular of them.
In addition, we will consider ways to solve them and configure the printer for printing.
- requires user intervention... How to fix: clear print queue, restart PC, printer. Update your driver or completely reconnect your device. If the error appears after replacing the cartridge, it is possible that the ink is not suitable for this model.
- the printer is paused... Office equipment stopped responding to user actions. If you are using a wired printer (which connects via USB), check to see if the cable is loose. For wireless devices, make sure the network is working properly. Try restarting your computer, router, device. Disconnect and reconnect it to the network, update the driver.
Remember to change the cartridge in time, as an error can occur due to lack of ink. Try to use only the ink that is officially supported by the manufacturer. If this is not possible, then the proven universal ones.
Video instruction
For those of you who better perceive visual information, we have prepared a thematic video.
 Installing a printer on Windows 10
 Windows Password Recovery: utility to reset Windows account password
 How to set up virtual private networks (VPN) Vpn extension for chrome android