Correct settings in openserver modules. Working with MySQL in OpenServer: key features
Openserver php setting is configured in modules and is a priority setting when using different cms-systems, scripts and applications. It will not be possible to install a system that supports php 5.6 if the server itself is configured with more powerful options, such as joomla, for which you need to install a php version of at least 7.
For the same reason, ready-made sites located on the local openserver server, when changing the settings of the modules, may not be available. It is difficult to lose data, unless of course there are many such sites. For one cms-system, you can set it up once and not pay attention to everything else.
But let's consider the option when on the local openserver server, several variants of sites are installed, with different system requirements. For example, I took osticket, with support for php version 5.6 and a popular engine that requires a php version of at least 7.0.
Hosting both of these sites on openserver will not work unless you create special profiles that specify the necessary parameters for each site separately.
Openserver config php with profiles
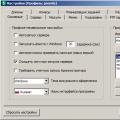
When you enter the settings, a window will appear with many different tabs (13) in the form of a menu.

For our particular case, the main ones will be "Basic" and "Modules". In the main parameters, profiles are configured, and in the modules, the server configuration for each profile separately.
Being in the "Basic" menu, in the "Profile name" field, you must enter the desired name and click the "Create profile" button so that the invented profile appears in the list of all other profiles, which, by the way, can be very numerous.
Then, simply select a new profile with the cursor and go to the "Modules" menu, where you can configure the necessary parameters for the new profile and save. After that, to save the new settings, the server will be restarted.

Having thus created the required number of profiles, with the necessary http, php and MySQL parameters, you can quickly select the desired set of settings in the form of profiles and easily switch between them.

In practice, everything looks very simple. After selecting the desired profile, you must click on the "Load profile" button. The selected settings will be available after the server is restarted.
It's so easy, using openserver profiles, you can quickly select the desired php settings of any version.
Openserver php setup practical use.
Program description
Open Server is a portable software package designed to help webmasters develop, debug and test sites directly on a computer (even if it does not have the Internet) running Windows. You can read in more detail about what Open Server is, what is the difference in its assemblies (maximum, extended and basic) and what components they include, you can read at the office. project website: ospanel.io.
Personally, I use the extended edition (premium)
Where to download open server?
- On the developer's site www.ospanel.io/download/- without donation, the download speed is very small (3 hours to download)
- From my Yandex disk, here: https://yadi.sk/d/qDuNKrWUhkHvo- I usually throw all the updates there
Installing OpenServer
Before installation, I recommend disabling the anti-virus program. In my case, this is Kaspersky Anti-Virus, it is disabled as follows: we find the anti-virus icon in the tray, click on it with the mouse (right-click) and select: pause protection, then select for how long to pause and confirm the action in the window that opens.
We launch the downloaded distribution of Open Server (preferably on behalf of the administrator). 
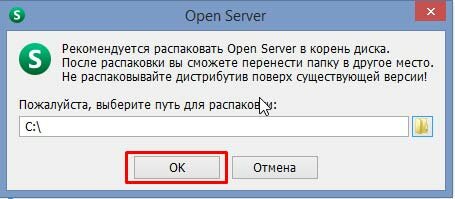
Specify the path to install the distribution. 
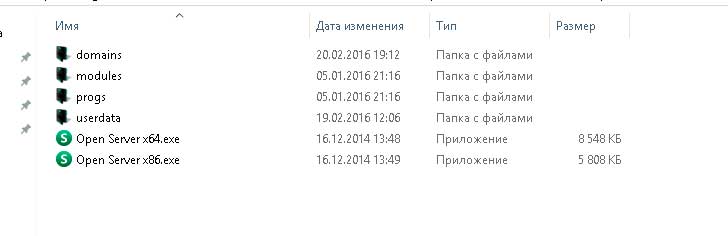
We are waiting for unpacking, after which we follow the path that you specified during unpacking and see the OpenServer folder there, inside which the installed Open Server is located

This completes the installation!
Open Server - first launch
To do this, let's go to the folder with the installed Open Server distribution (in my case, it is located on the local drive D). We right-click on the Open Server icon (x64 or x86, depending on the bit depth of your OS) and select "Run as administrator" in the window that opens.

In the window that opens, select the server interface language (in my case it is Russian):


They will be installed for quite a long time, you will have time to drink coffee freely at that time. or something else to do)
After installing all the necessary libraries in the tray (lower right corner, where the clock is), the Open Server icon will appear in the form of a red flag, click on it and select run.
If the window appears: Windows Security Alert, put both checkboxes against the items Private and Public networks and click on the "Allow access" button.

After that, the server should start successfully and the red flag in the tray should turn green, click on it and select "My Sites" - "localhost".
A page will open in the browser, in which a greeting will be written.

Congratulations on the successful launch of Open Server.
Configuring OpenServer
To do this, launch it, then right-click on its icon in the lower tray and select the settings tab.

A settings window will open in front of you, we are primarily interested in the Modules tab, here I recommend setting the modules you need (based on the hosting software, in my case the hosting will run, it supports the latest versions of Apache, Ngins, PHP, etc. Accordingly, I choose the latest versions).
In Doctor Web, it is disabled in the parental control settings if I'm not mistaken.
You can also try opening a command prompt as an administrator and running the following command:
attrib.exe -s -r -h -a C:\Windows\system32\drivers\etc\hosts
Common Error 2: Failed to start Apache
Or some other component or just writes the port (port number) is busy. This usually indicates that your port is occupied by some other program.
Solution to the problem:
If you have Skype running, make sure that it does not occupy ports 80 and 443, to do this, in Skype, go to the Tools -> Settings -> Connection tab and uncheck Use ports 80 and 443.
If it doesn't help or something else is blocking the ports. Then download, install and run the Port Explorer program (or similar), then go to the ALL tab, sort the list of processes in the Local Port tab, find the processes occupying the port indicated in the logs and end them. PS This action after each reboot of the system will most likely have to be repeated.
After that, restart Open Server and work!
If this does not help, then turn off the firewall (firewall) and antivirus!
Well, if all of the above does not help, then go to the office. forum open-server.ru/forum/ look for your problem, or write to the developers through the same forum what kind of problem you have and they will help you solve it. Well, or you can write about it in the comments, I will try to help you!
Hi all! In today's article, I will tell you about installing and configuring a local Open Server on your computer.
With the help of Open server you can test on the local machine (i.e. on your computer) any changes related to the creation of sites in and Php (self-written sites).
If you are a Denver fan, then I have an article.
Beginning of work
The very first thing we need to visit is the official website of the local server developer, which is located at this address - http://open-server.ru

In principle, we do not need to download the maximum edition package (504 MB). The second, more compact version with the necessary settings for creating a local server on a computer is quite suitable for us. That's why I choose it.
Enter in the "Code from the image" field and click on the "Download" button


I want to warn you to be patient, because choosing the second option will make your files download very slowly. It took me about 2 hours with dedicated internet. In principle, you can be even more cunning and upload all files through Rutreker. A tricky marketing ploy by the developers 🙂 Well, okay, let's move on.
Installing Open Server to Disk
Go to downloads and double click on our downloaded file. Next, you will be prompted to select the path where the local server will be installed. I will leave it unchanged, because I have only one disk - the disk c:\
Then unpacking will follow. We go to our directory where we installed Open Server and click on the appropriate icon (I use a 64-bit OS). We choose "great and mighty" as the language.

Next, a dialog box will appear telling us that this is the first time it is running on the computer, which will offer to install Microsoft Visual C ++ Runtime & Patches. We agree and continue to work. This process may take some time.

After installing the local Open Server, you will see a red flag in the system tray.

Right-click and select "Run"

After starting, you may get an error that the port to which the server is accessing (80 and 443) is already occupied by another program, in most cases it is Skype. The solution is the following. Go to Skype - Tools - Settings.

In the “Settings” section, you will need to go to the “Connection” sub-item and uncheck the checkbox “For additional incoming connections, use ports 80 and 443”. Save your changes.

After these manipulations, let's try to open and launch the Open Server window again. And voila! Everything is working.

Creating a new site on a local Open Server
Great, the program has been launched, now we need to create a new site and see how it works on our local hosting. To do this, go to the Open Server itself and its domains folder (domains or folders of our future sites).

Go inside and just click "Create a new folder".

There is already a site in the Domains directory called localhost. You can go to the browser and type this name into the address bar.
We will see a welcome message telling us that the server is running.

Now let's create our own folder with a new site and call it - test.loc. LOC will tell us that the site is on the local machine.

Inside it, through any text editor, we will create a simple php file - index.php

The index.php file itself can be created through a text editor or is also called a code editor - Sublime Text.

Now we go down to the very bottom of the window to the system tray area (where the Windows clock is located) and start our server.

After a successful launch, we again go to the Open Server in the tab my sites and select our local one - test.loc

Now let's go to the browser and see the result of the output of the php code on the page.

Important! There is one very important nuance: you can have an icon on that everything is working, a message appears, shown in the screenshot above. Here lies the error. If your site has php or scripts, they WILL NOT work! This is because many antiviruses, such as Kaspersky and others, regard the launch of Open Server as a virus and block the operation of all scripts. Before a session, just disable your antivirus and then everything will work fine for you. This is so, for information.
That's all my dear friends! I think that you will be able to set up your local Open Server and test your future sites without any problems. Thank you for your attention, see you soon.
Includes: Apache, nginx, PHP, MySQL, phpMyAdmin, FileZilla FTP server.
Russian version: yes.
OpenServer occupies almost 50 MB, which is three times larger than the volume of other kits, and at the same time it contains a rather impressive set of components. For example, there are two web servers at once: Apache and nginx, as well as two different versions of PHP and MySQL.
Installation
Although the downloaded file is executable, in fact it is a 7-Zip archive, at startup you specify the folder where the files should be unpacked, this completes the entire installation before it starts. In fact, the kit is not installed as a separate program, but is portable, so it can be unpacked anywhere, including a flash drive.
Starting the web server
After unpacking the files, you should run Open Server.exe; the icon with a flag that appears on the taskbar signals that the kit is loaded. When you click on the checkbox, a convenient menu opens (Fig. 1).

Rice. 1. OpenServer Menu
- Start - start the web server.
- Restart - restart the web server.
- Stop - stop the web server.
- Sites list - list of local sites.
- Additionally - launch PhpMyAdmin, quick access to web server configuration files, PHP and MySQL.
- HTML folder - open the folder containing the local site files.
- View logs - open a panel to view HTTP, PHP and MySQL errors.
- Settings - a window for setting up programs.
- About the program - a window with the version of the kit, copyright and a link to the site.
- Exit - terminate running processes and exit the program.
After starting the web server, the http://openserver page should be available, which lists the parameters for connecting to the database, FTP server, and other useful information (Fig. 2). If this page opens, then the kit is installed correctly and works.

Rice. 2. openserver homepage
However, OpenServer is quite picky about system settings. To work correctly, you need administrator rights, access to the c:\windows\system32\drivers\etc\hosts file, free port 80. It is quite possible that the kit will not work together with Skype, which also uses port 80 for work, as well as with firewall or antivirus. Many web servers under Windows face these problems, so they are quite well known and solutions have been found for a long time. In the OpenServer help (http://open-server.ru/help.html) all typical questions are discussed and answered, so if the web server does not load, you should look at the server logs and look into the help.
Local Sites
To create a local site, it is enough to create a folder with the domain name inside the html folder, and the www folder in it. To avoid conflicts with existing sites, the first level domain can be changed to ..lc\www. After creating the necessary folders, you should restart the web server or start it if it has not already been done.
After closing the program and restarting it, the list of sites is displayed in a special menu (Fig. 3), through which you can quickly open the site in the browser.

Rice. 3. List of local sites
Kit settings
The main settings for managing the program are located in the "Settings" menu, where you can set the letter of the virtual disk, autorun, version of PHP, MySQL, etc. (Fig. 4).

Rice. 4. General settings
- Server autostart - allows you not to load the web server manually, but to do it automatically when you start the Open Server.exe program.
- Clear logs on server startup - information about requests and errors will not be accumulated, but will be deleted every time the web server is started. You can view this information in the "View Logs" menu.
- Fast start - the correctness of starting services is not checked. This option is not recommended to be enabled, it is needed only in case of conflicts between ports.
- Virtual disk letter - you can specify a letter that will be automatically used when the kit is launched. The default is W.
- The server IP address is the local address by which the sites are accessed.
In the "Modules settings" tab (Fig. 5), you select which web server to use (Apache or nginx), the version of PHP and MySQL.

Rice. 5. Module settings
The remaining tabs - "Email Settings" and "Encoding Settings" are rarely used.
Note that when the web server is running, the settings cannot be saved, so you must first stop it and only then configure it.
Summary
OpenServer is probably the best kit for creating and testing local sites for Windows today. A convenient menu, launch system, simple creation of virtual hosts, attention to detail make it easy for novice web developers to work, and the components included in the kit will also suit professional programmers. It's nice that all this can work on a flash drive and does not require installation, which allows you to quickly transfer your entire projects from one computer to another. Of course, not everyone will need this opportunity, but it's good that it exists.
Despite the practicality and comfort of work, the kit has some drawbacks. It only runs under Windows XP SP3, Windows Vista or Windows 7 with administrative rights. There may also be incompatibility with other installed programs, which will require separate debugging. I also didn’t really like the redundancy of the kit, two versions of PHP and MySQL are definitely useless, and you can’t specify your preferences at the download stage. I will hope that someday a light version of the kit will appear, if not, then extra components can always be removed manually.
If you have Windows installed, you have administrative rights, which is a common thing on your home computer, then you must install and use OpenServer without fail. For the development and testing of local sites, this is it.
Articles in the same category
A concise and intelligible installation of OpenServer. Here we will properly configure the Database and install WordPress on a local Open Server.
This local server is free, for which many thanks to the developers. These modest guys, however, do not obsessively offer to make a donation in any amount for the development of the project. I consider this very noble in relation to us and I think this donation should be done.
Download the program Open Server
You can download Open Server from here. The downloaded archive is self-extracting. At startup, you will be prompted to select a location for unpacking. You can specify any location, even external media in the form of a flash drive or portable hard drive.Also, during installation there will be no shortcut on the desktop and in the start menu. The program is portable.
Choose any of the three distributions, I described them in .
Fill out the captcha and download.
After installation, the folder will look like this
I advise you to install a shortcut in the Taskbar. It will be convenient to run the program.

Don't look for the program in Program Files, you won't find it there. It is, as I said, portable, and only runs from the folder where you installed it. Therefore, the label should be looked for only there.
Press the meme on the shortcut in the taskbar and wait for a while. The program will not show any signs of its work when loading its necessary files. A minute later, a yellow flag will quietly appear in the tray (bottom right, near the date and time).
If it does not appear, click the arrow next to it, find the checkbox, after which the server will boot, and now by clicking the green checkbox in the tray, start Open Server. 
A small but essential step. If you use Skype, you need to go into it, and go to the settings, Tools - Advanced - Connection, and uncheck the checkbox, as in the screenshot 
This will allow the Open Server to run without problems occupying its ports.
And further. The server will create a virtual drive for itself, so don't be surprised if you see an extra drive in File Explorer. It will disappear when you log out of the local server.
Creating a site in Open Server
Now you need to go to the folder where you defined the location for Open Server. Open the domians folder, you will have one localhost folder there.Create a new one test.ru .
And now we will install the engine on this domain woppress.
First of all, let's download WordPress from the official website.
The archive will be downloaded, which you unpack in the same folder Downloads and open the unzipped folder.
Select all folders and files and copy to clipboard. Then open your new site folder test.ru
and paste all these folders there. 
Then open the file from this folder under the name wp-config-sample.php text editor Notepad++ Or just notepad and edit the code. 
Now, in order, that we correct.
But first we will create a database. To do this, we will digress from editing, we will then return to this step. It is important to create the Base, because we will enter the name of the Base in this batch file.
Installing the Database
We go to the Open Server menu by clicking on the checkbox in the tray and open PhpMyAdmin in the server menu itself.
The login window will open, where in the User window we enter root, leave the password blank, OK.
We entered the program, where we will create a database for our, for now, virtual site 
We assign the name of the base, in our case mywordpress, and set the base format utf8_general_ci. Create.
We have created a database for our site.
Now we return to editing the file, from where we digressed to create the Base.
Fill in the way the red squares are highlighted. Except for the big one.
This is our unique arbitrary code. It can be created by clicking on the link indicated by the arrow. Just copy the URL and open it in a new window, you will be prompted for a unique code that you copy and replace the one you had by default. All.
Save your changes and close notepad, or any other editor you use to edit your code.
Now change the filename from wp-config-sample.php on wp-config.php
That's all.
Go to tray, restart (yellow flag) server IT IS NECESSARY!
Then go back to the server, all in the same tray and go to My Sites. There you will find your test.ru.
Click and you are on the site. The WordPress engine installations will start. Give the site a name My blog
. Just create a login admin5. And a password. Make it simple, this is a test site after all, and we are not afraid of hacking. 

After that, we can type test.ru/wp-admin, enter our username and password 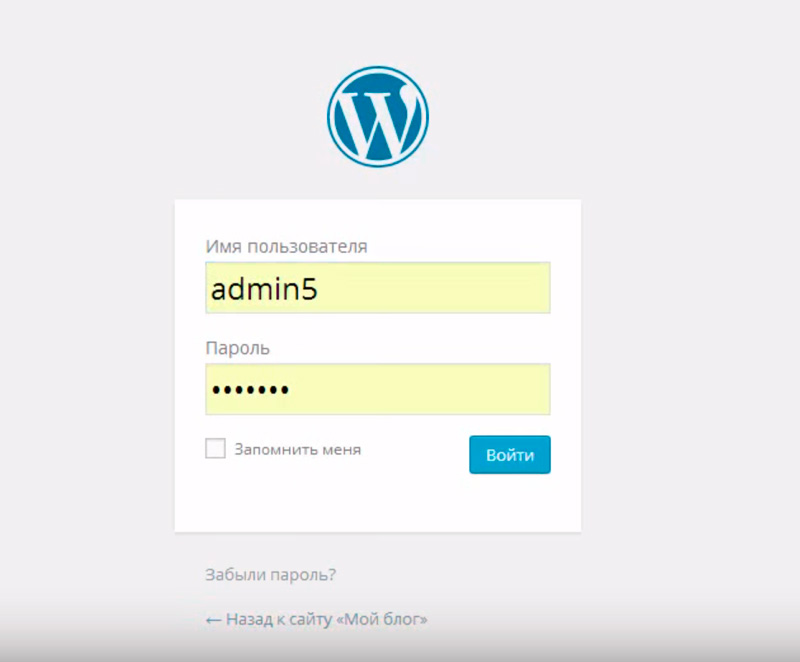
And get into the admin 
And if in the address bar we type test.ru
then let's get to the site 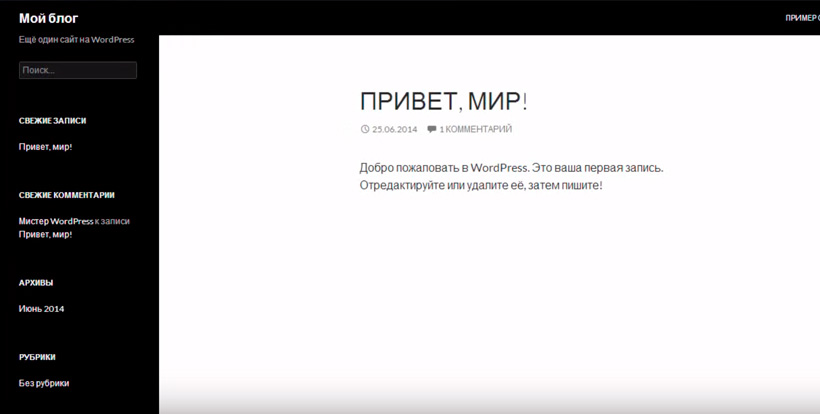
Our local server with a new test site is ready. Let's get to work and further education.
And all the best!
Work hard! The world will not be a paradise For those who want to live lazy. Sax Hans
 Working with MySQL in OpenServer: key features
 windows 10 profile name
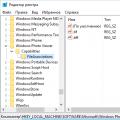 Windows Photo Viewer cannot open this image