How to install CyanogenMod on your Android without any problems. How to install CyanogenMod on your Android Why there is no 3g on cyanogenmod 12 firmware
This post was last updated on April 13th, 2018 at 03:31 pm
Galaxy S3 NEO CM12.1 (CyanogenMod 12.1, Android Lollipop) ROM is based on Android Lollipop 5.1 is again brought to you for Samsung Galaxy S3 NEO GT-I9300i, GT-I9301i and i9301Q by xda senior member Rox. Earlier Rox had built CM 12 and CM 11 for Galaxy S3 NEO. In addition to this we also have the,.
DISCLAIMER:
Installing custom ROM requires a, which may VOID your warranty and may delete all your data. Before proceeding further you may. You are the only person doing changes to your phone and I cannot be held responsible for the mistakes done by you. Neither the developer nor we will be held responsible for any disaster that happens to your device. KNOWN ISSUES:
- NFC (Can't be fixed, because of lack of sources)
- Audio in calls on 2nd SIM (GT-I9300I only)
- Some devices have non-working camera because they have different sensor -
REQUIRED DOWNLOADS AND LINKS FOR THE CYANOGENMOD 12.1 S3 NEO LOLLIPOP ROM FLASHING GUIDE:
Galaxy S3 Neo CM13 (CyanogenMod 13) ROM Update for:
GALAXY S3 NEO CyanogenMod 12.1 LOLLIPOP ROM INSTALLATION GUIDE:
If you have not yet installed a custom recovery on your S3 Neo then head on to the next link to get it done.
Points to NOTE on Backup:
- Try to avoid restoring apps backup using Titanium Backup. It may break things up.
- Don’t restore system data using Titanium Backup! It will definitely break the current installation.
- It is also discouraged to Restoring Apps + Data using Titanium Backup.
Follow this if you are flashing CyanogenMod 12.1 ROM for the first time to your Galaxy S3 NEO phone, or coming from another ROM:
- Download and Copy the GApps and Galaxy S3 NEO CyanogenMod 12.1 Lollipop ROM ZIP to your phone.
- Reboot the S3 NEO into recovery mode (Hole Volume UP + HOME + Power button while the phone is booting). Make sure to have a Custom recovery like.NOTE:
It is recommended to use the CWM recovery, especially for the GT-i9300i users. - Wipe data factory reset, Cache partition, Dalvik Cache and Format the System partition.
- Here is a guide explaining. This will delete all your data on your phone. IGNORE IF YOU DON'T WANT TO OR IF YOU HAVE ALREADY DONE THIS. You may consider complete backup of your phone data or take a NANDROID backup of the current ROM.
– .
– . - First flash the CM12.1 ROM ZIP from device. Then flash the GApps zip from your device memory.
- Here is a post explaining.
- Use the same guide to flash the GApps too. - Reboot and Enjoy the CyanogenMod 12.1 Lollipop ROM on your Galaxy S3 NEO.
Upgrading from earlier version of:
- Copy the latest Galaxy S3 NEO CyanogenMod 12.1 ROM ZIP file to your phone.
- Boot into Recovery.
- Flash the latest CM ROM ZIP from your phone.
- Here is a post explaining
Any smartphone, in fact, is the "little brother" of a full-fledged personal computer. It contains a central processor, blocks of random access memory, a storage device, controllers of interface devices, etc. To control this entire complex, a certain set of programs, called an operating system, is used. One of the most popular is Android from Google. It is installed on over 70% of mobile devices. It is easy to guess that this system is most often subjected to various modifications, and not by the developers, but by the smartphone users themselves. Oddly enough it sounds, manufacturers of mobile gadgets are in no hurry to please the owners of their devices with the release of updates and optimizations of the operating system. The reason is quite simple - the desire to sell new smartphones, and not to refine the series already sold.
What is "firmware"
Reading news from the world of smartphones, you can come across a number of specific terms. One of them is firmware. It is interpreted in two ways: as the process of updating the control software complex of the device, or as a set of system files intended to be loaded into the smartphone's memory, that is, a “distribution kit”, if we draw an analogy with computers. Most often, the second is still implied. And, as stated earlier, this software package is created by craftsmen making certain changes to the existing original firmware. Such solutions are called "custom".
"Zoo" firmware
Despite the seeming variety of existing software systems, they are basically all identical. Many of them simply copy the interfaces (appearance, way of interaction) of solutions installed on other brands of smartphones. So, lovers of Windows Phone can easily "turn" their "Android" phone into a gadget from Nokia, and connoisseurs of the creativity of Chinese developers can feel the beauty of "Miui" or Lewa. Other custom, on the contrary, optimize some functions, for example, they use a graphics accelerator in all applications, increase the volume level, etc. But you should always remember that almost all of them are based on the base official firmware.
"Cyanogen"
At the same time, there are a number of firmwares called CyanogenMod. In them, the user part, the menu and everything through which the owner interacts with the device has undergone significant revision. Also, many key spam and viruses have been changed. In short, if a person wants to see the true capabilities of his smartphone, then he simply must figure out how to install the CyanogenMod firmware.

Distribution search
One of the main conditions for the successful installation of such a custom system is the selection of the correct firmware. Although these solutions are initially built to work with Qualcomm, nVidia and Intel processors, there is still the possibility of "making" them work with MTK. Where the distribution kit is downloaded from, as a rule, it will certainly indicate how to install CyanogenMod. Therefore, in order to avoid the need to restore the functionality of the software part of the phone after an unsuccessful update, you need to carefully read the accompanying recommendations. Ideally, the firmware should be designed specifically for the same smartphone model.
How to install CyanogenMod firmware via Installer
There are several ways to download the control software to a smartphone. Their difference is that some require first obtaining root rights, while others bypass this limitation by using the capabilities of the replaced bootloader menu. Note that there is no "initially simple" way - each of them is simple and complex at the same time, so the user must choose one or the other. Let's take a look at how to install CyanogenMod Installerer. This software package consists of two blocks, the first of which is intended for installation on an "Android" device, and the second - on a computer, to which a smartphone will have to be connected with a cable. After installing the client part in the phone, the program must be launched. A menu will be displayed warning that all user data will be erased, i.e. a factory reset will occur. Then it is suggested to connect the device to a computer and change the operating mode from "MTP drive" to "RTR camera". The cable can then be temporarily disconnected.
In general, there are usually no difficulties with how to install CyanogenMod. After installing the corresponding computer application, you need to launch it. This will search the Web for the latest firmware. This takes 5 to 15 minutes. If a suitable option is found, the program will display a message that it is necessary to connect the smartphone to the USB port, not forgetting to turn off the anti-virus protection (some exploits are detected as malicious). Next, the download of the "Recovery" file and gapps that provide integration with Google services will start to the phone. When everything is done, it remains to click on the Install button and wait for a window with a message about successful installation to appear.
Those who are not for the first time interested in how to install CyanogenMod should be well aware that recently this method has lost its relevance. Moreover, it doesn't always work. The reason is the end of support for the search and download engine due to complaints from Google. In addition, the computer part of the application does not work correctly on the latest versions of Windows.
Roll up your sleeves ...
An equally interesting way to install CyanogenMod is to prepare the necessary files yourself. First of all, you need to pick up a custom "Recovery". This file can be found on the network resources where this smartphone model is discussed. In the case of a MediaTek processor, it can be assembled with MTK Droid using your Boot.img and Recovery from a compatible device. After that, using you need to flash this file into your smartphone. Then go to "Recovery" by holding down the power button and "volume down". After that, it remains to specify the previously downloaded CyanogenMod firmware file and install it. It is recommended to do a reset with the WIPE command.

Different versions
Sometimes smartphone owners ask the question: "How to install CyanogenMod 11?" This version is based on "Android 4.4 Kit-Kat". But the latter are 12.1 (system 5.1.1) and 13 (6.0, respectively). There is also CyanogenMod 10.1. How to install this software package? It is based on "Android 4.3". Owners of mobile devices need to remember that the installation process is the same for all versions of Cyan. The main thing is to find the right files for the device. Let us remind you how to install CyanogenMod 11. The process is as follows: a custom "Recovery" is selected and stitched into the phone; the found distribution kit intended for this model is written to the memory card; the system file is flashed from the recovery menu.
Peculiarities
Slower discharge, louder sound, stable network reception, interface acceleration, a modified menu - all this is CyanogenMod. How do I install applications on this system? It is this question that worries many who have not yet had time to work with this solution. In fact, there is nothing complicated about it. Since Cyan is based on the Android OS, the principles of operation remain the same: the installation of the APK file is launched via a shortcut. Unless the latter can be found both on the home screen and in the applications submenu, depending on the launcher.

Old means tested version
Let's take a quick look at CyanogenMod 7. How do I install the firmware? It is based on the OS "Android 2.3", so the procedure is identical to the new "Cyan". You need to select Wipe in the custom "Recovery", then "Select from SD-card", specify the downloaded file and click Install. After the end of the "filling", it remains to click Reboot. Depending on the "Recovery" used, the names of the indicated items may differ.
Samsung offered the official Android 4.4.2 firmware for the Samsung Galaxy SIII (AT&T i747, d2att) back in June last year. We haven't heard anything about the official Android 5 firmware yet. After testing the official version of Cyanogenmod 12.1 for AT&T Samsung Galaxy s3, based on Android 5.1 Lollipop, I realized that I didn't want to go back. This is the fastest firmware I have ever had. A significant role in this can be played by the abandonment of the Dalvik virtual machine in favor of ART.
Fortunately, Android is open source (at least for the Android Open Source Project or AOSP), so you don't have to wait for updates from the manufacturer if enthusiasts have suggested firmware for your device. Even the very popular Samsung Galaxy SIII (AT&T i747, d2att) was bypassed for a long time without offering the official Cyanogenmod 12 firmware, although there were many unofficial Android 5 firmwares on xda developers.
Although there are many different Android 5 firmwares for AT&T Samsung Galaxy s3, I chose the official version of CyanogenMod 12.1. Even unofficial versions of CyanogenMod I prefer to bypass. Even the official one assumes the installation of a new bootloader, modem, as well as Google Apps. Despite being open source, there is always a risk of catching malicious software. Therefore, of course, the official firmware may be preferable. On the other hand, official firmware is updated very rarely, therefore, due to the presence of unpatched vulnerabilities, it may not be so secure when using the Internet on a smartphone.
I liked CyanogenMod 12.1 because all applications were restored after flashing. However, I do not know whether to thank the previous CyanogenMod or Google firmware for this. I have used both for synchronization. But it is Google that allows you to save a list of applications and, if desired, even their settings, so it is likely that synchronization with Google helps restore applications. Although you have to log in in every application that requires logging into your account, anew.
How to install Android 5.1 Lollipop (Cyanogenmod 12.1) firmware on Samsung Galaxy SIII (AT&T i747, d2att)
Warning:
When flashing your phone, something can always go wrong. Use the firmware instructions below at your own risk.
As of May 26, 2015, Bluetooth may not work correctly on nightly builds of CyanogenMod 12.1. In addition, there may be problems with the camera, but you can install a free application.
CyanogenMod notifies when updates are available. They can be downloaded immediately from the settings menu. True, in the latest versions, when installing them directly from Android, the error "E: Zip file is corrupt! E: Error installing zio file" @ / cache / recover / block.map ""

You can still install the firmware update. To do this, you need to reboot in Recovery mode, then select Install ZIP and select the archive, which is downloaded from the settings to the cmupdater folder on the phone.
Update (June 6, 2015)
I've been testing cm-12.1-20150529-NIGHTLY-d2att.zip for over a week now. Absolutely satisfied with everything, there were no problems at all. So I recommend installing CyanogenMod 12.1 on your Samsung Galaxy s3 AT&T!
Update (June 16, 2015)
I've been testing cm-12.1-20150606-NIGHTLY-d2att.zip for over a week now. Everything is still stable. Apps are now easier to find as they are listed alphabetically, each next to the corresponding letter that the app starts with. "Over the air" or OTA updates are now installed without error.
Update (June 24, 2015)
On the previous firmware cm-12.1-20150606-NIGHTLY-d2att, Google Apps suddenly began to fail. At the same time, an error constantly occurred, and the phone began to get very hot, while the battery was discharged quickly even after turning off the data transfer and navigation. Installed cm-12.1-20150620-NIGHTLY-d2att.zip and new Banks GApps.
Update (June 26, 2015)
The camera did not work on the previous firmware cm-12.1-20150620-NIGHTLY-d2att. When using it, the error "I can not connect to the camera" began to appear. I installed cm-12.1-20150625-NIGHTLY-d2att.zip, after which I turned off data recording with shooting coordinates in the settings. Photo and video works.
Update (Dec 28, 2015)
On the previous firmware cm-12.1-20150625-NIGHTLY-d2att.zip did not like enabling / disabling Wi-Fi, although I could not find fault with the rest. Installed cm-12.1-20151228-NIGHTLY-d2att.zip and
Due to the fact that the CyanogenMod development team has released an installer with which you can easily install custom CyanogenMod firmware, this material will explain in Russian how to do it!
First of all!
You can read the official information in English on the CyanogenMod Installer wiki page, also on this page you can find list of Android devices which are supported by the installer.
What is needed to install the CyanogenMod firmware using the installer
- Computer or laptop with Internet connection
- Back up important data on Android device
- Disable Anti-Virus on PC, as well as on Android device (if installed)
- Original undamaged Micro-USB cable
- Charged battery on an Android device
- Enable USB Debugging on Android
- Connect your Android device directly, not via USB HUB
- Download CyanogenMod Installer on PC
Instructions on how to install CyanogenMod firmware using the installer
on device - part 1
1. Download and install from the official site Cyanogemod - CyanogenMod Installer application http://get.cm/app
2. Run the installed application and click the Begin button

2. Press the button Continue and switch the USB connection method to PTP mode(camera)


4. After a few seconds, a message will appear that you need to start CyanogenMod Installer on Computer, run

on the computer - part 2
5. Run the CyanogenMod installer, after which it will check the installer update

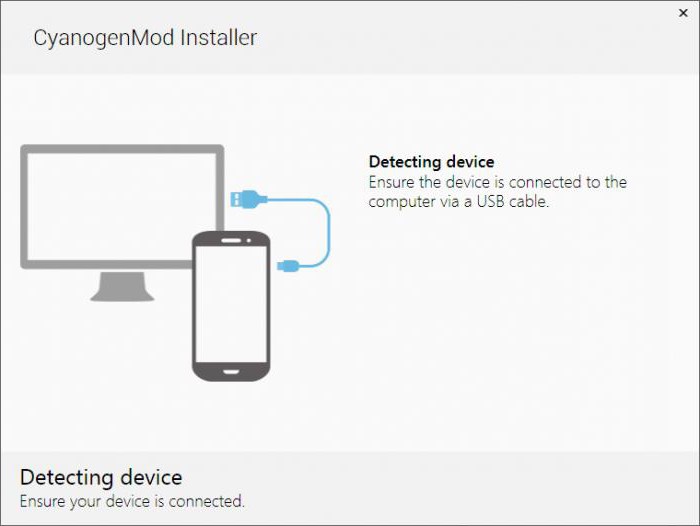
6. Then he will check if there is a connection to the Android device

7. After identifying the Android device, the download of custom recovery and firmware will begin, all this time, do not disconnect the device from the PC!

8. After all the necessary parts of the firmware have been downloaded, you will be prompted to install the firmware, click the button Install

Install Recovery

And then the CyanogenMOD firmware itself

In a few minutes, the Android device will have a new custom Cyanogemod firmware
After the firmware!
Once you have successfully installed the CyanogenMod firmware using the CyanogenMod installer, it is highly recommended to execute WIPE (WIPE DATA / FACTORY RESET) from the Recovery menu!
It is common in the world to compare Android and iOS. The main difference is the attitude towards the openness of the system for the user. If iOS does not even allow viewing individual folders on the device, then in Android the file system is available to the user. However, only at first glance it seems that Android developers are allowed to do whatever they want with their OS: many important and necessary functions remain unavailable. Therefore, CyanogenMod firmware has become popular among advanced users. Read about how to install, update and, if necessary, remove the firmware in our article.
What is CyanogenMod?
CyanogenMod is an alternative Android firmware that expands the functionality of the operating system. The firmware has gained popularity: as of 2016, CyanogenMod is installed on 14 million devices.
It all started with the fact that a simple programmer Stephen Kondik posted on xda-developers.com, the largest site with custom firmware for Android, his development for the HTC Dream smartphone. He did not think about the name for a long time and took his nickname - Cyanogen, adding Mod to it. Stephen Kondik did not expect that someone would be interested in his development, but already in the early days, users positively responded about the firmware. Then the programmer, in a creative impulse, worked hard to finalize CyanogenMod, posting several updates per day on xda-developers.com.
Then Stephen Kondik posted CyanogenMod on Github, a collaborative development service. Then other programmers joined in the improvement of the project, who brought their ideas and developments. Over time, it became clear that CyanogenMod had evolved from a hobbyist firmware to an exceptional project. The capabilities of CyanogenMod made the mobile device more functional than any other firmware.
Advantages
Why did users love CyanogenMod so much?
- High performance... CyanogenMod, thanks to its optimization, significantly improves the performance of the device. Both menus and heavy games run much faster and smoother on this firmware than on the standard one. As an example, consider the Nexus 4, which produces 15-16 thousand Antutu Benchmark points on standard firmware. After installation, Cyanogen makes 21 thousand points. In addition, for advanced users, Cyanogen allows you to change the scheme of the processor, control its frequency at its discretion. There are five modes: Interactive - standard frequency distribution, increases when the screen is turned on; Ondemand - less productive, more energy efficient; Userspace - allows you to configure everything yourself; Powersave - minimum processor frequency, maximum power saving; Performance - maximum processor frequency, best performance, but high power consumption.
- The only way to install a new version of Android for older devices. Few manufacturers support their devices even for 4-5 years, releasing firmware 5 and 6 Android, so CyanogenMod is the only way to put Android Lollipop and Marshmallow on such devices. Cyanogen also allows you to get rid of the manufacturer's pre-installed firmware, for example, Samsung's TouchWiz.
- Customizable appearance... CyanogenMod gives you the ability to customize the design of every detail of the interface. PlayMarket has thousands of custom theme options. Also, the firmware supports the original Android theme (Android Holo up to version 12 and Google Material Design in versions 12 and 13), unlike the official firmware of device manufacturers.
- System openness... The standard Android firmware has various restrictions for users. CyanogenMod does not have these restrictions, thanks to which there is a codec for the Free Lossless Audio Codec, a compressed cache, a large list of APNs, an OpenVPN client and a reboot menu. However, this is an advantage only for knowledgeable and able people, because the device can be accidentally broken.
Firmware versions
The latest version of CyanogenMod is the thirteenth, based on Android 6.0 Marshmallow. Each new version of CyanogenMod is developed to update Android. In addition, the developers maintain and constantly update all versions at the same time, releasing new builds of the project. There are six types of CyanogenMod assemblies:
- Experimental - Experimental firmware versions for testing new ideas. These versions are extremely unstable, have an abundance of bugs and are only needed by developers for testing.
- Nightly - daily updates, the result of the day's work of programmers. Like Experimental, they exist only for developers, so that enthusiasts can follow the development of the project and help it with new ideas and suggestions.
- Millie stone is a raw version that collects all the innovations to test their interaction.
- Snapshot is an already worked out assembly, suitable for use. Usually not all bugs have been caught and not all bugs have been fixed.
- Release Candidaty (RC) is an almost finished version of the firmware. Developers make one last check for bugs, performance and stability.
- Stable is the final stable release of CyanogenMod.
If you are a simple user who wants to install CyanogenMod, then you should choose the stable version of the firmware. This ensures that there are no errors and that it works. But for the sake of useful features that are not yet in the stable version, you can also try the developer versions. But such firmware is almost impossible to use - there are too many errors.
How to install: step by step instructions
Please note: installing CyanogenMod will void your warranty! This applies not only to Cyanogen, but also to any other custom firmware. There are certain ways to hide the traces of third-party firmware, but the methods are unreliable and do not always work. So if you're not ready to void your warranty, don't risk it.
Installing CyanogenMod is non-standard and difficult for untrained users: it has more than 10 steps. Updating the system is also not the most intuitive. Of course, there is an easy way to install the firmware, but this is far from the best option. The latest version of CyanogenMod is automatically downloaded, not always stable, as a result of which errors are possible. But since not everyone will want to spend time on a more complex method, we will analyze this option as well.
Easy installation
- First, check if your device is supported. To do this, follow the link: http://wiki.cyanogenmod.org/w/CyanogenMod_Installer#Supported_Devices and view the list of supported devices.
- In the smartphone settings, enable USB debugging (Accessibility -> For Developers -> USB Debugging).
- Download the CyanogenModInstaller app on your smartphone from Google Play.
- Download the dedicated Windows software (Vista / 7/8) to your computer: http://beta.download.cyanogenmod.org/install.
- Turn on the app on your smartphone and follow the instructions in the program.
- Connect your device to your computer via USB.
- Turn on the program on your computer.
- The program itself will start downloading the files required for the firmware. When everything is loaded, you will see the message “Everything is ready”.
- Click on the "Install" button.
- When the installation of the firmware is completed, the program will notify you about this with the message "Installation complete".
- Ready.
The hard way
- First you need to get Root rights (remove restrictions imposed by Android developers). We will do this using the Framaroot program. Download Framaroot 1.9.1 from the Internet, install it and run it. If the antivirus displays a warning, click "Allow".
- Now you need to unlock the Android bootloader. The best way to do this is the BootUnlocker program. You can download the application directly from Google Play. Run the program and click the "Unlock" button. The bootloader will be unlocked.
- You need to install Custom Recovery. Let's analyze its installation using the example of TWRP (Team Win Recovery Project).

- Let's start installing CyanogenMod.

- Once the installation is over, reboot the system. If everything went well, an empty desktop will open. If not, the phone won't boot. In this case, you need to enter Recovery mode again, install the firmware on a new one, but only turn on full Wipe.
- The last thing left is to install Google Play. To do this, download the Gapps package (http://opengapps.org), move them to the root folder and install in the same way as the firmware itself, via Recovery.
- Ready!
Video: How to Install CyanogenMod Firmware?
Can CyanogenMod be installed on an unsupported device?
The answer is unequivocal: no. CyanogenMod Installer will simply write that your device is not supported. If installed manually, there can be a bunch of problems, up to the fact that the phone or tablet will stop working. If the firmware could work on the device, the developers would add it to their list anyway.
How to update the firmware
There are also two ways to update CyaongenMod.
The easy way
This method works for Cyanogen versions 10.0 and higher. Everything is extremely simple: open the settings, go to the item "About phone", then "Update CyanogenMod". The device will automatically download the latest update and install it. In the process, the smartphone will reboot several times. All data will be saved.
Manual option
Please note: Do not upgrade your device to more than one version of CyanogenMod at a time (for example, from CM 10.0 to 10.2). Unpredictable errors and incorrect operation of the firmware may appear. It is also not recommended to rollback the device to earlier versions of CM (for example, from 10.2 to 10.1). Sometimes it leads to an error with an endless reboot of the smartphone. With any downgrade, you must first make Wipe Data / Factory Reset.
It is almost always best to use the easy update method, as there is less chance of doing something wrong. However, if your Cyanogen version is lower than the tenth version, as well as if you use third-party add-ons (add-ons), you will have to use a complicated method, since the standard update does not allow you to immediately install the add-ons to the firmware.
- First, download the latest stable (or whatever version of CyanogenMod you need) and the latest version of the Gapps package.
- Turn on Recovery mode.
- Install the firmware first, then the zip archive with Gapps, and then third-party addons. There is no need to do Wape, so all data is retained when updated.
- Ready.
When you update again, there is no need to reinstall Gapps, since the data is saved, but add-ons will have to be installed manually.
In addition, only with a complex version, you can choose which update to install (which cannot be done with a simple installation method).
How to remove if necessary
If you decide to return everything as it was, you need to reinstall the firmware again, but this time replace CyanogenMod with the stock firmware of your device manufacturer. You can download this firmware from the manufacturer's official website.
- When you download the firmware, save the archive in the root directory of the device
- Turn on Recovery mode (hold down the power button and the volume up button while starting the device).
- Check all Wipe checkboxes. Please note that all data will be deleted.
- Then install the downloaded archive with the official firmware.
- Wait for the installation to complete.
- Reboot your device.
- Ready.
Sometimes a return to the native firmware of the device erases all traces of the presence of CyanogenMod, in which case the warranty is not nullified. However, you should not count on this, as it depends on the luck and carelessness of the support staff. The rules for the provision of warranty service prohibit changing the manufacturer's firmware.
CyanogenMod is an interesting firmware that has grown from an amateur handicraft to a serious and ambitious project, which has no analogue in the world. CM allows you to do with the device what no official firmware allows. But it should only be installed by advanced and knowledgeable users, since open systems are unsafe. In addition, the phone may be damaged and warranty service will not be available. However, if you lack the standard functions of a smartphone or tablet on stock Android firmware, if you are ready to learn and develop, if you are ready to spend time and effort overcoming errors that arise, then you definitely need to flash your device with CyanogenMod. According to some users, CyanogenMod is the culmination of mobile development.
 You spilled coffee, tea, beer on your laptop
 Sound Tuning Software System Launcher 5
 Fn does not work on a laptop: reasons and all ways to solve the problem The ctrl v hotkey does not work