How to find extensions on google. Where is the Google Chrome folder on Windows, Linux, Mac OS X and Android? Folder on disk
Ivan Ivanichev
![]()
The work of an Internet marketer is so complex and diverse that it simply cannot be done without the help of various tools. Keep an updated list of super useful plugins for Google Chrome. All of them, before getting into this material, have been thoroughly tested for bugs and usability.
If you are an in-house marketer and do not cope with all areas of Internet marketing, contact TexTerra for individual services or complex promotion.
Design tasks: screenshotting, color and font detection, image search, adaptability check
FireShot screenshot extension - it allows you to capture the entire page, its visible area or region and take a screenshot using hotkeys. To take advantage of additional features - annotations, an image editor, printing, emailing and networking, you need to purchase the Pro version, which costs almost $40.
Note: the extension does not work in the Chrome Gallery, you can use it by calling the context menu with the right mouse button.

Imgur Uploader is a replacement for the original Imgur, removed from the Chrome Web Store but with a smaller feature set.

With Colorzilla, you can use an eyedropper to take a color from anywhere in your browser and determine its number. An essential item for designers.

A typical situation - you liked the font on one of the sites, but you don't know what it's called. Climbing into the codes and looking for the name takes too long (and many don't even know how to do it). With the What Font extension, you only need a couple of seconds to do this. You just hover your mouse over the word you need and get the name of the font. Works with both Latin and Cyrillic fonts.

With Resolution Test, you can see how a web page looks on different types of screens. You can add any of your own to the standard set of permissions.

Allows you to check how your site looks on different types of platforms.

Working with information: express translation and text analysis, convenient search, systematization and sharing
The fastest way to translate the desired word into English. You simply select it and click on the extension icon. Very comfortably.

A plugin that helps to clear the text of any verbal garbage, put the materials in order, according to the rules of the infostyle.

The extension checks your texts for spelling and grammatical errors anywhere on the Internet - it reads fields in social networks, in mail, etc. The site also has a plugin for Google Docs, an add-on for Word, and even a desktop version that works without the Internet. By the way, a huge plus is that 25 languages are supported: you can check texts in English, German, etc.

The extension adds an item to the menu that allows you to save (and not lose) several pieces of text at once. More convenient than multiple "Ctrl + C" and "Ctrl + V" somewhere in Word or Notepad.

A simple extension to count characters/words in any selected text. The scope of application is not limited to copywriting: characters are considered when preparing advertisements, meta tags, etc. In the plugin settings, you can choose what to display: characters with spaces, number of words or number of characters without spaces.

The coolest extension for saving articles, bookmarks, pictures and other content. True, to use it, you need an Evernote account. Not in Evernote yet? What are you waiting for? Registering soon! No wonder this service has so many fans.

Checks spelling. No need to open Word and wait for it to load.

With the OneTab extension, you can save 95% of your browser memory and also get rid of tab bar clutter. When you have many pages open, you simply click on its icon and collapse all the tabs into a neat list. To expand them, just click on the “Restore it” button.

Divides your monitor in two. The window size is configurable.


The most useful extension for converting files from one format to another. Over 2,500 different combinations are supported: rar to zip, pdf to jpg, epub to pdf, png to ico and many others.

Productivity: time tracking, task management
Once you understand which sites are your top time killers, you'll probably want to do something to decrease your time on them. And since the addiction is already strong enough, without outside help, you are unlikely to be able to cope. The solution to this problem is the Block site extension. With it, you can either completely block the site, or specify the time when it should be blocked (for example, during business hours - from 9 to 18). Then you definitely will not be tempted to climb the pages of VKontakte.
The extension does not work in the Chrome Gallery, you can use it by selecting "Block this link" from the menu.

An extension to manage extensions (sorry for the tautology). One click enables and disables plugins. I think after reading this article you will definitely need it.

The Great Suspender is an extension that makes Google Chrome less greedy by suspending tabs that are not currently in use. The time for which the work of these tabs will be suspended can be set by yourself.

A great app for procrastinators and everyone who wants to control their time or at least just understand what it is spent on. Lists of distracting/productive sites are configurable.

The simplest time management tool that works according to the "pomodoro" method. The "Tomato" button starts the countdown of 25 minutes, after the expiration of the period, an audible signal sounds. Then, accordingly, you need to choose - a short or long break. There are statistics.

SEO, web development, security: site statistics, keyword selection, technical audit
For those who are not ready to pay for Key Collector. The extension significantly speeds up the manual collection of search queries from Wordstat.

Extension for quick analysis of key SEO metrics: PR, Alexa Rank, incoming links, etc.

Finds and redlines the no-follow tag and the no-index meta tag.

An extension that shows which web technologies were used in the development of a particular site. Shows CMS, installed meters, programming language, etc.

Alexa Traffic Rank provides data about the site (traffic, average load time) you visit without interruption from browsing. You can also see how this site looked in the past using the Wayback Machine service, related links, etc.

SEOquake is an extension that provides data on the main indicators of search engine optimization of sites and a detailed analysis of search results pages, and also allows you to conduct an SEO audit for technical preparation for site promotion work.


This extension shows what tools the viewed site was “built” with and what analytics, advertising, tracking, communication services it uses.

This plugin measures the amount of traffic to the site and its sources, shows behavioral metrics (bounce rate, time on site, etc.). It is necessary for the analysis of competitors, evaluation of sites for
First, a little about what an extension is: an extension is a small add-on for the browser that expands its functionality. Extensions can perform a wide variety of functions: they make it possible to download music or video where it simply cannot be downloaded, for example, on VKontakte or on Youtube. They simplify the work with documents, images, give the opportunity to choose which search engine to use in a particular situation without going to the search engine site, change the appearance of the site.
Extensions in Google Chrome are installed from the official app store, don't let the name fool you - you don't have to buy anything. To get to the extension store, follow the link
Or go to the store using the browser menu: in the upper right corner of the browser, click on the button with three dots. The browser menu will open, select "Additional Tools". Another window will appear in which you need to find the item "Extensions" and click on it:
Now you are in the tab with the extensions installed in the browser. If no extensions have been installed before, then there will be nothing here, or pre-installed Google Chrome extensions will be displayed - documents, presentations, spreadsheets. Depends on browser version. Click on the top left menu item "Extensions", then down to "Open Chrome Web Store":


after which you will be taken to the extension store. Here you can view all available, sort them by categories, features, ratings. The only negative is the language, not all extensions have a description and interface in Russian.

If you know which extension you need, then just enter its name in "Store Search" and press Enter. Please note that search results may contain not only extensions, but also applications. In order not to be mistaken, select in the search results "Extensions". From the results found, select the desired extension and click the button "Install":

After installation, an icon should appear in the upper right corner, with which you can manage the extension, configure it, enable or disable any functions:

The settings are activated by clicking the right mouse button on the icon. In some cases, there may not be an icon, it all depends on the extension being installed and its capabilities.
How to Install a Third Party Extension in Google Chrome
If you have a third-party extension or userscript from a source you trust, but for some reason the extension is not available in the Google Chrome store, you won't be able to install it normally. For security purposes, installation of third-party extensions, i.e. extensions not from the store, is not allowed in Chrome. The following are ways in which this limitation can be circumvented.
Installing the downloaded extension in .crx format
- First you need to open the extensions page in the browser, as described above: Browser menu in the upper right corner > More tools > Extensions. Or copy chrome://extensions/ and paste it into your browser's address bar and press Enter.
- At the top of the page there is a switch "Developer mode", activate it. 3 additional buttons will appear below: "Pack extension" And "Update Extensions":

- Extension file ending in .crx, rename it so that it ends with .zip and open it with the archiver as a regular archive. Unpack it into a folder prepared for this (for example, create a folder on the C drive called Extensions, or any other name).
- In the browser, on the page with extensions, click on the button "Load unpacked extension" and in the window that appears, select the created folder, and then click OK.
The extension will be installed in the browser, now it remains only to activate it by moving the switch next to the extension to the "Enabled" position.
Installing a userscript - a file of the form .user.js in Google Chrome
Method one, which is simpler, but requires the installation of an additional extension. The extension is called tampermonkey and needs to be installed from the Google Chrome store. After installation, it will be available in the upper right corner of the browser. When you press left mouse button The following window will appear on the extension icon:

in which to select an item "Create a new script". Please note opposite the paragraph "Included" should have a green checkmark.
A window for creating a new script will open. Now you need to open the downloaded userscript using a text editor, copy the code from it and paste it into this window in the browser. Then click on "File -> Save":

The script is ready to go.
The second way to install a userscript- without the use of extensions. To do this, the script will have to be slightly modified, creating a manifest.json file for it, thanks to which the script can be installed as an unpacked extension.
- First you need to download the script file itself with the name *.user.js.
- Now create a folder and put the script in it (for example, create a folder on the "C" drive called Extensions, or any other name).
- Open the script with a text editor. Note! A regular Windows notepad may not work - it is advisable to use a text editor with the ability to change the encoding, such as Notepad ++. The text of these two files must be in UTF-8 encoding, otherwise the installation will not work. In the script file, at the very beginning, find the following lines:
// @name ... // @version ... // @description ... // @include ... (can be multiple) // @exclude ... (can be multiple)
- In the same folder, create a manifest.json file and paste this template into it (or download the finished file):
( "content_scripts": [ ( "exclude_globs": [ "all_domains_and_paths_from_exclude_directives" ], "exclude_matches": , "include_globs": [ "all_domains_and_paths_from_include_directives" ], "js": [ "userscript_file_name.js" ], "matches": [ " http://*/*", "https://*/*" ], "run_at": "document_idle" ) ], "converted_from_user_script": true, "description": "your_user_script_description", "name": "your_user_script_name" ", "version": "userscript_version_number", "manifest_version": 2 )
"content_scripts" : [ ( "exclude_globs" : [ "all_domains_and_paths_from_exclude_directives"] , "exclude_matches" : , "include_globs" : [ "all_domains_and_paths_from_include_directives"] , : "description_of_your_userscript","name" : "name_of_your_userscript", "version" : "userscript_version_number", "manifest_version" : 2 |
Fill it with the userscript data you were looking for in step 3.
userscript_version_number- up to 4 numbers separated by dots. For example, 2.1.3
userscript_file_name.js- the name of the script file next to the manifest.json file
all_domains_and_paths_from_include_directives- each in quotes, separated by commas, with all metacharacters like "*" - all paths from the @include directives that are written at the beginning of the userscript file (for example, ["http://site1.ru/*"," http:// site2.ru/*" ]);
all_domains_and_paths_of_exclude_directives- same for @exclude directives
After everything is ready, the userscript is installed as a third-party extension. Top right browser menu > More tools > Extensions. Check the "Developer mode" checkbox, then select "Load unpacked extension ..." and in the window that opens, select the folder with the newly created files. If everything is done correctly, the userscript will be added to the browser and activated. The only disadvantage of this method is that every time you start the browser, it will display this window:

notifying that it has a third-party extension installed that may be unsafe. Just click "Cancel" and everything will work.
A small useful article from one of our readers.
The path I have chosen may seem long or confusing to you, but it has the right to exist.
So let's get started:
1. Launch Chrome and go to the extensions menu at chrome://chrome/extensions
2. Switch to developer mode
3. There are additional features that the developers of Google Chrome have nicely provided to us, ordinary users, namely the ability to repackage extensions installed in Google Chrome.
4. We press the "Packing extensions" button and the following window appears in front of us:

Now a little more about the location paths of extensions installed in Google Chrome for Windows 7:
C 1:\Users\Username 2\AppData\Local\Google\Chrome\User Data\Default 3\Extensions\
for Linux Ubuntu 11.04 4:
/home/username 5 /.config/google-chrome/Default 3 /Extensions/
1 - The name of the disk may differ, usually this is the disk on which Windows 7 is installed
2 - Username in the system that has the Google Chrome browser installed
3 - If you have several users in Google Chrome, then the folder name may be different (for example, Profile 1, etc.)
4 - Tested personally on Linux Ubuntu 11.04, the paths may be slightly different in other distributions (also the path may be different for beta, dev, canary versions of Google Chrome)
5 - Username in the system that has the Google Chrome browser installed
5. We found a folder with extensions, looked into it and saw a lot of subfolders with names like "blpcfgokakmgnkcojhhkbfbldkacnbeo" - these are our extensions, in each such folder there is a subfolder with a name like "4.2_0" - it indicates the version of this installed extension.
Now a small lyrical digression: Each extension is in a folder, with a name generated by the browser itself, i.e. just by looking into the folder with extensions it is difficult to say where it is, but you can turn on your head and find out from indirect data which extension is in a particular folder. Such data includes: a) extension version (the name of the folder with the extension version will be a good hint for us). b) the icons inside with the extension folder will also be a good guide. c) you can simply view the contents of the scripts and identify which extension we have in front of our noses.
I didn’t bother much and made a copy of all the extensions I have, later on I can give all the packed extensions regular names.
6. Now the packaging process itself, it can be a little tedious (and I warned that the method is "confusing", but we are not looking for easy ways;), but it really works (I did not find alternative methods, and I did not really look for it, it suited me this).
In the "Packing extensions" window, specify the full path to the extension to be packed, for clarity, I will give an example of the full path to one of the extensions installed in Google Chrome on my computer in Windows 7
C:\Users\Administrator\AppData\Local\Google\Chrome\User Data\Default\Extensions\capoflidgjlhkbndkbnopnbnmkfcjbgn\1.6.0.8_0
(In windows 7, in the extension folder selection window, the ability to view hidden folders, which AppData folder is, is disabled, so it’s easier to copy the full path to the extension in advance and just paste it into the extension path selection window, there were no such problems under Ubuntu OS, folder selection passes there in normal mode).

Then click the "Pack extensions" button if you get a message

Then you need to specify the path to the private key file, it lies one directory up from the folder with the extension.
Path to extension (as above):
C:\Users\Administrator\AppData\Local\Google\Chrome\User Data\Default\Extensions\capoflidgjlhkbndkbnopnbnmkfcjbgn\1.6.0.8_0
Path to the key file:
C:\Users\Administrator\AppData\Local\Google\Chrome\User Data\Default\Extensions\capoflidgjlhkbndkbnopnbnmkfcjbgn\
I think it will not be difficult to paste the same path copied in advance into the bottom field and delete the last directory.
7. Everything, your efforts are rewarded, a message should appear.

This means that our extension has been packed and is located at the specified address, you need to copy/move the .crx extension file and the key file to a separate folder in order to further transfer this extension to another computer with the Google Chrome browser installed.
8. To pack the remaining extensions, you need to repeat the operations starting from point 6 of our manual.
Now you are the proud owner of an offline collection of your favorite extensions for Google Chrome. You copied everything to a flash drive, brought them where you needed and decided to install. Ask me "how to do it?". Everything is very simple. We open Google Chrome and drag a file with the .crx extension onto its window, Chrome will ask you one single question:

As reported on the network where the arbitration manager provides its services, extensions for Google Chrome are selected and installed by the user himself, depending on his needs (as they say, who needs what: one wants to download something from YouTube, and the other is interested in the source code of the web pages to see, and the third one got ads and I want to install an ad killer). This program is not responding. (yahoo_search.js) - Application Error: the instruction at 0xXXXXXX referenced memory error, the memory could not be read. Then you will see that in this folder there are three browser icons.
In the upper right corners, select the icon of the current search engine, scroll through the list to the "Search engine management" item.
Now we remove traces of the toolbar in the browser settings. This will help you at the same time solve the problem of how to remove ads in the browser. Now, in this list you need to find "Google Chrome". In the window that opens, look in the "Object" field. After that, Yandex.Bar will immediately disappear from your computer. However, if you have caught a more complicated virus, and you cannot perform these actions due to lack of rights and other warnings, remove the browser shortcut from the desktop and taskbar.
When you select the "Delete" item, the Google Chrome browser uninstallation window will open on your computer. So Us.yhs4.search.yahoo.com should be quickly removed from the computer after being detected. We will talk today about how to remove ads from the browser in all its manifestations. Often, the cross, which, supposedly, can be used to close the banner, leads to the opening of new tabs, windows, or the installation of some program (in most cases, a virus). In the window that appears, enter "webalta". Frequently visited pages do not have to search again - one click and you're done. It shows ad blocks that are not on this site, and the virus added them. And if necessary, you can always restore the profile and use it as before. Yes, it's very simple - with the installation of other programs, during the installation of which one (and sometimes several modules at once) is introduced into your system. That is why the default browser opens.
(Date: 04/06/2015)
|
| |||
Undoubtedly, it is the most popular web browser. This is due to its cross-platform, multifunctionality, wide customization and customization options, as well as support for the largest (in comparison with competitors) number of extensions (additions). Just about where the latter are located and will be discussed in this article.
The question of where extensions are located in Chrome may be of interest to users for various reasons, but first of all it is required to view and manage them. Below we will talk about how to go to add-ons directly through the browser menu, as well as where the directory with them is stored on disk.
Extensions in the web browser menu
Initially, the icons of all add-ons installed in the browser are displayed in it to the right of the search bar. By clicking on such a value, you can access the settings of a particular addon and controls (if any).
If desired or necessary, the icons can be hidden, for example, so as not to clutter up a minimalist toolbar. The section itself with all the added components is hidden in the menu.

Here you can not only view all installed extensions, but also enable or disable them, remove them, view additional information. To do this, the corresponding buttons, icons and links are provided. It is also possible to go to the add-on page in the Google Chrome web store.
Folder on disk
Browser add-ons, like any program, write their files to the computer's disk, and they are all stored in the same directory. Our task is to find her. In this case, you need to build on the version of the operating system installed on your PC. In addition, to get to the folder you are looking for, you will need to enable the display of hidden items.
- Go to the root of the system drive. In our case, this is C:\.
- On the toolbar "Explorer" go to tab "View", click on the button "Options" and select the item "Change folder and search options".
- In the dialog that appears, also go to the tab "View" scroll through the list "Additional Options" to the very end and set the marker opposite the item "Show hidden files, folders and drives".
- Click "Apply" And "OK" at the bottom of the dialog box to close it.


Now you can proceed to search for the directory in which the extensions installed in Google Chrome are stored. So, in Windows 7 and 10 versions, you will need to go to the following path:
C:\Users\Username\AppData\Local\Google\Chrome\User Data\Default\Extensions
C:\ is the drive letter on which the operating system and the browser itself are installed (by default), in your case it may be different. Instead of "Username" you need to substitute your account name. Folder "Users", specified in the example path above, in Russian-language editions of the OS is called "Users". If you do not know the name of your account, you can look it up in this directory.

In Windows XP, the path to a similar folder will look like this:
C:\Users\Username\AppData\Local\Google\Chrome\Data\Profile\Default\Extensions

Extras: If you go back a step (to the Default folder), you can see other directories of browser add-ons. IN "Extension Rules" And "Extension State" user-defined rules and settings for these software components are stored.

Unfortunately, the names of the extension folders consist of an arbitrary set of letters (they are also displayed during their download and installation in a web browser). You can understand where and what add-on is located only by its icon, having studied the contents of the subfolders.

Conclusion
This is how you can easily find out where Google Chrome browser extensions are located. If you need to view them, configure and gain access to management, you should refer to the program menu. If you need to access the files directly, just go to the appropriate directory on the system drive of your PC or laptop.
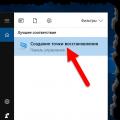 Restoring windows 10 to a restore point
 Scan Documents and Photos with the Fax and Scan Tool Scan Documents in Windows 10
 Where is the Google Chrome folder on Windows, Linux, Mac OS X and Android?