Setting up dir 320 on a laptop. Setting the ip address automatically on Windows XP
In order to get into the web interface of the router, you need to open your Internet browser and type 192. 168.0.1 in the address bar, Username - admin , Password - admin(provided that the router has factory settings and its IP has not changed).
Change factory password
Default: Login admin, password admin.
In the interface of the router, you need to go to the tab System, menu Administrator password.
In field Password (New Password) Enter a new password.
In field Confirmation (Confirm Password) repeat new password.
After that, the router will prompt you to re-enter its settings.

Internet connection setup
On the page Advanced settings; select Net; ⇒WAN;.

Click on the button Add.

Setting up a PPPoE connection
- In field Connection type: select PPPoE
- In field Port select the WAN port - it is listed there as Port 5.
- Username: Your login from the contract
- Password: Your contract password
- Password confirmation: repeat password
- Authentication algorithm: Auto
- keep alive
- MTU
In field Miscellaneous NAT And Firewall.
Enable IGMP.

Setting up an L2TP connection
- In field Connection type: select L2TP + Dynamic IP
- In the Port field, select the WAN port - it is listed there as Port 5.
- Username: Your login from the contract
- Password: Your contract password
- Password confirmation: repeat password
- VPN server address: write down the address of the provider's VPN server
- Authentication algorithm: Auto
- keep alive- check the box for permanent connection
- MTU- change the value to 1450 or less
In field Miscellaneous make sure the checkboxes are checked NAT And Firewall.
If the provider provides Internet TV service, check the box Enable IGMP.

Setting up PPtP (VPN) when automatically obtaining a local IP address (DHCP)
- In field Connection Type: select PPTP+ Dynamic IP
- In field Name enter the name of the connection (you can not change)
- Username: Your login from the contract
- Password: Your contract password
- Password confirmation: repeat password
- Connect automatically: put a tick
- MTU change the value to 1450 or less
- Authentication algorithm: Auto
- keep alive- check the box for permanent connection
- Save the settings with the button and reboot the router.


Setting up Wi-Fi on the router
1. From the advanced settings page, go to the tab WiFi, select the item basic settings; and set the desired name of the wireless access point SSID. After that we press Change;.

2. After that, it is also recommended to set a password for your wireless network. To do this, go to the Wi-Fi security settings, select the authorization type (WPA2/PSK is recommended), and then enter any password of at least 8 characters - this will help protect your wireless network from unauthorized access. Save your changes.

That's all: now you can try to use the Internet via a wireless Wi-Fi connection from a laptop, tablet or any other equipment.
Checking the Internet Connection Status
If the connection is created correctly and there are no problems from the provider, then in the column " Network Information", WAN connection status it will say connected and your ip-address.

Saving/restoring router settings
- Choose to save the current configuration. To save the current settings of the router, the settings file will be saved to the specified location on the hard drive.
- To restore settings from a file, you must click and select Loading a previously saved configuration to the device, specify the path to the file with settings, then click the button.
This manual shows and tells in detail how to set up a D-Link DIR-320 Wi-Fi router for Beeline and Rostelecom Internet.
Let's take a look at the following points step by step:
- How to connect DIR-320 to Internet line and computer for setup
- How to set up an L2TP connection for Beeline Internet and PPPoE for Rostelecom
- How to set up a Wi-Fi password and wireless network name
- Setting up IPTV television (Digital TV Beeline and Rostelecom).
So, everything you may need to configure this wireless router is here, you just have to read carefully.
How to connect a router
I'll start with how to properly connect a Wi-Fi router to configure it, since even here there are problems.
Behind the D-Link DIR-320, apart from power and a couple of buttons, there are five ports: 4 LAN and 1 Internet. It is to the last connector that you need to connect the cable of your Internet provider.
I also note that the setup itself will be easier if you perform it from the computer that is connected to the router by wires: connect one of the LAN ports on the device to the network card connector on the computer.
And the last two points:
- When setting up, the Beeline, Rostelecom or High-Speed Connection connection on the computer must be disconnected. And after you set it up, don't run it either - the router itself will connect to the Internet.
- If you are unable to enter the router settings, as described below,.
So, now you can proceed to the configuration itself.
Login to the settings web interface

To enter the D-Link DIR-320 settings, launch a browser and enter 192.168.0.1 in the address bar, you should see a login and password request. Standard login and password, if you have not changed them before - admin(if the password is not suitable, then you will be “thrown” again to the password entry page. It may have been changed. Then you can reset the router to factory settings by pressing and holding the Reset button for 15-20 seconds).
After correct input, you will be on the main page with basic information about the device. Click "Advanced Settings" at the bottom of the page.

Setting up D-Link DIR-320 for Beeline
To configure the connection, in the "Network" item, select "WAN", a list of connections will open. At the bottom of the list, click "Add" and set the following Beeline Internet connection parameters:
- Connection type - L2TP + Dynamic IP
- Login, password - your Internet login data that you received from Beeline
- VPN server address - tp.internet.beeline.ru

The rest of the settings do not need to be changed. Click "Save", after which the page with the list of connections will open again, and at the top there will be a notification with a one, click on it and click "Save".

Now, if you refresh the page, you should see that the newly created connection is in the "Connected" state, which means that the Internet is configured correctly and you can proceed to setting up the Wi-Fi network. Do not forget, the Beeline connection on the computer must be terminated.
On the advanced settings page, in the "Network" item, click "WAN". A list of connections will open, where there will be only one - click on it, and on the next page click "Delete". You will be returned to an already empty list of connections. Click "Add" and enter the following parameters for the Internet from Rostelecom:
- Connection type - PPPoE
- Username and password - Internet login data provided to you by Rostelecom

The remaining parameters can be left unchanged, click "Save". You will return to the list of connections. Please note that the "light bulb" is on at the top of the DIR-320 settings page, click on it and select "Save".
Refresh the page after a minute. If you see that the connection status has changed to “Connected”, then you did everything right and the Internet is already there, you can proceed to setting up Wi-Fi. Let me remind you that the connection of Rostelecom on the computer itself should be disabled.
Setting up a Wi-Fi network
In order to configure the wireless Wi-Fi network settings on the DIR-320, on the page with advanced settings in the Wi-Fi item, click "Basic Settings", on the page that appears, you can set your wireless network name (SSID) instead of the standard DIR-320.
Then save these settings and return to the "Wi-Fi" item, now you should select "Security Settings". This is where the Wi-Fi password is set. Recommended settings:
- Network Authentication - WPA2-PSK
- Encryption key PSK (password) - at least 8 characters, without Russian letters.
Save the settings, do not forget to also click "Save" at the top of the change indicator (light bulb). In general, the DIR-320 setup is complete.
TV setup
In order to set up Beeline or Rostelecom digital television, on the main page of the router settings, select "IPTV Setup Wizard", in it specify the port where the set-top box will be connected and save the settings. Connect the set-top box to the selected LAN port.
In this DIR-320/NRU configuration manual, we will take a detailed look at how to configure this router in DHCP mode, change the MAC address, and also in PPTP (VPN) client mode. Our manual for configuring the D-Link Dir-320 NRU router can be used for other models from the Dlink line, which have a similar web interface and functionality:
- D-Link DIR-300 (ver. B5+)
- D-Link DIR-615 (ver. E4+)
- D-Link DIR-655 (ver. B1+)
- and other models of "Dlinks", which we could not mention.
Well ... Let's assume that you have one of the D-Links with a new web interface in your hands, you took it out of the cardboard box along with a power adapter and a network cable. On the front side of the router, you will find LED indicators that, during operation, talk about the “behavior” of the router at a given time (about the operation of its interfaces). On the rear panel, to the right of the antenna, you will find 5 network connectors: 4 of them are labeled LAN needed to connect internal cables from home PCs, and into a lone connector labeled INTERNET a network cable from Aido is connected (this interface is commonly called by routers WAN). to the right of WAN interface is located USB a connector for connecting a 3G modem from a wireless Internet provider, and then there is a power connector and a button recessed into the case RESET to reset the router settings if necessary.
By the 4th LAN DIR-320 ports you can connect up to 4 PCs or laptops via a network cable. By the way, one of these blue cables (a regular patch cord) is already bundled with the router, so you can use it to complete the setup.
We have reviewed the basic information regarding the capabilities of your router, now you can proceed to its configuration, but first you need to connect the router to a computer or laptop, after which we will get access to the web interface of our router.
Connecting a router in Windows 7 and XP
Before setting up your D-Link DIR-320, you need to perform a number of preparatory measures - connect any LAN interface of the router with a network card on a PC or laptop with a blue network cable, and connect the power adapter to your router. As for the cable from Aido, it must be connected to the INTERNET (WAN) interface.
Now you should change the TCP/IP settings on your PC to DHCP client mode (automatically obtain IP addresses). Below we will look at how to do this using the example of Windows XP and Windows 7.
Connecting a D-Link DIR-320 / NRU router in Windows XP:
Start - Control Panel - Network Connections - Local Area Connection - Properties - Internet Protocol (TCP/IP) - then see the figure:
Connecting a D-Link DIR-320 / NRU router in Windows 7:
Start - type View network - select at the top in the search results - View network connections - Local Area Connection - Properties - Internet Protocol version 4 - see the following figure:

By default, all D-Links issue IP addresses from the 192.168.0.1/24 range to the internal network. Therefore, after 10-20 seconds, your PC or laptop should itself receive an IP address from the router. It will look something like 192.168.0.101 or 192.168.0.102. The inscription that the network card is assigned DHCP means that the router has successfully issued an internal IP address to the computer via the LAN interface. If this does not happen or an IP address of the form - 169.***.***.*** appears, then problems with the operation of the DHCP client on your computer are not ruled out. Most often, this can be caused by the operation of firewalls (firewalls), but there are other reasons ... In this case, we can advise you to manually register the necessary IP addresses in the network card settings. To do this, it will be enough to specify the following IP parameters on your PC or laptop:
IP - 192.168.0.101
Subnet mask - 255.255.255.0
Default Gateway - 192.168.0.1
DNS - 192.168.0.1
Setting up a router
We will configure the D-Link DIR-320 through the web interface. To do this, in any computer browser (Opera, Internet Explorer, Mozilla, Chrome) in the address bar go to: http://192.168.0.1 (usually all D-Links have this address by default). You will see the router's welcome screen on your computer screen. To enter the D-Link web interface, you will need to enter a username and password, and then click on Entrance. Default Username- admin, Password- admin:

After entering the credentials, you will see a pop-up message from the router (see figure). In this message, DIR-320 forcibly requires you to change the default password, which will later be used to log into the router. You just have to click on OK:

H you need to enter a new Password and his Confirmation, then press the button Save:

You will be taken to the main menu of the D-Link DIR-320 router, where you will see Device Information in front of you:

Important: to save the configuration after any change of settings (!) it is necessary to press the Save button in the upper right corner every time.
Internet connection and configuration in DHCP mode, specifying the MAC address
Now it's time to set up the connection of the router with Aido. In D-Link DIR-320 NRU, this can be done in p. Connections - WAN, click on the line WAN interface:

In DHCP mode (automatically obtaining IP parameters from Aido), there should not be any particular difficulties with configuring the D-Link DIR-320/NRU. For this in the field Connection type you must leave the option in position IPoE.
In field MAC You can make the MAC address identical to the MAC address of your computer that you were working on before installing the router, this will avoid calls to Aido. If you want to use a router with a "native" MAC address, then fill in this option, specify the MAC address that can be found on the bottom of the router (six pairs of alphanumeric characters). To register the MAC address of the router, you need to call the Aido technical support service and provide this MAC address.
We will not change any more options here, everything will work in DHCP mode. It remains only to press the button Save:


Now you need to check the performance of the settings. You can do this in p. Status - Network statistics. Here in the field WAN You can see the information that the DHCP client of the router has successfully received the necessary IP parameters from Aido. In fact, you can already work on the Internet from a computer that you have connected to the LAN interface of the DIR-320/NRU router.

Configuring the router in PPTP VPN mode "Real IP"
To connect via PPTP, you need to create a new interface. (Note: first we still need to configure the router to work on the WAN interface with the connection type ipoe). We open p. Connections, press the button Add:

To configure the router to work over a VPN connection, you must set the option Connection type into position PPTP. Next, consider the rest of the necessary options for configuring the DIR-320/NRU in PPTP mode [top-down]:
wanPPTPPSNameType– allows you to specify how the VPN server address is specified: as a domain name or as an IP address. Choose an option URL;
Server address- here the address of the VPN server mentioned above is indicated, enter ip.site;
PPP Username- in this option, enter the login for authorization with the VPN server. It can be found in your contract with Aido;
Password- this is the password for connecting to the Aido VPN server (see your contract);
Password confirmation- here you will need to re-enter the password for authentication on the VPN server in order to eliminate an error when typing;
Encryption- here the encryption of data transmitted over the VPN is activated. We leave the option Without encryption.
Authentication Algorithm- here you can select the type of authentication supported by the Aido VPN server. Choose option - AUTO or Automatic.
We do not touch the rest of the options and checkboxes in this menu. After pressing the button Save, the tunnel to the Aido VPN server should be successfully established:

Check if the VPN session has risen, you can in the menu Connections. In order for traffic to go through the VPN tunnel, be sure to check the box Default gateway opposite connection PPTP and save the settings via the button in the upper right corner!

An inscription that the PPTP type is in the state Connected indicates successful actions on your part. If the inscription Connected does not appear, then somewhere in the previous stages an error was made ...
Setting up routing (routing) for access to local resources
The next step when configuring D-Link routers in PPTP VPN mode is usually to fill in the routing table. This procedure is necessary for simultaneous access to local resources of the Aido network with an established VPN connection. Actually, if you are not very interested in local resources, then you can skip this step. For those who are going to continue to use local services such as torrent, you will have to configure routing. You can do it in DIR-320/NRU at Additionally — Routing. This menu is a table for entering static routes.
To create a new local route in D-Link DIR-320/NRU you need to click on the button Add:

In field Destination network you should specify the destination area of this route, specify 10.0.0.0 .
In field Destination network mask you must specify the subnet mask for a specific route, specify 255.0.0.0 .
In field Gateway you must specify the address of your local gateway (you can find it out from your contract or you could see it in the state of the local network connection on the computer that was connected to the provider's cable before installing the router).
In field Metrics you can put 1 or 10 . This value specifies the priority for this particular routing rule.
In field Through the interface leave option<Automatically>, then the D-Link DIR-320/NRU router will determine on which interface it is more appropriate to use this route.
To create a rule, you just need to click on the button Save:

After entering all the necessary routes, it remains to save the router parameters by pressing the button Save. On this, the routing setup in the D-Link DIR-320 / NRU router can be considered completed.

Setting up a Wi-Fi connection
The D-Link DIR-320/NRU router allows you to transfer data over a wireless network using the appropriate Wi-Fi equipment on the client side. Setting up a wireless Wi-Fi network in the new D-Links of the DIR series is performed in p. WiFi – General settings. Here you can completely turn off the Wi-Fi module in your router. Then the router will turn from wireless to wired.

Go to p. basic settings, where you can set the name of the network and select the wireless standard.
Hide hotspot- disables the distribution of the network identifier (SSID), this allows you to hide your network from devices running Windows, acting as a security tool. True, in this case you will have to create a profile to connect to the wireless network manually.
SSID– name of the wireless network (network ID). Under this name, the network will be visible in wireless Wi-Fi clients.
A country- option Russian Federation.
Channel— Forced channel selection for wireless communication. We do not recommend dealing with channel number 6 , since most Wi-Fi equipment works on this channel by default (few users change it). Ideally, we recommend that you opt for the channel 1 or channel 12 to minimize the chance of interference with neighbor networks.
Wireless mode- here you can select the wireless mode 802.11g or 802.11n, or maybe even the outdated 802.11b or a combination of them. In mixed mode (802.11 B/G/N mixed), keep in mind that the overall network speed when connecting diverse clients will drop to the level of the slowest client.
Below you can set Maximum number of clients that will connect to the router.

Wireless network encryption is configured in p. Security Settings.
In option Network Authentication You can select the wireless encryption algorithm. We recommend that you opt for the most versatile option. WPA-PSK/WPA2-PSK mixed- this will provide support for most modern Wi-Fi equipment.
In field PSK Encryption Key You set a password for your wireless Wi-Fi network. We recommend here to use a password of 8 to 10 characters in length, consisting of uppercase and lowercase letters, special characters and numbers. This minimizes the likelihood of password guessing by intruders.
In option WPA encryption You can choose the algorithm for WPA encryption. TKIP– less cryptographic option compared to AES, nose AES Some wireless clients may not work. We recommend setting the option TKIP+AES, then you will be compatible with most Wi-Fi clients.
WPA key renewal period can be left as default.

I would like to say a few words about one more option in Additional settings wireless network. Here option TX power responsible for the radiation of the wireless antenna. You can experimentally lower it to such a level that it will be enough to cover the apartment / room, and the network will not look much outside the apartment. This will reduce the likelihood of your hacker neighbors hacking the wireless network :) Yes, and this will affect your health for the better, especially if you quit smoking 😉

This completes the setup of the wireless Wi-Fi network in the D-Link DIR-320/NRU. To use Wi-Fi at home, the manipulations discussed above will be quite enough for you.
Port forwarding for torrent
Setting up port forwarding (port forwarding or Port Forwarding) must be done if you plan to use programs and devices on your home network that require unsolicited access to them from the Aido local network or the external Internet. For example, this may be required in case of access to a home IP webcam or when working with file-sharing services such as torrent. The principle of port forwarding is as follows: You yourself tell the DIR-320/NRU router what type of unsolicited traffic from the outside the router should forward to a specific IP address on the home network.
Consider port forwarding in D-Link DIR-320 NRU for Utorrent:
You can configure Port Forwarding in the D-Link router in p. Firewall - Virtual servers. In this menu of the Dlink router, you can create the necessary rules for port forwarding. Moreover, these rules can be created both on the basis of ready-made templates and for specific traffic. New rules are created after clicking on the button Add:

Open the Utorrent settings in terms of connection parameters and bring them to the following form. IN Incoming port specify the port we would like to forward in our router:

Next, let's go back to the router's port forwarding menu and create a rule to forward connections from Utorrent to the IP of our second computer on the home network. When creating a port forwarding rule, we will take into account that the second computer has an internal IP address of 192.168.0.222. We will forward TCP and UDP traffic by port 22222 , which is reflected in our rule:

We also note that for the correct operation of Utorrent, you will need to connect the “Real IP” service to your service, port forwarding alone in the router will not be enough! Without a dedicated IP address, you will not be able to fully distribute torrents, because. will interfere with NAT in Aido. In most cases, without a dedicated IP, torrent distribution will only go to 1/3 of the channel width.
This is all the necessary settings that may be required during home use of the DIR-620, DIR-300 / NRU, DIR-615, etc. routers.
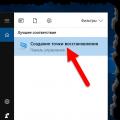 Restoring windows 10 to a restore point
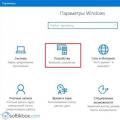 Scan Documents and Photos with the Fax and Scan Tool Scan Documents in Windows 10
 Where is the Google Chrome folder on Windows, Linux, Mac OS X and Android?