Only front camera works upside down. Webcam laptop shows upside down - how to fix
It often occurs quite often when the camera on the laptop shows upside down. Why does this happen and how to fix it? We offer three effective methodthat will help you. Do not worry, the proposed ways are suitable for both PCs and laptops, regardless of the manufacturer.
Problem with drivers
Most often, users meet with this problem in Skype. It arises due to drivers and wrong installation. In our situation, it takes place when:
- They are automatically set during the installation of windows;
- When installing, a special PAC driver was used (as an option, Driver Pack Solution);
To check which drivers are on your device, you need:
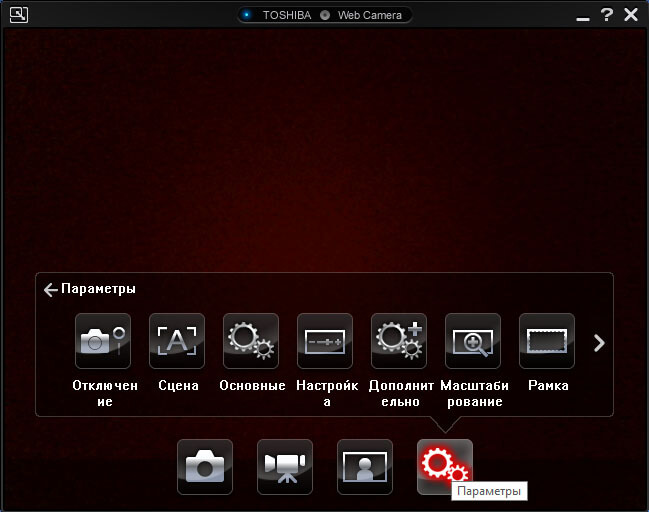
- Go to " ";
- Find a webcam;
- Click on it right-click and select "Properties";
- In the window that opens, go to the Driver tab and carefully look at the Supplier and the Development Date;

If the supplier is Microsoft and the date for a long time is no longer relevant, then the cause of the inverted image is in them. How to fix it? In such a situation, you need to open the site of the manufacturer of a laptop or web device and download from there the current version is completely free.
Display setup
If you are standing on your computer the necessary drivers Or after their reinstallation, nothing has changed, and the webcam still removes upside down, then in this case, the solution should be searched in its settings. If you do not know how to configure it, then you should not worry - everything is simple enough!
To quickly get into the web device settings you need:
- Open Skype;
- Go to "Tools / Settings / Video;
- Under its picture, click "Camera Settings";

After you do the above actions, a new window will open. In this window, you need to find the image rotation feature that is present in most devices. In English, it is called Flip Vertical, which in the translation denotes "reflect vertical", or rotate (rotation).
W. different manufacturers laptops such as Acer, Toshiba, Asus, HP, Lenovo and for different models Camera cameras with a webcam settings may look different.
This is the easiest way, but for its implementation you will need Skype that most users have. If you do not enter their number, that is, another option is a special program with which you can manage webcaps. Usually it is loaded to the computer along with the drivers. In it, you will find exactly the same rotation or vertical display function, which has been described above.
Application of third-party programs
If the previous ways presented did not help you configure the camera, and you still do not know how to flip the image of the camera back, then in this case only special remains software. The Manycam utility you can download on the Internet, will be guaranteed to solve this problem.
The installation process is quite simple, so even an inexperienced user will cope with it. The utility is suitable for all versions of Windows XP, Vista 7, 8, 10. Moreover, it is completely translated into Russian. After you installed it and launched, you need:


Now your image in Skype will be normal, and you will always know what to do if the webcam shows incorrectly.
On many modern smartphonesThe function is set in advance that can lead to the fact that all your pictures will have a mirror image. In other words, we are talking about the fact that the pictures will turn out overwhelming, which may make their perception difficult.
By the way, many famous psychiatrists have recently become more common to talk about the danger of such experiments that can have direct impact on the human psyche.
It is not necessary to explain that the distortion of any image can lead to the fact that a person will cease to adequately evaluate reality, which is very important for our thinking, having a certain kind of specificity.
So, now we know the answer, to the question of why Selfie the camera turns the photo. It happens because manufacturers install such a function to your device in advance.
How to remove the camera's coup in Selfie Camera?
In order to correct this state of affairs, you will need to follow a simple algorithm that is available to almost all smart devices. Exception can only be submitted models iPhone..
First of all, you need to enter your front camera, in which, in our opinion, you have a frontal mode. If you say specifically, it is this mode that it is capable of changing the image you get in the implementation of selfie.
Each front camera has its own menu, which, most often, is located in the upper left part of the panel.
Mirror mode in Selfie Camera
If you look closely, it becomes clear that the "Front Camera" option, you can burn a green button, which means that the mirror mode is turned on on your smartphone.
Now in order to correct the problem that occurred, you will need to press this button. As a result, it will highlight new postwhich will testify that your frontal mode responsible for mirror imageDisabled.
And this means that now all the photos that you will receive through selfie will be displayed in the usual form for human perception.
In fairness, it is worth noting that there are certain difficulties with the disconnection of such a mode on iPhones, in which such regime was established initially during production. Therefore, it needs to be remembered before you invest money in a particular device.
If the camera turns the image on android, then this problem is enough to simply eliminate the smartphone settings. In the Select Front Mode (Green Button) options and turn it off.
But not all smartphones support the image display configuration feature.
In most cases, when we make selfie, we do not even think about how it really turns out. We mean not that users do not matter how they look, and the fact that, as a rule, photographs made on the front chamber are reflected by the vertical and this is not attached to any particular importance. And this is not so important if the photo is not present in the photo. Well, on the other hand, it is a little strange to receive mirror displayed photos. Yes, and get rid of it pretty easy. So let's start.
Why does the smartphone turn the photo?
When you make selfie, the image that you see on the screen is also displayed as if you looked in the mirror. And for you it is normal. If you raise your right hand, then on the screen it will also be on the right. However, if a person will look at you, then from its point of view, the hand raised is on the left. In other words, "your right side for him left." Equally, as the opposite. Therefore, when it seems to you that your phone turned the image, in fact, he showed you a photo as if you look in the mirror. It is the "Cutting" effect, you need to turn off in the settings of your smartphone.
How to make a smartphone display a photo correctly?
Many telephones running this feature. To do this, open the camera application and click on the icon in the form of a gear. Srack this menu, you depend on the model of your smartphone, you will find the item that regulates the display settings and save photos. After you have discovered the desired option, turn it on, but keep in mind that the self-camera will still display the image for preview So, as if it was repeated. In this case, the final snapshots will already be obtained normally.

How to flip a photo on Android?
With how to make the camera of your smartphone normally work normally work. But what to do with your pictures already exist, which turned out to be inverted? For this you do not need to "drive" them in Photoshop. Download the free snapseed app, and then by running the application and giving it access to the Gallery of the pictures, open the photo you need.

Now select the "Rotate" option and start editing. On the Tools tab at the bottom of the display, you will see an icon made in the form of two arrows pointing to each other with a dotted vertical line between them. Click on it, and you will get the image reflected vertically. The same trick can be done in the event that you need to reflect the photo horizontally. After that, press the icon in the form of a check mark in the lower right corner of the screen to save the changes.
More interesting materials you can read in our
 Firmware for HTC One SV from flash drive
 Why is the laptop heats and what to do about it?
 Reset to factory SAMSUNG smartphones