1c shutdown all users. We expel users from the server infobase
- Vasya, from today you start users!
- But I'm a programmer, not a system administrator ?!
- Sysadmins do not know 1C, so you will start users!
- Aaaaa !!!
A programmer is a person who writes programs for a computer. However, the management of the list of users in 1C is usually entrusted to the one who is associated with 1C, namely the 1C programmer.
In principle, some programmers do not mind, since this gives them some "privileges" in their hands.
Nevertheless, the list of users in 1C does not differ much from the lists of users in other programs. Therefore, adding a new user or disconnecting an existing one is as easy as shelling pears.
1C users
So, 1C has its own list of users. With it, access to the 1C database is regulated. When entering the database, 1C will ask you to select a user from this list and enter a password.
There are options in which 1C does not ask for a username to log in. However, this does not mean anything at all . It's just that in this case, the user from the list is mapped to the Windows / domain user and is automatically detected. How
The only option when 1C does not really ask the user is when creating a new (empty) database. In this case, the list of 1C users is empty. Until the first user is added, 1C will log in automatically. A similar system is used in Windows with one user without a password.
1C users differ from each other:
- Access rights
- Interface (available in the menu items).
As such, there is no "superuser" or "group of administrators". An administrator is the user who has all rights in the configuration and administration rights enabled. In an empty database (when the list of users is still empty) - just such a user should be added first.
Two lists of 1C users
In fact, 1C has two lists of users. One of them (the list of 1C users) is "real" from the point of view of the programmer. It is located in the configurator. It is according to him that 1C determines the user.
This is the approach of the old typical configurations (for example, trade management 10, accounting 1.6, etc.) - users are edited in this list, and they are automatically added to the user guide when they first log in.
The second (users of version 1C 8.2, "not real") is the users directory (and the external users directory, as in ut 11). The reference book existed before, but the approach of the new typical configurations is that users start in it, and they automatically enter the "real" list.
The main byaka of this approach is that those who do not like to work this way and want to do it the same way - they cannot do it, since certain fields are filled in at the institution, and if you add a user with pens in the list, they will no longer be picked up in the reference book automatically.
How to add a user to the list of 1C users
So, the list of 1C users is in the configurator. and open the Administration / Users menu.


To add a user, you must press the add button (or Ins from the keyboard). If the list is now empty, then the first user must have administrative rights (see below).
- Name - username (which he will choose when entering 1C)
- Full name - reference name, does not appear anywhere
- Password
- Show in picklist
o if the checkbox is checked, then the user will be in the selection list when entering 1C
o if the checkbox is not checked, then the user will not be in the selection list (that is, it cannot be selected), but you can enter his name from the keyboard and enter - Authentication operating system- can be associated with a Windows / domain user and this user will not need to enter a password (it will log in automatically).

On the Other tab, you can select the rights and basic settings of the user.
- The main interface is a menu that will be available to the user (used only in the thick client)
- Russian language
- [Main] Startup mode - thick or thin client, using this parameter you can enter the configuration of the thin client - thick and vice versa
- Available roles (user rights).

User rights in configurations are usually divided into blocks ("roles"). In the old configuration approach, they were broken down by user positions (cashier, manager, etc.). This approach has a drawback - since in different organizations the cashier and manager may have different functions.
Therefore, in the approach of the new configurations, they are broken down by actions (access to the closing of the month, access to cash transactions). That is, a set of operations is set for each user.
In both cases, you have basic access rights to enter the program. In the old approach, this is:
- User
- Full Rights (for administrator).
In the new approach, these are:
- BasicRights
- Basic Rights
- Launching Thin Client - plus LaunchingXxxClient to launch others
- SubsystemXxx - a check mark for each subsystem (tab in the interface) that the user needs
- Full Rights (for administrator, not Administration!).
PS. Basic rights are not required for external users.
How to add a 1C user - 1C 8.2 users
The list of 1C 8.2 users in the new version is located in 1C (in 1C Enterprise mode), in the Users and External users directories (only if the configuration supports). The difference is that you should not create users in the configurator, but in this guide, and they will be automatically sent to the configurator.
If you are using a thin client, see the Administration tab of the desktop. Otherwise, open the Users directory, for example, through the Operations menu.


Click the Add button (or Ins from your keyboard). For you to manage the list of users, you must have the FullRights rights enabled.

Unlike the first approach, here you do not directly specify each right (role) to the user, but specify the groups of rights (user groups).
The User groups reference contains a profile that defines a set of rights (roles). In the User group profiles reference, you can change or add such sets of rights (roles).

1C user settings
In some configurations (especially in the configurations of the old approach), it is not enough to create a user. Additionally you need:
- Login for the first time in the system
- After that, find the user in the user guide
- In the form of the reference press (options "or")
o Menu Go / User Settings
o Menu Additional information / User settings and Additional user rights
o In some configurations, this is a plate directly in the user form
o In some configurations the global menu of the Service / User settings - Configure additional settings / user rights that define autocomplete fields and some access.

How to disable a 1C user
[Temporary] user disconnection is not provided in most configurations. Here are the variations you can use to achieve this result.
Old approach configurations (via configurator):
- Delete user
- Change password
- Remove the role User (will not be able to log in).
New Approach Configurations (Through Enterprise):
- Uncheck the Access to inf. base allowed
- Change password
- Exclude from all access groups.
Active users 1C
1C allows you to find out the list of users who are currently in the database.
To do this, in Enterprise mode, select the Service / Active Users menu (thick client, administrative interface). V thin client- the Administration tab, on the left Active users (maybe in See also).
In the Configurator mode, select the Administration / Active users menu.

Disconnecting 1C users
As you know, in order to update the database (configuration), it is necessary that all users exit 1C (not in all cases, but often required).
Users do not like to go out (this is a fact). And if you ask them by phone, they will surely come back in 30 seconds. With 200 users, it becomes a lot of fun.
Therefore, there are three ways to disconnect users from 1C:

Implemented in version 8.3.8.1652.
Previously, users accustomed to working with web applications experienced a certain inconvenience of not seeing the user's shutdown command. They are accustomed to the fact that there is usually such a team, and it is in a prominent place. And to shut down the web application, you need not just close the browser window, but execute this command. Which, among other things, will complete the authorization session. So that the next time you launch the application, you cannot enter it "just like that", but only after entering your username and password.
In 1C: Enterprise and team Output, and the command Shut down user ...(when using OpenID authentication) exist, but are located in the menu File, which many users don't know about.

To make the user experience more familiar, we've added a shutdown command to the app title bar, next to the button About the program... It is displayed as a hyperlink with the name of the current user.


This command, with basic authentication, exits the client application. And with OpenID authentication, it exits the user (OpenID logout) and also exits the application.
When publishing information base on the web server, you can set the URL that will be navigated to after the web client has finished working with this command. For example, to return to the main page of the service provider if the user was working with the application in the service model.
1. Disconnecting users in file version 1C 8.
To disable users in the file version I created a * .bat file with one line
net session / delete / y
It turns off all open common files on the computer on which the base is located.
Then I created a task (Windows Task Scheduler) that would launch this file at the appointed time.
You ask, what about the sessions that are open on the computer, I also eliminated them by creating a new * .bat file with the line
taskkill / IM 1cv8.exe / f
although it turns off all running 1C on the current computer, but for me it was not so scary since the archiving was carried out at night and no one was working in the database, this batch file can also be added to the Windows Scheduler.
2. Disconnecting users in the client-server database.
Just like in the case file base I used * .bat files.
Created two *. bat file, the first one turns off the 1C enterprise server, the second one turns it on very simply.
net stop "1C: Enterprise 8.2 Server Agent"
net start "1C: Enterprise 8.2 Server Agent"
Added two new tasks to the Windows scheduler, with a time difference of 15 minutes so that all frozen users can disconnect, these actions are the same as Starting the 1C Enterprise server and Stopping the 1C Enterprise server
3. Programmatic way to disable users in 1C
The task was to perform archiving every day at 22:30.
In this way, I did not bother, I created a new role "Do not close1C".
Created a new procedure in a regular application module:
Procedure CompletingUsers () Export If NOT RoleAvailable ("Do notClose1C") Then If Hour (mop_PerformanceOperations onServer.CurrentDateAtServer ())> = 22 Then // get the time on the server StopSystem (False); EndIf; EndIf; End of Procedure
If NOT RoleAvailable ("Do not Close1C") Then If Hour (mop_OperationsOnServer.CurrentDateAtServer ())> = 22 Then // get the time on the server StopSystem (False); EndIf; EndIf;
ConnectWaitingHandler ("CompletingUsers", "600");
The function current date on the server looks like this:
Function CurrentDateOnServer () Export
Return CurrentDate ();
EndFunction
Thus, we get the date on the server, if in the properties common module the "Server" checkbox is checked, I only checked it.
It turns out that the current code cuts off users for two hours, but usually after midnight no one logs into the database.
If this article helped someone I will be very glad.
To carry out routine maintenance in the 1C: Enterprise 8 information base, it is often necessary to obtain monopoly access to the database. For example, to perform a database backup or perform routine maintenance on the DBMS server (reindexing, etc.), you must disconnect all active sessions.
Let's consider a simple way to disconnect users from the infobase using the standard functionality of the 1C: Enterprise server.
Standard functionality
I'll make a reservation right away that we will talk about the client-server version of 1C: Enterprise 8. To disconnect sessions, go to the server administration console. There we will find the required infobase in the list:

Going to the IB properties, set the "Session start blocking enabled" option. In this case, it may be necessary to enter a username / password account infobase administrator.

Remember to set the session lockout period. You should also provide that for the duration of blocking sessions, you need to stop all background jobs... This is done with the option "Blocking of scheduled tasks is enabled".
If necessary, you can set the text of the message to users to whom they will be notified 5 minutes before the session is blocked, as well as the permission code for entering the infobase during the session blocking period.
The authorization code can be used to enter the infobase to perform routine maintenance while other sessions are inactive. You need to enter the permission code when connecting to the database using the parameters. For example, this is how the parameter passed to the server will look like if the permission code is "123456".

Having entered the database in this way, we will get monopoly access to the information base. Other sessions will not be able to join us.
The notification to the user about blocking sessions looks like this (depending on the message entered by the administrator). It appears every minute 5 minutes before the blocking period.
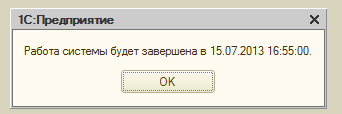
At the beginning of the session blocking period, a notification appears first:
After the session ends.

You can also disconnect active sessions by removing them from the list of active sessions. This action is sometimes necessary to end hung sessions.

In practice, it is best to report disconnected users in advance to reduce the risk of losing data entered by users but not yet saved.
At backup of infobases, the work of users with the infobase must be terminated.
"End the work of 1C: Enterprise users"
Set the flag if you need to shutdown users with the database before archiving.
Possible user shutdown options:
- "End sessions on the 1C: Enterprise server"
Option to disconnect users by forcibly disconnecting sessions on the 1C: Enterprise server. Available only for 1C: Enterprise client-server databases.
Important: do not confuse given user with the user of the 1C: Enterprise database and the user "central server administrator".
In the 1C: Enterprise server console, cluster administrators are located in the following path: "Console Root" - "1C: Enterprise 8.3 Central Servers" - "(*) Computer name" - "Clusters" - "Local cluster" - "Administrators".

"Cluster Administrator Name:"
The username is "cluster administrator".
"Cluster administrator password:"
The password for the "cluster administrator" user.
"A non-standard server agent port is being used"
Set this flag if the port of connection to the "Agent" of the server is different from the standard one.
"Port:"
Port of connection to the agent of the 1C: Enterprise server. The default is 1540.
To determine the port of the server agent, go to Server 1C by right-clicking on the computer name from the drop-down menu, select "Properties" - "Parameters of the central server 1C: Enterprise" - "IP port:".

- "Force users to shutdown"
Option to disconnect users by calling the user shutdown mechanism built into typical configurations. This mechanism is based on the "Blocking the establishment of infobase connections" procedure.

The execution algorithm is as follows:
- Start shutting down users.
- Start task execution (archiving, testing and patching, etc.).
- Start user work permissions.
"Moment:"
The moment the users shut down.
- "Finish work before completing the task"... Before each task execution, the user shutdown procedure will be launched.
- "Exit only if you need to update the configuration"... If the task is configured to perform exchange for the peripheral base and the changed configuration is received from the central site, the user shutdown procedure will start. Otherwise, the completion mechanism will not work.

 Packaging and delivery set
 Comparison of cameras Xperia XA Ultra and Xperia X
 As easy as pie: how to speed up your Galaxy smartphones?