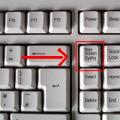
Mac hotkeys. What to do if the keyboard does not work on iMac? apple virtual keyboard for xp
One of the most important and first problems that every user faces when switching from a PC to a Mac has become the Russian layout in OS X, which is often puzzling due to its specific location and way of opening certain letters and symbols.
In contact with
In total, there are three Russian layouts in OS X: "Russian", "Russian-PC" and "Russian-phonetic". The extreme option can be immediately discarded due to the complete mismatch of virtual characters and physical keys. In the "Russian" layout, all keys are the same as the physical keys, but the main problem is that the comma and period are typed " ⇧Shift+ 6 " and " ⇧Shift + 7 ". Another thing is the “Russian-PC” layout, in which the dot is placed by pressing the button to the left of the right shift, and the comma is placed by their combination. But in this case, the entire top row of hot keys, pressed by the combination " ⇧Shift+", which simply ceases to match the image on the physical buttons. And the letter "e" is no longer a separate key, but a combination of a long hold of "e" followed by pressing one. Suffering will last forever until Ukelele and direct user hands who want to get comfortable when typing in the Russian layout take over.
Ukelele is free software distributed outside of the Mac App Store. The only drawback is the lack of Russian localization.
With the help of the utility, we will create a symbiosis of "Russian" and "Russian-PC" layouts, in which both the hot keys of the number row and all other letters will be in place, and a comma with a dot will be put in a simple and convenient combination.
Download the program and install.
How to create the perfect layout in Russian?

After starting the program, an empty virtual keyboard will appear in front of us. Don't worry, you don't have to fill everything in manually. First you need to select an existing template. For our case, the “Russian” layout is ideal.
 Switch to it, and then in Ukelele press File -> New From Current Input Source.
 Since in the Russian keyboard there is a slash " /
" (not to be confused with the backslash " \
") is practically not used, then assign instead point, for what:
Since in the Russian keyboard there is a slash " /
" (not to be confused with the backslash " \
") is practically not used, then assign instead point, for what:
1
. Double-click the left mouse button on the " /
«.
2
. Enter a dot symbol and press OK.
 comma assign to the same button, but it will be launched by the combination " ⇧Shift +
«:
comma assign to the same button, but it will be launched by the combination " ⇧Shift +
«:
1
. Hold down the key ⇧Shift and double-click the left mouse button on the " ?
»
2
. Enter a comma symbol and press OK.
 At the moment, we have an almost perfect Russian layout, but without the symbols " /
" and " ?
". We put them instead of the combination " ⇧Shift + 6
" and " ⇧Shift + 7
" (because we already have a dot and a comma, and these keys are already free. By the way, the seven is perfectly associated with a question mark), by analogy mentioned above.
At the moment, we have an almost perfect Russian layout, but without the symbols " /
" and " ?
". We put them instead of the combination " ⇧Shift + 6
" and " ⇧Shift + 7
" (because we already have a dot and a comma, and these keys are already free. By the way, the seven is perfectly associated with a question mark), by analogy mentioned above.

2
. Enter an arbitrary name, for example "Russian-PRO" -> FileDialogSave and save to any directory.

3
. Move the resulting file to:
- username/Libraries/Keyboard Layouts to make the layout work only for you;
— /Library/Keyboard Layout to make the layout work for all users on that Mac.
To activate a new layout, you must:
1
. Pass in System Preferences -> Keyboard -> Input Sources.
 2
. Add a new layout by clicking " +
» -> Russian(the new layout will not have a checkbox icon. Instead, there will be a keyboard icon) -> Add.
2
. Add a new layout by clicking " +
» -> Russian(the new layout will not have a checkbox icon. Instead, there will be a keyboard icon) -> Add.
 P.S.:
P.S.:
1. The operating system is likely to slightly change the name of the new layout.
2. In order for the new layout to work in all active programs, you need to restart them.
3. The layout file is an ordinary XML file that can be opened in any text editor (thus, you can correct the layout without Ukelele).
The system described above is only an example and a brief overview of the capabilities of a great tool. You can also create the perfect layout of your choice.
We all have been using the new operating system for a long time. macOS Sierra. Although the update has become unavailable for, Apple feels great on other computers.
It's time to discover some hidden features to get the most out of your new operating system.
1. RAID Assistant

Why is it needed: Appendix disk utility in OS X El Capitan simplified to the limit. The ability to create RAID arrays and combined virtual disks was cut out of the program. Luckily, the developers of macOS Sierra have come to their senses and brought back a useful set of features.
With it, you can use it for the house from old flash drives and not only.
How to turn it on: in the application disk utility in the menu bar select File - Raid Assistant.
2. Keyboard from iOS

Why is it needed: there are little things in the iOS keyboard that are missing on a computer or laptop. iOS has long been able to put a period when double-clicking on Space and capitalize the word after the dot.
Now macOS can do this too, only these features are turned off by default.
How to turn it on: go to Settings - Keyboard - Text and enable options Add a dot with a double space and Capitalize words automatically.
3. Restore tabs in Safari

Why is it needed: standard way to restore tabs by clicking on Command+Z allows you to return a limited number of closed sites. It will be useless if you accidentally close a window with several tabs or completely close the browser.
Another useful keyboard shortcut will come to the rescue, which will restore all the necessary pages or even a tabbed window.
How to turn it on: you don't need to configure anything, just click Command+Shift+T and the browser will open the last closed tabs, completely restore the closed browser window with all pages, or return all tabs when opened, if the display of a blank page on startup is enabled in the settings.
4. Picture in picture anywhere

Why is it needed: Initially, a window with a clip detached from the browser can be placed in one of the corners of the desktop. This location is not always convenient. Often you need to move the picture a little, and the window jumps a different corner instead.
How to turn it on: while dragging the video window, hold down the key command. Now you can place it absolutely anywhere.
5. Improve performance

Why is it needed: If your Mac can't handle the load, there are a couple of default settings that will improve your computer's performance. Options Reduced motion and Reduce transparency got into the desktop operating system from iOS and perform similar functions. The first switch will remove the animation, and the second - the transparency of the elements in the system.
How to turn it on: we pass along the way Settings - Accessibility - Monitor and activate one or both options at the same time.
With these features, using your Mac will become even more convenient. Remember yourself and tell your friends.
The use of keyboard shortcuts allows you to increase the convenience of working in the operating system by reducing the time to perform various operations. Instead of searching the menu for an item that is responsible for any action, you press a few buttons and perform it instantly. In this article, we will talk about the main macOS hotkeys that work in system applications.
The Mac keyboard is different from the standard PC keyboard. It has fewer keys and no function block. The navigation buttons included in it, "Printscreen" and Delete are replaced by combinations. The standard keys that are also present on the PC are shown in green in the screenshot. Red marked specific, available only on the Apple keyboard:
- Option ⌥ . General system modifier. In many menus, pressing this button changes the items, opening additional functionality.
- Command ⌘ . Similar to the Win key. Most keyboard shortcuts on the MacBook require her input.

The screenshot below shows how the OS menu items change when the Option button is pressed. On the left is standard command output, and on the right is extended output.

Finder
In the Apple operating system, Finder performs the same role as File Explorer in Windows. This is a constantly running file manager. Most of the operations performed in it require the use of the Command key and have a rationale in English:
- ⌘ +C (Copy) - create a copy of a file or document on the clipboard;
- ⌘ + V - paste from clipboard;
- ⌘ +X (Excise) – cut the selected object out of the current window. In practice, the Finder performs this operation by default for files. The selected object is immediately transferred to a new window.
- ⌘ +A (All) - select all files in the current window;
- ⌘ +Z (Zero) - return to the original (zero) state. Undoes the last action taken by the user.
- ⌘ +E (Eject) - eject or disable the selected external media;
- ⌘ +T (Tab) – create a new tab in the current window;
- ⌘ + F (Find) - launch the search dialog in Finder;
- ⌘ +I (Inspector) - display the properties of the selected file in a separate window;
- ⌘ +Y - start quick view. Works similar to the spacebar;
- ⌘ +M (Minimize) - allows you to minimize the current window to the Dock;
- ⌘ +O (Open) - open the selected file in the default program.
To save screen space, you can reduce the side menu, leaving only frequently used folders in it, and use keyboard shortcuts to navigate to the rest of the sections. Pressing Option opens access to the system library hidden by default.

Similarly, you can use keyboard shortcuts to change how files are displayed in the Finder window.

The following screenshot shows the Cover Flow preview mode invoked by pressing ⌘4 .

Useful Combinations
Any Macbook, regardless of the version (Air or Pro), uses the same keyboard and operating system. On macOS, there is no separation between home and professional versions. Therefore, keyboard shortcuts will work absolutely identically on any model.
Screen lock
Sleep works well on a Mac. Moving away from the laptop, you can close the lid and, returning, continue working from the same place without worrying about the safety of files. However, sometimes just locking the screen is enough. For example, if you break away from work for a few minutes, but do not want to show it to anyone.
The combination Control + Command + Q gives this opportunity. A lock window is displayed on the monitor, and after a set time, the screen saver will start. The keyboard shortcut Shift + Control + Power allows you to achieve a similar result. In this case, the monitor power is turned off and it goes out, bypassing the screensaver stage. If the specified checkbox is checked in the settings, it will be possible to access the laptop only with a password.

Forced termination of programs
Any program, including a program that has stopped responding, can be force-quitted on a Mac. To do this, in the menu bar, click on the apple logo and select the marked item. As you can see in the screenshot, this operation can also be performed using hotkeys.

Option + Command + Esc brings up a simplified analogue of the task manager. In it we find the program that needs to be completed, and press the marked button.

Often this operation has to be done with the built-in QuickTime video player. After closing the main window, it tends to remain in memory without being displayed in the Dock.
Fine tuning
Setting the sound, key backlight, and screen brightness on an Air or other iMac has sixteen positions between "Min" and "Max" values. Management is carried out by the corresponding function keys of the top row. If you hold down the Shift + Option keys while making an adjustment, then each of the control positions will be divided into four parts.

Thus, you get not 16, but 64 points of adjustment. When the additional buttons are released, the system will first fill in the incomplete division and then automatically return to normal mode.
Screenshots
As we said earlier, Apple computers do not have a separate key for taking screenshots. The following combinations are used for screenshots:
- Command + Shift + 3 . Screenshot of the entire desktop;
- Command + Shift + 4 . Snapshot of the selected area;
- Command + Shift + 4 + Space . Snapshot of the selected window or menu item.
Download Modes
When you start macOS, before the first appearance of the apple logo, you can select the boot mode. These combinations can come in handy not only for reinstallation or troubleshooting:
- Option . Boot volume selection for dual OS systems. Thus, you can choose between macOS and Windows installed on the BootCamp partition;
- T. Starting the system in external volume mode. If you connect a problematic Mac to a working Mac, you can boot from its hard drive and perform initial diagnostics;
- Shift. Starts the OS in safe mode;
- Command + R Recovery from hard drive;
- Option+Command+R . Internet recovery mode. Reinstall or restore macOS from Apple servers.
Shutdown
In normal mode, the MacBook can be turned off or restarted using the system menu. To do this, it contains all the options available to the user.

For these purposes, you can also use various combinations:
- Control + Power . Calls the shutdown menu in a separate window;

- Control +Command +Power . An analogue of the "three-finger combination" for Windows. Causes a forced reboot;
- Option + Command + Power . Switching to sleep mode without closing the lid;
- Shift + Command + Q . Ending a user session with a warning;

- Shift + Option + Command + Q . User logout without warning. When you next log in, previously opened windows are automatically restored.
Keyboard settings
In the Sierra version, Apple has changed the language switching combination familiar to many Mac users. Instead of Command in combination with a space, the Control key began to be used. Many users first change this setting to a familiar and convenient one.
- Open System Preferences and select the marked item.

- Go to the "Keyboard Shortcuts" section. In the navigation area, select the item of interest to us. In the right part of the window, the given and possible, but not preset, combinations will open. For example, Launchpad can be called from the keyboard, but there is no default shortcut for it. Mark it with a tick and open the edit box. We enter a combination that is convenient for ourselves.

- If desired, hotkeys can be set independently. For example, in the Finder there is a "Compress" item, which does not have its own combination. If the need for archiving arises constantly, then it can be created. Switch to the marked section. Using the "+" button, we call up an additional menu. We choose the program. Enter the exact name of the item and set the desired combination.

- The result of the performed manipulations is visible immediately, a reboot is not required. Using a given combination, you can quickly create archives.

- In the first section of the keyboard settings, you can set how the top row of function keys is used. By default, they are used to quickly access system settings such as media or backlight control. Their traditional role is activated by pressing the Fn key in the lower left corner. In some graphic editors, these buttons are used quite actively. In order not to use a combination of two keys every time, you can return them to their direct assignment. To do this, put a tick in the place indicated by the arrow. Now, to add volume, you need to use not F12, but Fn + F12.

- Here, lovers of experiments can independently reassign the role of modifier keys. Pressing the marked button will bring up an additional menu. Using drop-down lists, you can set new values. For example, swap Command and Control .

Finally
Using various keyboard shortcuts is a matter of habit. If this is not directly necessary, then they can be perfectly dispensed with. The convenience of macOS is that they are listed in the menu of each program and, if desired, are easily remembered.
Video instruction
If this topic interests you, the overview video below will help you learn more about how hotkeys work and find the most useful ones.
iMac computer - a monoblock, ready to work immediately after purchase. The device also comes with a wireless keyboard and mouse. Of course, the user can use any other input device, but it is the original keyboard included in the package that can realize the full potential of the iMac operating system.
During the operation of the input device, the user may experience difficulties. The reasons for the inoperability of the panel are not only due to failures in the operation of the OS, but also due to hardware failures. So in the event of a breakdown of the motherboard or Bluetooth module, the device may need a “complex” repair.
iMac does not see the keyboard
If the monoblock has stopped seeing the panel, pay attention to the signal level. If the battery (or batteries) is dead, the LED flashes. This is a low battery signal. Charge the battery or replace the batteries with working ones. And check if the wireless device works.
Check that the panel is enabled. The Magic Keyboard has a switch on the back wall, slide it to the "on" position. The backlight will turn on. For Wireless Keyboard on the right panel, press the "power" button. The green indicator will light up, but not for long.
If the keyboard still does not work, make sure that the pair is created between the desired panel and the all-in-one. The computer may have paired with another Magic Keyboard. To switch and configure another pair, go to the system settings. Click on the "Keyboard" section, in the window that opens, click on the "Bluetooth Keyboard" option. When the LED flashes twice with a break per second, it means that the panel is ready to pair. After the keyboard is detected by the system, configure it.
To test the connection, press the Caps Lock button. When pressed, the corresponding LED will light up on the connected panel. Check the functionality of other buttons. Open a text editor or notes app and type freely.
Check your Bluetooth wireless connection . The panel works via Bluetooth. , so disabling the communication module may interrupt the keyboard display. To exclude this possibility, go to the Bluetooth settings window . If the input panel is displayed in the list, then it is connected.

keyboard not working
If the keyboard has been dropped, has reached the end of its useful life, or if you have spilled something on the panel buttons, it is best to contact an authorized service center for repair immediately. But if there were no visible reasons for the breakdown, and the keyboard does not work, try the following to fix the inoperability. If you do not use your native OS on your computer, but Windows, then the keyboard may work with a delay after waking up the PC. This situation is common with wireless devices.
If you press a button and the PC wakes up, but then stops responding to the keys, restart your iMac. Or wait a little while the panel starts to work. An alternative when entering a password to log in is to use the on-screen keyboard. This function is located at the bottom of the display on the left and you need to look for it in the "accessibility" section.
To exclude the failure of the Bluetooth module, you need to connect another wireless panel. If it works, the problem is not Bluetooth. . When the panel is no longer detected by the PC after a system crash or a new OS installation, the output is to connect a wired keyboard via the USB connector.
How to switch the language on the keyboard?
To switch, open the apple menu and go to system settings. Open the "Keyboard" section. Click on the "Input Sources" option ". Press the "+" key to specify an additional language. In the list, check the boxes at the beginning of the languages to add. Then check the box at the bottom of the page at the beginning of "Show input menu on panel menu".
The menu bar will now display another icon, in the form of a flag. To change the language, click on the flag and change the language. For a similar action from the keyboard, use a set of keys. The combination "Cmd" + "space" returns to the previous input language. Combination "Cmd" + "space" + "Opt" replaces the language with the next one in the list.
If these combinations move the user to the search box via Spotlight, go back to the "Input Sources" subsection ". It is located in the "Language and Text" section. ". Click on the "hotkeys" button, then click on the "Spotlight Search" option. ". Remove the checkbox, then select "Keyboard and input text ". In this section, check the boxes next to "Select previous input source" and "Select next input source ". Now you know how to change the language layout from the keyboard and through the icon on the menu bar.
Keyboard not working in Windows 10 - universal solution! How to enable usb keyboard and mouse in bios Bluetooth wireless keyboard
Sometimes, for work or study, we need specific characters that are not found in the official Russian or English layout - an arrow, a mathematical root, a currency symbol, letters and hieroglyphs of other alphabets, etc. In this article, we'll show you where to find them on a Mac computer.
In contact with
Something, by the way, can be done with keyboard shortcuts. For example, in the English layout, pressing Option (Alt) + Z will give you a letter Ω ("omega", the last letter of the Greek alphabet). To access all special characters, do the following:
How to quickly invoke special characters (emoji, icons) on Mac (macOS)
1 . your Mac and select a partition Keyboard.
2 . Check the box next to Show Keyboard and Symbols panels in the menu bar.

3 . In the status menu, click on the small flag (Russian, American). There will be two new lines - Show Keyboard Panel and Show Symbols panel.

Keyboard panel
By clicking on this inscription, a virtual keyboard is displayed. Press any of the "optional" keys - and be surprised at how many special characters you can type on it! The usual Russian layout is shown below, and then it is the same, but taking into account the key pressed Option (Alt).


You can hold down several optional keys at once. For example, here are additional options for the English keyboard obtained using the combination Option (Alt) +⇧Shift:

It is enough to press a button on the virtual keyboard, and the desired special character will immediately appear in your text editor.
The disadvantage of this panel is that it only shows the characters that can be typed on the keyboard layouts you have chosen. In reality, there are many more of them (symbols), so it's time to move on to the next section.
Symbols panel

All Unicode special characters are collected here. Initially, ten items are displayed in the panel - Arrows, Parentheses, Punctuation, Currency Symbols(including the ruble icon), Pictograms, Icons/Stars, Math Symbols, Letter Symbols, Emoji and Latin. Various font options are available, and similar characters are displayed. Special characters used at least once fall into the section Used. You can also add new collections - to do this, click on the "gear" in the upper left corner of the window and select Customize list... There are many options here, from the aviation alphabet to ancient writing systems and code tables.
 How to take a screenshot on different devices
 Wrong MMI code or wrong connection - problem solution
 Internet Explorer update