How to replace thermal paste: a simple guide that will extend the life of your PC. How to change thermal paste on a computer and laptop Where does thermal paste change in a computer
Content
Caring for a computer / laptop is an important procedure that needs to be paid close attention. This is especially true for cooling the processor - one of the main elements of the PC. The fight against high temperatures involves the systematic replacement of thermal paste - a substance that does not allow key parts of the computer hardware to overheat.
Why do I need thermal paste on the processor
A viscous liquid called thermal paste must be applied to the processor before the heatsink is installed on it. Many are mistaken that the mass is needed to quickly cool the microcircuit: in fact, it serves one purpose - rapid heat conduction from the chip to the cooler, which removes hot air. This process is very important for a computer or laptop, because otherwise the processor (main or video card) may simply burn out. Then a replacement is required, and this PC part is not cheap.
Replacing the thermal paste on the processor is desirable every time you clean the laptop, and the operation itself requires the highest accuracy and care. Improper application of a substance can harm the computer and ultimately lead to the purchase of important parts. One tube should be enough for several routine care procedures. It is desirable to change the heat-conducting mass immediately both on the motherboard and on the video card, since disassembling and assembling a computer is not such a simple matter.
What thermal paste to choose for the processor
With the advent of a large number of equipment on the market that requires constant monitoring of thermal conductivity, more and more manufacturers offer their own thermal pastes for purchase. The choice is really wide, but you should pay attention to the quality of the product. In household appliances stores, you can find both domestic companies and foreign ones specializing in pastes. The most famous lubricant on the Russian market is KPT-8, which, although it has an impressive age (and it was invented back in the USSR), is distinguished by its high performance and flattering user reviews.
Alsil from GM-Inform can be attributed to domestic thermal pastes that stand out among the rest. The main elements of this product are aluminum nitride and high quality silicone (for viscosity). I would also like to note the choice of manufacturers such as Titan Silver Grease, Zalman, Gelid GC-Extreme and Noctua NT - these foreign liquids for cooling in syringes have passed all quality tests and easily cope with all tasks. The price of all these products is low, so everyone can afford such heat protection for a computer.

cpu thermal paste price
If you suddenly urgently need thermal paste for the processor, then you should know that it is inexpensive - from 200 to 500 rubles. Agree, this is not a very high price for such a useful and effective little thing. The product can be easily ordered/purchased in an online store (ordered with delivery in Moscow and other parts of Russia) or purchased at retail points of sale (supermarkets of household appliances).
Below is a comparison table of top lubricants with a difference in thermal conductivity coefficients and prices. All of them show excellent efficiency results as coolants. The choice of one or another mass depends solely on the buyer. Those people who figured out how to properly apply thermal paste to the processor and performed all the steps correctly will not notice much difference in the operation of the system cooling.
|
thermal paste for cpu |
Coefficient of thermal conductivity |
Cost (rubles) |
|
Titan Silver Grease |
||
|
Zalman ZM-STG1/2 |
11 | |
|
Gelid GC-Extreme |
||
|
Asus Thermal Extremely |
How to apply thermal paste to the processor
The process of removing old and applying new grease on the main parts of a laptop or PC is laborious and painstaking. Before you replace the thermal paste on the processor, you need to do a number of certain sequential preparatory manipulations. For example, remove the cover of a laptop without damaging the insides, and clean the entire work area from dust (you can use a vacuum cleaner). How to properly apply thermal paste to the processor:
- After cleaning the surface of the laptop from dust and debris, use a screwdriver to disconnect the heatsink from the processor.
- Use a cotton swab dipped in alcohol to remove the layer of previous thermal paste from the chip.
- When changing thermal paste, make sure that the new layer is thin and spread over the entire surface of the processor.
- Take the tube with one hand, squeeze a small amount of mass (several grams) directly onto the chip, spread over the entire area using any plastic card or other device.
- Try not to stain the surface of the motherboard with the heat-conducting mass, do not touch the contacts.
- After the procedure, not allowing the working material to dry, “put” the radiator back, pressing the paste tightly between it and the chip.
- Do this procedure with the processor of the video card.
- Do not forget to carefully fasten all the screws, while not violating the integrity of the computer hardware.

We install, then “Computer”, “Sensor” and clearly see the temperature of all the “iron”, which is subject to heating. The picture shows “non-critical” temperatures, but a week ago it was different. 
I will tell you one case about my home PC (the screen of which you see) and how the Aida 64 Extreme Edition program helped me. Somehow I felt like changing the thermal paste at the same time, after all the operations I had done, I was happy to put the whole system back together, screwed on the side covers and sat down at my “machine” ... I immediately wanted to check the result of my work and launched AIDA when I saw the CPU temperature - 90 degrees, it became ill, this is with an almost “complete idle time” of the system. Naturally, I removed the cover of the PC case and saw my jamb (it’s not called otherwise) the cooler on the processor was turned off (and the settings in the BIOS for overheating the “stone” were not there). This is how AIDA saved me from going to the store.
We digress, let's continue ... For all the gestures I did, I needed: a clean rag, alcohol, a vacuum cleaner without nozzles, a brush for paints, thermal paste, see the picture (1.5 gram Syringe is enough for you three times for sure) and some tools.


Replacing thermal paste on a video card
Let's start with the video card, release it, unscrew the bolt and snap off the clip, as shown in the figure.

Soviet, because the bolts are small and there will be a lot of them, take any box (you can from matches). We will put the bolts in the box, then it’s easier to find, because something is always lost, rolled up, rolled away or vacuumed . Another important point, I wrote about a brush and a vacuum cleaner, so be sure to clean all the details of the computer with a brush (because the dust was coked there and it needs to be "disturbed"). Then, carefully without touching the hardware, remove all the dirt with a vacuum cleaner. No thermal paste will help if the cooling system (grids, coolers) is clogged with dust.
We take a video card and unscrew the four bolts that hold the cooling system (in different models in different ways) and turn off the cooler (see pictures). I turned off the cooler with wire cutters, very carefully, slightly swaying, we pull it towards ourselves. We remove the cooling, also carefully, without any sudden movements - horizontally to the board, swinging.


We removed the cooling of the video card and what do we see?! Dry, gray mass - this is the old thermal paste, it must be completely removed. We need a solvent (in our case, alcohol), a plastic card and a rag. Because with a grille it’s easier (it’s hard to damage it, unlike a processor and chipsets), just take a plastic card and clean off all the remnants of thermal paste (very carefully), wipe the surface of the grille with a rag moistened with alcohol and let it dry for a couple of minutes. See pictures.


Now the processor of the video card itself (very carefully, without haste).
We remove the old thermal paste (in no case do not scratch the surface of the "stone"), at the beginning I blotted the old thermal paste with an alcoholized cotton swab, and then carefully wiped the video adapter processor with a cloth (you can also remove it with an eraser - the main result).
Next, we apply the thermal paste on the processor, with a thin layer of neatly 1-2 mm so that it does not protrude beyond the edges, because under the influence of heat, the thermal paste will spread over the entire surface (this is where the oil can ruin the porridge;). In this case, I used a cheap thermal paste "KPT - 8" tube of 125 grams (I do not advise saving on thermal paste like I do - it's better to buy a 1.5 gram syringe - about 250 rubles). For applying and spreading over the surface of the "stone" I used a plastic card, applied thermal paste to the edge of the card and carefully smeared it evenly.

That's it, you can assemble the video card back, I advise you to screw the bolts with a "cross" and do not forget to connect the cooler back!!! Put aside.


Replacing thermal paste on the processor
The queue approached the "heart of the computer" (the main processor). We turn off all power from the motherboard, turn off the processor cooler, system coolers (if any), front panel button connectors, SATA connectors, front panel usb devices (card readers and additional usb outputs) and front panel audio outputs.

We unscrew the processor cooler (4 bolts - we put it in the box), release the grill that stands under the cooler (if necessary, we must remove the dust) and carefully swaying horizontally relative to the motherboard, remove the grill. In no case do not pull it sharply - this way you can damage the "legs" of the processor (bend or, worse, break off). As with the video card, remove the old thermal paste from the grate.


We clean without removing the surface of the processor and remove the dust that has accumulated under the "stone" cooling system. The computer on which I do this procedure and photograph in operation for 1.5 years - think about what's going on with you :).

This is what the processor should look like after cleaning.

We take thermal paste, apply it to the surface of the processor, snap the grille back, fasten the cooler and immediately connect it to the power supply to the mat. fee (so as not to forget later).


We figured out the processor, exhaled. :)
Now let's deal with the South Bridge (highlighted in the figure with a red rectangle), try not to leave your attention and accuracy. Completely along the perimeter of the motherboard, we unscrew with a Phillips screwdriver all the bolts that hold it, about 8 pieces. We take out the motherboard, turn it over and see that the radiator grill is held by two plastic fasteners. On the reverse side, we press on the fastener with a finger (there are springs there), so that it crawls out on you and with pliers we squeeze the "burrs" of this latch. Thus, we alternately squeeze out two fasteners onto the front side of the motherboard, slightly shaking the grille - remove it.

As I noticed that the "native" thermal grease on bridges is similar in properties to resin and it is very difficult to remove it, but we have nowhere to retreat ... I took a thin flat screwdriver (at my own peril and risk) and with very gentle, filigree movements removed all basis of thermal paste from the grid and chip. Then he degreased it with an alcoholized cloth and removed the residue. I repeat, you choose the tool as it is more convenient for you, it can be a plastic card, an eraser, a wooden ruler, etc. The main thing is not to damage anything mechanically.


Here's what happened. Let dry for a couple of minutes.
Here I didn’t save money and took a good expensive thermal paste, the drawings are given at the beginning of the article, carefully squeezed the contents out of the syringe onto the chip and dipped it with the tip of the same syringe, spreading the thermal paste over the surface. We insert the grate back, squeeze the fasteners one by one onto the back side of the "mother" and use a flat screwdriver to loosen the fasteners (make sure that the fasteners do not fall out back). We assemble everything in the reverse order and remember the order in which all devices are connected. You can run AIDU and see the result of the work done - the temperature.
Yes, and at the end of the article, I remember how I bought a new computer (about 5 years ago) and a year later got under the processor ... what a surprise I was that the guys who assembled the PC for me in the computer room did not even bother to drip thermal paste.
Moral: Hope for the service, but do not make a mistake yourself :) Good luck to everyone !!!
Poor quality or dried out thermal paste is one of the causes of overheating of the processor. If, after cleaning the cooling system from dust with a normally operating fan, the operating temperature of the processor, even in idle mode, exceeds 45 o C, it is recommended to replace the thermal paste.
What is thermal paste for?
Thermal paste is a viscous substance with good thermal conductivity. It is designed to improve heat dissipation from the housing of the heated components to the cooling radiator. Thermal paste is sold in tubes and syringes. The average cost is from 150 to 1000 rubles depending on weight and brand.
When choosing a thermal paste, you should pay attention to such characteristics as thermal conductivity, temperature stability, the presence of a non-drying base, dielectric properties and toxicity. There is a large selection of imported thermal pastes on the market: Arctic Cooling, Zalman, deepcool. Inexpensive domestic brands remain popular KPT-8, NS-125 and Alsil.
How to change the thermal paste on the processor

Before replacing the thermal paste, you must disconnect all cables from the system unit. Then you should remove the side cover of the PC case to gain access to the processor cooling system. To remove static electricity from your hands, just touch the metal parts of the system unit.
The standard Intel processor cooler has four fastening legs with slots for a screwdriver. To remove it, you need to turn each leg half a turn counterclockwise.

You can unlock the AMD CPU box cooler by turning the knob on the heatsink.
After removing the cooler, you can start replacing the thermal paste. Before applying new thermal paste, you must carefully remove the remnants of the old paste from the processor and heatsink with a napkin. If the paste is dry, you can soften it by lightly soaking a cloth in ArctiClean cleaning fluid or alcohol.
Apply thermal paste to the processor case evenly thin, ideally about 0.2 mm, layer. You can use a flat plastic object, such as a plastic card, to spread the thermal paste layer evenly.

After the paste is applied, we install the cooler in place, connect the necessary cables to the system unit, turn on the computer and check the processor temperature in idle state and under maximum load.
How often do you need to change the thermal paste on the processor
The frequency of replacing thermal paste depends on several factors - the intensity of operation of the computer, the efficiency of the cooling system, the quality of the thermal paste. Experts recommend replacing thermal paste every six months for preventive purposes. In practice, this period may be longer. If there are no special problems in the operation of the PC, it is enough to check the temperature of the processor and at the same time the temperature of the video adapter at maximum load in stress tests once a month. When the temperature exceeds the allowable values, the thermal paste will need to be replaced.
Hi all! Today we will talk about one little thing that occurs to each user every 4-5 years - this is remopasta replacement. Recently, one of my readers asked me - how to change the thermal paste on a computer? This article will be the answer.
When we work on a computer, the processor releases a large amount of heat. As a result, the computer overheats. To prevent this from happening, there is a cooling system - a radiator with a cooler. But there is free space between the processor and the heatsink, and because of this, the process of direct heat transfer into space is difficult. To facilitate the removal of heat into the air, thermal paste is applied.
Thermal paste fills these void spaces and improves heat transfer. As a result, cooling is faster and more efficient. Still, over time, thermal paste ages, loses its qualities and dries out. Many (most of all beginners) are intimidated by this step, but with the help of the following instructions, you will be able to replace the thermal paste yourself.
When and how often should the thermal paste be changed?
The answer to this question can be given in different ways. Some replace it only once a year, some - every four years. However, we can affirmatively say: “If the processor works without any errors and the temperature is normal, then it’s better not to go there.” Thanks to the Everest and AIDA64 programs, we can find out the temperature of the processor. If the processor temperature does not reach 60 degrees, this is the norm, and if it exceeds 70 degrees, it is dangerous. And if other problems appear, for example, the computer began to turn off or freeze for no reason, then you need to clean the processor from dust or try the recommendations below.
The choice of thermal paste
In order not to be at a loss in the diversity of the assortment, it is better to ask friends and acquaintances for advice on what thermal pastes they use. Most users prefer KPT-8 thermal paste in terms of price and quality.
Replacing thermal paste on a PC processor
First unplug the computer from the outlet, open the left cover and lay it on its side in a comfortable position. Unplug the cooler from the main board.

The processor is now available for applying thermal paste. But before applying the thermal paste, you need to remove the old thermal paste residue. Residues can be removed with the special tool ArctiClean. In turn, you can use alcohol. Many use vodka. Just a few drops and wipe it (with a cloth or brush). Repeat the procedure on the outside of the processor and on the bottom of the heatsink.
Now you can apply thermal paste.
Press a small bead of thermal paste onto the center of the processor.

The drop size should not exceed the size of a grain of rice, since the function of the thermal paste is only to fill the free space formed as a result of an uneven surface between the cooler and the processor. How it looks like is shown in the figure below:

Spread some fresh thermal paste gently. Strive to smear it with a thin layer over the entire surface. It is best to use a plastic card. It is important to follow the thermal paste so that it does not flow over the edges, and if this happens, wipe off the excess.
There is no need to apply thermal paste to the heatsink. After applying, install the cooler back and do not forget to connect its power to the main board. Close the lid, plug in the power, and turn on the computer.
Applying thermal paste on a laptop processor
The procedure for replacing thermal paste is exactly the same as for a desktop computer. The main thing is that you have experience in the field of dismantling or instructions for disassembling a laptop of your model.


As with the process with a computer, we clean the processor from the old thermal paste and apply a new layer of thermal paste.

Then we collect everything back and turn on the laptop.
That's all. As we see change laptop thermal paste or PC can even a beginner.
If the computer works fine and does not reboot on its own, and the processor temperature after checking is normal, it follows that you did everything right. And if the temperature is critical, then you applied a large layer of thermal paste and then the heat transfer was disturbed. then you already know the solution to this problem.
Do you have any questions? - We will answer them for FREE
Do you want to learn how to consistently earn on the Internet from 500 rubles a day?
Download my free book
=>>
To prevent such important components of a computer or laptop as a video card and processor from overheating and burning out, thermal paste is used.
Since the processor does not have a completely flat surface, a small amount of air space is formed between them and the fan.
As you know, air is a poor conductor of heat, and both parts tend to heat up during PC operation. Therefore, to fill the available space, a heat-removing paste is used, which must be changed approximately every 1-2 years.
How to change the thermal paste on the processor, instructions
But, as a rule, this is only done when the PC starts to overheat badly. In this case, while cleaning a computer or laptop, the thermal paste is also replaced.
However, it is worth remembering that the change of heat-removing paste should be carried out after each removal, in other words, the fan from the processor. The fan is not placed on the old thermal paste.
You can do this yourself, or by contacting specialists at the service center. It all depends solely on your capabilities, as well as on whether your PC or laptop is under warranty.
Since if you decide to change the heat-removing paste yourself, then you will damage the integrity of the factory seals. And this, in turn, makes it impossible for you to return or exchange a low-quality product in case of a serious breakdown.
Also, the replacement of thermal paste requires accuracy and care, since its incorrect application can lead to damage to the video card or processor, with the subsequent replacement of these parts.
This article will discuss how to properly replace the thermal paste yourself, as well as what is required for this.
Choosing a material
When you personally change the heat-removing paste in a computer or laptop, you may be faced with such a question, which one is best to buy and how long it will last.
The first thing I want to say in this case is that you should buy only high-quality goods. Since a lot depends on the quality of thermal paste, including the frequency of its change due to drying.
Among the heat-removing pastes of domestic production, KTP-8 is the most popular.
The following thermal pastes are also a good option:
- Arctic Cooling MX-3.
- AlSil-3.
- Titan Silver Grease.
- Zalman ZM-STG1/2.
- Gelbit GC-Extreme.
- Noctua NT.
- Asus Thermal Extreme.
Similar material can be purchased at specialized computer stores or supermarkets that sell household appliances.
Also, heat-removing paste can be purchased in the online store. One tube is enough for a long period of use, the main thing is to keep track of its expiration date.

Preparatory work
Faced with the question of how to change the thermal paste on the processor, after acquiring a heat sink material, you can get to work.
Keep in mind that the process of replacing thermal paste is quite painstaking and before moving on to solving the main issue, you will need to do several important preparatory work:
- First, determine whether it is necessary to change the heat dissipation paste at all using the Speccy application. This program will allow you to determine to what temperature the processor heats up during the operation of a PC or laptop, and then you can compare the indicators with the allowable rate on the website of its manufacturer. By the way, 60 degrees is bad in general for all processors.
- Unplug your computer.
- Clean the surface of your laptop or PC. That is to remove dust and debris.
- Remove the cover from the processor or laptop.
- Find a CPU cooler.
- Disconnect the power supply of the cooler from the motherboard, including the heatsink if necessary. To do this, unscrew all the screws with a Phillips screwdriver or unfasten all the latches (depending on the manufacturer).
- It is necessary to carefully disconnect the cooling system from the processor. Remember the processor is a fragile thing, so if the old thermal paste has not changed for a long time and is very dry, do not try to stick a knife or other objects between the parts. It can only hurt. In this situation, the only correct solution is to rotate the processor in a circle by hand, using a small amount of physical force so as not to damage anything, but at the same time slightly soften the thermal paste to separate the shrunken parts.
Replacing thermal paste

Summing up
As you can see, if you have a question about how to change the thermal paste on the processor, then this is not so difficult. But at the same time, the process itself requires care.
Also, I would like to note that it is not recommended to use cotton buds to apply a heat-removing material, since the remaining fibers will have a bad effect on thermal conductivity.
In addition, since there are various models of sockets for installing a processor on a motherboard (sockets), in some cases it is better to take your PC or laptop to a service center.
This applies to sockets that are installed at the beginning of the build. In this case, to install it back, you will need to pull out the motherboard.
Which in turn means disconnecting it from the power supply and removing all connectors coming from the buttons and ports on the PC case.
P.S. I am attaching a screenshot of my earnings in affiliate programs. And I remind you that everyone can earn money in this way, even a beginner! The main thing is to do it correctly, which means to learn from those who are already earning money, that is, from Internet business professionals.
Check out the list of verified 2018 Affiliate Programs that pay money!
Download the checklist and valuable bonuses for free
=>> "Best Affiliates of 2018"


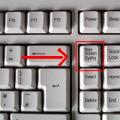 How to take a screenshot on different devices
 Wrong MMI code or wrong connection - problem solution
 Internet Explorer update