Windows 7 automatic wifi connection. How to prevent a laptop from automatically connecting to a Wi-Fi network
That's bad luck - many users, having updated their iPhone or iPad, noticed that Wi-Fi can no longer be turned off through the control center. That is, by pressing the Wi-Fi switch, the video user turned white (the Wi-Fi icon), but did not turn off completely.
This is how it happens:
that is, even by forcibly turning off Wi-Fi, we see that the system allows you to turn it off only until tomorrow, and then turn it on itself. What is this impudence?
That's what Apple wants
Without Wi-Fi or mobile internet, a modern smartphone is a lifeless toy. Thus, the iPhone cannot update services, receive notifications, use system applications at the discretion of Apple's developers, and collect the necessary information for the manufacturer.
That is why it is very beneficial for smartphone companies to keep their product connected to the Internet for as long as possible. Apple decided to do it brazenly and radically, tritely forbidding turning off Wi-Fi through the control center.
For the user, this is bad, since the included wireless networks increase battery consumption, and they can simply create inconvenience, for example, receiving notifications from social networks and other instant messengers.
How to disable Wi-Fi completely
Now you can turn off Wi-Fi completely in iOS 11 only through the settings. It's simple - go to the main settings of the iPhone or iPad,
Find the Wi-Fi item and turn it off.
The quickest way to get to this menu is to use 3D Touch on the settings icon on the iPhone's home screen. In principle, there is nothing complicated about this, just now Wi-Fi turns off a little differently.
Watch right away:
Now WiFi networks are becoming more and more popular. Just as in the recent past, wireless telephone communications replaced wired communications, and now wireless networks are beginning to replace wired ones. I already wrote on my blog how to automatically connect to the Internet via VPN / PPPoE in Windows 7. However, in the case of a wireless network connection, this method does not work. By default, Windows 7 does not have a mechanism for automatically connecting to WiFi networks, and doing it manually every time is tiring, especially if you need to constantly connect several computers. Let's fix this shortcoming.
Any WiFi network is a computer that creates it, and several computers that connect to it. Sometimes a router is used as a computer that creates a network. Creating a wireless network is easy, but you have to manually connect to it each time. This process can be automated. Setting up automatic connection to it at the start of Windows 7 consists of two parts.
Adding a computer to a wireless network
First you need to copy the wireless network settings to a USB flash drive. To do this, on the computer creating the network, in the list of wireless networks available from the tray, right-click on the network, and open its properties.
In properties, go to the tab Connection and click on the link Copy this network profile to a USB flash drive.

The system will ask you to insert a flash drive.

For a long time I could not understand why my Next button was unavailable all the time, although the flash drive was perfectly mounted in the system. However, then I realized that the flash drive should be formatted in FAT, and not in NTFS (as I usually do). The fact is that this flash drive should subsequently be universal, that is, mounted in Windows XP, Windows Vista and Windows 7. If it is formatted in NTFS, then in Windows XP you won’t see it without shamanic dances with a tambourine, and Microsoft does not like such witchcraft . So remember - flash drive must be formatted in FAT. As soon as I changed the file system to FAT, the system prompted me to continue the operation.

Copying a network profile requires administrator rights. This procedure takes about a second.

Now, using this flash drive, you can automatically connect computers to a wireless network, even if it is encrypted and with a password. We insert this USB flash drive into the computer from which we want to enter the wireless network. If autorun of external media works for you, then you will see the corresponding menu item in the window that appears.

If autorun is disabled, then you need to open the root folder of the flash drive and run the file.

The system will notify you that the computer has been successfully added to the network. Now, when connecting to a wireless network, you will not need to enter a password every time.

Automatic connection to a wireless network

In this folder, right-click and create a shortcut.

In the line indicating the location of the object, paste the command with parameters:
C:\Windows\System32\netsh.exe wlan connect name=Network name without quotes

Give the label a name and click the button Ready.

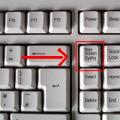
That's it, the computer has been added to the network, the auto-connect shortcut has been created. It remains to reboot and check if it works - immediately after loading Windows and logging into your account, a console window will appear for a split second, in which the command indicated in the shortcut is executed. No matter how much I tried to take a screenshot of it, each time I failed - this window appeared and disappeared so quickly.
As a result, the computer will automatically enter the wireless network to which it is connected by default, without passwords and reminders.

Many users in our time have moved from a desktop computer to laptops. And of course, you want to enjoy all the "benefits" of new technologies. So for example, instead of a regular cable to connect to the Internet or a local network, we use a WIFI wireless connection.
Consider a way to optimize our work - staying at the PC. So that when the PC starts, after the welcome screen, there is an automatic connection to the WIFI network, we need to do some simple manipulations.
Create an autoload file
Note!This method applies only to networks without a verification key or for automatically created connections (in which the key is saved in the connection profile).
- Go to the following path: START - All Programs - Startup
- "Startup" right-click select "Open"
- In the window that opens in the workspace, right-click again: Create - Shortcut
- The Create Shortcut Wizard window opens.
- In the line "Specify the location of the object" write:
C:\Windows\System32\netsh.exe wlan connect name=name of your connection - At the end of "name of your connection", enter the correct name of the wireless network connection (for example, Dlink)
- After click next, specify the name of the shortcut, for example WIFI
- Click Done
Instead of an afterword
That's all, you can close the "Startup" folder and restart your computer to check
This method was tested on Windows 7
Stay connected even when you're out of mobile coverage. Simply set up automatic connections to trusted open Wi-Fi networks. Thanks to the Wi-Fi Assistant service, your data will be completely protected.
Wi-Fi Assistant is available:
How to enable or disable Wi-Fi Assistant
I get the message "Your device is running the Wi-Fi Assistant app"
To make connecting to open networks more secure, Wi-Fi Assistant uses a virtual private network (VPN). This prevents other users on the open network from accessing your data. The message "The device is running the Wi-Fi Assistant app" means that the connection was made through a VPN.
In this case, Google monitors system data. However, with a secure connection to the site (via HTTPS), VPN operators (such as Google) cannot record the transmitted data. We use system data sent via VPN for the following purposes.
 How to take a screenshot on different devices
 Wrong MMI code or wrong connection - problem solution
 Internet Explorer update