How to remove windows 7 desktop themes. How to remove third party themes (skin packs) in Windows? What actions to take next after a reboot?
There are situations when an OS service needs to be not only disabled, but completely removed from the computer. For example, this situation may arise if this element is part of some already uninstalled software or malware. Let's figure out how to do the above procedure on a PC running Windows 7.
It should be noted right away that, unlike disabling services, deletion is an irreversible process. Therefore, before carrying out further actions, we recommend creating an OS restore point or a backup copy of it. In addition, you need to clearly understand which element you are deleting and what it is responsible for. Under no circumstances should you eliminate services that are associated with system processes. This will lead to incorrect operation of the PC or complete system crash. In Windows 7, the task posed in this article can be accomplished in two ways: through "Command line" or "Registry Editor".
Determining the service name
But before moving on to the description of the direct removal of the service, you need to find out the system name of this element.
- Click "Start". Go to "Control Panel".
- Come in "System and safety".
- Go to "Administration".
- In the list of objects, open "Services".

Another option is available to run the required tool. Dial Win+R. In the field that appears, enter:
Click "OK".
- The shell is activated "Service Manager". Here in the list you will need to find the element that you are going to delete. To make your search easier, build the list alphabetically by clicking on the column name "Name". Having found the desired name, right-click on it ( RMB). Select an item "Properties".
- In the properties window opposite the parameter "Service name" there will be exactly the service name of this element that you will need to remember or write down for further manipulations. But it’s better to copy it to "Notebook". To do this, select the name and click on the highlighted area RMB. Select from menu "Copy".
- After this, you can close the properties window and "Dispatcher". Next click "Start", click "All programs".
- Go to directory "Standard".
- Find the name "Notebook" and launch the corresponding application by double clicking.
- In the text editor shell that opens, click on the sheet RMB and select "Insert".
- Don't close "Notebook" until you perform a complete removal of the service.


Method 1: "Command Line"
Now let's move on to directly consider ways to remove services. First, let's look at the algorithm for solving this problem by using "Command line".

Method 2: "Registry Editor"
You can also delete the specified element using "Registry Editor".
- Dial Win+R. Enter in the box:
Click "OK".
- Interface "Registry Editor" launched. Move to section "HKEY_LOCAL_MACHINE". This can be done on the left side of the window.
- Now click on the object "SYSTEM".
- Then enter the folder "CurrentControlSet".
- Finally, open the directory "Services".
- A very long list of folders will open, arranged in alphabetical order. Among them you need to find the directory that corresponds to the name we copied earlier in "Notebook" from the service properties window. You need to click on this section RMB and select an option "Delete".
- A dialog box will then appear warning you about the consequences of deleting the registry key, asking you to confirm your actions. If you are completely confident in what you are doing, then click "Yes".
- The section will be deleted. Now you need to close "Registry Editor" and restart the PC. To do this, press again "Start", and then click on the small triangle to the right of the element "Shutdown". Select from the pop-up menu.
- The computer will restart and the service will be removed.


From this article it is clear that you can completely remove a service from the system using two methods - using "Command line" And "Registry Editor". Moreover, the first method is considered safer. But it is also worth noting that under no circumstances should you remove those elements that were included in the original configuration of the system. If you think that one of these services is not needed, then you need to disable it, but not delete it. You can remove only those objects that were installed together with third-party programs and only if you are completely sure of the consequences of your actions.
leather packs or third party themes are software packages VE settings, cursors, Sound packs, backgrounds si Links screen (Login screen, loading screen) Etc that allow users to change everything The emergence of Windows systems The vast majority of leather packaging is intended for transform the appearance operating system, so that it gives the appearance of a different operating system (for example, transforming the appearance Windows XP in Windows 7 or Windows 8 Or rotate the system layout Windows in Mac OSX or Linux).
Third Party Themes si conversion packages for Windows, not part of the official topic Microsoft But they created and launched a regular amateur developers And sometimes, although they do their best, eliminate errors or errors Users can encounter a variety of Problems after installation, For example, inability to load the server, cumbersome operation them, or it just happens that the final appearance of Windows after the conversion does not please users. In such cases, only solve the problems Complete themes uninstallation or Package Conversion.
How can we completely remove skin packs on Windows systems?
1. System Restore
Whenever we want to bring Windows updates Recommended first create a restore point So if you want problems or System return to default settings, We can cancel changes through System Restore Although most skin pack sites automatically create a restore point before changing system files It is recommended that they be Handcrafted users for greater safety. And if you want delete third party topic installed incorrectly or whose appearance is not pleasing, then you can use System Restore Utility integrated into Windows to restore the system to a previous state and get it back default appearance his.
To create a restore point, go to Control Panel > System and Security > System > Security, Then in the window that opens, click the button create next Creating a restore point...

To give System Restore to a Windows operating system, go to All Control Panel Items > Recovery and click on the button Open system recovery(Or write System Restore in Site search from Start Menu and give enter).

then select restore points and click on the desired one Next.

2. Uninstaller Software included in the Skin Pack
If you have not yet created a restore point before installing the skin pack, you have the option to use Uninstaller software included in him. Removing an option Pack leather can be found in Adding/removing programs or Programs and Features > Uninstall a program.

Also the uninstaller software for it can be found in installation folder from Program files or Start Menu.
3. Order Sfc / Scannow
System files may be recovers quickly using the hint tool System File Checker and DOS command Sfc/Scannow. System File Checker is The utility is built into Windows OS with which users can check file system integrity, it identifies corrupted main files or changes and Restore default settings his.
To use this new utility, open Command line cu administrator privileges(Type: CMD in Start Menu search Then right click and select the displayed result Run as administrator) And enter the command PFS / SCANNOW.

Scanning system files will take several minutes, files being damaged or modified automatically restored(It is recommended to keep it handy just in case). Once the scan and recovery is complete, give reboot the system.
4. Disc Setup Windows
If none of the above methods work, not only should you use CD/DVD for installing Windows OS, shoe Disc Setup windows then select Windows/Computer Repair(All personal archive si installed applications will remain intact).

- How to remove third-party themes (skin packs) in Windows
How to remove third party themes (skin packs) on Windows?Windows 7 is an operating system whose visual style can be changed beyond recognition. There are a huge number of third-party themes available for free download. Gamers can design the system in the style of their favorite game: Stalker, World of Tanks, Dota, Diablo, Skyrim, Call of Duty, etc. Fans of simple compact themes pay attention to minimalism. There are themes to suit every taste:
- mentioned games;
- movies;
- anime;
- music;
- minimalism.
Skins in the style of the Mac OS operating system are especially popular. No Apple computer - no problem now.
There are many sites on the Internet with themes to suit every taste. Below is a list of trusted resources. You are guaranteed to download the theme you like without registration and will not drag viruses or adware onto your computer.
Comparison of sites
| Website | Description | Number of topics | Sorting by category (games, movies, etc.) |
|---|---|---|---|
| 7Themes.su | 7Themes. A site that hosts more than 650 themes only for Windows 7. A big plus of 7Themes: division into categories | More than 650 | Yes |
| Oformi.net | The site is similar to the previous one. But the number of topics is half that – 300 pieces. The download is free, there are clear instructions for installing themes. A nice feature of the site is the ability to sort topics by date added, popularity, number of comments and alphabet | More than 300 | No |
| All4os.ru | All4os.ru completes the top 3 sites with free themes. There are over 230 of them here. As on previous resources, there is a sorting option, a detailed description of each topic and screenshots | More than 230 | No |
How to install a Windows 7 theme
After selecting the appropriate skin, prepare Windows to support third-party themes. The task is simple and will take no more than 10 minutes. Even though Windows 7 supports full style conversion, it may experience some glitches. Therefore, we recommend creating a restore point before the installation procedure. In case of OS problems, you can “roll back” it to the previous level. The instructions consist of two parts: installing patches and directly adding the theme itself.
How to patch system files

Now all that remains is to place the downloaded theme in the desired directory in Windows.
How to add a theme in Windows 7
Step 1. Download the theme you like. Click “More details”.

A separate topic page will open. On the right there is a "Download" button.

Note! If you can’t download the theme using the first button, try Yandex. Disk"
The downloaded archive is opened using WinRar.


Then open “C:” - “Windows” - “Resources” - “Themes” and move the theme files to this folder.


Step 2. Examination. Go to “Personalization”. Right-click on the desktop and select “Personalization” at the bottom.

If you follow the instructions and follow the steps correctly, you will get the result - the installed theme will be displayed in the window.
Step 3. Click on the topic. We wait a few seconds. Ready! The photo shows an example of the installed “Mac White” theme.

How to change the start button in Windows 7
If you want to radically transform the Windows interface, you can customize Start.
“Start” is linked to the Explorer file (explorer.exe). Therefore, to transform the skin you will need rights to the file. The Takeownershipex utility helps solve the problem.
Method 1. Download the program. Go to the website 7themes.su. In the menu, select “Miscellaneous”, then “Start Buttons”.

Then click the “Installation Instructions” button.


It will help us get access rights to the explorer.exe file.

Method 2. Download Windows 7 Start Button Changer. It is designed to change the button skin. You can download it from the “Installation Instructions” page described in method 1.

All that remains is to select the line “Select & Change Start Button” in the program.

In the explorer that opens after clicking, look for the downloaded skin.

Ready-made skins are available on the sites described in the article.
Where are the installed Windows 7 themes located?
All themes are located in the folder “C:” - “Windows” - “Resources” - “Themes”. "C:" is the name of the drive where your system is installed. It may be different. The main thing is to find the folder with “Windows”.

Where are the default themes in Windows 7?
In the same folder where you installed them personally: “C:” - “Windows” - “Resources” - “Themes”.
How to delete topics?
Simply delete the theme files from the “Resources” - “Themes” folder.
“Installing the theme for Windows 7 Home Basic and Windows 7 Starter.” Unfortunately, in these editions of operating systems there is no “Personalization” item. If you right-click on the desktop you will not see it. But the problem can be solved. The Personalization Panel utility will come in handy.
- Download the program. We go to the website Oformi.net. In the menu we find “Miscellaneous”, in the drop-down list select “Programs”.

- Then click on the “Sort by popularity” item.

- Scroll down a little and find the program you need.

- Let's launch the utility. Select “Typical installation”. Click “Next”.

- Examination. Go to “Personalization”. Right-click on the desktop and select the bottom line of the menu.

- A window with themes opens.


How to update Direct X: improvements for gamers
In order for the system to support skins and smooth operation of games, it is recommended to regularly update DirectX. This is done in three steps.
Step 1. Find out the current version of DirectX. Open the Start menu and select Run. Or use hot keys (press Ctrl+R keys at the same time).

In the program that opens, enter the command “dxdiag.exe” into the text field.

Click “OK” and an information summary about the system appears. Find the line “DirectX Version”.

Step 2. Download the program from the official Microsoft portal: https://www.microsoft.com/ru-ru/download/confirmation.aspx?id=35
Step 3. We install the program by simply following the installation instructions.

Note! Uncheck "Install Bing Bar" if you don't need this add-on in your browser.
We are glad that our article helped you decorate Windows and make the system irresistible. Thanks for reading!
Video - How to install a theme on Windows 7
Every time Microsoft releases a new version of its operating system, people are faced with the fact that it is significantly different from the previous version. By the way! You can use all the latest licensed versions of operating systems from Microsoft.
If a laptop or personal computer has a licensed version of the operating system, then it can be updated automatically. This happens without formatting the old system; the new one is installed automatically on top of the old one, preserving all data. This way, the old system remains on the computer. Let's assume that Windows 7 was automatically installed on your computer in this way. How exactly to roll back the operating system to the previous version?
How to remove Windows 7 from your computer safely
What actions to take next after a reboot?
If your previous operating system was installed on a different drive, then you will want to format the drive that Windows 7 was located on. If they were installed on the same drive or you are not sure exactly which drives they were on, then clear the system of unnecessary files you will need to manually. Simply delete all folders that are related to the Windows 7 operating system and empty the Recycle Bin. There is no need to store unnecessary system files that you will no longer use. This can significantly degrade system performance and adversely affect the performance of your computer.
Instructions
Start by right-clicking on your desktop background image if returning to the default Windows theme is required in the XP version of that system. In the context menu that pops up, select the “Properties” line. The theme selection control element is placed on the first tab (“Themes”) of the window that opens (“Properties: Screen”) - this is a drop-down list under the inscription “Themes”. Expand it by clicking the mouse or pressing the alt and down arrow key combination, and then select from the list the theme that you consider standard for your version of the OS - for example, click on the “Classic” line. After that, click the “OK” or “Apply” button and the system will change the appearance and sound design of the graphical interface in accordance with the choice made.
If you are using a later version of this OS (Windows Vista or Windows 7), then after clicking on the desktop background image, select the “Personalization” section in the menu, and in it the “apply standard Windows theme” item. This will be enough to carry out the normal operation of returning to the basic theme of the operating system.
If the operation of restoring the standard theme in normal mode does not work, then you have several options to return everything to its place. One of them is to reproduce the latest version of the system that worked correctly from a restore point. Another is to use the operating system installation disk by performing the installation operation in update mode. The third is to try to independently start or restart the service responsible for the correct operation of themes. To do this, right-click the “My Computer” icon, select “Manage” and find the “Services and Applications” section in the left pane of the launched component. Having opened it, find and highlight the “Themes” line in the right panel, and then in the middle panel click on the “Run” or “Restart” link.
Sources:
- how to restore standard version of windows on laptop
Some browsers allow you to customize their interface using themes that you can download online. But sometimes, after installing a new theme, you want to get rid of it right away, and in order not to clutter your browser with unnecessary add-ons, the theme can be easily removed.
Instructions
In Opera, themes come from the Appearance dialog box, using the command of the same name, by clicking the Menu button in the upper left corner of the main browser window. To remove any of the installed themes, just select it and click the “Delete” button. The selected topic will be deleted.

In the Mozilla Firefox browser, you can remove the theme by selecting the Firefox menu, and then opening the “Add-ons” section on the “Appearance” tab. Select the theme you don't want and click the "Delete" button. The topic will be removed from the browser.

In the Google Chrome browser, themes are installed from the menu section “Options” - “Personal Materials”. To remove an existing theme, click the Restore Default Theme button. The old topic will be deleted.

Video on the topic
Sources:
- Removing copyright from WordPress themes developed by SMThemes
Your computer desktop is constantly in front of your eyes. And it’s always nice when they have something to admire. The standard design gets boring over time and you want something new. Changing only the background image does not help for long, so a new desktop theme would be a good solution. It won't take long to get tired of it, but it will please the eye every day.

You will need
- Access to the Internet.
Instructions
Select the Themes tab (selected by default). And in the field of the same name, set the theme you like. After this, a window will show you how the theme will look if you save the changes.
In the "Themes" tab, you can select "Other themes on the Internet." After clicking the mouse, your browser will automatically open to the official Microsoft page, where you can download new themes for worker table.
To install a theme in Windows 7, click on the "Start" button, then go to "Control Panel", then to the "Appearance and Personalization" menu and finally select "Personalization". On the other hand, you can simplify this process and right-click on the desktop and select the same “Personalization” item.
Now select the appropriate one from the list of suggested topics. If you want to expand your selection, click on the link "Other topics on the Internet." The Microsoft website will open to you, where you can download the design options you like.
After downloading the appropriate theme, double-click on it. When the installation process is completed, the theme will be automatically displayed.
Video on the topic
A familiar picture set as a desktop theme can get boring. Or maybe the desktop will require a more strict design. There is no need to endure a boring drawing. To remove a graphic image used as a desktop theme, you need to follow a few simple steps.

Instructions
In order to delete a desktop theme (a graphic image that serves as a background), right-click on any free space on the desktop. In the drop-down menu, select the “Properties” line (last line from the bottom) and left-click on it. The properties window will open.
In the window that opens, go to the “Desktop” tab by clicking on the inscription with the left mouse button. At the top of the tab, the current desktop theme is visually displayed, at the bottom there is a list of images that can be used as a theme, and control buttons.
When the tab is open, the theme you are using is displayed in the list by highlighting it. If it's a custom image, it will be at the bottom of the list. Using the scroll bar, go to the top of the list and select the first option, “No.” Click the "Apply" button - a desktop view without a theme will appear at the top of the window.
Next, you can click “OK” or “X” to close the desktop properties window or continue configuration. Using the "Color" drop-down menu, you can select the desktop background color. If you do not find the color you are interested in in the palette, click on the “Other” button in the color selection window and select the desired color from the spectrum.
If you want to return a deleted desktop theme or install a different one, repeat the previous steps and select the desired theme from the list. If the topic is not listed, click the Browse button to bring up a dialog box where you can find the image you're interested in.
Helpful advice
From the same tab, you can configure other desktop settings, for example, change the appearance of icons for the main folders located on the desktop (“My Computer”, “Trash”, and so on). To do this, click on the “Desktop Settings” button, select the appropriate folder and click on the “Change Icon” button.
When processing an image, for various reasons, sometimes it is necessary to remove the background: perhaps it was not very successful when photographed, or you decided to choose a more suitable setting for the model. Adobe Photoshop has many different tools for removing background images.

Instructions
Open the image.
From the toolbar, select Magic Eraser Tool. In the properties panel, set Tolerance - the difference between the color and the reference, and Opacity - the degree of impact on the image. With one click you remove unnecessary background.
The second tool from the Eraser Tool group is the Background Eraser Tool. To work successfully with this tool, you will have to adjust the tolerance and brush size when removing the background around an object of complex shape. Place the cursor (it looks like a circle with a cross, like an optical sight) over the border between the background and the object so that the cross is above the part of the image to be deleted. Press the mouse button and, without releasing it, move around the object. When you reach an area where the color changes dramatically, take a new sample of color and trace the object further.
If the background is more or less uniform, it is very convenient to use the Magic Wand Tool. In the Properties panel, in the Selection Controls group, click the Add to Selection button. Click on different areas of the background until it is all selected. To smooth out the jagged edges of the selection, select the Feahter command from the Select menu with a radius of 1 pixel. Press Delete on the keyboard - the background is deleted.
To get rid of some blurring of the contours, in the Filter menu, select the Sharpen and Smart Sharpen commands.
If the object you want to leave in the image is not too complex in shape, you can use the Magnetic Lasso Tool. Place the cursor over the border of the object and left-click to specify a color swatch. Then move the cursor along the contour. If found
 Fixing the problem with Android File Transfer not working
 Preparing your MacBook for sale
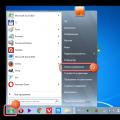 How to remove third party themes (skin packs) on Windows?