Create an iso disk image in windows 7. What is an iso image, how to create and use it
A disk image is a file containing full copy the structure and content of the data that are on the disk. It stores all the information that duplicates the location and content of a particular storage device. The order of data sectors is repeated on the image, but the structure built on it is ignored.
The purpose of creation was originally backup disk data where the exact original structure was preserved. Currently, due to the proliferation of optical media, there are more images in as ISO files that can be used instead of CDs. ISO has less data - no overhead information.
Using archiving programs that support the opening of this type of data, you can extract and view the contents of this file. About the same, how and with what tools you can reproduce the disk image will be discussed further.
Create an image with ultraISO
One of the most accessible methods for creating ISO is using the UltraISO utility. The program is paid, but you can use the trial trial version, which we download from the official site. 
The essence of use is as follows: there is two main fields- the directory tree of the mounted image on the left and the data stored in them on the right. Below are the directories and files stored on the computer.
We set the name future copy, for which we left-click on it, property – Rename. Entering a new name.
Then we drag folders and files from the storage area on the computer to the image files area. To find the ones you need, use the directory explorer presented below. 
Notice that at the top is displayed overall size documents.
Actually, to complete the operation, it remains only to save: File – Save as.
From the proposed formats we take ISO and keep.
The saving process will appear, after which you will find a copy in the location you specified. 
Burning an image with Daemon tools
Daemon Tools is an equally popular image recording program.
There are several variations of this software, among them the free DAEMON Tools Lite. After installing the free license, you will have a virtual DVD drive.
After starting, click on the button below to create a copy of the disk. 
V settings refer to drive unit where the drive and folder are located where the image will be saved.
Specify the type of copy MDS or ISO.
Farther Start and the creation process will begin, at the end of which the copy will be ready. 
Mount to check it you can in the virtual drive.
Using Ashampoo Burning Studio Free
The free version of this program is free, it will allow you to burn a disk image. Downloading from off. site, simple and straightforward installation.


After installation, the application will start on its own. We choose Disk image – Create.
If we create on the basis of a real disk - beforehand insert it into the drive.
We indicate the storage location and click Further to start the process. 
After completing the procedure, you can open the folder containing the file. 
How to create a copy of a disc using CDBurnerXP
To create an ISO in the CDBurnerXP utility, select from the menu File – save project as ISO. 
Specify the directory where to save the file and click Create ISO.
Can be customized options, such as: name, description, date, identifier, copyright and other settings. Opening Boot Options you will see a dialog box with additional options. 
ISO with ImgBurn
ImgBurn is a handy tool for burning ISO images. Everything is done very quickly and quite simply.
After downloading and installing the program, you will see the following window. 
As you can see, here it is possible as write down image to disk, so do it from available files.
In this case, we are interested in the latter.
You do not need to specify any special additional settings (the only thing is, if you wish, you can change the write speed and the number of copies), specify the drive from which we want to read the data and click Reading 
The copying process will go, at the end of which the message will signal us about its successful completion. 
Free DVD ISO Maker
The program is free, easy to use and simple. 
After starting, you will need to select Select CD/ DVDdevice, that is, the drive to be read (specify the path). Next is the place where we will save the resulting file. Then we press Covert and wait for the final completion of the copying procedure.
Using ISODisk
Also free, download it from the official site. 
The interface, although it is in English, is quite intuitive. Some users do not recommend using it to mount virtual drives, but it copes with the task of creating ISO with a bang.
Greetings to everyone who looked at my blog page to read another useful article. I decided to devote it to how to create an iso disk image file. Let's talk about such user needs as creating an image from a source or files on a PC, mounting it to a virtual media or burning it to a disc. In my deep conviction, the easiest way to solve these problems is through the appropriate software - UltraISO, Daemon Tools, Nero Burning Rom and Alcohol 120 programs (these are not all possible options, but I am often asked about these programs).
Definition
For those who do not quite understand what a disk image is, I will try to explain it in an accessible way. For example, you took a game from a friend that runs only from the disk and simply does not work without it in the drive. You liked the game. There was a desire to keep it for yourself, but the installer needs to be returned. Just copying files from a disc to a PC will not do anything. Each time the game is launched through the game.exe, it will swear and demand to insert the disc into the drive. In this case, you just need to make an .iso file. That is, create a clone of a disk on your computer with all its contents, settings and autorun. In order for the system to accept the created image as a real game disc, it must be mounted on a virtual drive. That is, next to the drive you have, displayed in the "My computer" folder ("Computer" or "This computer"), another virtual brother will appear, onto which all the information from the game installer will be dropped. You can use the same iso file or a USB flash drive.
It so happens that the PC has installation files for a program or some kind of video project (for example, a wedding shooting, in which individual videos are collected into a single film with menus, animations, and so on), which need to be burned to a medium to create an installer or DVD -disk with a movie. In these cases, it is worth doing the same steps, but with copying the source files not from the disc, but from the "insides" of the PC. All of the above just seems complicated. In reality, it is easy, literally in a few clicks, done through special programs.
It seems to have explained, which means that you can proceed to how to create an iso disk image file step by step for each utility I have indicated above.
UltraISO

Before you can create an iso file with any program, you need to download and install it, but keep in mind that ultraiso is a paid pleasure. Although if you need this utility for a one-time use and a small number of files (up to 300 MB), then you can easily get by with a trial period. Let's say it's about us. So, downloaded, installed, launched, chose a trial period. Let's now try to create an image from the files available on the computer. For this:
- Using the lower part of the window, we will find on the PC and add all the required documents to the upper field (you can simply drag and drop).
- Then, using the "File" section of the main menu and the "Save as ..." command, create an .iso file, not forgetting to give it a name.

- We are waiting for the end of the process and get the desired image.
To create an image from an optical media, we do the following:
- We insert it into the drive.
- Find "Tools" among the menu sections and select the "Create CD Image" command or press the corresponding button on the toolbar.

- We start the process by clicking the "Create" button and wait for its completion.
We write the created project.iso to a disc:
- We insert the disc into the drive.
- In the program, using the "Open" command in the "File", we find the previously created image and click on it twice (or press "Tools", select "Burn ..." or on the corresponding button on the taskbar).

- We set up the recording options (select the drive and method), start the process and wait a bit.

Disk media are not so popular these days. Most users prefer to deal with flash cards. Therefore, I will briefly talk about how to create a disk image and write it to a USB flash drive using the same UltraISO program:
- We insert the USB flash drive into the connector and run the utility.
- In the "Boot" menu section, select the "Burn hard disk image" command.
- We indicate the path.
- We format the flash card (optional, but recommended).
- We start the process.

Daemon tools

A disk image in all programs is created in approximately the same way, so further I will describe the process in less detail - now, briefly about how to create an iso file in Daemon Tools:
- We insert the source media into the drive and turn to the utility.
- We command it "Create image ..." through the "Tools" menu.
- We set the format, speed, name and other parameters.
- Click the "Next" button to go to advanced settings, and then "Start".

Advanced settings of Daemon Tools allow you to protect the received project with a password or lock its data, split into volumes or compress, ignore damage and much more.

Nero

Several years ago, many people preferred Nero to work with disk media, using which you can also create an iso disk image file, and now I will tell you how. The process of creating a disc image is carried out in Nero Express, and its burning to a medium is carried out through Nero Burning Rom:
- Paste in the source and open Nero.
- Use the left arrow to open the window with the list of available applications and go to Nero Express.
- In the left half of the window that appears, select the "Image, project ..." option, and in the right half - the desired action (CD / DVD copy).
- Specify the directory for saving the image and start the process by clicking on the "Copy" button.

To burn the created project to disc, you need to go to the Nero Burning Rom application and use its functionality.

There is another way:
- We turn to Nero Express.
- In the left window, click on the "Data" section, in the right - indicate the required type of disk.

- Add documents stored on the PC and go to "Next".
- Through the arrow on the left we get into the advanced burn settings.
- Set the name, and set Image Recorder as the drive (required!).

- Click on "Record", specify the save directory and wait for the end of the task.
Alcohol 120

The last utility on my list is the Alcohol 120 utility, so further on how to create an iso disk image file in it:
- Insert the source into the drive and open Alcohol 120.
- Among the list of "Basic operations" we find the task "Create an image".

- In the wizard window, set the parameters - drive, save location and format, project name, and so on.
- We command “Start” with the corresponding button.

At the end of the story, I want to separately note that you can open iso files to view the content created by you and someone else with the same programs and ordinary archivers. Goodbye to everyone.
It is very popular. It is used for burning discs, creating bootable USB drives and other tasks related to optical discs. But, the main function of UltraISO is to create disk images. In this article, we will show you how to create a disk image in UltraISO and save it in various formats.
There are two ways to create a disk image in UltraISO:
- Method # 1. from a real CD, in this case the source code for the disk image is a real disk that needs to be inserted into the optical disc drive;
- Method number 2. Creating a disk image from separate files, in this case a disk image is created from absolutely any files that are on your computer.
Method # 1. Create an UltraISO disk image from a real CD.
First of all, insert the CD into your optical disc drive and launch the UltraISO program. After that, open the "Tools" menu and select "Create CD Image" or just press the F8 key.
After that, a window for creating disk images will open in front of you. In this window, you need to select in which the CD is installed.

Specify the location to save the disk image and its name.

And also select the format of the disk image.

UltraISO has a large selection of available disk image formats. In addition to the classic, the user can choose such formats as compressed ISO, BIN / CUE, NRG, MDF / MDS, IMG / CCD / SUB.
If the disc has scratches or does not want to be read normally, then you can check the box next to the "Ignore reading errors" function. But, in this case, the disk image may have corrupted files.

\ After all the settings are set, you can click on the "Make" button. After clicking on the "Make" button, the process of creating a disk image in the UltraISO program will start.

At the end of this process, the disk image will be in the folder you selected.
Method number 1. Create a disk image in UltraISO from separate files.
In addition, the UltraISO program lets you create a disk image from scratch, using separate files for this. Creating such a disc image is even easier than creating a disc image from a real CD. All you need to do is open the UltraISO program and add the files you want to it.

After the files have been added, you can rename the disc image. To do this, right-click on the disk in the left part of the UltraISO program window.


After that, a window will open in front of you in which you need to select the folder to save the disk image and the file type (disk image format).


At the end of this process, a disk image created in the UltraISO program will be in the folder of your choice.
How to create a windows 7 iso image?
There are many ways to create Windows 7 ISO images, but along with them, there are also many programs for creating the above ISO image. A list of programs with a short step-by-step description will be below. Here are five of the easiest and fastest ways to create ISO images.
Create an ISO image in the UltraISO program.
I will give a brief description of the UltraISO program. This software product is one of the most popular for working with ISO-images for many types of digital media, one way or another associated with images, be it disks, flash drives or the creation of bootable media. So, provided that this program is available and installed on your computer, step by step create an ISO image and answer the question: how to create a windows 7 iso image as follows:
2. Create an ISO image in Linux.
Considering that to create an ISO image, everything that may be needed is already present directly in the OS itself, then it will not be difficult for you to create an ISO image file in a Linux system:
- Directly in Linux, run the command line (other names are terminal, console);
- Enter the following: dd if = / dev / cdrom of = ~ / cd_image.iso - this action will create an image from the disk that is inserted into the drive. (However, if the inserted disk was bootable, then the image will be the same);
- And to create an ISO image from files, it will be enough to use the following command: mkisofs -o /tmp/cd_image.iso / papka / files /.
3. Create an ISO image in Free DVD ISO Maker.
One of the simplest and most intuitive programs for creating an ISO image. In addition, it is free on the Internet:

The program will immediately start converting the file. After the conversion is complete, you can enjoy the converted ISO image file.
4. Create an ISO image in ISODisk
As before, I will make a short description. The program is completely free and easy to use. Below I will give a step-by-step description of using the ISODisk program and creating an ISO image with it.

5. Create an ISO image in CDBurnerXP.
One of the freeware, simple and convenient programs in Russian is the above CDBurnerXP program for creating ISO images. The sequence of steps from the beginning to the final completion of creating ISO images is as follows:

You can also create ISO images in more complex programs with powerful functionality, but is it worth bothering, wasting time and delving into complex programs when the goal is just to convert the file to an ISO image. But if you are still interested, I will give a list of these programs below:
- PowerISO;
- BurnAware Free;
- ISO recorder 3.1;
- ImgBurn;
- Ashampoo Burning Studio Free.
I hope that the question: "How to create an ISO image of Windows 7?" you received the answer. Happy conversion!
Hello dear readers of the computer help blog. Today I will share with you useful information on creating a disk image or how to create an ISO image of a disk, I will also tell you and show you different ways of how you can make an image using special programs.
Last time we got acquainted with the Qiwi electronic payment system, we went through the procedure.
The disc image can have different extensions, but in most cases the ISO format is used. An ISO disk image is the same copy of an optical disk in the ISO 9660 file system. In other words, a disk image is a regular file that can be stored on your computer like any other.
Making an image
For example, you have a disc with a game, music, video or program. To run it and work with it, you need it to be inserted in your optical disc drive. You can insert and use it, but the more often you use the discs, the faster their surface deteriorates, scratches and becomes unusable.
It's the same story with optical CD / DVD / BD-ROM drives. In order to read any disc and information on it, there is a small laser in the drive device, with the help of which the reading process takes place. The laser wears out over time, starts reading discs every other time or stops playing them altogether.
Such a story happened on my old laptop Fujitsu Siemens. About two years later, as I got it, I began to read discs every other time, and then refused to work at all. Recently I wanted to replace it, but there are no such in stock in computer stores, you only need to order from abroad. And I don't want to buy the used one. So I live with a non-working CD / DVD-ROM.
In order to burn an identical disc or create a disc image at the moment there are many different programs. In this issue we will look at the following disk imaging programs: CDBurner, UltraISO, Deamon Tools, Ashampoo, and Nero 7.
Creating a CDBurnerXP disc image
CDBurnerXP is a CD / DVD / BD burning software. It is free and anyone can use it. CDBurnerXP has many languages, it can create and burn ISO images to discs. Works on most Windows operating systems.
After downloading and installing the CDBurnerXP program on your computer. Run this utility, everything is in Russian, you have to figure it out.
We go into the CDBurnerXP program and select Copy disc.

The Copy Disc window appears, go to the Scan Options tab, select the source, set the number of attempts to read the disc. You can check the boxes next to Ignore unreadable data and Disable hardware error correction, but I would not advise you to do this.

After that, go to the receiver device, select the Hard disk and, opposite the word File, press the button with three dots, indicate the location, the name of our ISO disk image and click on the Save button.

After everything has been selected and indicated, click Copy disc. This process can take a long time, everything will depend on the amount of information in your data.

Then the Copy Progress tab opens in front of us, where we can see how much time has passed, how much is left and the status of creating a disk image in percent.

If everything goes well, the Extract ISO-image completed in two minutes window should come out, this time may differ for you. Click OK.

Thus, you can make an ISO disc image from any disc with information, of course, if it is not copy-protected and does not have different protection systems.
If you have lost the required disc or you do not have it at your fingertips, but you urgently need it, if you have made an image of it in advance, you can burn it to a disc. To do this, go back to the CDBurnerXP program, select Burn ISO image to disc.

Creating a Disk Image - CDBurnerXP | site
How to create a disk image using UltraISO
The UltraISO program in its name means working with files with the ISO extension and the like. It is paid, you can purchase a license for $ 30 or use the trial period.

This utility has a fairly simple interface in Russian. We go into UltraISO and the Unregistered version is immediately written at the top, if you clicked the Trial period during installation.

Go to the Tools tab and select Create CD Image, you can press the F8 button or select the drive icon with the disc.

The Create CD / DVD Image window opens. We also select the source drive, put a tick if necessary in the CD reading settings. Save As: choose where to save the image file, by default this is the My ISO Files folder in your account documents.

If you have little space on the disk where the operating system is installed, or you want to specify a different location and storage of the image files, you can change the destination folder.
After that, we indicate the desired output format, it is advisable to select Standard ISO (* .ISO), if you work with other programs, you can select another desired format. As everyone has chosen, we press the button Make.

Upon completion, a Hint will appear - The creation of the CD image has been successfully completed and they offer to open this project, you can click Yes or No, no difference.
This is how a disk image is created using the UltraISO program.
Disk Image Creation - UltraISO | site
Creating a Deamon Tools disk image
Deamon Tools is a common program with which you can create ISO images, mount virtual drives on your computer, burn discs, and much more. Personally, I have been using it for over 5 years.
After you have downloaded the program, run it and put all the checkmarks in the settings, you can also choose a free license. Next, you will be asked to install various add-ons from Yandex: Yandex bar, search from Yandex, make it a home page, and so on. I don't need all these additions, so I removed all unnecessary checkboxes.
If you work in the Windows 7 operating system, then you will be prompted to install the Deamon Tools gadget on the desktop, I installed it, you can agree or refuse it.

We go into the Deamon Tools Lite program, the Free license will be written at the top. Find, select and click on the disk with a floppy disk, when you hover over which there will be an inscription Write disk image.
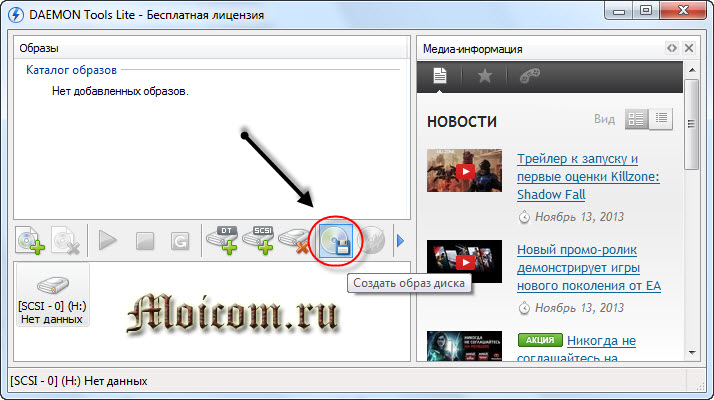
The Create Image window appears in front of us. Here you can select a drive, read speed from 12.0x to 48.0x, specify the location of the output image file.
By default, the program saves the image file to its own folder called DAEMON Tools Images with the extension MDX files (* .mdx). If you will only use DAEMON Tools, you can leave this format. But if you want to use other programs as well, then I recommend changing the File Type to Standard ISO Images (* .iso).

There are also additional settings, you can check or uncheck the boxes opposite:
- Compress image data
- Delete image on error
- Add to image catalog
- Protect our image with a password

As everyone has chosen and configured, press the Start button.
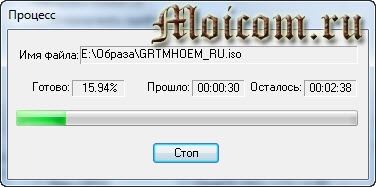
It will take longer than usual to read and write an image of such a disk. In the meantime, I recommend reading the information.

Upon completion, there should be 100% of the general and current state, also after the Read track event, the inscription should appear - Image creation is completed.

We press close. This completes the process of creating an ISO-image of the disc.
Disk Image Creation - Deamon Tools | site
How to create a disk image with Ashmpoo
I already wrote about Ashampoo Burning Studio in the article.
To download Ashampoo, you need to go to the official website of the program, here you will have a choice to use the free Ashampoo Burning Studio 6 FREE or the latest version of Ashampoo Burning Studio 12. The twelfth version can be installed for free for a trial period, if you like it, that is, you can purchase a license this program for only $ 49.99.
I will use the latest paid 12 version of the program with a trial period. If you want to extend the trial period, an email with further instructions will be sent to your email inbox.
After downloading and installing the Ashampoo program, I suggest that you familiarize yourself with the information on how to create a disk image using it. To do this, launch the Ashampoo Burning Studio 12 utility.

Go to the tab on the left under the name Disk Image and select the one you want from the four options:
- Burn image
- Create image
- Create image from files
- View disk image

If you want to create a disk image, then select create an image. If you have documents, data, files and so on, then we go into creating an image from files.
Create image from files
We go to the tab create an image from files and select the desired action. Next, we are offered 8 options for what type of image we want to create:
- Data disc
- Advanced data disc
- Audio CD (for listening to music in the car)
- Create MP3 or WMA disc
- Create video or slideshow DVD disc
- Create video or slideshow Blu-rey disc
- Video DVD disc from folder
- Video Blu-rey disc from folder

I will choose Create video or slideshow DVD disc, you can use any other. We get to the Start page for creating a disk image. We write the name of the recorded project and Next.

It is possible to select the TV system and screen format and then again Next.

After that, add the desired video, click Add Video.

We select the desired video file, I chose the movie Aviator, the main role is played by Leonardo DiCaprio. The film is good, I advise everyone to watch it who have not seen it. Click OK.


Then our video Aviator appears on the screen and click Next.

You can choose a menu theme or skip this step by clicking Next.

Then go to the settings for saving, formats and sizes. We indicate the path of the disk image on the hard disk, select the image format (it is advisable to select the ISO format), you can limit the size of the image or leave it without limitation. As always Next.

Then the encoding of our video clip begins. Depending on the quality of the video and its size, the encoding time will differ. In my case, it takes about an hour, but in fact it took about two, in yours it may be different.

When the decoding process is complete, the next Save to Folder Status starts.

Finally, if everything went well, the following window should appear - Disk image, video media successfully saved.


Click Exit, go to the save folder and look at the result.

After that, our new Aviator disk image can be mounted to a virtual drive or burned to a DVD disc.
Creating a disk image with Ashampoo | site
Create an ISO image of a Nero 7 disc
Probably everyone used the Nero program, or at least heard about it. With it, you can burn discs of different formats, capture video, create your presentations, videos and a whole bunch of other possibilities.
To date, Nero 2014 already exists, you can download it for a trial period from the official website or buy it for 2899 rubles.
If you don't want to pay money, you can download Nero 7 via torrent.
I have the seventh version installed, I'm used to it and I consider it reliable, so I will give examples on it.
After you have downloaded and installed the Nero program, go to Nero StartSmart, go to the Save tab and select Copy CD, if you have a DVD disc, then select Copy DVD.

The Nero Express window opens. We select our source drive, in the drive - receiver column we put Image Recorder and click on the Copy button.

We are offered to choose a location, name the file and save the image file in the format (* .nrg), click Save. This format is accepted by most programs that work with images, including Daemon Tools.

The Burning process window appears, in which the image for recording is created, you need to wait a little.


In the end, we should get the following result Nero 7.nrg image.

This is how you can create disc images with Nero 7.
Creating a Disc Image with Nero | site
In custody
Well friends and came to the end of the article creating a disk image or how to create an ISO disk image. We learned how to create an ISO image using programs such as CDBurner, UltraISO, Deamon Tools, Ashampoo Burning Studio 12 and Nero 7. Which one you choose is up to you.
You may have questions related to how to create a disk image. You can ask them below in the comments to this article, as well as use the form with me.
Thank you for reading me in
 Recover unsaved document in Word
 Repair a damaged Word file
 Creating an ISO image on a computer