How to make a video from photos: Best programs. Creating a movie (excellent slideshow) in Picasa Picasso Roller from the old movie
The girls kiss at the New Year parties. SaintTrek George Michael "Kissing A Fool".
Want to make such a movie? It's simple.
We need a Picasa program. You can download this miracle from Google on this page.
Other posts:
- We make a beautiful animated flash album for the site with your own hands
Creating a movie in Picasa
In the left part of the program window, select a photo folder. In the future, the photos can be added or deleted, swap places and so on.
In the top menu: Create - a movie from the selected one.

On the "Film" add sound track: Download - Select a music file on your computer.

Adding inscriptions. Being on the Slide tab, click on the desired frame at the right bottom of the window and set up fonts, background, text output templates, signature or titer.

I think it is not difficult to figure it out in the settings. Some of the settings: audio process parameters, slide duration, video size ...

Transition style (I like the "shift and scaling of the face") and so on.

After all manipulations, press the "Create Movie" button. If there are many photos, it is created for quite a long time - a few minutes.

Picasa, default, saves new movies to the folder: My documents \\ My drawings \\ Picasa \\ movies. You can find it there.
Picasa - WMV films format ( Windows Media. Video). It is better not to download it to the LIRA, but you can. And immediately from Picasa - there is even a special button for this.

To find a file for conversion to "Library" FLV there is another way except for searching in a folder. To do this, go back to the library.
In the left pane, we find the folder "Movies" and click on it.

In the central part of the Picasa window, press the right mouse button on the right film And choose "Find on the disk".

Here he is, our pretty film.

Conversion video file from WMV format in FLV format
For WMV conversion in FLV and much more, I use the program Format Factory.. At the moment, version 2.60 is relevant, and you can download it on
When you open Picasa for the first time, you can choose the scan option of your hard disk, or just my images, my documents, or desktop. The program displays your photos in the library. Perhaps you will find photos that you have already forgotten because Picasa does watching very simple and convenient. If you have photos outside the directories of my images, my documents, and the desktop, then you can add a new folder manually by clicking on the tools / folder management. The program will display your photos.
Press twice to the photo to go to the edit window.
Find out what makes each button in the "Conventional" editing window. Short manual:
- The first button, "Crop". Pressing this button, you can cut part of your image. You can choose the size of manually, or one of the previously created sizes. Click "Apply" when you finish.
- The second button, "Straighten", can fix the horizontal position of the landscape. Click on it, and use the grid, and the slider until the image gets into place. Click "Apply" to save the changes.
- Third button, "Redeye". If you click on it, Picasa will automatically correct the "red" eyes in your photo and display them in green squares. If the program missed someone's eyes, you can bring the window of this function on them, and Picasa will fix them. If the program is highlight the wrong object with squares, then you can click on this square so that Picasa ignore this selection. Click "Apply" when you finish!
- The fourth button, "I" M Feeling Lucky "changes the lighting and color of your photo at the discretion of the program. This button may be useful for changing unclear and dull photos.
- The fifth button, "Auto Contrast", raises the contrast of your photo to a better level.
- The sixth button, "AUTO COLOR", improves the color of your photo and works fine with dim images.
- Seventh Button, "Retouch", can remove traces of dust from your photo, which can help if your lens is dusty. Click the "Retouch" button, and then hover the muddy part of your photo by moving the mouse until the stain is removed. Click "Apply" to save the changes.
- The eighth button, "text", can add text to your photo. Press the button, and then specify to any location in the photo to start a typing set. Use the text box that appears to change the font settings, size, color and text transparency. Click "Apply" to save the changes.
- The ninth and last button, "Fill Light", can highlight your photo if it is dark. Move the slider up and down until the photo is perfectly illuminated.
Find out what makes each button in the "Tuning" tab. This information Clarks the use of setting tools:
- The "Fill Light" slider, has the same meaning as the last button in the editing field "Basic". Move it up and down to highlight your photo. Useful when you forgot about the flash.
- The "Highlights" slider, makes the colors of your photo brighter and open. Use when you want to highlight the bright places of your photo.
- Slider "Shadows" has the opposite effect, in comparison with the slider "Highlights". Use when you want to add shadows in dark areas of your photo.
- The "Color Temperature" slider changes the temperature of your photo. Blue - cold and red - warm. Move the slider to the left if you want to add more blue, and right, if you want to add red.
- "Neutral Color Picker" removes a shade with photos. Press the pipette icon and then on a neutral black, gray or white photo zone to change the color.
Find out what makes each button in the "Effects" tab.
- "Sharpen" - exacerbates the edges of your photo. Use when the photo seems blurry and outside the focus. Click on "Sharpen", and then move the "Amount" slider until you reach the desired result. Click "Apply" to save the changes.
- "SEPIA" - gives photos retro sepia tonality.
- "B & W" - turns your photo into a classic black white picture.
- "Warmify" - changes the 'color temperature' on a warmer.
- "Film Grain" - gives your photo grainy. This button, in combination with "Sepia" or "B & W", turns a modern photo in retro snapshot.
- "TINT" - changes a photo on the color of your choice. Click on the button, and select Color using a pipette to apply it to the picture. Next, move the "Color Preservation" slider until you reach the desired result. Click "Apply" to save the changes.
- "SATURATION" - increases the saturation of your photo. Click on this option, and move the "Amount" slider to the desired effect. Click "Apply" to save the changes.
- "Soft Focus" - softens the focus around the point, according to your choice. This tool is useful to highlight a specific object of your snapshot. Click on this option, and move the "Size" and "Amount" slider until you reach the desired result. Click "Apply" to save the changes.
- "Glow" - gives the glow of your photo, especially in the light parts of the snapshot. Click on this, and move the "IntenSity" and "Radius" slider until you reach the desired result. Click "Apply" to save the changes.
- "Filtered B & W" - takes a photo similar to the one that would be made on a black and white chamber and with a color filter. Click on this, and select Color to use the filter. Click "Apply" to save the changes.
- "Focal B & W" - makes a photo of black and white, with the exception of one place, in your choice. Click on this, and move the pointer to the desired place. Next, move the "Size" and "Sharpness" sliders until you reach the desired result. Click "Apply" to save the changes.
- "Graduated Tint" - increases the shade of one part of your photo, which makes it useful while editing photos of the sky. Click on this, and select the color to use the shade. Next, move the "Feather" and "Shade" sliders until you reach the desired result. Click "Apply" to save the changes.
- Click on "Upload" to download Picasa web albums. It will only work if you have account Picasa (located here: http://picasaweb.google.com).
- Click on "Email" that send your photos to friends. You can use the default email program, but it will be more difficult to work with Picasa, or you can use your Gmail account, which will be much simpler.
- Click on "Print" to send selected photos to your printer. Before printing, you can change the settings.
- Click on "Export" to move your photos to another folder on your hard drive. This is useful if you want to copy your photos to a USB or CD disc.
- Click on "Shop" to shop online. From sites where you can sell your photos to professional printing services.
- Click on "blogthis" to download your photos on Google Blog if you have it, along with the message.
- Click on "COLLAGE" to create a collage of your selected photos. You can select the grid settings and the size of your collage. When you finish, save it and share with friends!
- Click on "Video" to create videos from selected photos. You can choose an audio track to use with the video, photo transition style and the size of your video. Pressing "Slide" from above, you can add text to your video. When you finish, you can download your video on YouTube if you have a YouTube account.
- Click on "Geotag" to add a location to your photos using Google Earth. To do this, you will need Google Earth installed on your computer. Wait for Google Earth, then move the pointer to the desired position on the globe, and click "Geotag" in the lower right corner of the screen.
What is so sin, we love to show our photos to relatives, friends and just familiar. But one thing to launch a slideshow with some Vewor on home computer. And if you want to be able to always carry it with you, then problems will arise. A bunch of photos store on the flash drive or CD is inconvenient. In addition, others may not be a normal viewer. Therefore, the optimal option is to place a slideshow in the form of a separate executable file or create a mini-movie.
Observing such a question, I began to seek free programs with which I could have completed the task. Of course, you can use commercial software, for example, the same Ahead Nero, but why? It's time to go to free software. The half-hour search on the Internet gave deplorable results. Or Picasa, or six little-known, but specialized programs. The choice fell on the product from Google. Moreover, there is a detailed certificate in Russian.
First of all, you download the program-winner from Google from the page http://picasa.google.ru (the installation file weighs about 10 MB). When you first start the utility will suggest scanning your hDD To search for pictures. We agree and wait for a few minutes. In the left part of the program window, we will receive a folder tree ("library"), on the right - sketches of photos.
Now we'll figure it out a little with the terminology. Standard slideshow you can also run. Collect all the files into one folder. Or select photos in the folder manually, clamping Ctrl and highlighting them one. Then go to the "View\u003e Slide Show" menu (or immediately press "Ctrl + 4"). Immediately launches slideshow. Settings are available at the bottom of the screen, it is enough to lead the arrow of the mouse aside. At the same time, the slide show will pause, to continue it to click on the "Space" key.
But we need something else. In Picasa, this is called the "Film" project, which allows you to create a video file with extension.wmv. You can mock together not only photos and music for the substrate, but also video phrases. The final file can be shown to friends and acquaintances. Or immediately download to the popular Youtube service. And now in more detail.
So, we chose photos, to convenience, copying them into one folder. Open Picasa, we find in the left list the desired folderSelect it and select the "Create\u003e Movie" menu.
A new window will appear. Left Managing Menu, Right - Frames from the movie right sizeRight from the bottom of the shooting of the film.
If you want the sequence to be sorted by file name or date of creation, go back to the "Library" tab, right-click on the folder and select the desired sorting "Sort folder by parameter ..."
Tab "Movie".This section is responsible for the basic parameters of the future film. You can choose the soundtrack to the slides. Alas, only one in WMA or MP3 format. However, the 3-5 minute composition is enough to view multiple tens of photographs. You can select three modes: Cut the audio, mapping show photos with sound or link photos according to sound accompaniment. The default is the second point, i.e. The duration of the image shows depends on the total duration of the composition.
Next, you can choose a transition style: only 10 filters are available. This is a bit - in some programs of their hundreds, but more than enough for an amateur slide film. Sorry, you can choose only one style.
Then, depending on the selection of the two previous modes, the duration of the slide shows and the "Overlapping" parameter is selected.
Now you can go to the selection of the movie size. Permissions are available from 320x240 to the maximum 1920x1080.
Put, if you need a tick in the "Show signatures" and "trimming of the full photo frame" (to fill the full frame of the film).
At the bottom of the bottom there are three more buttons: "close", YouTube "(create a movie and send it there) and" Create a movie. " They still do not touch and go to another tab.
Tab "Slide". This section is responsible for the text design of individual slides. To each you can pick up a signature. The font is changed, size, drawing, as well as the color of the background and letters. You can also choose a template template. Each slide can be prescribed individual signatures in the storyboard on the right below. Picasa also automatically creates a zero frame with the folder name and the date of its creation. This inscription can be changed to another, for example, "Trip to St. Petersburg. November 2008. " In the film you can add text slides. And remove unnecessary.
Tab "Clips". Used to add and delete photos, as well as downloads to them from the library ("Advanced" button).
To change the order of photographs, you need to drag them manually. See what happened, you can press on a green triangle in a storyboard.
Create a final film
So, all settings are made, choose "Create a movie." After a few minutes - the creation time depends on the amount of movie resolution - it will be created. The film will automatically be saved to the View folder \\ C: \\ Documents and Settings \\ Admin \\ My documents \\ My drawings \\ Picasa \\ Movies \\. If you want to return to the project later, click on the "Close" button. And you agree with the proposal to save the draft.
That's all. Remember that the quality of the film primarily depends not on the number of filters used by the transition between photos, and from their aesthetic qualities.
(Published in the newspaper "My friend Computer", No. 3, February 2009. Here is the author's event.)
48946 views
Comments |
| error 9. Wrote (a) ansenna. , in 2010-06-23 21:36:54 also a mistake 9, sirent ((( |
| iiiii Wrote (a) iII , in 2010-12-19 12:54:14 how to download |
| Wrote (a) Desmond., in 2011-01-27 17:18:25 Hmmm is useful |
| Wrote (a) TATYANA
, in 2011-02-12 07:15:02 I all made up and made a film. I press the film to create, it turns out the draft Chernovik and create now, I click Create Now. I get only for some reason the drafts when I press reproduce the slide show then I have a black screen and nothing more. Why? |
| pROBLEMI S Picasa 3 Wrote (a) vadim. , in 2011-05-25 19:14:14 I did everything and made a film. I press the movie Create the window to Chernovik and create now, I click Create Now. I only do it for some reason, when I press reproduce the slide show, then I have a black screen and nothing more. Why? |
| Change the movie in Picas Wrote (a) Pauline , in 2012-01-14 21:54:07 Hello, created a film from the photo with music, first to view him put a small resolution from photographs, today it has been edited by this film and created on its basis another, resolution photo 1600 * 1200. And at once two problems - a new film is inspired when viewed and it does not have a button \\ "Change the movie \\", please tell me what is the reason? |
Hello, dear blog readers Website. This article wrote my spouse (Alena), so next story will go from a female person (do not be surprised). I decided to warn, and then think that I have something with my head ...
I want to present you amazing program for watching photos called Picasa. Recently, we have studied in detail - the brainchild from the Great Yandex. Picasa is the brainchild of Google, also has great opportunities that, I think, will be interested in many.
I often have to deal. My indispensable assistant is recently, which is able not only to "snatch" photos from the scanner, edit them, show the slideshow, but also perfectly copes with batch processing Images.
Well, and here somehow dealt with the processing of digital photos and I got on my eyes free program From Google - Picasa. I decided to see what kind of "beast", and was pleasantly surprised by the opportunities that open when working with this free editor of the photo. Unfortunately, there are deficiencies (for someone, perhaps not significant), but about them just below.
What is Picasa, her capabilities and disadvantages

To advantages programs for viewing images Picasa You can attribute the following:
- Photos can be downloaded to the computer directly from the scanner, cameras, phone or memory card. A huge number of file types are supported (.jpg, .gif, .nef, .raf, mpg, .avi, .divx, .mp4, .mkv, etc.). When you first connect any of these devices to the computer, the autoloading of all files on your Google disk is configured.
- Viewing images can be viewed both in the usual and full screen mode. You can also turn on the view in the form of a slideshow.
- Picasa can be used as free photo editor (possibly retouching, cropping, alignment, color / contrast correction, etc.).
- It is possible to overlay various special effects in the photo (sepia, black and white, grain, radiance, various shades, asterization, thermal imager, red-eye removal, etc.)
- Images can be selected directly from the Picasa photo editor.
- You can send an image to someone to email, or send to publication on social networks.
- Create an extraordinary collage of selected pictures.
- Create a screen saver from any number of images.
- If you decide, it will automatically save under the new name, and will not spoil your original.
The advantages, of course, with interest, overlap the existing shortcomings (in principle, to any program, if you want to wish much, you can complain):
- There is no possibility inside the photo album to create subfolders (other albums).
- It does not know how to correctly display files with extension.tiff (only the first page of several) will be visible.
- Well, there is a small problem with changing the size of the picture (you can change, but not one action, as I would like).
Installing Picasa to your computer
We go to the official website and click Download Picasa. Agree with all the conditions put forward by us, after which we select the folder (place on your computer) where to persist boot file. (It does not take much, only 65.9 MB). Press the "Install" button.

At the end of the installation, we remove unnecessary ticks (I left only the last one - "Run Picasa"):


A window will open with a proposal or log in by entering the address of your email and password from it.

After you entered (or created anew) to your account, you will be asked set up startup photo and video on Google+. To do this, click on the "Configure" button:

Here you can choose those sources from where your photos and video files will automatically be downloaded, which will be visible only to you (if you do not renew to provide anyone access to them). After installing or removing unnecessary checkboxes, click on "start loading":

For a while (depends on the number of photos and video files on your computer) in the lower right corner of your monitor you will watch such a window, where the pictures will replace one other - this is the search for all images available on your computer. Wait for the completion of this process.
![]()
All, on this installation of the Picasa photo editor to your computer is completed.
Picasa web albums - organization and add photo
At first sight photo editor from Google Looks like an ordinary viewer of photos, but in fact he has some nuances. Let's look at what:

On the left we can observe the section "Folders" (they, by the way, will be a full copy of those folders that we have on our computer). remember, that deleting some photo from the Picasa folder, it will disappear from your computer. Praise with this.
Here with the section "Albums" the situation is much easier. The albums are the brainchild of the program itself, so we can move without fear and delete image placed in there - the source will always be in folders on your computer.
Users - Search by Persons
In the "Users" section, you can collect a collection of persons. Picasa knows how very well recognize faces in photosBy collecting them from different folders on your computer (it would be nice if this opportunity spread to Google pictures that it would be more efficient with help). Here you can also delete and move the photo without any consequences.
If you try to slowly enter the name of the person who is depicted on it, then you will be offered the options for those people who are in your friends in various social networks. Origine!

If the proposals have not been received (well, this person has no account yet), Introduce its name, or just a name (for example, Varvara), and click on keyboard Enter.. You will open the window where the introduced name "Varvara" will be born at the very top. Then, click " New person"(The name of the barbarian also appears with an asterisk) and on the right, if desired, we enter it e-mail, then click OK.

Now we see that in the relevant section we have appeared new user - Barbara (in this folder all photos of the barbarians will be blisted, starting with the diaper and ending with old age):

What is surprising, Picasa determines this with incredible accuracy.
Adding photos to Picasa, Import new
First, let's choose what we want to see in our program to view photos. To do this, select "Tools - Parameters - File Types". We put the ticks opposite those types that Picasa show, then click OK:

Now we need to mark the folders that will be edited. We go to "Tools - Folder Manager". On the left, select the folder you need, and on the right - the action (how many times the selected folder will be scanned, or it should be completely removed from the photo editor):

As I said a little earlier, download to computer image You can directly from the scanner, the camera, mobile phone And even from the memory card. They not only be saved in this program, but will be automatically added as needed if you allowed it in the settings.
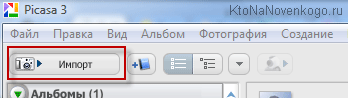
Click on Import new photos:
In the window that opens, select the device (scanner, camera, etc.) from which we want to import anything to the program for watching photos and not only. Below, choose the folder where it will be all imported, and choose import everything or selectively.
Picasa - free photo editor
Free photo editor Picasa Rich on a variety of filters and effects that can be applied to a particular photo, thereby changing it to be unrecognizable. Let's try in reality how it will look. Click twice in the image that we want to improve. We have this window:

- Back to the library - Go back to select another image.
- Play —
- Data Exif - Here will be displayed all additional information about the snapshot that any digital camera can remember. This is and what a camera, and with what lens is removed this image, which settings (ISO, diaphragm, excerpt) were made, etc. In this case, we have nothing displays, because This picture was copied from the Internet (there will also be no EXIF \u200b\u200binformation if it was scanned).
playing a slideshow from the selected pictures.
viewing one image (as in this case we have).
- View two different images (selected and subsequently).
- View the selected image in two versions (original and modified, using any filters). This option seemed to me the most interesting, so I will choose it.
Frequently performed operations

Criming - This operation allows you to cut part of the picture you need. Click on the image and not releasing left button Mice allocate the fragment we need, after which we release the mouse button and press ENTER. You can also choose the size of the proposed (there is a good choice).
Alignment. Here the name speaks for itself. This operation allows you to correct the curvature in the photo (for example, to equalize the horizon).
Red eyes - eliminates the effect of red eyes in the photo. Holding the left mouse button alternately each eye, let go of the button - the deficiency will be eliminated. Unfortunately, the illuminated eyes cannot be fixed, this operation removes only redness.
I'm lucky! - There will be automatic correction of lighting and colors in one click. Correction for good luck, so to speak.
Contrast autocorrection - Automatic correction of the level of brightness and contrast.
Autocorrection color - Automatic correction of color balance.
Retouching - allows you to remove various defects in the pictures. For example, you can refrete a very old photo, or spoiled something (the coffee drunk on it, for example). Press "Retouching", select the size of the brush and start image recovery.
Text - This should be all clear. Select a place in the photo, click "Text" and enter the information you need.
Aligning clarification. The use of this tool will help to correct, for example, too dark a silhouette of a person in relation to the rest of the rest in the frame.
Correction of lighting and colors

Lightening and dimming - Using the slider, you can adjust the level of clarification or dimming image.
Colorful temperature - With the help of the same slider, you can make your photo in warmer colors, or, on the contrary, hit the colder.
Choosing neutral color - With a pipette, we can help Picasa to choose a neutral gray, or a white part of the photo in order to then restore the color balance more correctly (in your opinion).
Effects in Picasa Photo Editor
Although Picasa is a free editor of photographs, but it is even eliminating opportunities. I think that she will not give up anything, for example,. What is only a variety of effects that can be applied to the image. The result will be simply stunning. We look:

- We can increase or reduce the sharpness of the snapshot by setting the value of this setting using the existing slider.
- Apply sepia, that is, to form a photo, make it in some red-brown tones.
- Make a photo black and white, which, you need to confess, now again goes into fashion.
- With the help of the same slider to make tones warmer.
- Add grain. Someone this will seem excess (like me, for example), but many believe that it gives some charm to a snapshot that you just printed on the printer.
- It is possible to add any shade of the image. Choose the desired colors in the palette, and then with the help of the slider adjust its saturation. It turns out effectively.
- Add saturation picture.
- Apply a soft focus. That is, allocate in the photo the area that will remain a clear, and the rest is blurred.
- Add shining the most white plots in the photo. Using the slider, the intensity and radius of this setting changes.
- Put a black and white filter or focus. Changes some, of course, can be observed with a naked eye, but here these settings somehow did not really like. Try, maybe you are them and check out.
- Well, the last effect in this tab is the choice of tone. Choose your favorite shade in the palette and admire how our photo is transformed.
The next tab also has effects:

- Overlay infrared film.
- Application of lography (on the edges you can make a little blur and dimming). This effect simulates a snapshot made to the "Lomo" chamber, which was in use in 1984.
- To impose an effect in the style of Holda (with the help of the slider is regulated by the blur on the edges, graininess and dimming). Mimics a snapshot made to plastic toy photocamer.
- The effect of HDR (it is possible to adjust the radius and the intensity of the setting, as well as its dimming).
- Sinemascop, with the possibility of insertion from above and below wide black strips (imitates the old movie).
- The effect of orton (glow, brightness and dimming). Your photo will look like a painted wet watercolor.
- The effect called "in the style of the 60s", which gives pictures of the Starin (it is possible to add a picture rounded corners and warm radiance).
- Invert - take a photo similar to the negative.
- Imitation of the thermal imager.
- The effect that mimics the cross processing of the film.
- Postering is a decrease in the number of colors in the picture.
- Duplex - image conversion into two-color. Choose the first color and second, adjust the brightness, contrast and dimming.
Well, on the third tab of the photo editor Picasa, a few more effects live:

- Strengthening is an increase in color saturation and an increase in contrast.
- Soften - this effect Gives a picture softness and some shine.
- Vignetting darkes the edges of the photo. You can choose the desired color, size, intensity and scale of the dimming.
- Pixelization mimics large pixels and low resolution (you can adjust the pixel size, mixing mode and dimming).
- Sports focus - the image is scaling outside the central region. You can shift the focus center, adjust the zoom intensity, change the focal size, mark clear boundaries and apply the dimming.
- The effect of drawing with a pencil.
- The ability to make the image of the neon ablusion effect (color is the ability to choose).
- Stylize under the comics.
- Add the shadow discarded by the image. It turns out as if you put your photo on a sheet of paper (the sheet color can be selected in the settings) and the shadow comes from it (its color can also be designated). Also selected the distance of the image is relative to the paper sheet, angle, shadow size and dimming (transparency).
- Pasparta - blackout edges photo. This is something on the similarity of the application of the frame (the frame is also double - its color and thickness both inside and outside) are selected.
- Imitation Polaroid image. Adjust the slope and color sheet, on which it allegedly lies.
Contour - adding frame. The frame will consist of two colors - outside and inside (both colors can be chosen), it is also possible to adjust the thickness of each frame, mark the radius radius. Setting "Text Height" Increases the black area under the picture to display any text. It turns out something like (in fact).
Copy effects
For example, you have long been set over some image for a long time, and even do not remember yourself, which filters used, and the result you was so impressed that I would like to edit other photos. So Pisasa is very able to do it very much, and it can apply this set Effects immediately to several photos of your selected! But there is one thing but: copy effects You can only inside one folder. That is, the edited photo should be in the same folder as the ones you want to edit (impose the same effects) on the same principle.
What do I need to do?
We choose the photo to which we applied any effects. Then go to "Edit - copy all effects."

After that, select the images in the same folder to which we want to apply the same effects, and choose "Edit - apply all effects." Everything is very simple.
Group editing and renaming photos in Picas
In order to make group editing images In the program to view photos of Picasa, you need to highlight the necessary and go to "Photography - Group Editing":

Then choose the action that we want to produce: rotate clockwise, make a contrast or color correction, increase the sharpness of the image, add grainability, change to sepia or black and white, remove the effect of red eyes, etc.
If something went wrong, then you can always take a step back - cancel changes In one click from several photos. To do this, you need to highlight them, and then select "Photo - Cancel all changes." And even if you once added a frame to the picture, and now they made it in the black and white version, which did not suit you, by choosing "Cancel all the changes", there will be a cancellation of the previously applied frame.
Here, in the "Group editing" item, there is an action - group renaming images ("Group editing is to rename").
We choose the pictures that we want to change the name, click "Rename". In the window that opens, we enter the name, for example, "nature", if desired, a tick near the additional data and click on the tab of the same name:

The selected photos will eventually have everything to have the name "nature", and they will also be assigned its own sequence number after the name (Nature-001.jpg, Nature-002.jpg ...).
Additional features of the Picasa photo editor
Magnifying glass and how to add a note
Pikasa has the opportunity view images through a magnifying glass. It is necessary in order not to open each image separately in a new window. To do this, click on the appropriate icon (folder with a magnifying glass), and keeping the left mouse button (your cursor will look like a magnifying glass) Mouse over any image. After you release the left mouse button - the magnifier will disappear.

To your favorite photos were always at hand, they can easily add to favorites - add note. To do this, choosing one or more pictures, click on the yellow star. In the lower right corner, this asterisk will turn on the selected pictures, and you will have new folder Favorite pictures - marked photos.

To remove photos from this folder, i.e. Remove the mark from it, simply select it with a mouse and click on the icon with a yellow star.
Adding text tags to photo

In the window that opens, give the name of your presentation, enter the description, choose the video category, add the tags through the space bar ( keywords) And decide whether your video is publicly available.
The video cannot be longer than 10 minutes and weigh more than 1 GB. Observe the copyright - Do not post on the video hosting YouTube all sorts of music videos, television programs and the like things created by you, otherwise you can block you.
Then boldly click on "Add Video". You will have a window where you can watch the download video. At the end of the download, in the lower right corner of the monitor "Click to view the Internet" (if it was accidentally closed this window, then look at your video on YouTube in your channel):
![]()
For a time video on YouTube will be processed (depends on the size). After that, you will have the opportunity to dig in its settings:

Opposite the "video" there will be a tissue, which will show the number of loaded rollers for this video hosting. By selecting our film-presentation and clicking on the "Actions" button, what actions can be performed with it:
- Configure Access Parameters - make outdoor, access link, limited access
- Delete
- Apply additional actions - Add date, access to video statistics, category, Comments, Place of shooting Show, Insert age limit, Add tags and description, etc.
- Well, and see the last perfect actions
By clicking on the "Edit" button - we can improve the video, add subtitles, sound, download, or delete the roller.
Creating a collage in Picas
In order to, click on the appropriate button, after selecting a photo folder (you can select the mouse and separate pictures) of which this most collage will consist of:

To the right, you will have a set of selected photos scattered on a sheet of paper. By clicking on any of these images, it can be deleted, installed as a background (the rest of the pictures will be blinking), or turn and resize with such a target that appears:

Left is provided with a rich selection of styles:
- Stack of photos - randomly scattered pictures (applied by default)\u003e -
- Mosaic - Images automatically adjust the page size
- Mosaic frame - Mosaic with a relief center of the image (i.e., in the center of the collage, a photo will be installed, and the rest around it).
- Grid - Images will be placed in lines and columns of the same size.
- Index print - Reduced images will be built into the row, and the header of the folder selected earlier will be blocked above them.
- Multi-exposure - All images will be appointed one on top of another (a very beautiful background is obtained).

Also in the settings you can add border for photos:
- Make images without frames (installed by default).
- Make an ordinary white frame.
- Make a frame in the form of Polyauchdovsky pictures.

As a background you can use solid tone. To do this, click on the square (see Screenshot below) and with the help of a pipette in the manifessed palette you choose the desired color. The color can be selected from the most image by sending the cursor in the form of a pipette on any of the pictures:

As a background, you can use the image. To do this, click the left mouse button one of our pictures (it will be circled in a bright frame) and click on "use the selected" (it will be displayed in the square), and then admire how the background is transformed on our future collage:

Each style, whatever we choose, be it mosaic, index print, a stack of photos, there are some more interesting settings. For example, the mosaic can set the grid step - the images will not connect with each other, and will have a similar frame. And by choosing, for example, a stack of photos, you can preize the images of the shade (will look more natural, not drawn) and add signatures (who will be signed or that in this picture is depicted):

By the way, the signatures are taken by default from the name of photos, so do not forget to sign them before creating a collage. Also any collage can be installed as background drawing desktop.
On the Clips tab, we have all the photos available in the previously selected folder (from which we took photos for the manufacture of collage). If we suddenly wanted to add images to a collage, we go to this tab, choose a few more images you like and press the Plusik (for removal, respectively, "cross"). Selected pictures will be added to the collage in the same form, as well as existing there (with a shadow, framework, inscriptions, if such were assessed by us earlier in the style settings):

Generally, creating a collage in Picasa He strongly delays, it all depends on your rich imagination. Yes, do not forget to click on the "Create Collage" button at the end.
If you have any urgent things, and you did not finish you, then click on the "Close" button - will happen saving Chernivika In the folder "Collages" (will appear among other albums):

When you need to edit it, then twice click on your project in the appropriate folder and click "Change Collage". Everything is quite simple and convenient.
Sending photos by email
Very convenient picasa Sending photos by email. Click on the convective located at the bottom of the program:

We will be offered two ways to send our images ( postal program By default, or Google Postal Program):

In this case, as the program by default, I was offered to use Opera, since it was installed with me as basic to relieve and send any different correspondence. I am very pleased with her. If I wonder, you can learn about it in more detail. So, if you choose the default program (click on the corresponding button), then you have an email in it, where you will only enter the address of the recipient and click on "send".
When you select Google Mail you will have this window:

By the way, if you still do not have your account on Google, then look. In the "To" field, enter the addresses of those who want to send images by mail - while entering letters you will pop up tips with postal addresses of your friends, which is very convenient. Then you can enter a name in the "Theme" field, then it comes to watch photos attached to the letter (they can be viewed using arrows and remove the extra, accidentally falling into this letter frame). In the letter itself you can add something from yourself, or leave everything as it is, that is, how many files were sent and that these photos were sent through the Picasa program from Google. If everything is entered correctly click on "send".
On this note, I think it is possible to finish. I hope that it will be interesting. Good luck in learning free editor Photos of Picasa!
Good luck to you! To ambiguous meetings on the blog pages Website
You may be interested
 Free file sharing - how to fill a photo and get a link to the picture
  How to online make an inscription in the photo or impose text on the picture
  How to add a watermark on a photo or any other image online
  Radical - Free photo hosting with quick and easy download Photo through Radikal.ru
Google in each version of its Picasa program adds new features, gradually turning it into a real combine to work with digital images. We want to submit a list of interesting things. additional featuresthat you can come in handy.
The main purpose of Picasa is viewing and organizing a collection of digital photos. In addition, the application is closely integrated with online storage of images with the same name, which allows you to publish snapshots on the Internet without any problems and share them with friends, relatives and other users. However, this list of tasks solved with Picasa is not limited.
Picasa is very easy to send photos by email - for this you only need to highlight files and click the button " Email»On the bottom of the toolbar. However, by default, the program compresses images up to 480 pixels. If you need to send full-size pictures, go to the Picasa settings ("Tools → Parameters → Email") and check the "Source Size" item.
Screensaver from local images and RSS feeds

When installing Picasa, a special screensaver is installed, which allows you to view a slideshow from the local or loaded from the network in minutes. To activate it in the computer screensaver settings, mark google point Photos screensaver. In its parameters, you can select transition effects, specify local folders, Picasa web albums or even the RSS channel with pictures.
Batch Size Changes, Water Signs

Everyone knows about photo editing tools in Picasa, but there is also an excellent batch change in the program. To use it, select one or more images, and then select "Export photos to the folder" item in the File menu. In the dialog box that appears, you can specify the save folder, the desired size and impose a watermark if necessary.

If you want to create a movie with a spectacular video sequence of photos and background music, then Picasa Movie Maker will help you with this. Unlike other programs with it, only a few minutes needed to choose a music track, specify a set of pictures and the style of transitions between them, and add credits and screensavers. When everything is ready, you can publish a video on YouTube with one click.
Creating a collage

The means of creating collages in the Picasa program is no less inferior to many paid competitors. This tool can work automatically or provide you with complete freedom of action: select the template, setting up size and image location, background color, grid step, frame and many other parameters. The resulting collage can be saved in jPG format Or install as desktop wallpapers.
Creating web galleries

With Picasa, it is very easy to prepare photos to demonstrate on your website in the form of a web gallery. To do this, select the necessary files, and then select "Exports in the form of an HTML page" in the "Folder" menu. Next, you specify in the header dialog box that appears, the size of the pictures, select the template, and in just a few minutes the finished gallery will be saved on your hard disk.
Group renaming, editing

Despite the fact that the program contains everything you need for manual correction of photos, sometimes you have to do the same operations with hundreds and even thousands of files. In this case, the tool entitled "Group editing" in the "Photo" menu. With it, you can rename files, turn, change color and contrast, impose some effects, etc.
Creating a poster
If you need to turn the image into a large poster, you should use the appropriate Picasa tool ("Create → Create Poster"). This feature allows you to divide the photo into several parts and print each of them separately. Then you can connect the resulting fragments together and make one scale canvas from the original photo. The sizes of the poster and its components are specified in the settings.
Search duplicate

In your collection of images, there will be a repetitive files. To find such coincidences will help a special function of the program, which is located in the "Tools → Experimental → Show Repeating Files" menu. It does not have any settings of the degree of conformity, but it works quite confidently and very quickly - in just a few seconds, Picasa finds duplicates even in the largest collection.
Definition of people on persons

The face recognition feature is Google's branded technology, in the development of which there was a lot of money and time. Appearing a few years ago as a bold innovation, today she allows you to confidently find people in the photo and assign them names. Gradually, as the data accumulates, the program is self-evaluating and can already find out who is depicted in the picture.
Filter by colors

There are many types of sorting photos: by time picture, event, size, acting persons, geographical location. The Picasa program in addition to such an extensive list offers another type of filtering - in colors. To do this, proceed to "Tools → Experimental → Search" and select the desired color. As a result, all images from your collection, having the appropriate color gamut, will appear.
Adding geotegov

Having at its disposal projects such as Google Earth and Google Maps, the developers did not fail to add map capabilities and Picasa. With their help, you can specify the place of shooting of any photo. To do this, we open by clicking on the appropriate button on the toolbar toolbar, which runs on Google Maps, and drag photos to the point on the map where they were created.
 State Services Personal Account
 State Supervisory Cabinet- Entrance on SNILS and Telephone
 Single telephone rescue service in the Russian Federation