Extract bios from exe. Or useful tips for experienced users
Hello, dear readers of the site site! My name is Roman Zakhattov and I present to your attention the third and final part of the article on the restoration of the damaged BIOS firmware (on the example laptop Acer. Aspire E1-532). Before reading this part of the article, it is recommended to get acquainted with and, in which we performed the disassembly of the Acer Aspire E1-532 laptop, removed the motherboard from it, connected to the BIOS microcircuit the CH341A programmer and saved the damaged BIOS firmware into a separate file. We will continue our work preparation of the new BIOS firmware file and then write it to the BIOS chip.
Restoring the damaged BIOS firmware on the laptop by the programmer, in case the laptop is not loaded. Part 3. Removing the BIOS firmware from the EXE file to update the bios. Editing the firmware file in the Hex editor and its entry in the BIOS chip
We turn to the website of Acer to the Acer Aspire E1-532 laptop support page.
And perform downloading all available BIOS firmware.

For example, open the folder with the firmware version 2.10.

In this folder, we see the usual exe file, start it.

After starting the V5WE2210.exe file, we get a window with an error that says that this BIOS firmware is not suitable for this laptop or computer. But the OK button until we click, since we need from the V5WE2210.exe file to extract the BIOS firmware file for our Acer Aspire E1-532 laptop.

Go to section with: on the way
C: \\ Users \\ Username \\ APPDATA \\ LOCAL \\ TEMP (username can be any depending on which name is created account). In the Temp folder we see a temporary folder 7ZS2C4E.TMP, which appeared after starting the V5We2210.exe file.

Let's open the 7ZS2C4E.TMP folder and see the isflash.bin file in it, which is the BIOS chip firmware file. Copy this file on the USB flash drive.

File isflash.bin copied to the USB flash drive.

The size of this BIOS firmware file is 9.45 MB.

When you try to open this firmware file in the CH341A-USB program, we receive a message that the file size is more than you need, that is, this firmware file is too large to use it to flash the WinBond W25Q64FV chips (namely this microcircuit is installed on the Acer laptop motherboard Aspire E1-532).

Microcircuits can be different volumes, consider this on the example of WinBond chip. As can be seen from the table, the volume of the chip can be 512, 256, 128, 64, 32 MBIT and so on.

The W25Q64FV chip has a volume of 64 MBIT (or 8 MB).

Since our BIOS Isflash.bin firmware file extracted above eXE file 9.45 MB Weighs, and the BIOS microcircuit on the Acer Aspire E1-532 laptop motherboard is 8 MB, then to successfully restore the BIOS firmware, we need to reduce the file isflash.bin from 9.45 MB to 8 MB. For these purposes, we use the Hex editor, for example HXD. Go to the address
https://mh-nexus.de/en/downloads.php?Product\u003dhxd20
and do download installation File hex Editor HXD.

Click on the downloaded file and run the installation.


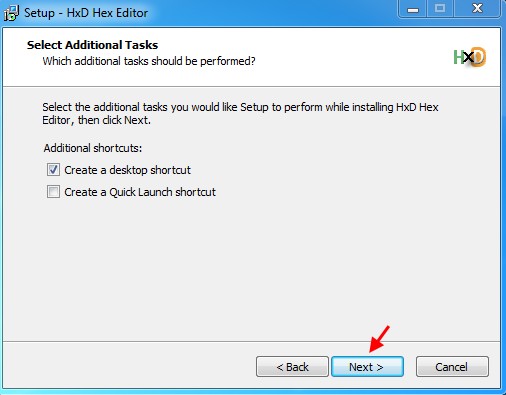
Install.

Installation completed.

Click on the HXD Hex editor label and launch it.

Main window HXD.

Click on File Open.

Select file isflash.bin and click "Open"

We get the following.

In the same way, open the damaged firmware of the BIOS ISFlash01.bin firmware (which we have saved in the second part of the article).

Consider attentively the structure of the file isflash01.bin. As you can see, the file firmware isflash01.bin begins with FF values \u200b\u200b(line 00000000), and in the line 00000010 there are values \u200b\u200b5a A5 F0 0F.

Now consider the structure of the file isflash.bin. We see that this firmware file begins with 4D 5A 00 00 values \u200b\u200b(line 00000000). We need to make it so that the file isflash.bin starts in the same way as the file isflash01.bin, that is, to the beginning of the file isflash.bin there were FF values \u200b\u200b(row 00000000).

IN open file isflash.bin Click Search-Find.

And search for the value of 5a A5 F0 0F.

We see that the value of 5A A5 F0 0F in the isflash.bin file is in line 0001F340, also above in line 0001F330 we see the FF values.

We highlight in the file isflash.bin Range of strings 00000000-0001F320. To do this, select Edit-Select Block.

Indicate the initial (00000000) and the final (1F320) row of the allocated range.

Dedicated row range 00000000-1F320.

Delete the selected row range from the isflash.bin file, clicking Delete.

As you can see, after removing the selected strings, the firmware file isflash.bin is now starts in the same way as the file isflash01.bin, namely in the line 00000000 there are values \u200b\u200bof FF, and in the string 00000010 Values \u200b\u200b5a A5 F0 0F.

Let's return to the firmware file isflash01.bin. Scroll through it to the end and see that it ends with a string 007FFFF0.

If ISFLASH.BIN file is scrolling to the end, we see that it ends with a string 009548F0.

Delete from the file isflash.bin all the lines in the range of 00800000-9548F0, that is, we will make it so that the file isflash.bin ends with a string 007FFFF0. Click Edit-Select Block.

Indicate the range of highlighted rows.

Dedicated row range 00800000-9548F0.

Delete the allocated range time 00800000-9548F0, clicking Delete.

As you can see, now the firmware file isflash.bin ends with a string 007FFFF0.

Save the BIOS firmware file under a new name by choosing Save As ...

Specify the name, for example isflash_new and click Save.

New BIOS ISFLASH_NEW.BIN firmware file.

You should pay attention to the fact that the file isflash_new.bin weighs as much as iSflash01.bin file, which we have saved in the second part, namely 8 MB.

Since the W25Q64FV chip, as mentioned above has a volume of 64 MBIT (or 8 MB), and our editable firmware file isflash_new.bin Weighs 8 Mb, then we can proceed to flashing. We connect the CH341A programmer to the BIOS chip in the same way as they did in the second part of the article.

Run the CH341A-USB program. We specify the manufacturer and the microcircuit model and delete old firmware BIOS, pressing "Erasing".
Universal program for removing firmware and BIOS backups from any models of laptops and personal computers.
Dump should always do when we want to make firmware, update, Update or BIOS rollback. Sometimes they ask for a copy of the bios laptop or motherboard personal computer, To repair similar equipment.
And what is BIOS and how this abbreviation is decrypted.
BIOS is cuts from the English words base_input_output_system and translates it as basic_ysystem_vod
Making a dump of bios laptops and computers using this program is very easy and simple.
Brief instruction How to use the Universal Bios Utility Backup Toolkit 2.0 program for creating bios. DAMP, and in Russian backup.
Video instruction manual with this program.
Many antiviruses define this program as a virus, but it is not.
After downloading, you can check this archive at www.virustotal.com which will say that half of antiviruses will find in it various virusesAnd the second half does not find.
My AVG defines its same as a virus. And on Buke, Casper says that everything is fine.
After checking this file, look, whether your antivirus finds the virus in it. If so, disconnect it during the program.
Then unpack the archive and run the resulting file named Universal BIOS Backup Toolkit 2.0.exe
If your system tells what administrator rights are required. Then click the right mouse button on this file and click the item to start on behalf of the administrator.
After that, the program window opens in which we see information about the type, version, size, manufacturer and the date of your bios.
After that, we click the Read button and wait until the process of reading the bios does not end.
After that, the signboard will appear with the inscription that the reading of the bios is completed successfully.
Click OK. Then click the backup button.

We are offered to choose a place where we will keep the bios dump. Choose the desired folder And click the Save button.

We all made a backup copy of the bios, you can upgrade the version, sew a new or old stable version of the bios.
How to extract BIOS Dell files?
Copy the Bios.exe file to the C drive:
Run the command line in the administrator mode and write it:
cD \\
bios.exe / writeromfile
bios.exe / writebinfile
bios.exe / writehexfile.
»Bios.exe - This file is downloaded from Dell website. "
The unpacked BIOS file will be copied to the C :!
Unpacking new Bios Dell.
- Download Python 2.7 Interpreter.
https://www.python.org/download/releases/2.7/ - Install Python 2.7 on your computer (it is this version!).
- with Python - Decompnewdell.py script.
- Extracted from the archive the decompnewdell script. Please copy to the folder with the Python interpreter (usually C: \\ Python27).
- Also in the folder with the interpreter (usually it is C: \\ Python27) Copy our accumulated Dell BIOS. Rename it in biosupdate.exe. It should turn out to be in the photo below.
- Run the Windows command prompt in the administrator mode and write it:
cD \\
CD Python27
Python Decompnewdell.py Biosupdate.exe.
It should turn out to be in the photo below.

And in the folder with Python (usually C: \\ Python27) will appear Biosupdate.exe_decompressed.hdr.
- With the PfSexTractor.exe program, I remove the program in the same folder where the file has been created. HDR (usually C: \\ Python27).
- In team windows string We write:
PfSexTractor Biosupdate.exe_deCompressed.hdr.
It turns out in the photo below.

And the biosupdate.exe_decompressed.hdr.exe_decompressed.hdr.extracted folder will be created, within which all the extracted files are located from which you can collect a dump for firmware on the programmer. Ready!
Actually, the original method, snap and microcodes can be found (directly by AMI instructions), and in most cases the use of this method does not bear any problems and does not have underwater stones, but I regularly encountered such a problem with my practice:
Those. There was a banal lack free space inside the image. When you modify the BIOS for yourself for a specific processor, you can not pay attention to this, because You can always upload only one microcode to your processor, or remove some old microcode to release the place, but when you modify the stream, you need to search for another solution, compromise.
As a compromise, I chose the following decision - we take latest versions Microcodes for all Core generation processors in all constructives (Celeron E, Pentium E, Core 2 Duo, Core 2 Quad, Xeon * 3xxx / * 5xxx) and replacing them all that was before. The set of microcodes turned out the following:

The volume of this set is only 76 kilobytes. This file It turned out by combining these files:
cPU00010676_PLAT00000001_VER0000060F_DATE20100929.BIN.
CPU00010676_PLAT00000004_VER0000060F_DATE20100929.BIN.
CPU00010676_PLAT000010_VER0000060F_DATE20100929.BIN.
CPU00010676_PLAT00000040_VER0000060F_DATE20100929.BIN.
CPU00010677_PLAT00000010_VER0000070A_DATE20100929.BIN.
CPU0001067A_PLAT00000011_VER00000A0B_DATE20100928.BIN.
CPU0001067A_PLAT00000044_VER00000A0B_DATE20100928.BIN.
CPU000006F2_PLAT00000001_VER0000005D_DATE20101002.BIN.
CPU000006F6_PLAT00000001_VER000000D0_DATE20100930.BIN.
CPU000006F6_PLAT00000004_VER000000D2_DATE20101001.BIN.
CPU000006F7_PLAT00000010_VER0000006A_DATE20101002.BIN.
CPU000006F7_PLAT00000040_VER0000006B_DATE20101002.BIN.
CPU000006FB_PLAT00000001_VER000000BA_DATE20101003.BIN.
CPU000006FB_PLAT00000004_VER000000BC_DATE20101003.BIN.
CPU000006FB_PLAT00000010_VER000000BA_DATE20101003.BIN.
CPU000006FB_PLAT00000040_VER000000BC_DATE20101003.BIN.
CPU000006FD_PLAT00000001_VER000000A4_DATE20101002.BIN.
The modification procedure itself has also changed a bit and became not easier, then faster:
Step 1 - Open the BIOS image in the MMTOOL program: 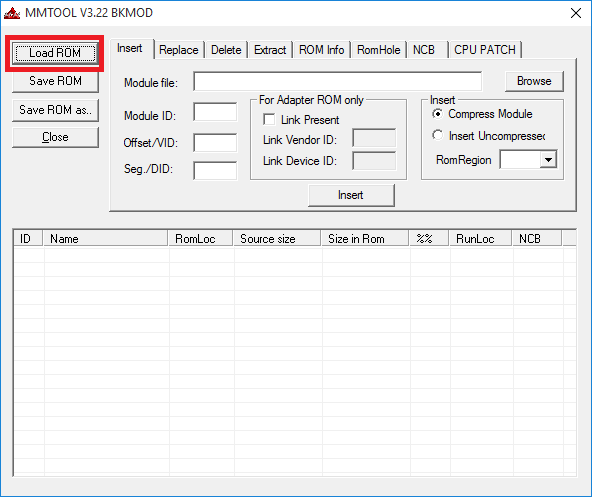

Step 2. - To check, go to the last tab (CPU Patch) and see the number of microcodes. Here are them for example 31 pieces: 
Step 3. - Go to the Replace tab and look for "P6 Micro Code" on it: 
Step 4. - By selecting "P6 Micro Code", click the button of the Ikshchi, select the ncpucode.bin file, described above and replacing it with the Replace button: 


Step 5. - To check, go to the last tab (CPU Patch) and see the number of microcodes. After the microcodes change, 17 remains, the latest version: 
The fundamental difference with the order of modification described on delidded.com is not. In most cases, it is not the same at the output, but the processor receives the desired microcode. From subjective positive moments I would like to pay attention only to the fact that microcodes are guaranteed to update all current processors, whether "civil" or "server", as well as there are practically no risk to get a message about the lack of space. Although, in my practice, there was not enough space for such a set of microcodes a couple of times, it was with BIOS for ECS P4M900T-M and ECS P4M900T-M2 boards, which are generally compatible with Xeon E5450.
By tradition, a public link to the archive with tools - (Zip, 234Kb). Archive contains executable file Mmtol.exe. (version 3.22 BKMOD), File with microcodes for all 45 / 65nm Core / Xeon generation processors ncpucode.bin., as well as two files 45nm.bin. and 65nm.bin. With microcodes only on 45NM processors and only 65nm. Using these files can be useful in cases when it is necessary to release an additional volume in the BIOS, for example, for a new Firmware which is a controller, network, disk, etc.
! Nb.: Nor in the ncpucode.bin file, nor in the files 45nm.bin / 65nm.bin no support pentium processors 4, Celeron (without alphabet indexes), Pentium D, Celeron D and Xeon W (Xeon 5080 for example). These are Netbrust generation processors.
 Extension to work with files in the web client
 Fixing the error "Server refused access via POP3" when connecting Gmail mail!
 1 does not start on windows 10