Contention SSD in a laptop. Installing SSD and HDD instead of a drive
Hello. SSD Discand every day they are becoming increasingly popular in the component market. Very soon, I think they will be needed than luxury (at least, some users consider luxury).
Installing SSD. The laptop gives a number of advantages: the faster boot of Windows (download time is reduced times in 4-5), longer work of the laptop from the battery, SSD disk is more resistant to shocks and shocks, disappears. HDD DiscoV). In this article, I want to disassemble step-by-step installation SSD disk in a laptop (especially since the questions on SSD disks comes quite a lot).
What is needed to start work
Despite the fact that the installation of the SSD disk is enough simple operationWith which almost any user can cope, I want to warn you that all you do - do on your fuck and risk. Also in some cases, the installation of another disk can cause a failure of warranty service!
1. Laptop and SSD disk (naturally).
Fig. one. Disk drive SPCC Solid State Disk (120 GB)
2. Cross and straight screwdriver (most likely the first, depends on the attachment of the covers of your laptop).
Fig. 2. Conducting screwdriver
3. Plastic card (anyone suitable, it is convenient to pose a cover that protects the disk and rAM laptop).
4. Flash drive or external hDD (if you just replace the HDD disk on SSD - then you probably have files and documents to be copied from the old hard disk. Subsequently, you take them from a flash drive to a new SSD disc).
Options for installing SSD disk
A lot of questions comes by the options for installing an SSD disk in a laptop. Well, for example:
- "How to install an SSD disk so that worked and old hard Disk and new? ";
- "Is it possible to install an SSD disk instead of CD-ROMA?";
- "If I just replace the old HDD to a new SSD disk - how would I post his files to it?" etc.
Immediately I want to highlight several ways to install SSD in a laptop:
1) Just take out the old HDD and put a new SSD in its place (on a laptop there is a special cover, closing disk and RAM). To enjoy your data from the old HDD - you need to advance before replacing the disk, copy all data on other media.
2) Install an SSD disk instead of a drive for optical disks. To do this, you need a special adapter. The essence is generally like this: take out the CD-ROM and insert this adapter (in which insert the SSD disk in advance). In the English version, it is called as follows: HDD Caddy for Laptop Notebook.
Important! If you buy such an adapter - pay attention to the thickness. The fact is that there are 2 types of such adapters: 12.7 mm and 9.5 mm. To know exactly what you need, you can do as follows: Run aIDA program (for example), find out accurate model Your optical drive and then find its features on the Internet. In addition, you can simply remove the drive and measure it with a ruler or cigrobe.
3) This is the reverse version from the second: SSD to put instead of an old HDD disk, and HDD is installed instead of a drive using the same adapter as in Fig. 3. This option is preferable (us a look).
4) Last option: Install SSD instead of the old HDD, but for HDD to buy a special box for connecting it to USB port. (See Fig. 4). Thus, you can also use both SSD and HDD disk. The only negative is an extra wire and a box on the table (for laptops that are often transferred is a bad option).
How to install an SSD disk instead of an old HDD
I will consider the most standard and frequently-encountered option.
1) First turn off the laptop and disconnect all the wires from it (power, headphones, mice, external hard drives, etc.). Next, turn it up - on the bottom wall of the laptop there must be a panel covering the hard disk of the laptop and accumulator battery (See Fig. 5). Take out the battery, moving the latches in different directions *.
* Fastening on different models Laptops can vary somewhat.
Fig. 5. Fastening the battery and cover covering the laptop disk. Laptop dell. INSPIRON 15 3000 SERIES
2) After the battery is removed, unscrew the screws that the lid closes the hard dick is attached (see Fig. 6).
3) Hard disk in laptops, usually, attached to several cogs. To remove it, unscrew them enough, and then remove the hard side of the SATA connector. After that - insert in its place new Disc SSD and consolidate by his cogs. It is done quite simply (see fig. 7 - the disk mount (green arrows) and the SATA connector (red arrow) is shown.
4) After replacing the disk, secure the cable with a screw and put the battery. Connect all wires to the laptop (disconnected earlier) and turn it on. When loading, go to the BIOS immediately in the BIOS (article on keys for entry:
Fig. 8. Whether a new SSD disk has been identified (on the photo the disk is recognized, and therefore you can continue working with it).
If the disk determined, check in what mode it works (should work in AHCI). In the BIOS, this tab, most often, Advanced (see Fig. 9). If you have in the parameters, another mode of operation - Switch it to ACHI, then save the BIOS settings.
After the settings conducted - you can start installing Windows and optimize it under SSD. By the way, after installing the SSD, it is recommended to install Windows again. The fact is that when windows installations - It automatically sets up services for optimal work with SSD disk.
By the way, very often I ask questions to update to speed up the PC (video card, processor, etc.). But rarely who speaks about a possible transition to SSD to accelerate work. Although on some systems, the transition to SSD will help speed up the performance of work at times!
I have everything today. All fast work Windows!
Subscribe:

It's no secret that today many laptop owners no longer use regular built-in DVD drives, since the popularity of optical disks is reduced every year, and compact and spacious USB drives come to their place. And in order for the unnecessary drive to do not occupy a place in the system, it can be replaced with an adapter for connecting an SSD or a conventional HDD of a 2.5-inch disk.
Instructions for installing an SSD disc instead of a DVD drive in a laptop
Before disassembling the laptop itself, you need to buy the HDD-DRIVE CADDY SATA-SATA adapter for this operation, which by form resembles the usual built-in laptop DVD and has a special niche with SATA connectors to connect an additional internal drive. Acquire this device by low prices It is possible on trading platforms, such as Aliexpress, or in similar online stores.
You will also need a free HDD form of a 2.5 inches form for installation in a free compartment.
After everything you need is purchased, you can proceed:
Turn off your laptop, close the screen, turn it upside down and disconnect the battery;
Using a suitable screwdriver, remove the protective plastic lid to open access to the drive (the principle similar to almost all models and manufacturers of laptops).
Unscrew all the drive fastening screws, then carefully remove it from the housing. It is usually easily done through its side fitting;
For reference. In some models of laptops, DVD drive Fixed with one screw located under the keyboard. With such a design, to dismantle it to remove low part Cases do not need. It is enough to remove the fixation of several latches, raise the keyboard, unscrew the screw and remove the DVD drive tray opening.
Then you need to install a new SSD or HDD disc in the compartment of the purchased adapter, and put the already assembled design to the place of the past drive. Do not forget to connect the power and tighten all locking screws back;
Collect the back of the laptop in the reverse sequence, install the battery and try to enable the system.
For reference. The installed disk can not determine immediately. It may be necessary to format it through the disk control manager. To do this, go to the control panel, select "System and Security", then click "Administration", then "Computer Management". The system will determine the new connected disk and clicking on it right-click, you can easily format it in the desired file System, as well as ask him a name that will be displayed in Windows Explorer.
Hard drives are not so easy to fix in the compartment for a laptop DVD drive: a special adapter is required with suitable connectors. To do this, we use the adapter Icy Box IB-AC642which can be bought on Amazon about 3,500 rubles. More affordable analogues from China are sold at www.aliexpress.com for the price of 1000 rubles.
If you want to install a quick laptop solid State Drive, Determine it in the hard disk compartment, and the hard drive extracted from it in the DVD drive compartment. As the manufacturers of adapters-adapters assure, their products are fully supported by SSD carriers, but in practice there may be problems with the speed of work.
Transfer data from a hard disk to a solid-state drive - for this convenient to use a special program, for example, such as Data Migration Software. from samsung. Next, we will tell you how to get a DVD drive and install your old Winchester In the adapter, and the SSD carrier is in the hard disk compartment.
1. Remove the HDD compartment cover
HDD mobile computer It is usually located in a special compartment under the rapid lid, which shows the symbol of the hard drive. The lid is attached to the case with several screws. To unscrew them, you will need a small cross screwdriver. Important: Before opening a mobile computer, make sure that the battery is removed and the device is disabled from the power supply. In our case, to replace the hard disk, it is necessary to remove the back cover of the entire laptop case.
2. DVD drive
As a rule, DVD-drive is fixed with only one screw. In our example, it is approximately the center of the mobile computer housing, next to the hard disk compartment. Unscrew the screw and insert a thin object into the hole for the mechanical opening of the drive sash. Pull the drive on yourself and remove it from the housing. Disconnect the front panel from the optical drive using a flat screwdriver.

3. Give the hard drive
Now free the hard drive. Carefully pull the hard drive behind the tray on yourself and remove it from the compartment. If your hard disk is in a plastic or metal case, remove it.

4. Install the disk in the adapter
Install the hard drive in your adapter purchased. Make sure the adapter plugs are properly connected to the drive connectors. Then secure it with screws.

5. Insert the hard drive in the DVD-drive compartment
Now insert the adapter with the hard drive already placed in it in place of the removed DVD drive. To secure it, use the screw that you unscrewed when you got a DVD drive.


7. Starting a hard disk under Windows
It is possible that it will take it to activate it from the control panel to use it. To do this, click the Start button and further "Control Panel", then "Administration | Computer Management | Disk management. Select "Action", then "Repeat Disc Check". Start this utility will also work if you enter the "Diskmgmt.msc" command in the "Run" line.

Hard drives still play a key role and are one of the main components. modern computers. It is considered normal if you buy / replace HDD every few years. But the world of home computers is already moving to the side solid-state drives (SSD)And perhaps this time you will go for buying an SSD, instead of HDD. Do you need such? Let's try to find out this in this article.
A few years ago, most users abandoned SSD due to their high prices, limited storage capabilities and potential compatibility issues. Most of these problems were recently solved, so the answer is Yes, you need such a drive. In this you will see if you read the article to the end.
As they say, there are several points that you need to know before immersion in this topic. Do not do it blindly. Be informed to accept the best decision When buying SSD.
Prices
Prices for solid-state drives over the past few years have fallen greatly. In 2010, the average price of them ranged about 3 US dollars per GB of memory, while in 2015 you can find SSD 34 cents (20-30 rubles) for 1 GB of memory, for example, CRUCIAL BX100 500 GB costs 169 dollars (from 11 thousand rubles).
By the way, SSD is still more expensive than traditional hard drives, and this difference in price not Is insignificant. For example, Western Digital Blue in 1 TB can be bought for 3600 rubles. Comparing with Samsung 850 EVO, price WD BLUE tripled below despite the fact that the places on it twice as much.
So in matters relating to savings, HHD without any questions beats SSD. If your budget is limited, stay on HHD. Nevertheless, SSD has never been so cheap as now, and they are sufficiently available, so do not be afraid to spend money. They are standing.
If you decide that you need SSD, buying a larger capacity drive will be 2 times more profitable. For example, Samsung 850 EVO 120 GB costs about 5,000 rubles (50 rubles per GB). Paying 2500 rubles more, you can get a capacity of up to 250 GB (30 rubles per GB). But the most profitable is the SSD with a capacity of 500 GB for 12.5 tr. With a price of 25 rubles for 1 GB of memory. So buying such a drive, you pay half a cash for 1GB!
physical characteristics
Whenever you bought the equipment, you always need to find out the likelihood of possible incompatibility. The best SSD world will be completely useless if you can not use it in your system, right? Fortunately, SSD (most) is largely standardized, so everything will be fine with you if you depict at least a similarity of attention to this detail.
Form factor: Most modern SSDs go in a 2.5-inch form factor, which just coincides with the standard size of the hard disk for laptops. This device is inconvenient to use for desktops that require a 3.5-inch form factor, but you can fix it using an adapter - such as, for example, Sabent 2.5 "-3.5" Mounting Kit for $ 7.
It should be noted that the new form factor is gaining popularity: Standard M.2. (known previously called NGFF). Such SSDs intended for ultra-thin laptops and mini-pcs are very thin and have tiny sizes.

Thickness: The fact that SSD has a 2.5-inch form factor, does not mean that it will suit your laptop. You must also make sure that its thickness is small enough for your laptop.
Usually the SSD thickness ranges somewhere between 7 and 9.5 mm, modern drives often strive in a smaller side, to 7 mm. Check with the instructions for your laptop to find out what thickness you will fit.
Interface: The main mass of the consumer class SSD has a SATA interface, although you will receive 3 GB / s or 6 GB / s SATA depends on the capabilities of your computer. Now the devices are mainly produced with 6 GB / s, but if you manage to find 3 GB / s, those are likely to be cheaper.
Noise: One of the advantages of SSD before HDD is that SSD is working quieter due to the lack of mechanical components. If you want to get away from HHD's buzz because of the rotation of the disk and the cod during the file search, then SSD is suitable for you as much better.
Performance
The main thing the advantage of SSD. Before HHD - as well as the reason why people remain with SSD by going to them with HHD - the fact that SSDs work faster. With SSD, the computer is loaded in seconds, the programs start almost instantly, and the files are moved to 10 times faster.
It is worth noting that in terms of performance, even the worst ssd is still on the head in front of HHD. If all you need is speed, there are no questions - SSD is created specifically for you.

As already mentioned, not all SSD is the same. Just look at the following options:
- SANDISK INTERNAL 120 GB (52 dollars) has a consistent reading speed 520 MB / s 180 MB / s;
- Silicon Power Velox V70 120 GB (140 dollars) has a consistent reading speed 557 MB / s and consistent recording speed 507 MB / s.
Maybe the difference in 37 MB / s when reading and 327 MB / s when recording and is not important for you, then you can simply choose more cheap option. But if you are really important every bit of speed, then you must imagine how much it will cost you (extra 88 dollars in the example above).
Capacity of the drive
There is an important difference in how HDD and SSD work. While HDD often has to deal with disk fragmentation, SSD has its own reason for experiences - collecting garbage.
When the data is recorded on SSD, they are written in fragments called page. A group of pages is called block. At any specified page, the page in the block can be all filled, all empty or partially filled.
Due to the fact that they are so designed, overwrite existing data on SSD on it (in contrast to HHD). Instead, in order to record new data in the filled block, the entire unit must be lost.
Moreover, in order to prevent data loss, any information present in the block must be first transferred somewhere else Before erased the block. Once the data is moved and the unit is released, only then new data can be recorded in this block.
This process, called garbage collection, requires free space For proper functioning. If you do not have enough free space, the garbage collection process loses efficiency and slows down. This is one of the reasons why SSD performance drops over time: it is too loaded.
In order to maintain garbage collection at the peak of efficiency, the traditional advice will be maintaining 20-30 percent disk space empty. For a 250 GB drive, it will mean that you can use only 200 GB maximum.
Durability
The last detail of which you need to think is how long SSD will serve you. Only 74% hard disks Survive after the fourth year of life. How do SSD behave compared to such results?
Unlike HDD, SDD does not have in their composition of moving parts - which is very good for quiet work, and also implies that there is nothing to wear out. Consequently, mechanically damage should not worry you.
Bad news, on the other hand, is that SSD is more susceptible to breakdowns due to electricity drops. The loss of power supply during the operation of the device may result in damage to the data or even a full-scale breakage of the device.

In addition, the memory blocks on SSD have a limited number of possible recording sessions. If you constantly record the data on the SSD (about 1 GB per day), then the device may loss the ability to record data (although reading will still be possible).
The life expectancy of the solid drive is 5-7 years. Every year after the expiration of this period, the probability of the device breakdown increases.
Is SSD suitable for you?
If you are constrained in the means, you do not care about the speed, or you are primarily worried about the safety of data, then you should stay on a traditional hard disk. For everyone else, just the time to go to SSD, if you have not done this yet.
Each user would like to install a modern SSD disk on his PC for better productivity and higher system operation. Put the solid-state drive on the computer is incredibly simple, and the process itself is usually not accompanied by any difficulties.
By the way, I had previously like a similar article, but in it we, for this, just needed to remove a small lid on the back of the case, which does not create any difficulties.
But install SSD in a laptop instead of a DVD drive, it is much more difficult, because it must be carefully disassembled for a start. And many users at this stage have difficulty. So let's understand the whole process in more detail.
What is needed for installation?
To begin with, you should familiarize yourself with the characteristics of your laptop to understand which components need to be purchased. As practice shows, in most modern CD models, you can easily deliver an additional hard disk. Therefore, there should be no problems.
Before starting, you should make sure that you have acquired everything you need for full-fledged work.
You will need:

Separate attention should be paid to the last item, so let's understand it in more detail
How to choose an adapter?
The size of the drive is two species and differs in its thickness - 9.5 mm and 12.7 mm. Before buying an adapter, carefully measure the thickness of your drive and only then buy the appropriate adapter. Otherwise, the SSD disc adapter simply does not fit into the laptop to the DVD drive.


You should also pay attention to the interface with which the drive is connected. If a sATA interface, Using the adapter with an adapter on MSATA, you can easily supply SSD instead of a drive. But if your DVD drive is connected via IDE, and this is an outdated technology, then you will need an adapter with IDE to SATA.


As mentioned above, the adapters differ only in thickness, while their shape and width are the same. Included with the adapter usually goes a disposable screwdriver, screws for mounting the hard drive and plastic cover. The latter is needed to install on the adapter to close the free space that is formed after the drive is removed.
Disassembling a laptop
After we have prepared everything you need for replacement and purchased a suitable adapter for CPS, you can start opening a laptop with a subsequent replacement of the drive.
This can be done as follows:

After the battery is disabled, you need to remove the installed hard disk.
For this:

Under the lid there is a hard drive and memory modules. We need to remove the hard disk, as a solid-state drive will be installed in its place.
If you ask why it is here that we set the SSD, and not instead of the drive, then this is a simple explanation.
When the tire speed to which the hard disk is connected is faster (in this case, the hard disk is connected via SATA 3, while the SATA 2 drive) is installed in the HDD place.
To properly remove the drive, you need to accurately follow the following instructions:

We post down both drives aside, we will come back to them.
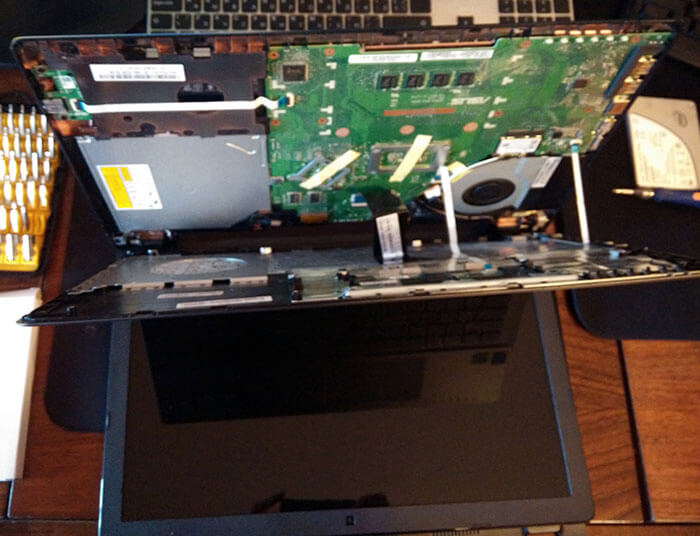
Removing the top cover
Now we need to remove the top cover of the laptop, unscrewing all fixing screws. It is necessary to take into account the fact that they are of different sizes and must be remembered where they were unscrewed.
After all the screws are unscrewed, it remains behind the mediator. Now it is necessary to separate the lower and top of the laptop. You need to be extremely careful when opening, as most models have not reliable latches that can easily break. Check again, whether all the screws have been unscrewed, otherwise there is a risk of damaging the device body.

To remove the lid, you need to insert the mediator into the slot, which is located between the upper and lower lid, and slowly rotate it to dedule the latches inside the case. Start with the front of the laptop where are located light indicators. It is necessary to walk the mediator around the perimeter of the entire hull.
After you separate the top cover from the bottom, in no case dramatically do not lift it up. Both parts are associated with loops, and you can damage them.
When working with some devices, you do not have to disconnect the loops, as sometimes to replace the DVD drive is obtained without removing the upper part of the device, which largely can save your time.
DVD-drive
Now unscrew the DVD drive. We will need a short screwdriver to unscrew the screw with which the drive is attached to the case. After it is unscrewed, you can remove the drive without any problems.

Then remove the plastic lid from the DVD drive. To do this, you need to open it. This will require a clip or needle. We find a small hole on the front panel of the device and insert the clips there. After easy pressing, the drive carriage will leave the housing, and you will get full access to its lower part and can easily separate the cap from the carriage.

As soon as the plug is extracted, it will need to be put on the adapter.


After that, we set the adapter to the place of the drive previously retrieved by us and tighten the fixing screw.


It remains to turn the laptop with the bottom side and install an SSD disk to the place of the old HDD. We close the lid on the beginning of disassembly and tighten the remaining bolts around the device perimeter, insert the battery.
Now the laptop is assembled and ready for work. We carried out the installation of two hard drives: the old HDD we put in the adapter and connected instead of a drive, and the new solid-state drive is mounted in its place.
Software settings
The next stage will be bIOS setup, namely inclusion aHCI mode. This mode Allows you to increase the speed of the drive, mainly due to the advantages of NCQ technology. Other features are also opening, such as hot replacement.

Now you know how to put a CZD in a laptop instead of an old DVD drive, and you can do it yourself without any problems, accurately following our instructions.
By the way, you can fully transfer the system without losing its performance using special programsFor example, such as Acronis Universal Restore, Macrium Reflect and others. They have a wide functionality and will help you in the current situation.
The topic is completely disassembled in this video.
 How to combine two accounts on Facebook?
 Download and insert a beautiful framework to Word Document
 How to fix clock_watchdog_timeout type "Blue screen" (0x00000101)