Clean MacOS installation, or how to reinstall (restore factory settings) Mac. Install Mac OS X on PC
Sometimes there is a need to install not the most relevant version of the operating system. There are several reasons for this: no alternative software, slowing down fresh versions MacOS. Finally, just a sense of nostalgia in the skewerphism and the Software of the Jobs era.
In this instruction, we will tell you how to install operating systemWith which your MacBook or IMAC has been supplied, or how to roll back to past OS X or MacOS versions as quickly as possible.
What to do before installing

Due to the fact that you plan to lower the version of the operating system (set the more old version), the creation of a copy of Time Machine does not suit us.
Considering, we will make the so-called "clean installation", providing for the full formatting of the system disk, save the whole necessary information On external hDD, rewrite passwords that do not remember and transfer important bookmarks.
Remember that during the installation process, your MacBook or IMAC will be fully cleaned from all files.
noteTo set the last version of OS X or MacOS on a laptop or a computer that was presented after its announcement, it is impossible.
Those. If you have MacBook Pro. 2014 release, put on it OS X Lion 2011 release simple way»It is impossible.
Create a loading flash drive MacOS or OS X

First of all download you boot distribution
operating system. There are plenty of resources on which the images with the past versions of OS X or MACOS are placed.
Arming a flash drive from 8 GB and higher and proceed to turning the image.
Note: There are several ways to create. boot flash drive With desktop Apple Operation. We deliberately indicate the option using a universal utility. Install Disk Creator as the most comfortable and simple.
Step 1. We connect a flash drive to Mac and open Disk utility From section Programs.
Step 2. In the side of the side we find our external drive - a USB flash drive, highlight it (single tap or click) and select item Erase.

Step 3. We ask the drive any name latineta, Select Format Mac Os Extended (journaling) and schema GUID section scheme. Click Erase.

Step 4.. After formatting flash drives, press Ready.
Step 5.. We already have a loaded dustbilling of the operating system in the DMG format.
Mount the DMG image, twice taping through the downloaded file. After a few seconds it will appear in side menu Finder.

Now create a bootable USB flash drive using the Install Disk Creator utility.
Step 6.. We download and install the Install Disk Creator utility [Download, 2.2 MB]. We launch it and select our formatted flash drive in the "Select The Volume to Become the installer", and as an installer - an image of a system from a DMG image.

Choosing a USB flash drive and image, click Create Installer And we wait until the utility creates a USB flash drive.
Install MacOS or OS X

We have a ready-made flash drive, which records the boot distribution of the system of interest to our system. Now you can proceed to install the OS itself.
Step 7.. Restart Mac and immediately after the appearance of the Apple logo, hold the ALT key until the menu appears with the selection of the boot drive.

Select the newly created USB flash drive (yellow icon) and wait for the installation menu.
Step 8. In the menu that opens, choose Disk utility (Disk Utility).

Silvering our main drive Go to the "Erase" tab, specify the name of the partition and click Erase.

Step 9.. Formatting hard or SSD drive, you can close Disk utility and in the main menu to choose Install.

The installer menu is intuitive. Just choose the section to which you plan to install OS (and in our case it is only a formatted disk with the specified name) and wait for the installation.
The installation procedure takes from 20 to 60 minutes, depending on the configuration of your Mac and the version of the operating system.
Installation of the factory version of the OS

In addition to creating a bootable flash drive, Apple has provided another option to install the Internet connection. So you can restore IMAC, Mac Pro. Or MacBook before the "purchased" state and get the OS, with which the computer was originally supplied during the sale.
) Only thanks to their "native" innovative and convenient operating system. Not everyone is ready to overpay for the design, but the "apple" operating system, many would like to try on their PC. Well, there is a way out. "Hakintosh" is a solution to this dilema. And I will help you understand the intricacies of the OS X Yosemite setting on your "Macintosh". And how to collect a powerful Khakintosh, I already told a few days ago.
Previously, to install Mac OS on the "alien" PC accounted for pretty worry, now the process of assembling and setting "Khakintosha" has become faster, but from this no less "slapper". It is necessary to take into account many nuances, the ignorance of which can lead to an unsuccessful attempt to install Mac OS to your "non-disconnect" PC.
What is Khakintosh?
It is easy to guess that "Khakintosh" is a naked Macintosh, and this term is used as for custom buildings of PCs, imitating Apple Mac.Book or Apple Mac Pro, as applied to the installation of "native" Apple Operations on a regular PC or laptop.
Can I do "Khakintosh" from his laptop?
Who does not risk, he does not use Hakinton. There is always a risk that you will lose all the important data when the MacOS is unsuccessful, or install it "crooked", earning a bunch of bugs. The best approach is first to collect custom build for a PC or a laptop from "iron", which simulates the architecture of the original device from Apple. But you can try and simply install Mac OS to your PC or laptop, if you are confident that it is quite powerful for this operating system.
How to choose the best "iron" for "Khakintosha"?
I will not dwell on this matter in detail, because quite recently told about how to collect "Khakintosh", and, offered to choose from 3 systems for a different budget and with different needs.
Now I would like to discuss with you all the nuances settings MAC. OS on the usual PC or custom "hackintosh", that is, literally "spending" you from point A in b so that you can install Mac OS correctly.
For this guide, I chose the installation and configuration of Mac OS X Yosemite (OSX 10.10). In the case of other versions of Mac OS, success even in case of proper execution of all steps, the setup is not guaranteed.
How to install OSXNA PC or Hakintosh: Step-by-step instructions
Installing OS X on the PC will require a slightly larger than to write an OS image on a DVD disk, choose boot section And click multiple buttons to start and continue the process. So get ready to spend time.
The licensed version of OS X Yosemite can be obtained free only if you already have MacBook or Macpro with official versions Mac OS X Snowleopard, Lion or Mountainlion, or any Mac Mavericks. Therefore, let's lend an original PC or Apple laptop to download OS X Yosemite installation files. Using official Apple. ID on any poppy or PC with a licensed version of Mac OS X 10.6.8 (or more designer), download OS X Yosemite with the official OS page in the AppStore.
Step 1: BIOS Setup
Before installing the OS, you need to configure several parameters in the BIOS of your PC. If the installation passes on the recommended Khakintoshe Casteche with Amiuefi BIOS, the preliminary settings will be easier. For other systems, you need to throw off the BIOS to the initial optimized settings (OptimizedDefaults), and the hard disk to the parameters in AHCI mode.
Here standard settings Amiuefi Biosdl Gigabyte Amiuefi Bios, Gigabyte Award Bios, ASUS Amiu EFI BIOS and Msiamiu EFI BIOS:
- To exit the BIOS / UEFI installation menu, press and hold the Delete on the keyboard until the PC is loaded.
- Throw the settings to the original (OptimizedDefaults) before doing anything.
- If the CPU on your PC supports VT-D, find this function and disconnect it;
- If the CFG-Lock is activated, disconnect.
- If the system is in Secure Boot Mode mode, disconnect it.
- If available in the settings (depends on the BIOS), then in the OS Type parameters, select Other OS.
- Save the settings and exit from menu Bios.. PC must restart.
Step 2:Installation OS X Yosemite
It is time to install OS X Yosemite. There are several ways to install - for beginners (un
ibeast) and for experienced users (Clover), which are already understandable in the intricacies of the OS installation on Hakintosh.
In the case of installing using Unibeast, you should have access to the original Mac (laptop or PC), for example, lend for a while at a friend. If there is no such possibility, you will need to additionally install the Snow Leopard from the licensed DVD from scratch.
Unibeast is a tool for creating a download installer capable of installing your previously loaded from the AppStore version of OSX. To successfully install OS X Yosemite in this way, you will need:
- Copy OS X Yosemite with official page in Mac App Store. (Choose the latest version)
- Flash on 8 GB (or more).
- Unibeast, download which you can.
- Multibeast, download which you can.
If all of the listed is available, then you need to create a USB flash drive installation files OS X Yosemite. For this:
- Open the website Mac App Store on the original Mac (the one you took on time) and download from the OS X Yosemite site. Make sure the file downloaded and added to Applications.
- Connecting Mac your USB flash drive and open the address: / Applications / UtiliTies / Disk Utility.
- Select a USB flash drive in the left column and click on the Partition Table. Select "Current" and then "1 Partition".
- Select Options, then Master Boot Record.
- In addition, "Format" Select Mac OS Extended (journalled).
- At the end of actions, close the diskutility and run the Unibeast program.
- Following the prompts of the program installation wizard, specify the connected flash drive when you want to install Unibeast, then select Yosemite, which version of OS X you want to install.
- Complete the unibeast installation on the flash drive, using the wizard prompts. The whole process should take 10-15 minutes.
- Drag the downloaded MultiBeast file to the same flash drive, this program will be needed later.
Now connect the flash drive with everyone the desired files To your "Khakintoshu". Run the PC and click on the "hot" key to enter the OS installation menu (usually F12 or F8). Select a flash drive when the system will ask you to specify the source of the installer.
On the welcome screen, select Language (Language), then select Utilities\u003e Diskutility.
In the left column, select the hard disk on which you want to save OSX, click on Partition Tab, then to "1 Partition" in the drop-down menu.
Then click on the "Options" button and select GUID Partition Method.
Call the hard disk, then select Mac OS Extended (Journal) from the Format drop-down menu, then click on Apply and Partition. Close the diskutility upon completion of the process.
To complete the installation, continue to follow the tips of the installation wizard.
This is a compressed instruction, which I regularly use to install OS X Yosemite on "Khakintoshai". Online a lot more detailed instructionsbut if you have experience settings software For PC, then this information will be quite residual.
Step 3: Install Driver
Anyway, OS
X Yosemite You have installed, now it is necessary that the system work is correct, that is, the installation of drivers is required.
Here it is useful to Multibeast, which is capable of installing everything at once required drivers (graphics, network and sound) directly from the flash drive to Hakintosh. The program also contains System Utilities to bypass installation permissions and a collection of NA drivers different parameters Configuration.
Run Multibeast from Flashki and follow these instructions:
- If this primary driver installation via MULTIBEAST, select QuickStart, then EasyBeast, UserDSDT or DSDT-FREE. Most likely, you will need to choose a DSDT-free, well, if you have an old Bild "Hakintosha", then DSDT.
- Click Drivers to select options in Audio, Graphics and Network categories. Depending on the Khakintosha build, you can find or not find the desired audio driver (the second most likely). Find out your "motherboard" chipset and select the appropriate Apple HDA driver for her. You may also need to be needed. network Drivers (Ethernet). Everything else will be offered to install the program, you only need to select a suitable GPU. Some gpupport special drivers, but most work with those that the program offers by default.
- Next, select Customize. To install "sleeping" mode to a PC (on a laptop it is impossible to do this), select Generate CPU STATES, and then Use Kernel Cache. Further on the settings, see yourself, are not sure what and how to configure - leave everything as it is.
- Then click on Print or Save to make a backup of the selected configuration.
- Then click Build, then - Install. Now wait until Multibeast sets all selected drivers.
- Restart the PC to complete the installation process.
MultiBeast needs to be selected for the post-installation of drivers only after using Unibeast to install MacOS. If you used to install OS X Yosemite clover bootloaderYou will need to manually install KextSB folder / EFI / Clover / KEXTS and configure /efi/clover/config.plist according to the "Iron" parameters of your "Khakintosha".
Alternative graphic Drivers from nvidia.
For each version of OS X NVIDIA releases new graphic drivers. They differ from standard Drivers Apple and install them at Hakintosh. Previously, the installation of the drivers from NVIDIA solved the problem with OpenCL in some applications, and also made it possible to use the more powerful GPU configuration on some builds. Also these drivers allow you to use the latest Maxwell video cards with complete acceleration, including NVIDIA GeForce GTX. 750, GTX 750 Ti, GTX 970 and GTX 980. You can download them.
Step 4: Update "Hakintosha"
Judging by my experience with previous versions OS X, Each OS X update requires reinstalling all graphic, network and audio drivers via MultiBeast (which you installed in step 3). Watch for updates on this site (UpdatePosts), where new instructions for installing updates and drivers on "hackints" will be published with OS X Yosemite according to Apple update protocols.
The main problems in the work of "Khakintosha":
For obvious reasons, Hakintosh is rarely perfect, then the video card burns, then the sound drivers are not suitable and other nuances. Get ready for the fact that full functionality will be unavailable to you, especially if you have the cheapest version - many users will not work hardware acceleration Graphs, the network falls off.
My "Khakintosh" had problems with the "sleeping" regime. Some problems are detected and eliminated only by the method of trial and error. But it is better to immediately turn to the specialists in "Khakintosham" online or in your city. Friends help me in this matter, without their support, I would not have decided on the creation of Hakintosh.
Last advice: Do not forget to copy data from your internal hard disk In the event that something goes wrong (Believe my experience, the likelihood of risk is losing important data large). So, make a backup before every attempt, something radically change.
Optionally, I propose to see video instructions for installing OS X Yosemite on Hakintosh:
In the App Store and download it absolutely free right now. The new OS will be installed right on top of OS X Mavericks, and all your data and applications will remain in previous places. Alas, the performance of some of them is not guaranteed and this is due to the need to issue updates from application developers. Removal I. re-installation Applications can solve the problem, but the stability will remain in question.
If your OS X has already passed several stages of the update, and the thought is told about clean reinstalling the entire system - Boldly into battle!
Under clean installation implies full formatting hard disk / ssd. All data, programs, applications and everything that ever was installed on the Mac will be lost irrevocably (contacts and accounts attached to ICloud will remain after re-entry in the already reinstalled system). If, after these rows, you don't have anything in my heart, but in the soul still calmly - proceed to a clean reinstall.
1. Connect the removable hard disk, USB flash drive or any drive, which will be sufficient to save all your data (photos, music, documents) and copy them. (To use all the benefits of recovery through Time Machinefollow).
2. After making sure that everything you need has already been transferred to the external drive, go to the App Store and download the image OS X Yosemite.
Perform this stage will have to obligatory Because for clean installation your account must first go to OS X Yosemite. Only in this case MAC will offer reinstall OS X Yosemite (and not OS X Mavericks when you pass up updates from the App Store).

Without updating via the App Store, you will be offered OS X Mavericks as a "clean system".
So you first update the existing OS X Mavericks to OS X Yosemite Through the App Store, and then spend the clean system of the system.
After upgrading to OS X Yosemite via the App Store and successful login, perform a reboot.
3. As soon as before the eyes appear white screen And Mac makes the characteristic start of the download start - clamp the key combination Command + R.. Patiently waiting for the passage passage passage.

4. We are encountered a window OS X utilities. Choose Disk utility and click Proceed.

5. Choose Main discwhere the system was installed, give him a name and choose Erase. After a few seconds you will see a completely clean drive.

6. Close the disk utility and go to item Reinstall OS X. (In the OS X utility menu). As a target disk for installation, select just formatted. Installation will begin immediately.
When reinstalling the system from zero, consider what you should know Password account used in Mac App Store.. Otherwise, the installation will be impossible.
7. Pay attention to the status wiFi connections (Upper right angle) - the availability of the Internet is necessary because the system will be downloaded from Apple servers. Otherwise, you risk getting a mistake.

Depending on server loads at a specific point in time, the installation may take from 20-30 minutes before several hours. If you have the opportunity to connect with a network cord "Twisted Couple" - It can significantly speed up the download.
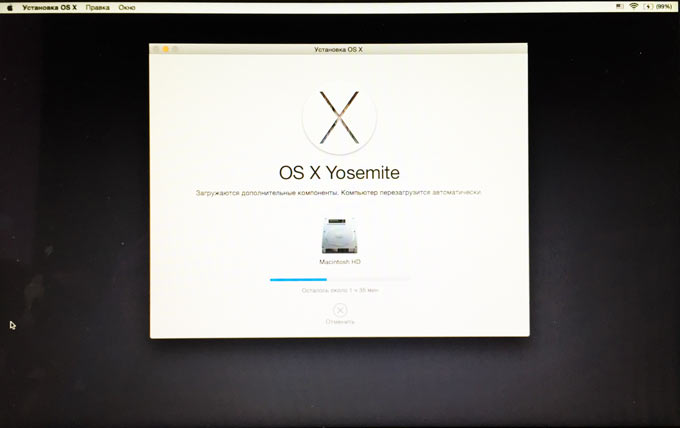
After rebooting, you will welcome the start screen of the new OS X Yosemite and will be offered to go through the usual steps of the first entrance.

Successful installation and testing of the new OS X Yosemite.
![]()
Operating system OT. apple companies deservedly considered exemplary. And indeed it is. The combination of ideal external view And the striking performance has always done the "Mac OS" much better than Bill Gates Bill. And this is not at all discrimination, but the statement of the fact. Operating systems from Microsoft always lagged behind the "Makov" in terms of design and performance. On one day, Apple decided to switch to processors from Intel. From this point on, set the "poppy" on the usual PC was possible. However, not all so simple. Installation "Mac" on a PC or laptop can pour into a strongest nervous disorder, for not all iron is supported by "Poppy". And to start it under it very problematic. But we will still try. So, in front of you instructions on "Installing Mac OS on a laptop."
What are the risks when installing on PC
The risks are a great set, because this operating system is not intended for our wooden computers.
- First, some "vital" PC components may not work. It turns out to run them or not - unknown.
- Secondly, the "Mac OS" installation on a PC or laptop is accompanied by an increased flow rate of nerve cells, which can lead to equipment breakdown (from the first time you will not be installed).
- Thirdly, install the "Mac" on a computer other than the original "poppy" is a punishable crime. But if it does not scare it, then please.

And the laptop is always associated with risks - laptops for the most part are problematic devices for "poppy". If you can somehow change the configuration on a compatible, then with laptops, such a focus will not pass. Full launch of "Poppy" on laptops will be carried out only with the help of numerous "crutches". And the more "crutches", the system will be unstable. So, you still want to try to install a "poppy" on a laptop or PC? Then continue.
What you need to install
To start, you need a computer with a compatible processor. Without this nothing will come out. At the moment, processors from "Intel" families of Core and Atom are supported. Processor must be supported Ivy Bridge. and a set of SSE instructions. If you do not have such a processor, it is better to immediately refuse this venture. Now about the owners of processors from AMD. Theoretically, it is possible to force the "poppy" to work on these processors, but the stability of the work is not guaranteed. Moreover, the likelihood of frequent departures and reboots is very high, because AMD is not intended for "poppy".

If your laptop has a suitable configuration, you can proceed to preparing a USB media to install the operating system. It is recommended to have a flash drive of 16 gigabytes and more (in most cases the image will be deployed on the USB flash drive installed system, and "weighs" it is about 10 gigabytes). And the last than you need to stock, is free time and patience: installing Mac OS on a laptop from a flash drive (if you do it for the first time) will take 4-6 hours and will spend your nerves. The installation itself will pass quickly, but not everything turns out the first time. Yes, and the system setting requires a lot of time. So, let's go.
Preparation of flash drive and distribution image
Since we will put the original "poppy" with small crutches, then for a start you will have to download the image of the system with the App Store. At the moment, the most damned version is Mac OS X Yosemite. It will be installed. As practice shows, the best option Creating a bootable media is its creation from under the Mac OS installed. But not everyone has it at hand. So you need to put it on virtual Machine (at least) and already under it make the loading medium. Suppose that the "Mac OS" is installed on the car. What is the next step?
The next step is to download special programs (crutches) that will help cheat the system and make it believe that it is installed on a computer from Apple. These are called Unibeast and Multibeast. Next, format the USB flash drive in Mac OS X Extended format (journal). Then we run Unibeast and drove the Continue and Agree button everywhere until you reach the option of the OS version. Here you choose our distribution and turn on support for Support). After that, click Continue and Install. The image is recorded for half an hour. Now go to the next point of instructions "On the usual laptop".
Before installing
There are some useful pieces that better learn before starting the installation. First of all, we will have to pierce with bios a little (if you do not disable some of its options, then the installation will not succeed). So, we go to the BIOS and turn off the AHCI support completely. Then turn off the discrete video card (for those who have Optimus), for it does not start, like no dance. Well, set the download from the USB media to the first place. With bios, everything seems to be. Some can ask a question about how to install Mac OS on laptop asusIf the biode cannot be turned off the video card. Answer: just do not turn off. She herself will not start.

It will also be useful before installing check memory and disk for errors. "Mac" is a very capricious system. The slightest error can lead to sad consequences. Do you need it? If there are no errors, you can proceed to the installation process, pre-stuck the USB flash drive into the connector on the laptop. Yes, do not forget before turning out the AHCI and the video card to reset the bios settings to the standard. Believe me, it will be better.
Installation
The chameleon sheath is loaded first. She proposes to choose a way or from a hard disk. Select the boot method from the flash drive, but with the display of the installation log. So it will be easier to understand what an error occurred (if it arises) than in graphical mode. After loading the desired keckers, the Mac OS installer will boot. Now you need to format the section. Select the "disk utility", the desired section and format it in "Mac OS X journal." Click "Next" and the installation process begins.

If nothing has passed anything anywhere, then after creating an account you will throw you off immediately on the desktop of the installed system. If the installation stopped for some reason, it is important to find out what this is for the reason. In most cases, the installation will stop due to the video card. Then you need to restart the laptop and when you select the download from the flash drive to register the GRAPHICSENABLER-YES key. After that, everything should go to your guy. Many are interested in how to install Mac OS on laptop Acer. with hybrid graphics. Answer: In the same way. By disconnecting a discrete video adapter.
After installation
If the installation has passed without a bitch without a zadyrink, then it's time to proceed to setting up the installed system. It is absolutely necessary. If this is not done, then after rebooting the system simply will not start due to the absence of the necessary keckers. To configure the "Poppy" you need to run the previously downloaded MultiBeast utility. It is she who will help us in the setting. How to install Mac OS on lenovo laptop And then set it up? Similar. Although with Lenovo has some features that useful will learn. Some models are supplied with such wi-fi transmitters that do not start under the "Mac" in general (BCM 4313). It will only help the adapter replacement.

If we do not have "Lenovo", we continue the setting. Multibeast requires to select the drivers required for our laptop. In addition, it is required to select the DSDT sheet of the laptop from Apple, which is most suitable according to the characteristics of our. Then you will only click on the Build button, then install. After completing the installation of the necessary keckers, the system is required to restart the computer in order to change the changes.
What is categorically not necessary to do during the use of "Poppy" on a laptop
First, do not attempt to update the operating system using the Apple Store. Since each new version Wanted their kekkers, your computer simply does not turn on after the update. Secondly, if everything works fine, do not try to experiment with kexts. Due to lack of experience, you very quickly hang the system. You will have to access the instructions again "How to install Mac OS on the HP laptop" (or what is there for a laptop). Thirdly, never use the NTFS system for the second partition of the hard disk. It is not supported in "Macs". And programs that carry out such support, the "hackintos" work unstable. Therefore, you should not risk.

To the number of what you do not need to do, the process of cleaning "Mac OS" unnecessary garbage With the help of special programs. Remember, "Mac" - not "Windows". There is no registry! And there is nothing to grieve there. And CleanMyMac programs can seriously damage the system. Next do not hope that powerful software packages Like Prologic, you will be launched. As a rule, they have serious problems with the launch of "non-rigging". You can simply kill the operating system. Well, do not install programs from unknown sources. Viruses under "Maki", of course, little, but they are very tough and can kill your system once or two.
What to read to familiarize yourself with the principles of installation and settings
To understand how Mac OS is installed on a laptop, some study of "Matchasts" is required, because, as practice shows, it is impossible to establish a system with "Polpinka". Be sure to have any errors. And good, if frivolous. In order not to fallinate on the first funny error, you need to read the information on the forums "Hakintochnikov". These comrades have already eaten the dog on the installation of "Macs" on PC. If anything, they can even help with some problems. Although they do not particularly want to understand.
There are also many resources on which it is delayed in detail how Mac OS is installed on a laptop. Also, there are ways to solve the most frequent errors. Find these resources is very simple. Some craftsmen can even configure DSDT and kekters for you. Of course, for a fee. But it is better to sort out the process of installation and settings yourself. Especially since it is not so difficult.
What Distributions do not use
In no case, do not attempt to use distributions already prepared for installation on PC. As a rule, they are very curves, because from the individual system they tried to make universal. And this does not happen. It is better to find out how Mac OS is installed on a laptop, and create a distribution unit under your machine "from scratch". Stability will be much higher.
What to do if it did not work
If you have studied all the information about how Mac OS is installed on a laptop, studied all errors and know how to fix it all, but it doesn't work anyway, it means that your laptop is categorically not suitable for "poppy". Replanted back to Windows, with "Makom" you will not have anything.
Conclusion
This instruction is not a reference. It describes an exemplary algorithm for the installation of "Poppy" on laptops. Specific actions depend on the model of your laptop and its configuration. So read additional information All will have to. Dare, future "makovodas" - and everything will turn out. Do not forget to just strictly follow the instructions for Mac OS to install on a laptop. "
The network is now full of copy-paste, essentially one and the same article, about installing MacOS X on Khakintosh about the same heading. I will tell you how to put Mac OS X from the flash drive on Mac.
There is nothing difficult here, however, not everyone is a pro, and reinstalling the system on Mac - the thing is quite rare, it's not Windows. When does it happen? In my case it took to upgrade with the old mAC version OS X Leopard (10.5) until the next Mac OS X Snow Leopard (10.6).
It is asked why to write about such an old one, when on the OS X 10.9 approach, but I will leave the topic of novelty today alone, the essence of the question does not change. Disk image OS X SNOW LEOPARD INSTALL DVD 10.6.3 RETAIL I took from the torrent inmac.org.
In general, it is possible to install from the flash drive and OS X Lion (10.7) and Mountain Lion (10.8). You can easily purchase OS X Mountain Lion in the App Store (the issue of the question is only 625 rubles).
After the download is completed, a utility will appear in the program folder. installing Mac OS X Mountain Lion.
Right-click on the installer and select "Show Content Package". Next, copy from the SharedSupport folder to any convenient place Installesd.dmg..
Creating a loading flash drive or Mac OS X disk
Mac OS X Snow Leopard recording DVD Disc Double density (6.3 Gb on a regular blank will not fit in any way), and the drive for the record of this farm also did not exist. I did not upset. At a time when space ships are furious ... Use CDs Moveton.
Stick the appropriate flash drive to the computer and run Applications\u003e Utilities\u003e Disk Utility.

- First of all format our USB flash drive. In the "Erase" tab, specify a new name (for example Mac_os_x) and file System Mac Os Extended (magazine).
- Mount Imagine future systemtwice by clicking on the image file. In my case it is Mac.os.x.10.6.3.Retail.dmg. (or Installesd.dmg. What was written above). The image will appear in the left panel of the disk utility.
- Go to the Restore tab. With the side panel of the disk utility in the "Source" field (Mac OS X Install ESD). In the "Purpose" field, drag the created partition on the flash drive (MAC_OS_X).
- Click the "Restore" button. This process is not fast, so you have to wait a bit.

Mac download from flash drive
Load the system while holding the alt key (It is Option) before the selection of the download options. Well, then it remains to follow the instructions of the installer.

By the way, all user data, down to the desktop screensaver, when switching from one version of Mac OS X to another remained not touched. Although at the time of installation, the lonely cold ant ran over the back, when suddenly it turned out that the user part of the documents was not stored on the server and the backups were not done. So, I recommend not to be lazy and, just in case, create backup Important documents in advance.
 State Services Personal Account
 State Supervisory Cabinet- Entrance on SNILS and Telephone
 Single telephone rescue service in the Russian Federation